Each person would prefer to watch, in addition to central television channels, another 20-30 thematic TV channels in high definition. What is needed for this? Choose one of the Russian satellite broadcasting operators, purchase a set of equipment and configure it.
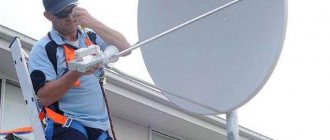
In most cases, configuration and installation of equipment is included in the purchase package, so after purchasing the “plate”, installers come to perform the necessary work. However, you can completely cope with this task yourself, and we will tell you how to do it.
Antenna structure and equipment set
Considering that the instructions are designed for a beginner, let's start with the basics. All satellite antennas present on the domestic digital television market are divided into two groups:
- Offset.
- Direct focus.
The difference between the models lies in the operating principle.
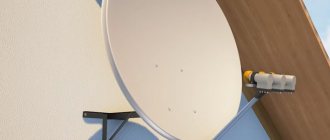
In direct focus antennas, the signal reception converter is located exactly in the center at a short distance from the mirror. In offset ones, the signal is reflected at an angle, and accordingly the converter is shifted relative to the axis.
The method of installation depends on the type of antenna. Direct-focus ones are mounted at a right angle, which corresponds to the satellite’s trajectory above the horizon. With offset analogues the situation is different. Here you need to turn to the school physics course and remember that the angle of incidence of the beam is equal to the angle of reflection.
Therefore, such models are installed with a slight inclination relative to the satellite.
The satellite dish consists of the following elements:
- Mounting bracket.
- Reflector mirrors.
- Irradiator with a removable casing that protects from precipitation.
- Depolarizer – converts circular polarization into linear frequency.
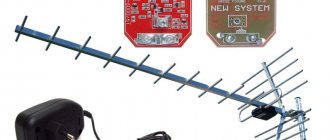
- Converter with signal amplifier.
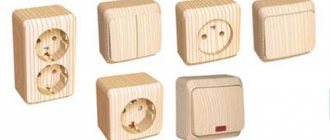
In addition, the basic package includes:
- tuner responsible for broadcasting channels;
- disek – switch between converters that receive a signal from a satellite;
- coaxial cable with connection connectors.
The package also includes connecting plugs, anchor bolts and dowels.
TOP 5 reliable satellite television providers in Russia
In addition to the purchase and installation of equipment, there remains one more important detail - the choice of a satellite TV operator. Today, there are quite a lot of companies providing such services throughout the country.
This raises the question: “Which operator is better to connect to?” Let's consider proven and popular providers in Russia.
- NTV plus. The first domestic operator to start broadcasting in satellite television format. To date, viewers have access to 200 channels, 30 of which are broadcast in HD format. Satellite location: 36°E.
- Rainbow TV. A package of Russian and international TV channels designed for a wide audience. The broadcast network includes sports, children's, music and film channels. Satellite location: 75°E.
- TV MTS. A new service from a well-known mobile operator. Once connected, 130 TV channels are available, 30 of them in high definition format. The receiver has an intuitive interface and takes television broadcasting to a completely new level.
In particular, viewers can watch live broadcasts and pause, rewind, and watch video on demand.
- Telecard. Today, it is the most affordable satellite television operator operating in all regions of the country. There are two types of connection equipment: SD and HD, which imply different tariff plans that differ in the broadcast network and broadcast quality.
- Tricolor TV. Currently it is the largest provider in the Russian region. The key advantages of purchasing equipment are the absence of a subscription fee and a reliable signal level, regardless of external factors. The broadcast network includes 38 TV channels, and a paid package is available.
In addition, you can pay attention to the operators “DV Platform”, “Continent”, “HD Platform”. Providers offer a wide selection of thematic and educational channels in high image quality
In conclusion, we offer you to watch an intelligent video that will help you cope with the task yourself:
Antenna installation
Let us immediately note that installation must be carried out in strict accordance with the manufacturer’s instructions, which are included with the equipment. If you don’t follow the mandatory rules about high-quality images, you can forget. Correct installation of the antenna consists of the following steps:
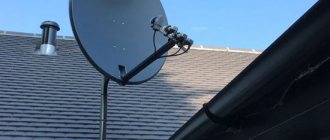
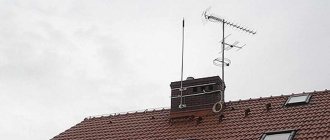
Choosing a direction . The mirror of the “plate” always faces south, and no foreign objects should fall into the target. If the antenna is installed in a private house, it makes sense to mount it at a height of 7-10 m from the ground: this will reduce the level of dust in the air and help to significantly improve image quality.
Installation of fasteners . First, mounting brackets are installed, which are secured with anchor bolts or collet pins. The main rack is installed strictly vertically, otherwise setting up the equipment will be problematic.
Assembly and installation of the “plate” . An antenna is assembled to which the converters are screwed. These elements are always installed with the connectors down to avoid oxidation of the contacts. All connections are reliably insulated and covered with a layer of sealant for greater reliability. The assembled antenna is hung on a bracket and secured with fasteners.
After this, the finished “dish” must be oriented in the direction of the broadcast satellite. To do this, exact geographic coordinates are determined; a mobile device with a satellite navigation module will help here.
The azimuth of the broadcast satellite can be found on the provider’s website, where there is an inclination angle calculator.
Next, all that remains is to align the “plate” in accordance with the coordinate grid. To do this, it is recommended to use an engineering compass.
To configure the antenna to receive a signal, perform the following steps:
- The TV and tuner are connected to the converter via a coaxial cable. The equipment is connected to the network, and the following menu items are selected sequentially in the receiver menu: Installation -> Manual search.
- Then the antenna itself is adjusted by swaying relative to the installation axis. This is necessary for the equipment to “catch” the satellite.
- above 60% is good .
After this, the mirror is carefully tightened, trying not to disturb the azimuth.
During pre-tuning, you should not be in front of the antenna: any objects in the reception area will negatively affect the image quality.
How does satellite TV work?
Before you start talking specifically about installation, installation, configuration and other stages of connecting satellite TV, it is worth understanding the very concept and principle of operation of a satellite.
Satellite
The best start for this, of course, is to clarify the very concept of satellite television. So, in essence, this is a system for transmitting a television signal coming from the transmitting center all the way to the cable that is connected to the consumer’s TV.
All this works with the help of repeaters, which are artificial Earth satellites, which are located in low-Earth orbit along the entire length of the planet’s equator. All such satellites are equipped with special equipment that can receive and transmit signals, thereby connecting with duplicate copies on the Earth itself.
Compared to regular terrestrial television, which works without the help of all these incredible satellites, just on Earth, satellite TV provides a better signal. Moreover, due to the specifics of broadcasting, satellites can cover areas on a much larger scale than the same repeaters of regular cable TV.
On the other hand, on the ground, so to speak, when receiving a signal, you will need special equipment, which is usually combined into sets of satellite equipment. This includes a satellite dish (dish), a bracket (attaching the dish to a wall or roof), a converter, a satellite receiver, and a variety of cables. In some cases, the same satellite receiver may already be built into the TV. However, this occurs only in new models of recent years.
The satellite that organizes the transmission is called geostationary and occupies a fixed position in the sky for a given point on earth. That is why, if the satellite dish is correctly installed and configured once, it will work constantly and is always aimed at the satellite.
And of course, the most important thing in the entire satellite TV device is the TV itself, or in some cases simple monitors with a built-in DVB-S card. There are huge quantities of televisions today, so all the problems that may arise with the choice are just problems that can be called “eyes running wild”.
Principle of operation
Since the first use of satellite in television, which was already in 1962, although the system has changed technologically, the basic principle of operation still remains the same. And to make it clear exactly what a person is dealing with, now we will go over all the issues and features.
In satellite TV, just like in terrestrial TV, there is some kind of ground-based center that transmits broadcasts of various channels. But unlike terrestrial TV, here the signal is transmitted not over the air, but to a television satellite in digital form.
Already in Earth's orbit, the receiving satellite picks up the signal and transmits it back to Earth to the same consumers who have the satellite TV system installed. It is precisely because of the previously described geostationary orbit that a satellite, when moving, always transmits a signal only to the same territory, and therefore to all fixed antennas in the reception area.
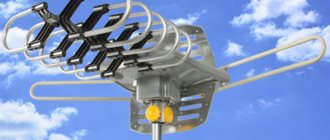
The plate itself is a concave metal circle or disk, the so-called parabolic shape. Because of these special shapes, all radio signals that fall on the surface of the antenna are constantly reflected, concentrating on the surface. But in the place where the entire flow is reflected, another important element is placed - a converter or, in common parlance, a head.
This converter collects all possible radio signals, transmitting them further using a coaxial cable to a receiver or satellite tuner. It receives signals from the antenna, and then converts it all into a form more understandable for the TV, thus transmitting everything to the receiver.
The most important thing is that it is thanks to such transformations that the original quality of the television signal is preserved. Also, by its design, one satellite is capable of receiving several hundred different television channels at once.
Well, of course, almost the most important ones in the field of satellite television are satellite TV providers, who, by organizing an oligopoly on TV channels, sell the rights to receive these same signals to people. All this, of course, is packaged in packages that include about a hundred channels.
Only because of the main feature of channel transmission, all this is sold by subscription every month. Well, this is where the dilemma arises about purchasing tariffs, packages and kits. After all, with such a choice as we have in our country, you can get confused in offers, prices and number of channels.
Equipment
By the way, we also need to talk about equipment sets. After all, in fact, this is the backbone of satellite TV itself, which means choosing the right offer is quite important for every consumer. Here you can either rely on satellite TV providers or go to a hardware store and pick everything up yourself.
Everything depends, of course, primarily on the chosen provider, but also on the awareness of the buyer himself. So when choosing, you need to find a middle ground and choose a satellite television set to match it.
But installing already purchased equipment is the same issue that almost everyone is ready to discuss. “You can’t make a mistake here, right? Everything has been selected, purchased and fits, all that remains is to screw in a couple of bolts and do 2-3 wiring.” No, in reality it’s not like that, and here, too, you need to approach it with knowledge of the matter.
Just so that such incredibly unsolvable questions no longer arise, you can figure out right now and right here how to connect satellite television yourself.
Tuner settings
The next important step in installing a satellite dish is setting up the tuner. The equipment of some providers automatically detects the satellite, the user only has to catch the necessary TV channels.
If there is a need to fine-tune or change the parameters specified by the manufacturer, go to the “Menu” section and select the “Installation” sub-item. There will be several sections here, so we will consider in detail what each item is responsible for.
Satellite. The first line indicates the name of the broadcast satellite and its location in geopolar orbit. The name of the translator does not affect the equipment settings.
Sometimes the desired satellite is not on the list at all. In this case, select any translator and tune in to its frequency.
LNB type . The type of installed converter is determined here. There are two types of devices: C and Ku , depending on the reception range. In the first case, the menu is set to “Standard”, in the second – “Universal”.
TP number . This section displays a list of transponders. Using the buttons on the remote control, you can scan the frequency and save all broadcast channels. Information about the required parameters can be found in the provider's frequency table.
DISEQC . This is a switch between converters configured for a broadcast satellite. If the antenna works with one translator, you need to set the menu to DISABLE (disabled). When the antenna is configured for several satellites, the line indicates the connection port to the desired converter.
Positioner . This function is responsible for automatically adjusting the antenna to the azimuth of another satellite. For this purpose, the “plate” is driven by a built-in electric motor. If there is no corresponding key on the remote control, then the equipment does not support this function, so the menu is set to “disabled”.
Polarization . This item can be left in automatic search mode. If you select the vertical or horizontal settings, only TV channels located in the specified plane will be broadcast.
LNB power supply . The item must be in the on position so that power is supplied to the converters.
The interface of equipment from different providers may differ, so carefully read the manufacturer's instructions for setting up the equipment.
How to set up your TV
This is the easiest stage of setting up the equipment. After connecting the antenna and debugging the receiver, testing of available TV channels is carried out. Typically, programs are arranged in a random order depending on the broadcast frequency.
Using the remote control, you need to connect the channels in a convenient order.
Selecting a channel list
First of all, you need to decide which channels you would like to watch on your TV. You can view lists of channels broadcasting in Russian and Ukrainian on our website on the “Lists of channels without a subscription fee” page. This page lists only channels broadcast in the public domain or that can be opened using Biss keys, which are supported by any modern receiver. If you are not satisfied with the above lists of channels without a monthly fee, you can familiarize yourself with the lists of paid channels from the Ukrainian providers XTRA TV or Viasat, where the conditions for viewing them are clearly described.
Common connection errors
If, after installing the equipment, the image leaves much to be desired, it means that errors were made during setup, which led to a deterioration in the quality of signal reception. In most cases, users make the following mistakes:
- insufficient diameter of the antenna mirror - leads to loss of signal in bad weather conditions;
- errors when choosing the polarization of the converter - do not allow the equipment to tune to the desired satellite;
- lack of a protective casing - at low temperatures the irradiator will become covered with ice;
- connection via an unsuitable cable - the core must be copper: a steel core noticeably worsens the reception quality;
- poor-quality cable crimping at the connection points.
In addition, most users make mistakes when connecting two or more TVs to a satellite dish.
If you are not confident in your abilities, you should not install the equipment yourself. In the best case, specialists called to fix the malfunction will require partial compensation for the cost of damage; in the worst case, the repair is completely carried out at the user’s expense.
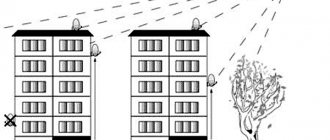
Check before purchasing
Before purchasing an antenna for your cottage or home, you need to make sure that its installation is possible and that nothing will interfere with the reception of the signal from the satellite. If there are multi-story buildings, tall trees or other obstacles around, the signal will be unstable, and the image on the screen will be of poor quality or will be interrupted. You also need to make sure that the necessary equipment is included in the kit. In addition to the dish, converter and receiver, the box must contain a television cable, fasteners, operating instructions, a smart card, a cable for connecting the receiver to the TV, etc. You can check the contents using the user manual.