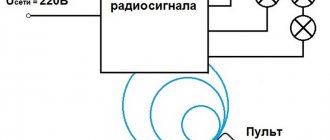
The transmission of information via electromagnetic waves in the radio frequency range has become commonplace in the life of modern man. Without this type of communication it is impossible to imagine civilization in general: television, telephones, radio, navigation and control equipment, as well as many other attributes of our everyday life could not exist without radio waves.
Without going into the physics of the propagation and transmission of radio signals, we note: in order for this type of communication to work, a special kind of device is required that transmits and receives signals. Transmitters, as a rule, are rarely used by the average person, but receivers are used everywhere.
A necessary element of the receiver is the antenna, and even if you don’t see it, for example, on a cell phone, this does not mean that there is no antenna, it’s just hidden inside the case. Unfortunately, this is not always possible.
We won’t tell you what the problem is here - this is a topic from a course in physics and radio electronics, and therefore it is of little interest to a person far from these issues.
However, we note: in some cases, for example, to receive a television or satellite signal, the antenna itself is quite large in size, and it must be installed at a certain height and oriented in a special way in space. In order for these conditions to be met, a special design is used - an antenna bracket.
You can look at photos of the antenna bracket on specialized websites - they will give the most general idea of what it is. To fully understand this issue, you need to know more, and therefore we will dwell on this topic in more detail and reveal some, not entirely obvious, aspects: knowing them will save you from unpleasant and unnecessary “surprises”.
Bracket designs
According to the area of application, it is necessary to distinguish the following types of antenna brackets:
- Street;
- Indoor;
- Automotive.
Car brackets are specialized structures, and therefore it makes no sense to dwell on them in detail in this article.
For indoor installation, use special indoor antennas with appropriate mounting brackets. Their main feature: small dimensions, the ability to install anywhere, with the exception of some special models, as well as aesthetic appearance.
There are no difficulties in using such antennas and, accordingly, their brackets, especially since they are made as a single whole.
There are a lot of options for such brackets. Complexity and cost depend on many factors: the mass of the antenna itself; the need for adjustment in space; installation method; possibility of remote position adjustment.
Many people make their own antenna bracket
In this case, it is important to take into account your capabilities and provide sufficient strength and reliability of the structure
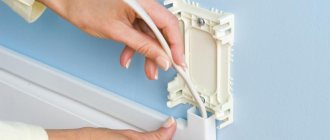
How to route the cable
Installing a signal reception system also involves installing the appropriate cable. The cable must be installed in such a way that weather conditions have minimal impact on it.
The wire is laid parallel to the length of the antenna mast, with clamps included in the design, and then laid along the ridge of the roof, the wall to the window where the TV is located.
Where it is inserted into the window, the cable must be securely fastened. There must be a hole in the window frame for the cable.
To prevent rain or snow from getting into the hole, after installation the opening must be treated with sealant. The cable should have some slack to reduce exposure to temperatures.
Installation should be carried out in accordance with technical requirements. The staples should not put pressure on the wire, and the radius of the wire bends should not be too large.
How to install an outdoor TV antenna in a private home
To make TV antennas for a private home, steel, copper, aluminum alloys and dielectric materials are used: plexiglass, getinax, textolite, etc. Wood products can be used as insulators only in extreme cases, and even then after pre-treating the wood with paraffin or special varnishes.
Every effort must be made to protect metal parts from corrosion. Electroplating is an ideal option, but usually not available. Therefore, cover the parts with various varnishes and paints for exterior use, this will prevent the structure from aging.
Wall covered with foam plastic and siding
If there is a brick or other strong surface under the decorative elements, two fastening options are used.
1. Standard wall mounting
In this case, a piece of foam plastic and siding is cut out exactly to the size of the bracket mounting area and installation is carried out using standard materials.
Disadvantage: Significant reduction in the “reach” of the bracket, which subsequently does not allow the antenna to be rotated towards the base station.
2. Installation of fastening using special spacer tubes and extended length anchor bolts
You will need rigid metal tubes, the length of which corresponds to the width of the interlayer. With their help, soft materials such as siding or foam will not experience stress, and the fastening will remain reliable.
Working method:
- Cut holes in the foam for the metal tubes;
- Drill through the walls;
- Install the metal tube;
- Secure the bracket.
Extended length anchor bolts (for example, No. 200) can be used. Select an anchor so that half the length is located in a strong wall, the other half in foam. Drill a hole, insert an anchor, remove the nut from it, attach the bracket and tighten the nut again.
Devices for receiving analog TV signals
Classic antennas, gradually becoming a thing of the past, consist of several types of broadband receiving devices.
They are designed to receive an analog TV signal broadcast from a television tower. Such devices operate in two bands, receiving decimeter (UHF) and meter (MV) waves. Naturally, each of them differs in design elements.
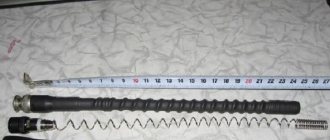
Previously, many radio amateurs made and installed analog antennas themselves. They could be seen near every house on a long pipe secured with guy wires.
The most advanced was considered an all-wave design, capable of receiving signals from two ranges at once. Nowadays you can still find similar devices of domestic and foreign production on the market.
With the transition to digital format, antennas that receive the corresponding signal have become in demand.
But, when choosing a receiving device, you need to know that such television is broadcast in the UHF range. If you already have an installed analog UHF antenna, it can also be used for reception, the main thing is that the TV is equipped with a DVB-T receiver. For older TV models you will have to buy a DVB-T2 receiver, otherwise receiving digital TV will be impossible.
Types of satellite dishes
There are several types of satellite antenna, each of which has its own purpose. Design options:
- spherical;
- plate-shaped;
- mirror;
- flat.
The most budget-friendly, and therefore popular, type is the so-called plate. This type of antenna can be short-focus or long-focus. They differ in the shape of one of the most important elements of a satellite antenna - the mirror (usually called a reflector).
There are also direct focus devices. They are among the cheapest, but are not popular among ordinary users, since the mechanism for attaching them to the wall is very complicated and requires additional costs.
Ventilated facade
In the case of a ventilated facade, the first stage of work will be to remove the facing tiles from the “hooks” of the steel frame to make room for fastening. Cut a hole in the insulation layer and secure the bracket in the standard way, as described above. The antenna mount should be mounted at one of the edges of the resulting opening.
On facade tiles:
- The location of the cut is marked (make sure how the antenna will be directed);
- A grinder makes a cut (use a tile cutting circle; cut on a perfectly flat surface).
Next, the tile is installed in its original place.
Lightning protection of antennas: lightning rod design
Lightning protection of outdoor antennas requires mandatory grounding. If the antenna is located within the range of the lightning rod at home, it does not need to be grounded.
The design of a lightning rod consists of three main parts: an air terminal, a down conductor and a grounding conductor.
The lightning rod can be made from a steel rod (diameter 12-15 mm) with a square section (10 x 10 mm) or a water pipe (gas pipe). In the latter case, the upper end of the pipe is flattened. The cross-sectional area of the lightning rod is at least 100 mm2, length 0.3-1.5 m.
The down conductor connects the lightning rod to grounding. This is either a strip of steel (cross section of at least 40 mm2) or a cable of the same cross-section. The wiring of the down conductor depends on the design of the lightning rod.
When manufacturing any lightning rod, the following must be observed:
Ground electrodes can be vertical or horizontal; in the first case, pipes (rods) are driven 2-3 m into pits (0.8 m deep), then the pits are filled up; in the second, pipes, pieces of iron, coils of thick wire, etc. are placed in holes of the same depth. The length of the horizontal pipe depends on the soil: in clay soils at least 2 m, for sandy soil up to 12 m.
Metal antenna masts are also grounded. If the mast is installed on a grounded metal roof, it is connected to the roof by a down conductor.
In general, the down conductor is connected to the zero potential point of the antenna (the middle of the uncut tube of a loop vibrator, the short-circuit jumper of a quarter-wave bridge, a metal boom, etc.). The shield of the reduction cable is also connected to the antenna's zero potential point.
Be sure to make a lightning rod at home, thunderstorms are quite common, and a simple lightning rod system will once again insure you against fire.
Methods for mounting satellite dishes on a wall or roof
If you have a country house or dacha, most likely you will need to install a satellite dish on the roof of the house, and do it yourself. This is relatively easy to do.
After selecting and purchasing the antenna, you should inspect the roof and find a place suitable for mounting. It must be remembered that fasteners cannot be installed on heating pipes. But instead of them, you can use ventilation brick shafts or, as they are also called, masts. The structure must be positioned so that nothing blocks the “dish”, otherwise the signal will be received intermittently. One of these obstacles may be trees. You should find out in which direction the tower is located in order to place the equipment level and thereby avoid unwanted interference. It is necessary to make holes in the ridge element and in the roof itself, preferably using a wood drill. After attaching the antenna, you need to assemble the finished mast and attach the wire to the wall.
Don't forget about mounting the antenna on a pole - this is the easiest way to mount it.
Using special brackets
The antenna mounting bracket holder is a special device that allows you to mount a satellite dish in a certain position and fix it on almost any surface, be it a roof or a wall. Brackets can come complete with the “plate” itself, but more often they are sold separately.
Requirements for brackets for CA
For each type of satellite dish, it is recommended to select a certain type of brackets, their main types:
- for vertical mounting (for example, wall bracket for mounting antennas “ks 240”);
- for horizontal mounting (roof).
The recommended overhang length between the wall and the bracket attached to it is 1–1.1 meters.
Features of fastening brackets
Having made all the necessary holes, secure the bracket. It is recommended to attach the “plates” to the bracket in the most vertical position so that rainwater does not accumulate in it, and it, in turn, does not interfere with the operation of the antenna. It must be remembered that brackets come in different shapes, and before purchasing you need to choose the most suitable one, most often in the shape of the letter U. The length of the bracket is also selected taking into account the specific installation location.
Using anchor bolts and clamps
In addition to all of the above, mounting for a satellite dish can be done using not only brackets, but also clamps. These are special self-wedging anchor bolts that will ensure the tightest and strongest fit of the antenna to the wall. The clamp works on a similar principle.
Installation Rules
First of all, you first need to mark the hole, and the main thing here is not to miscalculate, since the screwed in bolt is unlikely to be pulled out. After drilling the holes, you need to blow them out and then insert the anchor bolt tightly.
Almost any building surface can be used to attach such bolts.
For more information about assembling, installing and setting up a satellite dish, see the video below:
Previous entry How and where to attach LED strip Next entry Attaching logs to a concrete floor
Brick, concrete, solid wood (timber, log)
The fastening method is the simplest, carried out according to the standard method:
- Before drilling, find out where the wiring is located using a metal detector.
- Mark the holes.
- Drill holes (a hammer drill is suitable for concrete and brick walls; if the wall is wooden, use an electric drill).
The process of drilling into a brick wall is quite simple, but you may encounter some difficulties. For example, burnt bricks must be drilled at low speeds in combination with the activation of the impact function. Burnt brick can be recognized by the black color of the dust.You need to start drilling a brick wall for a 12 mm hole with a 4-6 mm drill. They reach the planned depth, then the width of the hole is expanded with a 10 mm drill. Having reached the required depth, a similar action should be repeated with a 12 mm drill.
- Blow holes through a small diameter tube to remove debris.
- Place dowels with polyethylene plugs into the holes (usually a diameter of 12-14 mm is used)
- Secure the bracket: screw a capscrew bolt into each hole and tighten with hex head screws, securing the bracket. On a concrete wall, use an anchor instead of a cap screw.
- Assemble the “plate” according to the instructions.
- Connect the measuring device (Sat-Finder) and, based on its readings, rotate the plate at the optimal angle.
- Pull the cable inside the room: you can through a window, but it is better to drill a hole for it in the wall.
- Connect the cable to the set-top box.
When installing on a concrete or brick wall, dowels with polyethylene plugs with a diameter of 12-14 mm and hex head screws for the appropriate key are used. Anchor bolts are also used for fixation to concrete.
1.7. Satellite antenna hangers
Antenna mount selection
The bracket for mounting the satellite dish must provide reliable support for the antenna with a large margin. Perhaps after some time it will be necessary to install a larger satellite dish instead of the existing antenna. The best option is to use a bracket already installed on the wall (balcony, loggia), which also has sufficient strength for a larger plate size.
Therefore, it is advisable to purchase the bracket separately. Types of brackets are shown in Fig. 1.42.
| A) | b) | |
| V) | G) | d) |
| Rice. 1.42. | Types of brackets for mounting satellite dishes: a – flat mount for antennas with a diameter of up to 60 cm; b – point mount for an antenna with a diameter of up to 60–90 cm; c – point mount for an antenna with a diameter of up to 90–120 cm; d – universal antenna mount for antennas with a diameter of up to 60–120 cm; d – support mount for a satellite dish with a diameter of 160 cm (on the roof, on the ground). |
Selecting the antenna size is one of the most important issues. The larger the antenna, the greater its gain. But antennas over 1.2 m are much more difficult to install and require a larger bracket. We need to find a “golden mean”. In reality, the size should be such as to ensure high-quality viewing of channels from the selected satellite.
If you plan to watch several satellites and install a multifeed, then the dish should be 20–30 cm larger than in the case of receiving one satellite.
Methods for mounting satellite dishes
Satellite antennas come in direct focus and offset.
In a direct focus antenna, the receiving head is located in the center, and the focus is at the center of the antenna at a certain distance from the mirror.
In an offset antenna, the signal travels at an angle and, reflected at the same angle, hits the receiving head (the focus is shifted relative to the center).
The antenna mounting method can be of two types:
- azimuth-angle;
- polar.
The polar suspension allows you to redirect the antenna from one satellite to another using an electrically driven actuator lever or a motorized suspension.
Special requirements are placed on the suspension and fasteners, especially if a large-diameter antenna will be installed at a high altitude and in a very windy place. Wind loads can reach very large values. And very often, all the equipment for the antenna, in order to reduce its cost, is made without a significant margin of safety. Don't cut corners in cases like this.
An azimuth-angle suspension (Fig. 1.43), which has manual adjustments only horizontally and vertically, is used to receive a signal from one selected satellite. They allow you to tune the antenna to any satellite and firmly fix it. Of course, you can then deploy it and tune it to another satellite.
| Rice. 1.43. | Azimuth-angle suspension |
| Advice. |
| You should only purchase antennas with a clearly marked elevation scale. Also, make sure that the kit includes two pairs of mounting brackets. |
Polar suspension (Fig. 1.44), which allows the antenna dish to follow the entire visible part of the geostationary orbit, stopping at any selected satellite. The polar pendants are electrically driven and controlled remotely using an indoor positioner. They allow you to receive signals from a large number of satellites.
| Rice. 1.44. | Polar pendant |
The name of this type of suspension comes from the fact that the axis around which the antenna rotates when tuning is directed towards the North Star.
| Note. |
| Most often, offset antennas have a fixed azimuthal suspension, and direct-focus antennas have a polar one. |
Features of using the suspension
Let's consider the features of using these suspension designs. Azimuth-angular - as a rule, a fixed suspension, the antenna is tuned to a single satellite and is rigidly fixed to the mounting bracket. To receive another satellite, the antenna must be completely reconfigured. Simple and cheap pendant.
Polar is a much more complex suspension in design and configuration and, accordingly, more expensive. Provides the ability to receive several satellites located in different orbital positions. In Fig. Figure 1.45 shows a photograph of the polar suspension assembly used for a 1.8 m antenna.
| Rice. 1.45. | Photo of a polar pendant |
| Advice. |
| If you need to receive several satellites, for which a 1.2 m antenna is sufficient, then it is better to install a 1.8 m or at least 1.5 m antenna in the polar system. Some reserve will not hurt. |
Step-by-step instructions for installing the plate
You must first assemble the satellite antenna structure as described in the attached instructions. As a rule, antennas are supplied disassembled. Therefore, the structure should be assembled using the accessories supplied.
Next, we will consider the step-by-step installation of a satellite dish.
Step #1 - attaching the antenna holder bracket
Again, taking into account working with a branded product, where all installation elements and components are designed for the appropriate load, work is being done to install anchor bolts in the wall of the building.
One of the options for antenna brackets that are used for reliable, strong installation of a satellite dish. Initially, a support pipe is attached to the wall, and the antenna bracket is directly attached to the pipe.
This work is done in a standard way, using a tool for working with concrete. After introducing the anchors, a support rod is attached to the installed anchors, and a metal bracket is attached to the rod.
Step #2 - installation of the antenna converter
Installation of the pre-signal amplifier - converter is carried out strictly according to the instructions, where all the details of the placement of this component are noted.
The converter itself should be secured in the support ring so that the device is perfectly sealed. Even a small penetration of moisture inside threatens to disrupt the operation of the device.
Step #3 - connecting the cable to the converter
At the current stage, the cable, which is usually also included in the kit, is connected to the converter module. The connection is made using the special “F” connector included in the delivery package.
An example of a well-connected cable on the converter side. The successfully sealed connection area is clearly visible, which will ensure stable operation of the amplifier for a long period of time.
The connection area must be carefully sealed, for example, with silicone sealant. The cable from the switching point is pulled carefully and without unnecessary effort along the body of the converter holder rod. It is fixed at regular intervals with plastic ties or other means.
Step #4 - securing the satellite dish
The prepared “plate” is installed on the bracket, while the adjusting screws are not tightened all the way - they are left loose.
This approach is necessary for the simple reason that further (after installation) the procedure for fine tuning to the satellite will follow. Accordingly, the “plate” will have to be moved both vertically and horizontally.
An installed, fully customized household “dish”, ready to reward its master with a high-quality television picture received from a satellite
Separately, it is worthwhile to provide instructions on installing the F-connector on a coaxial cable. This operation has its own characteristics. The final area of the cable (approximately 15 mm long) must be freed from the first insulating layer.
But the insulation must be removed taking into account maintaining the integrity of the screen braid present under the insulation layer. Then the second layer of insulation is removed at a length of about 10 mm. This frees the central copper core. Next, screw the connector onto the stripped end switch until it stops, passing the copper conductor into the corresponding hole.
Which antennas are better?
As usual, in addition to the type of equipment, you have to choose a manufacturer. And this, perhaps, is no simpler. Recommendations can help. There are several popular manufacturers on the forums:
- Locus (Locus). Antennas made in Russia. Wide range, low prices (from 480 rubles to 1.7 thousand rubles). There are both active ones - with a built-in amplifier, and passive ones.
- Harpoon. Also a Russian-made antenna. Receives in UHF and MV zones. They are produced only in passive form and are intended for installation in areas of poor reception. Retail price - Harpoon-0416 - 1500 rubles, Harpoon-1028 - 2300 rubles.
- Antennas "Delta" produced by JSC "NPP OST". The range here is very wide. There are both narrowly targeted ones only for VHF or only for UHF bands, and broadband ones. Moreover, UHF antennas can be used to receive a DVB-T2 digital television signal. Many models are equipped with an F-connector - a device through which the cable is connected: during installation, you do not need to disassemble it to connect it. Insert the conductor, stripped of insulation, into the socket. All. The cable is connected.
- GoldMaster (GoldMaster). There are few reviews, but according to those available, it receives reliably even in the area of uncertain reception. Even during rain, the signal quality hardly drops. The picture is still clear, without “snow”.
All other manufacturers are not particularly popular.
For inactive antennas, amplifiers are also needed. There are also preferences here:
- LHA House Amplifier;
- TERRA (Terra);
- Powerful amplifiers with low noise levels Breeze, Alcad.
Digital models
These models are similar to standard over-the-air designs that pick up the signal using a tuner. Such devices have additional protection against interference, so the signal is received quite well. When choosing such a solution, you don’t have to spend a lot of money - the cheapest offer is suitable for your dacha. On average, the cost of a digital antenna starts from a thousand rubles. The ethereal model with an amplifier also costs from a thousand and above. Satellite dish - up to five thousand, which will also not be the biggest expense, but in this case you also need to consider paying for access to the channels. Per year it ranges from 1.2 thousand rubles and above. It is precisely because of the additional fees that this solution is not always advisable for a summer residence.
Satellite signal reception
Today, in almost every private home you can see satellite dishes that resemble the shape of a dish. In addition to the TV signal, they are capable of receiving satellite Internet. Such devices are very popular in rural areas where reception of analogue and digital TV is difficult.
The antenna design consists of a parabolic mirror that reflects the signal to the converter, which, in turn, sends it through the cable to the digital receiver (receiver). Mirrors vary in size and material. The larger the diameter of the dish, the better it picks up a weak signal.
But the large size of the mirror increases the windage, which requires reinforced fastening. Otherwise, in strong winds, vibrations will occur, and a plate deviation of even 1 mm will result in a loss of signal reception. On the TV screen this will be expressed by stripes of a torn picture.
The most affordable are metal mirrors, but they are susceptible to corrosion.
Aluminum analogs have proven themselves to be excellent. But plastic plates quickly become deformed and fail. Mesh parabolas are convenient for frequent travel, but they are very light and have a large windage.
Necessary conditions for confident reception
One of the prerequisites for successful and reliable reception in the vast majority of cases, for example, for receiving satellite and television signals, is direct visibility between the transmitting and receiving antennas.
What does this mean? It's simple: the transmitting antenna, for example, a TV tower, is installed at the highest point of the landscape, this achieves the maximum coverage area, and the receiving antenna is yours. The main thing is that there should be no obstacles between these two antennas: hills, buildings, poles, fences, etc. That is, the signal from the transmitting station reaches the receiver along a forward vector, without encountering obstacles.
It is important to note here: if your house is located on a mountain, i.e., there are no obstacles between it and the transmitting station, then there is no point in “raising” the antenna high; a high location will not give any effect. It will be enough to use a simple bracket for the antenna on the wall, raising it 2-3 meters
Otherwise, when the antenna is installed in a lowland, a sufficiently high mast is required to provide direct visibility, which will ensure reliable reception of a signal of sufficient strength.
The next thing you need to know about is directionality. In this case, we are dealing with the need to accurately orient the receiving antenna to the transmitting one. In other words: the receiving side of the antenna must be directed strictly in the direction of the transmitting station, this achieves the maximum level of the useful signal.
In some cases, in addition to positioning in the horizontal plane, clear orientation is also required in the vertical plane, in particular: the bracket for a satellite dish must provide for adjustment in both planes, and do this with high accuracy.
Another prerequisite is sufficient structural strength. When exposed to external factors: wind, shocks, precipitation, etc., the antenna must maintain its position and also not pose a danger to others.
For safety reasons, when installed outdoors, at a sufficiently high altitude, it is necessary to provide protection against lightning strikes, which will avoid damage to equipment, the possibility of fire and electric shock to people during a thunderstorm.
Facade and walls made of hollow blocks
When installing brackets on a wall made of foam concrete or aerated concrete, it is recommended to use chemical anchors.
- Drill a cone-shaped hole for the dowel;
- Insert the dowel;
- Place a metal pin in the hole;
- Pour in the chemical composition and leave for a while.
If you have any problems during the process of installing antenna brackets yourself, contact our specialists.
Our specialists will answer your questions or install equipment at the highest level. All work is guaranteed. Tell friends:
TV antenna for a summer residence: where and how to install
Before you begin installing an antenna in a private home, determine the location of the nearest tower or repeater. You can do this by indicating your location on the CETV coverage map
Once you know the mileage, you can buy equipment. What you will need to install outdoor antennas:
Antenna, if you follow our advice, then one of the following; Coaxial cable (RG 6 professional steel, SAT 703, SAT 50 copper); F connectors, TV plug (according to the number of connections); Lightning protection on the cable (optional, but if you want to install an antenna on a mast, it’s better to put it on the price of 300-350 rubles) Bracket or mast; Ties and clips for fastening the cable; Device, digital set-top box with TV or TV with dvb-t2 support for setup; TV signal amplifier and dividers (if required) .Fasteners for bracket or mast. Decide for yourself which fasteners will suit you (screws, studs, anchors, etc.)
d.).Puncher or drill, drill or drill with a diameter of 8 mm. under the cable. A knife for stripping cables, wire cutters and, depending on the circumstances, what may be required.
Everything about the equipment. You determined where to go from the map. Next, we will consider options for installing television antennas.
Installation of a mast for TV antennas
The mast for TV antennas is installed on the roof of the house, at a height of about 5 m.
Fastening is best done using clamps with a thrust bearing; Rotating the mast, find the best image on the TV screen, then tighten the clamps. Do not attach the antenna to dormer windows, telephone stands or chimneys. It is not recommended to install the mast on a tree, which, swaying in strong winds, can cause additional interference.
Often an antenna mast up to 20-30 m high is installed on the earth’s surface.
In this case, it is made from durable spruce or pine poles, preferably from metal pipes, reducing their diameter from the surface: from 50-60 mm to 30-40 mm, and even thinner pipes are placed on top. If the mast is secured with guy ropes (steel cable, wire with a diameter of 5 mm), then you cannot start placing guy wires near the antenna vibrators and attach them near the electrical wiring. It is best to make a stretch wire from pieces of wire (about 1 m) and connect them with insulators.
What kind of installation happens?
After purchasing the required material, make sure that the design contains fasteners. Be sure to treat the threaded part with oil or silicone lubricant.
After connection, you can seal it with waterproof silicone to avoid oxidation of the contacts.
Taking into account where the antenna will best receive the signal, you need to decide where exactly it will be located and at what height. Typically, antennas are located on the facade or on the roof.
Grounding
Do I need to ground an outdoor antenna?
Theoretically, if there is no lightning rod on a personal plot, this safety measure is necessary. In the event of a lightning strike, the grounded antenna device will operate in lightning rod mode, saving the TV from fire. At the same time, experts are of the opinion that there is no particular need for grounding antennas, given that most people do not watch TV during a thunderstorm while removing the cable plug from the antenna socket.
Grounding diagram for a television antenna and mast:
We talked about how to make a lightning rod with your own hands in a separate article. The instructions for installing a grounding loop in a house were also described in detail earlier.
Now you know how to install an antenna on the roof of a private house. We hope that our step-by-step instructions, with photos and video examples, were useful and interesting for you!
We also recommend VIDEO:
https://krovlyakryshi.ru/elementi/ustanovka-antenny-780
https://okrovle.com/kroem-kryshu-sami/montazh-antenny-na-kryshe.html
https://stylekrov.ru/kak-ustanovit-antennu.html
https://samelectrik.ru/pravila-ustanovki-antenny-na-kryshe-doma.html
Legal aspect of installing an individual antenna
If you plan to install it on the roof of a private house, then everything is simple.
You do not need to obtain permission for this procedure, because. you are the owner of this building. If you plan to install the antenna on the roof of an apartment building, then certain difficulties may arise. To avoid them, you need to stock up on knowledge of the laws of the Russian Federation in advance, from which it follows that:
- you, as the owner of a separate apartment in an apartment building, are at the same time a co-owner of the entire house as a whole, including such premises as the basement, attic, and also including the roof;
- The keys to these premises of residential buildings must be kept by the Housing Office and issued to homeowners upon their first request.