The main nuance when installing lighting in outbuildings is that it is necessary to take into account fire and electrical safety requirements. You yourself understand that the outbuildings or workshop at the dacha are not always heated. In addition, such buildings may have high humidity, which further aggravates the situation. That is why you need to know how to install light into a barn from a private home, so that in the future the lighting system will be safe and durable. Next, we will tell readers of the site Electrician Himself all the nuances of electrical installation work and provide some practical advice on this issue!
Electrical Security
Ensuring the safety of using electricity is perhaps a more important task than even the electricity supply itself. The danger of electricity lies in its current-damaging ability in relation to humans and in the fire hazard - due to the extreme heating of the wires during a short circuit.
This topic is quite extensive. As for the power supply circuit, the main thing in its design is to ensure the safe operation of the electrical network.
With regard to human safety, the wiring diagram provides for a number of measures:
- Presence of electrical insulation on all live parts
- Correct placement of sockets
- Grounding of all necessary elements
- Inaccessibility of most electrical components for accidental contact
- Increased network protection in children's rooms
- Application of special measures for protection in wet areas
8. Installation of the electrical network according to the connection diagram
Electrical installation must be carried out strictly according to the diagram and using the materials specified in it. Under no circumstances should you install machines that do not comply with the design. It is impossible to arbitrarily underestimate the cross-section of wires. You cannot be careless about the connection points of the wires.
Often, would-be craftsmen simply twist two or more wires, not caring that a loose connection is where the wires overheat or spark. It is unacceptable to twist wires made of different metals, for example, aluminum and copper. All connections must be made in special junction boxes.
Wiring on bends is only possible at right angles, otherwise it will be impossible to determine where the hidden wire is located if you suddenly have to drill into the wall.
Laying of wires must be strictly horizontal or vertical
There are many such rules, we will talk about them in more detail in other articles.
How to install light in a barn: necessary materials
Now we move on to the second stage and prepare all the necessary materials.
Let's start with the wire, we recommend using VVGng, it has increased protection and will serve you for many years. The junction box must be moisture-proof - this is an important point.
Related article: Do-it-yourself water-heated floor: design and installation
Do not forget that all devices must have good protection. And of course, we make the correct calculation of the cable cross-section. We recommend installing energy-saving lamps, this can include: LED and conventional house-saving lamps
The light in such buildings can burn for a long time, so it is important to save on this once again
Electrical features for country houses
The electrics of a country house also have a number of features, including lightning protection, the use of grounding, lighting and alarm systems.
Most cottages use a non-standard layout, which imposes its own characteristics on the organization of electrical wiring. Most often, they have at least two floors and are distinguished by the widespread use of a wide variety of energy-consuming equipment. Accordingly, the calculation of electrical networks should be carried out taking into account the ability to withstand increased loads.
In cottage construction, electrical wiring is divided into three components. The internal one combines all the circuits laid indoors. External, respectively, are the circuits used to organize outdoor lighting and operate various electrical appliances located outside the home. The third component is utility wiring, which ensures the operation of heating, air conditioning, water supply systems, and so on.
When designing electrical wiring, the main criteria are ease of use and functionality, but do not forget about the appearance, which should ensure harmony and maximum invisibility, hiding behind the finishing elements.
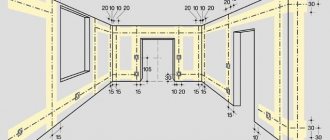
Electrical and wiring diagram
There is an electrical connection diagram, and there is a floor plan that matches the house plan.
The electrical diagram shows what types of connections are used - where the current is supplied in parallel, where in series, etc.
Electrical network diagramFor installation, you should also have a wiring diagram. In its simplest form, it should be a drawing that coincides with the plan of the entire house. It shows the location of the electrical wires and the places where the mounting units and connectors for the power supply are located.
Electrical wiring diagram
Here we see into which room the wires from the distribution board go, what brands of wires are used, how the sockets are located on the walls, etc.
Of course, the presented schemes are quite primitive. In reality, the power supply diagram can be quite complex. The project usually combines electrical and wiring diagrams.
Do-it-yourself electrical wiring in a house made of aerated concrete
There comes a time in the “life” of every building when the electrical system has to be replaced or repaired. There is a big temptation to do everything yourself. This prospect attracts significant cost savings and the opportunity to realize any plans.
However, installing electrical wiring in a private house with your own hands is a huge responsibility. You can take it upon yourself only if you are confident that the existing knowledge, skills, and equipment are sufficient for the competent implementation of your ideas.
Otherwise, it is difficult to avoid mistakes that result in fires and accidents.
If the technician has the necessary knowledge on installing different types of wiring in residential buildings and is ready to follow the requirements of the regulations, information about the features of laying cable lines will help to avoid unnecessary mistakes.
Information about the features of electrical work is important when doing it in the house with your own hands.
This knowledge will help control the quality of repairs by professionals, evaluate the correct choice of equipment, parts, tools, and connection methods.
External electrical connection
Although the connection from the power line to the building is the responsibility of the electricians in your village, you live in the house, and this work also needs to be monitored, as well as providing the electricians with everything necessary for installing the wiring. Moreover, there may be several connection options, and it is up to you to decide.
Here are a few notes on this stage of work.
Wiring can be carried out both by air - from the pole to the house, and underground. The wire from the power pole to the house should not sag more than 3.5 meters from the ground. It should not touch tree branches, wooden parts of the house, or any other protruding parts. If the distance is more than ... meters from the pole to the entrance node to the house, you need to install an additional support for the wires.
For the input cable, wires with a minimum cross-section of 16mm2 are used. It can be two-core (using a voltage of 220V) and four-core (using a voltage of 380V). NYM, VVGng, VVG and PUNP wires meet all operating requirements (safety, minimal losses and durability).
Wires are introduced into the house through a hole carefully insulated with non-flammable material. The wires must be threaded through a protective casing, such as a plastic or metal pipe.
Rules for external connection of a house
Inside the house, the wires go to the electric meter, which records the electricity consumed, and from the meter to the distribution panel.
Connection procedure
To make it clearer to you where to start in order to install electricity on your own plot of land, we will divide the actions into two stages: organizational measures (collecting documents, submitting an application, etc.) and technical ones (in particular design and electrical installation work).
Getting permission
Organizational arrangements involve the submission of a package of documents to the energy supply organization, such as:
- A copy of the passport of a citizen of the Russian Federation - the owner of the site (if the application is submitted by another person, a power of attorney is attached).
- A copy of the document confirming ownership of the house or summer cottage.
- A plan diagram of the site with the location of power receiving devices and indicating the nearest power transmission line support, as well as indicating the exact location of all engineering systems on the site, including gas pipelines and water supply pipes.
- Single-line diagram of the applicant's electrical networks.
- Consent to the processing of personal data (in accordance with the requirements of the Federal Law “On Personal Data” No. 152 of July 27, 2006.
It is better to clarify the list of required documents and the procedure for their execution and submission in the Distribution Zone.
Plot data can be provided from a public cadastral map, in which a plot can be found by the cadastral plot number indicated in the title deeds.
There is a point that if the pole from which you can connect electricity is located further than 25 meters from the border of the site, then in order to provide light to the site, you will have to install an additional pole, and most likely at your own expense.
If everything is in order with this and the distances are within normal limits, there will be no difficulties, and following our recommendations you will be able to conduct electricity to the site. Based on these documents, the energy supply company must issue technical conditions, thanks to which you can already install light.
According to Decree of the Government of the Russian Federation No. 861 dated December 27, 2004 (clause 12), the energy supplying organization does not have the right to refuse you, and if it is not possible to connect electricity on time, for technical reasons, inform the deadlines for their implementation. This may be a lack of technological connectivity, this line is operating at the limit of its capabilities, and the connection of a new subscriber will lead to an accident in the network. And in order to bring light to your home, you need a partial or complete modernization of the power supply network, which can take years of waiting.
If the answer is positive, in a month you will have in your hands a document, a connection agreement and technical conditions, with an allowed power of up to 16 kW (for a country house and a residential building they differ), the name of the electricity meter, the input switch, the RCD protective device and the sealed box for outdoor installation.
The Importance of Electrical Network Planning
As in any business, when laying electrical networks, first of all, you cannot do without a detailed plan. First of all, this is accounting for all consumers (light bulbs, washing machines, refrigerators, etc.). Secondly, a graphical display of the electrical wiring system from source to consumer.
All stages of installing electrical networks are based on the electrical connection diagram. In general, this is a drawing that clearly shows:
- Power supply units from the input line
- Short circuit protection devices
- Distribution boxes where power lines branch off to certain premises and consumers
- Location of power lines - that is, wires
- Places where sockets for consumers are installed
The plan diagram must necessarily include information about the power of consumers, the parameters of fuses, the parameters of electrical wires and similar information.
Barn Lighting Options
All types of artificial barn lighting can be divided into internal and external. The external one is most often located directly at the entrance or near the door. In order to save energy, you can use solar lamps, which will accumulate charge during the day and illuminate the building at night.
Solar lamp at the entrance
Interior lighting fixtures are installed on the ceiling or wall; additional lighting can be placed near shelves, near a workbench or table, if the barn is intended to be used as a workshop.
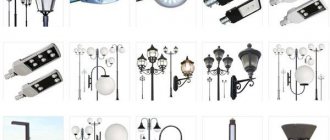
Several types of lighting equipment can be used to illuminate commercial buildings:
- LED lamps are the most economical in terms of light emitted per unit of power consumed. They have a long service life and an acceptable temperature range for barn lighting, but their cost is the highest;
- Fluorescent lamps are second on the list of economical lamps for interior lighting of a barn; they have slightly worse parameters than LED lamps. However, they are extremely capricious to low temperatures and at temperatures below –5ºC, an energy-saving lamp may not light up at all.
- Halogen lamps are low efficient for barn lighting, but have the lowest cost. These are relevant if the barn is rarely used and the lighting is turned on only when necessary.
Incandescent lamps are used extremely rarely in lamps, unless the owner wants to change to more advanced models. But, at the same time, Ilyich bulbs for lighting are justified for winter chicken coops, since they are a local heater and provide a good spectrum of light for the bird to gain weight and increase activity. In addition, artificial light in a chicken coop can be provided by specialized LED devices, but their price is quite high compared to a classic lamp.
For some sheds it is important to have autonomous lighting, especially if it is also used as a garage, basement, etc. The simplest version of an autonomous source is a rechargeable flashlight, which can be stored in any convenient place. But in the garage, autonomous lighting can be powered from a car battery.
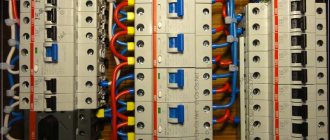
Distribution panel
It is the distribution panel that is, as it were, the “brain” of the entire power supply system of the house. It is a metal box with built-in nodes from which wires extend to one or another area of the house. All components in the box are mounted so as not to touch each other.
The main elements of the distribution panel are protective fuses. They are mounted at the common entrance to the panel and for each group of consumers. Modern fuses have replaced traditional electrical plugs, where a network break in the event of a short circuit occurred after the melting of the fusible inserts included in the plugs. Today, this role is played by automatic fuses, or simply by automatic circuit breakers, where the network breaks when the temperature rises critically thanks to built-in sensors. Each machine is designed for a certain power of current consumers.
Distribution panel
Electric installation work
So, now let's talk about the most interesting thing - how to install light in a barn from a private house. In fact, lighting installation is much easier to complete than preparatory work. Let's look at an example of a simpler and at the same time popular installation method - by air into a dry utility unit.
- Attach the first hook to a suitable location on the house. You can use mounting on insulators, as shown in the photo below.
- Pass the cable through a corrugated pipe, which will additionally protect the lighting line from mechanical damage.
- Turn off the power at the home switchboard.
- Drill a hole in the wall of the house to insert the cable into it and connect it to the house distribution panel at the input.
- Extend the light to the shed and run the cable inside the building.
- Install a circuit breaker at the entrance.
- From the machine, take out the distribution box, from which you need to route the cable in a corrugation to the required places (where the light bulbs will be located).
- You can connect the lamp not only inside the barn, but also at the exit, as shown in the photo. In both cases, it is better to use lamps with moisture-proof shades for lighting.
- Install a light switch in a suitable location. To control street and interior lighting, it is better to use a dual model. We provided a wiring diagram for a two-button light switch in the corresponding article.
- After all the electrical work, turn on the power and check how correctly you managed to install the light in the barn.
That's all you have to do to install lighting in the barn with your own hands! As you can see, there is nothing complicated and besides, such work will not take much time
We draw your attention to the fact that if you install a step-down transformer (for example, nuclear power plant) in an unheated utility room, you will have an additional outlet to which you can connect a power tool during repairs. In this case, the cross-section of the copper cable that you will stretch from the dacha must be at least 2.5 mm2
This completes our simple instructions. We hope that now you know how to install light into a barn from a private house with your own hands! If your summer cottage is often left without electricity, it is recommended to place a flashlight at the entrance to the outbuilding, which can save the situation at any time.
Determining installation conditions
Before installing the light, you need to find out what the barn in the country is and what it is generally used for. Now we will look at the main options for utility units and briefly talk about what difficulties may arise when installing lighting yourself.
- The room is heated and dry. It is easiest to install light into such an outbuilding, because... You can choose any type of wiring: open or hidden.
- The humidity is high or the barn is simply not heated. Here you already need to draw the lighting line only in pipes, which additionally isolate the wiring from moisture.
- Particularly damp premises (usually greenhouses and hotbeds). The conductor must be double insulated, the light switch must be placed outside the dacha building. The lamps must be waterproof with a degree of protection IP 65, and operate from a safe voltage of 12 Volts.
There is no significant difference between a damp and a particularly damp room in terms of electrical installation work. In any case, you will have to install lighting in a corrugated or metal hose and install a 220/12 V step-down transformer if the barn is used as a cowshed or chicken coop. Well, the last of the most important installation conditions is the distance from a private house to an outbuilding. If the distance is small and there are no obstacles (we’ll talk about them a little below), we recommend bringing the light into the barn through the air. If the room is several tens of meters away and there are many trees or other obstacles along the way, it is better to lay the cable in the ground at a depth of at least 80 cm, as shown in the diagram.
Examples of how to choose the right RCD based on rated current:
At the same time, remember that if “on top” the RCD is already protected by a circuit breaker whose rating is less than the rating of the RCD, then after that the RCD can be connected to circuit breakers with the sum of ratings of at least 1000 A.
Often, some designers simply mathematically distribute machines into phases, etc., I don’t understand why this is necessary, because in everyday life it is difficult to achieve a clear distribution of the load among the phases.
A simple example, today you are ironing things in the kitchen, as a result, the phase from which the sockets are connected received a load of + 2 kW, and tomorrow you are ironing in the Living Room, which is from a different phase - as a result, 2 kW went from one phase, and appeared on the other.
Of course, this does not mean that now you need to connect the washing machine, dishwasher, and water heating boiler to one phase. Large consumers need to be distributed as evenly as possible across phases, but counting the power of light bulbs, television sets, and computers is definitely not necessary.
In the article “Shield diagram” I discussed the main points on drawing up diagrams. What elements does the shield circuit consist of? I tried to explain everything as simply as possible.
Thank you for your attention. I'm waiting for comments, criticism, suggestions
Tests
After the socket and switch are installed, and the light bulbs are screwed into the lampshades, you need to carry out the first test run. If after switching on the lights are on, the socket is functioning, everything is in order, the work has been successfully completed.
If the lights do not light up or blink or the wiring sparks, you need to check the circuit for breaks and tighten the screws of the machine more tightly. Problems can be caused by a phase-zero mismatch, a violation of the integrity of the insulation in twists, or a connection of copper with aluminum.
We must not forget about safety precautions: do not work with a connected network, use insulated tools, avoid getting moisture on wires and devices.
WordPress Social Login is not configured yet. Please navigate to Settings > WP Social Login to configure this plugin. For more information, refer to the online user guide..
Outdoor wiring
Laying open electrical wiring in a house made of aerated concrete is carried out if there is a time limit and there is no desire to create dust. This type of work is much simpler and can be used for both aerated and wooden walls, in accordance with the requirements of the PUE. All components are purchased for open wiring; the wires must be designed for the maximum rated load and have double insulation. All sockets, switches, junction boxes are installed on the wall surface and secured. Under them, wooden planks are installed, with a lining made of asbestos or a similar non-combustible material (asbestos, fluoroplastic), or ready-made segments of non-combustible material. We recommend choosing VVGng for the cable; it is non-flammable, which will additionally protect your residential building from fire. All wiring and installation is carried out similarly to the installation of hidden electrical wiring in aerated concrete, with the exception that the wire is laid along the surface of the wall in a plinth, gutters, corrugation or on dielectric insulators. The connection of conductors is carried out by an electrician using terminal blocks, welding or crimping.
Work on installing wiring in a house made of aerated concrete must be carried out by specially trained personnel - an electrician, in order to avoid possible malfunctions during operation. The video examples below clearly describe all the stages of installing electrical wiring in an aerated concrete house:
Electrical supply by air
The air supply method is attractive because it does not require a lot of time and money. But the standards set requirements that not all houses meet:
- The cable entry into the house must be located at a height of at least 2.75 m. If the height of the house is sufficient, a distribution panel with an RCD is mounted on the wall, and the cable from the pole is connected to it. If the house has a smaller height, a special rack (pipe rack) is installed. It can be of a curved shape called a “gander” (in the picture on the left) or straight (in the picture on the right). These two entry methods differ in the method of attachment to the walls of the house (see photo). Methods for installing a rack for air supply of electricity into the house
- The distance from the pole to the entry point should not exceed 10 m. If this distance is greater, additional support is installed. The distance from it to the power line should not be more than 15 m.
- The tap from the power line is made: up to 10 m - with copper wire with a cross-section of 4 mm;
- from 10 to 15 m - with a wire with copper conductors with a cross-section of 6 mm.
- aluminum wires are used in any case with a diameter of at least 16 mm.
Connecting to a power pole by air
Although copper wires require a smaller diameter, they cost significantly more than aluminum wires. Therefore, the introduction of electricity into the house from a pole is most often made from cables with aluminum conductors. There are two ways:
- Stretch a torso or wire between the posts and attach a current-carrying cable to it with special clamps.
- Use self-supporting wires for which support is not needed: SIP (self-supporting insulated wire). It is connected using:
- insulators (glass, polymer, porcelain);
- special fittings.
Special fittings appeared not so long ago, but are becoming increasingly popular. It has a certain margin of safety. If it is exceeded (falling trees, massive snow melting, etc.), the fittings are destroyed, but the cable remains intact and the power supply is not disrupted.
From the place where the input cable touches the wooden wall of the house to the place where the shield is installed, the cable must be laid in a steel pipe
Inputting electricity into the house from a pole through a pipe stand
Air supply of electricity to the house also has disadvantages:
- The electrical wiring is exposed, which can cause damage.
- Hanging wires limit the possibilities for accessing large equipment (truck cranes, aerial platforms, etc.).
Outhouse power supply circuit
Electrical supply to
workshop
,
garage
or
barn
must come from a separate circuit breaker located in the main panel of the house. In the construction, it must fit into an additional panel with automatic circuit breakers (AB) that provide protection for outgoing lines (at least one circuit breaker for the socket network and one for the lighting network).
Cable connection to the workshop
Chain on the side of the house
Connect the three-core VVG-NG cable with cores with a cross-section of 6 mm² to the house panel. Connect the phase conductor of this cable to the output terminal of an additional single-pole 32 A circuit breaker, connect the neutral conductor to the common neutral busbar (N), and the grounding conductor to the grounding busbar (PE) of the panel.
Chain from the building side
The cable laid in a double-walled flexible electrical pipe must be brought to the workshop panel.
Outbuilding power supply circuit diagram Use a 40 A two-pole RCCB with a rated residual current of 30 mA as the input device.
Connect the phase and neutral conductors of the power cable to its input terminals.
Connect the green-yellow conductor (core) to the grounding bus (PE) of the workshop panel.
Connect a 16 A circuit breaker protecting the socket group to the output phase terminal of the VDT with a wire with a cross-section of at least 2.5 mm².
Using the same wire, connect a 10 A circuit breaker to this terminal to protect the lighting circuit.
Using a wire with a cross-section of at least 6 mm², connect the output neutral terminal of the RCCB to the neutral bus (N) of the workshop panel.
The workshop socket circuit is made with a three-core VVG-NG-LS cable with a core cross-section of 2.5 mm², and the lighting circuit is made with the same cable, but with a core cross-section of 1.5 mm².
To lay wiring inside the workshop, it is convenient to use plastic cable ducts with appropriate accessories (corners, branches, branch boxes, etc.). You can read more about them in the publication
How to install exposed electrical wiring with your own hands
.
Wires for internal panel wiring
The thermal regime of the installation wires inside the panel is more severe than the thermal regime of conventional wiring.
Therefore, relatively large cross-section wires are used to connect protective devices inside the shield. This contributes to less heating of the wires and, accordingly, extends the life of their insulation. Recommended minimum cross-sections are given in the table below: Recommended minimum cross-sections of copper wires
More information about the wiring diagram
The output of wires from the distribution panel corresponds to the location of consumers in different rooms. Let's take a closer look at typical electrical distribution schemes in a house.
In modern homes, we use various electrical appliances that consume different amounts of electricity. The level of its consumption is expressed in the power of the electrical appliance.
The most powerful consumers in a modern home are electric stoves and sauna heaters, the most economical are light bulbs and small household appliances.
Below are the average power consumption ratings of some of the most commonly used electrical appliances, ranked from most powerful to least powerful (in watts):
- Instantaneous water heater – 5000
- Electric stove – 3000
- Automatic washing machine – 2500
- Welding machine – 2300
- Oven – 2000
- Iron – 1700
- Boiler – 1500
- Vacuum cleaner – 1500
- Heater – 1500
- Microwave oven – 1400
- Electric kettle – 1200
- Fan – 1000
- Refrigerator – 600
- Computer – 500
- TV – 300
- Light bulb – 60
Already from this small list we can see where the main consumers of electricity in our house are concentrated - in the kitchen and in the bathroom-laundry room. Naturally, it is not recommended to turn on all appliances at once, but a switched-on electric stove with a constantly running refrigerator is enough to put a significant load on the network.
It is the nodes from which the wires lead into such rooms that have the most powerful machines.
Connecting to the home network
In our case, the barn is built of expanded clay concrete and brick. The thickness of the walls is 30 cm. Heating with electrical appliances is expected on particularly cold days. The wiring will be made from a two-core cable with a cross-section of 2.5 and 1.5 mm² in an open manner.
The connection is made using an overhead line. One end of the cable is connected to the house network, the second is passed through a metal tube attached to the shed structures, and brought into the room through a small hole in the brickwork. Know-how - a piece of plastic pipe is inserted into the channel so that the insulation frays less.
RCD installation
A 10 amp RCD circuit breaker will be connected to the shed's electrical system. The residual current device prevents electric shock to a person or animal when it comes into contact with a voltage source, as well as fire as a result of damage to the insulation.
The device responds to the potential difference between the incoming and outgoing current, which is normally zero. In the event of an insulation breakdown, the reverse current decreases and the RCD automatically turns off the electricity supply.
Requirements and standards
There is a large number of tips, but it should be noted that all recommendations must comply with regulatory documents. Otherwise, errors and shortcomings in the shed's power supply system can lead to electrical injury or an emergency.
Depending on the type of building, the lighting of the barn will differ significantly:
- In dry rooms that are heated in winter, any wiring method can be used. If the barn is heated, the line can be installed in both open and hidden ways.
- In unheated sheds, where natural moisture may appear from temperature fluctuations, the electrical cable is additionally placed in a sealed tube that prevents the penetration of dew. Lighting devices are also selected with a sufficient degree of dust and moisture protection.
- For sheds with high humidity (where a greenhouse, greenhouse and similar premises are organized), it is necessary to use cable and wire products with double reinforced insulation in accordance with clause 2.1.43 of the PUE . The lamps must have IP67 or IP68 protection, the switch is placed outside the barn.
- If the barn is built of boards and there is no finishing inside, then the wiring and installation of lighting devices on a flammable surface is carried out in accordance with clause 2.1.38 of the PUE on a non-combustible surface. The non-combustible layer, when directly located on it, must protrude in each direction in the case of an open laying in accordance with clause 2.1.37 of the PUE. Hidden wiring in wooden structures is carried out in metal tubes that do not spread sparks.
- To ensure safety during the operation of lighting or other electrical equipment in the barn, special measures must be used in accordance with clause 1.7.50 of the PUE . This could be connecting lamps to low voltage 12V, using protective grounding, connecting an RCD or double insulating cables. The above measures can be used both together and separately.
Preparing materials
So, based on the above conditions, you must prepare materials in order to independently install light from a private house to the barn. We recommend that you use VVGng cable (for overhead wiring), moisture-proof distribution boxes with sealed inputs, as well as light switches with a high degree of dust and moisture protection (at least IP44). Also, with the aerial method of installing the lighting line, we advise you to additionally buy a special insulated cable, along which the corrugated cable will be laid in the future. For the cable, additionally purchase two hooks and special cable clamps, which will be necessary for further fastening.
If you nevertheless decide to draw a lighting line to the shed in a trench, we recommend that you watch the instructions with video examples on installing electrical wiring underground, which describes all the intricacies of electrical installation work. As for the cable, its length must be purchased with a margin of 3-4 meters so that there is no strong tension on the electrical line and at the same time there will certainly be enough material from the house to the barn. Don't forget to calculate the cable cross-section based on power and length. If you are going to connect several light bulbs and will not remove an additional socket from the distribution box, you can safely choose a cable cross-section of 1.5 mm 2 (again, if there are no restrictions on the distance from the house).
Be sure to protect the lighting line in the barn with a circuit breaker, which will protect the electrical wiring from a short circuit and the outbuilding itself from fire. Read about how to choose a circuit breaker in the corresponding article.
Tags: , automatic, ampere, boiler, sconce, introductory, view, choice, switch, house, , clamp, protective, insulation, cable, like, computer, design, , installation, power, load, nominal, lighting, heating, connection, potential, wire, project, , work, calculation, repair, socket, row, light, lamp, LED, network, connection, diagram, ten, type, current, transformer, , phase, photo, shield, electricity, power tool, power supply
How to connect a shed to electricity from the house?
The main nuance when installing lighting in outbuildings is that it is necessary to take into account fire and electrical safety requirements. You yourself understand that the outbuildings or workshop at the dacha are not always heated. In addition, such buildings may have high humidity, which further aggravates the situation. That is why you need to know how to install light into a barn from a private home, so that in the future the lighting system will be safe and durable. Next we will tell the readers of the site
The electrician himself
all the nuances of electrical installation work and provide some practical advice on this issue!