Let's look at repairing a floor fan with our own hands, using the example of a typical product from the Krasnodar plant. There is nothing complicated inside, but it is not easy to immediately describe the method of adjusting the rotation speed. The design is average. The relatively heavy body tramples on the weightless leg, sensing the slightest push, the product falls. The situation is aggravated by lying carpets. The four plastic supports scattered at the corners of the thin steel cross do not help. The stand is fragile, bends easily, and is supported by snot. Therefore, the first recommendation is not to deal with products that have mechanical instability, so as not to become infected with mental instability. Bork products are equipped with fall protection, but not products from the Krasnodar plant. However, the motor will not burn out in case of excess, there is protection...
Basic faults
A household fan does not have a complicated design, and the principle of its design can be seen in the figure below.
If you look closely at the figure, it becomes clear that the electric motor, gearbox, crank, rotation speed switch and propeller that creates the air flow can fail in the device.
The main difference between a desktop cooler and a floor-standing one is the high stand in the floor-standing version. Otherwise the designs are identical.
So, the main malfunctions that you can observe in the cooler you purchased:
- the unit does not turn on, the power light does not light up;
- the device does not work, but the light is on;
- the cooler blades do not rotate well;
- the unit does not turn to the sides;
- The cooler makes a humming noise and does not rotate.
The unit does not turn on
In this situation, there may be 2 options: the light indicating that the unit is ready for operation may light up or not. Depending on this, the breakdown diagnostic algorithm will differ.
The light doesn't light up
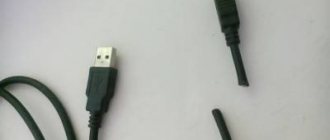
If, after plugging the device into the socket, the light located on its body does not light up and it does not start, then, first of all, you need to check whether there is voltage in the socket. This is done simply: take any electrical appliance and plug it into this outlet. If the device works, then you need to look for a fault in the electrical plug and cord.
To check the plug, unscrew it and check that the wires are securely connected to the terminals. To check the cable, you need to disconnect it from the terminal block of the device and “ring” it with a tester. If a break is detected in the cable cores, it should be replaced.
The light is on
The reason for this behavior of the unit, when the indicator light is on, but the fan does not work, and no sounds are heard, may be caused by a breakdown of the block with buttons. To check the buttons, you will need to disassemble the button block located on the stand of the floor fan or the stand of the desktop device. But, before disassembling the device, make sure that it is unplugged from the outlet.
The operation of the buttons is very simple: there is an “on” and “off” position. It is necessary to check the “output” and “input” on each key using a tester.
If a faulty button is detected, it cannot be repaired. Therefore, the switch should be replaced or the connection made directly. This approach to solving the problem will help to put the unit into operation if you are far from the store, for example, in the country.
Faulty speed switches can also be the reason why the fan does not turn on. To check the regulator, you will need to put it in the maximum position and check the “input” and “output” using the same tester.
Cooler blades do not rotate well
If the fan does not pull and does not move air well, you will need to disassemble the housing in which the motor is located. Sometimes the fact that the propeller does not spin may indicate insufficient lubrication in the plain bearing installed in the electric motor.
The fan is disassembled as follows.
- First you need to unscrew the protective mesh (its front part) and remove it.
- After the grid, disconnect the propeller. It can be screwed to the motor shaft with a nut with a left-hand thread. That is, to unscrew the nut, rotate it clockwise, and to tighten it, counterclockwise.
- Remove the rear protective mesh by unscrewing another nut.
- Unscrew all fasteners holding the unit casing. Sometimes there is another bolt in the handle to adjust the rotation of the body. If you do not unscrew it, you will not be able to remove the motor casing.
- Now, when the engine is open, you should drop a few drops of machine oil (it is better to use spindle oil) onto the bushing (indicated by the red arrow) and rotate the shaft several times in different directions so that the lubricant is absorbed inside.
- After this procedure, slight rotation of the shaft is resumed. Reassemble the motor housing in reverse order.
- Turn on the unit and check the air flow.
Problems with the blades
Since plastic is used in the manufacture of the blades, this part of the fan is very susceptible to external mechanical influences. As a result, the blades often become deformed and break if any foreign objects get caught behind the mesh. In this case, in order to repair the fan, the owner needs to dismantle the protective mesh. The back cover can remain in place. There is no need to remove it. The protective mesh is held in place by a special clip in the form of a plastic cap. It is easy to turn with just your hands. After the clamp is twisted and the protective mesh is removed, the special lining that secures the blades is detached. This stage of work can be completed without the use of tools. The blades must be replaced if they are very deformed. If during operation of the fan there is slight friction against the protective grille, then they can be easily aligned by hand. According to fan owners, plastic blades bend very easily.
The fan does not turn to the sides
How to fix a floor fan if it stops spinning (turning) from side to side? It's all about the crank, the mounting screws of which can become loose or unscrewed. To find out, you will need to disassemble the motor housing. If during operation of the unit the body turns with a delay or a complete stop, then the gears in the gearbox should be checked for engagement. It is also necessary to check the gear switch itself, namely, its movement up and down.
Disassemble the gearbox and remove the main gear. The shaft will also have to be pulled out. Apply lubricant to all moving parts and assemble the gearbox. If the gears are heavily worn, they require replacement, although it is quite difficult to find analogues of broken fan parts. In this case, you will have to assemble the unit without a gearbox and use the cooler in normal mode, when the air masses move in one direction.
Crank offset
Crank stickout is usually accompanied by problems with the shaft. In this situation, repairing the fan must begin by removing the cover. Next you will need to work on the stator, which is located next to the electric motor. Sometimes it can be fixed on a special platform. In any case, you need to tighten the nuts with a wrench. Next, the shaft itself will be visible in the fan, under which the crank is located.
If it is deformed, then it needs to be removed first. Cranks are made mainly from stainless steel. A person can straighten them on his own. However, this part is very small in size, and in this situation it is easier to use a vice. If you cannot solve this problem yourself, then you will have to contact a service center.
The cooler makes a humming noise and does not spin
Cases when the fan does not spin and the motor hums are quite common. There may be several reasons causing this failure:
- lack of lubrication on the bearings (what to do was discussed above);
- capacitor failure;
- electric motor malfunction.
Capacitor failure
Repairing a floor fan in this case comes down to checking the capacitance of the capacitor using a tester. To get to the radio component, you will need to disassemble the motor housing. A detailed description of how to disassemble the case was given above. After removing the casing, you will see the capacitor attached to the motor.
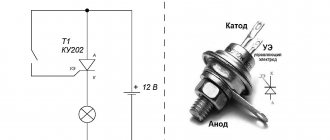
The presented device has a capacitor capacity of 0.85 microfarads. For this reason, the device must be set to a value ranging from 2 microfarads to 200 nanofarads, as shown in the figure below.
In this case, after connecting the capacitor to the device, it is clear that its capacity is 0.841 microfarads. If we take into account the error of ± 5%, then the capacity of the radio component is within normal limits, and it is not the reason why the cooler stopped working.
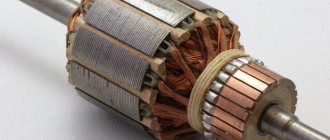
Engine malfunction
When repairing a fan with your own hands, you also need to “ring” the electric motor in search of a breakdown. If it is faulty, the device will not turn on and will make a humming noise. It is necessary to measure the resistance on the two stator windings, having first disconnected the wires going to them, as shown in the following figure.
As you can see, the resistance is also within normal limits, since its value is 1215 Ohms (1.2 kOhms). Otherwise, the device will buzz but will not turn on. In such a situation, the motor will need to be rewinded in a special workshop.
Engine disassembly and malfunction
First, the engine must be freed of all plastic parts. Unscrew the 4 screws from the front side and remove the cover.
On new models, in addition to screws, there are also latches. They need to be bent with a screwdriver.
To disconnect the leg, you need to find another screw, which is usually hidden under the plug.
Loosen it and pull out the mounting shaft. To dismantle the wires that pass through the leg, you will need to bite them out or unsolder them from the terminal blocks on the speed buttons.
At the same time, write down or sketch where each one is initially connected.
As a result, you should have a bare fan motor in your hands without anything unnecessary.
Let's take it apart. Unscrew the screws holding the back cover together.
At the same time, before disassembling, be sure to put marks on all covers and hardware indicating how everything was originally assembled.
Otherwise, after incorrect docking, you will lose alignment. There will be problems with the shaft wedging and the rotation of the blades.
The device is very noisy
Since the propeller of the unit, the main task of which is to create air flow, is made of plastic (not always of high quality), there is a high probability of deformation of the latter. This usually occurs if the unit is left for a long time in direct sunlight, or near a source of high temperature. When deformed, the balance between the blades is disturbed, which causes strong vibration and noise during normal air flow.
Shaft vibration may also occur due to a sliding bearing sleeve that has become loose from long-term use.
Often, when the device falls and the blades spin, the protective grille becomes deformed. If a rotating propeller hits it, one of the blades may break.
To summarize, we can say that in different fan models, the main components and control elements may look different. But this does not change the principles of diagnostics and troubleshooting.
Basic faults
A household fan does not have a complicated design, and the principle of its design can be seen in the figure below.
If you look closely at the figure, it becomes clear that the electric motor, gearbox, crank, rotation speed switch and propeller that creates the air flow can fail in the device.
The main difference between a desktop cooler and a floor-standing one is the high stand in the floor-standing version. Otherwise the designs are identical.
So, the main malfunctions that you can observe in the cooler you purchased:
- the unit does not turn on, the power light does not light up;
- the device does not work, but the light is on;
- the cooler blades do not rotate well;
- the unit does not turn to the sides;
- The cooler makes a humming noise and does not rotate.
Switches and thermostat
What other electrical elements in the circuit can fail? Immediately after the power wires there is a thermostat and a mode switch.
On the outside of the case there are the familiar “handles and wheels” that are familiar to everyone.
Some people mistake the thermostat for an element that regulates the speed of rotation of the blades. In fact, this is a bimetallic strip, and one of the power wires from the plug comes directly to it.
When you twist this knob, a barely audible clicking sound should be heard. This means the thermostat turns on and off. If the circuit does not have a separate microswitch, then it also performs its function.
But his main task lies elsewhere. When the heater and heater body reach a certain temperature (which you set by twisting the knob), the bimetallic plate inside the thermostat bends and snaps off its contacts - the fan is completely turned off.
The serviceability of this element is also checked with a multimeter. Place two probes on the contacts and turn the knob. In call mode, the sound will appear and disappear.
The mode switch is checked using the same scheme. By turning its handle, you turn on one heater, two, or simply put the fan in fan mode without heating.
Only when you remove the terminals for testing, it is better to take a photo of their initial connection on your smartphone in advance, so as not to confuse the contacts later.
The currents in these elements are not weak - about 10A. Therefore, the loss of a chain in them is not so uncommon. True, the very first check of the thermostat and the 4-position switch can be done “by smell”.
Burnout of contacts under such a load never goes away without leaving a trace. Such things will definitely smoke and stink.
The unit does not turn on
In this situation, there may be 2 options: the light indicating that the unit is ready for operation may light up or not. Depending on this, the breakdown diagnostic algorithm will differ.
The light doesn't light up
If, after plugging the device into the socket, the light located on its body does not light up and it does not start, then, first of all, you need to check whether there is voltage in the socket. This is done simply: take any electrical appliance and plug it into this outlet. If the device works, then you need to look for a fault in the electrical plug and cord.
To check the plug, unscrew it and check that the wires are securely connected to the terminals. To check the cable, you need to disconnect it from the terminal block of the device and “ring” it with a tester. If a break is detected in the cable cores, it should be replaced.
The light is on
The reason for this behavior of the unit, when the indicator light is on, but the fan does not work, and no sounds are heard, may be caused by a breakdown of the block with buttons. To check the buttons, you will need to disassemble the button block located on the stand of the floor fan or the stand of the desktop device. But, before disassembling the device, make sure that it is unplugged from the outlet.
The operation of the buttons is very simple: there is an “on” and “off” position. It is necessary to check the “output” and “input” on each key using a tester.
If a faulty button is detected, it cannot be repaired. Therefore, the switch should be replaced or the connection made directly. This approach to solving the problem will help to put the unit into operation if you are far from the store, for example, in the country.
Faulty speed switches can also be the reason why the fan does not turn on. To check the regulator, you will need to put it in the maximum position and check the “input” and “output” using the same tester.
Cooler blades do not rotate well
If the fan does not pull and does not move air well, you will need to disassemble the housing in which the motor is located. Sometimes the fact that the propeller does not spin may indicate insufficient lubrication in the plain bearing installed in the electric motor.
The fan is disassembled as follows.
- First you need to unscrew the protective mesh (its front part) and remove it.
- After the grid, disconnect the propeller. It can be screwed to the motor shaft with a nut with a left-hand thread. That is, to unscrew the nut, rotate it clockwise, and to tighten it, counterclockwise.
- Remove the rear protective mesh by unscrewing another nut.
- Unscrew all fasteners holding the unit casing. Sometimes there is another bolt in the handle to adjust the rotation of the body. If you do not unscrew it, you will not be able to remove the motor casing.
- Now, when the engine is open, you should drop a few drops of machine oil (it is better to use spindle oil) onto the bushing (indicated by the red arrow) and rotate the shaft several times in different directions so that the lubricant is absorbed inside.
- After this procedure, slight rotation of the shaft is resumed. Reassemble the motor housing in reverse order.
- Turn on the unit and check the air flow.
Electrical circuit of the fan
The electrical circuit of the fan consists of two parts - an electric motor with a starting capacitor and a unit for switching on and adjusting the speed of rotation of the blades.
The electric motor is a metal casing (stator) in which windings made of copper wire are fixed and connected according to the diagram shown above. A rotor is also fixed in the housing in sliding bearings, which, in response to the appearance of an electromagnetic field as it passes through the stator windings, rotates.
By applying supply voltage to the windings L1, L2 or L3 using interconnected switches S1, S2 and S3, you can regulate the air flow speed. The motor winding L4 and the capacitor C1 attached to the motor housing are used to start the motor.
If winding L4 or capacitor C1 is broken, the engine will not start when turned on in automatic mode. But if you turn the impeller clockwise by hand, the blades will begin to rotate. In this way, you can determine the malfunction of this chain.
In some fan models, to protect the windings from overheating in the event of a malfunction, a thermal fuse (indicated St° in the diagram) is installed at an operating temperature of about 125°C.
When heated above the design temperature, the thermal fuse breaks the circuit and the supply voltage is not supplied to the motor windings. This prevents them from burning out if the rotor jams when the lubricant is produced. The thermal fuse is usually installed at the end of the stator windings.
The fan does not turn to the sides
How to fix a floor fan if it stops spinning (turning) from side to side? It's all about the crank, the mounting screws of which can become loose or unscrewed. To find out, you will need to disassemble the motor housing. If during operation of the unit the body turns with a delay or a complete stop, then the gears in the gearbox should be checked for engagement. It is also necessary to check the gear switch itself, namely, its movement up and down.
Disassemble the gearbox and remove the main gear. The shaft will also have to be pulled out. Apply lubricant to all moving parts and assemble the gearbox. If the gears are heavily worn, they require replacement, although it is quite difficult to find analogues of broken fan parts. In this case, you will have to assemble the unit without a gearbox and use the cooler in normal mode, when the air masses move in one direction.
The cooler in the computer is noisy
When a user complains to you that their computer is loud, there are actually only two types of components that can create that noise: disk drives and cooling fans. But in most cases, you will find that the noise is generated by one of the cooling fans inside the computer. Most computers have three cooling fans, one inside the power supply, one on the case itself, and one on the processor. Of course, each of these cooling fans is designed to keep the entire system as cool as possible by creating a constant air flow inside the case that will draw cool air while moving hot air.
If any of these cooling fans fail, the system can overheat and cause operational problems. So your first instinct is to simply replace the noisy fan. Although this is a fairly simple operation, it is not always necessary. In many cases, the cooler only needs one drop of oil.
The cooler makes a humming noise and does not spin
Cases when the fan does not spin and the motor hums are quite common. There may be several reasons causing this failure:
- lack of lubrication on the bearings (what to do was discussed above);
- capacitor failure;
- electric motor malfunction.
Capacitor failure
Repairing a floor fan in this case comes down to checking the capacitance of the capacitor using a tester. To get to the radio component, you will need to disassemble the motor housing. A detailed description of how to disassemble the case was given above. After removing the casing, you will see the capacitor attached to the motor.
The presented device has a capacitor capacity of 0.85 microfarads. For this reason, the device must be set to a value ranging from 2 microfarads to 200 nanofarads, as shown in the figure below.
In this case, after connecting the capacitor to the device, it is clear that its capacity is 0.841 microfarads. If we take into account the error of ± 5%, then the capacity of the radio component is within normal limits, and it is not the reason why the cooler stopped working.
Engine malfunction
When repairing a fan with your own hands, you also need to “ring” the electric motor in search of a breakdown. If it is faulty, the device will not turn on and will make a humming noise. It is necessary to measure the resistance on the two stator windings, having first disconnected the wires going to them, as shown in the following figure.
As you can see, the resistance is also within normal limits, since its value is 1215 Ohms (1.2 kOhms). Otherwise, the device will buzz but will not turn on. In such a situation, the motor will need to be rewinded in a special workshop.
How to lubricate the power supply cooler and system unit cooler.
To begin, unscrew the cooler in the computer, disconnect the wires going to the cooler, clean the dust, and place it on the table. If this cooler is from a power supply or a cooler from the exhaust of warm air from the system unit, then carefully remove the sticker located on the opposite side of the blades. There should be a rubber seal or plastic cover that you need to open and use a syringe to drop a drop of oil.
Then rotate the cooler blades with your fingers so that the oil is distributed evenly over the entire surface. Next, close the sealing rubber plug and glue the sticker; if the sticker does not stick, then glue a piece of insulated material instead.
There are also non-separable coolers; they do not have a rubber seal behind the sticker; there is a plastic insert soldered in there. However, this type of cooler can also be lubricated, but this is more difficult. But some non-separable coolers do not have a fixed washer, so the impeller can come out with little effort with your fingers, we try to separate the cooler blades from the body without much effort, if the cooler blades are separated, then lubricate the shaft with oil and insert it back, if not, then read on. To lubricate a non-separable cooler, we need a drill or pliers and a not too large drill of 2-4 mm. We drill a hole in the center, just be careful not to overdo it and damage the shaft and bearings, remove the plastic shavings from the hole, then drop 1-2 drops of oil into the drilled hole, preferably using a syringe. After lubricating, rotate the cooler blades to distribute the oil evenly and cover the hole with electrical tape or something else of your choice, the main thing is to prevent the oil from running back out.
I advise you not to pour oil to the very edges as excess oil will still leak out.
The device is very noisy
Since the propeller of the unit, the main task of which is to create air flow, is made of plastic (not always of high quality), there is a high probability of deformation of the latter. This usually occurs if the unit is left for a long time in direct sunlight, or near a source of high temperature. When deformed, the balance between the blades is disturbed, which causes strong vibration and noise during normal air flow.
Shaft vibration may also occur due to a sliding bearing sleeve that has become loose from long-term use.
Often, when the device falls and the blades spin, the protective grille becomes deformed. If a rotating propeller hits it, one of the blades may break.
To summarize, we can say that in different fan models, the main components and control elements may look different. But this does not change the principles of diagnostics and troubleshooting.
The most reliable fans of 2022
Table fan Mystery MSF-2428
A broken fan should not be thrown away immediately; the most reasonable thing to do would be to figure out the reasons and, if possible, repair the device. Often fan malfunctions are not related to breakdowns, but simply require simple cleaning and lubrication.
Some types of mechanical damage can be eliminated yourself by replacing the failed part. It is more difficult to repair floor or tabletop models with a more complex design. Since fans are included in most modern refrigeration and air conditioning devices, each case is individual. We will consider only the most common causes of breakdowns and ways to eliminate them.
Changing the safety valve
Another equally common problem that can lead to fan interruptions. If the above checks have been previously performed and all elements are in order, then you need to check the safety valve of the expansion tank.
The main function of the valve is to maintain the operating pressure above atmospheric pressure. Thus, the water present in the liquid does not boil when the temperature reaches 100 degrees. If the valve stops working, the pressure becomes the same as atmospheric pressure, and the liquid will begin to boil when it reaches a certain temperature.
The sensor will only work at 105-107 degrees. The liquid will begin to boil and the fan will not work. It is impossible to check the operation of this element in artisanal conditions. But it’s realistic to buy a new part and make a replacement.
If you need to replace the sensor, it is important to buy the same model with identical characteristics. Otherwise, the cooling system will start working too sooner or later. You can do the replacement yourself using the following procedure:
disconnect the battery terminal;
empty the radiator of liquid;
disconnect the two wires that are connected to the sensor. Use a 30 mm wrench;
Apply sealant to the new sensor and install it in the appropriate place;
do not tighten the sensor too much;
Fill with coolant, start the engine and wait until the temperature rises.
If all steps are done correctly, the procedure does not take much time. On average, replacing a new sensor takes no more than 30 minutes. You can contact a specialized center, but a simple procedure can be expensive.
Breakdowns of household floor fans
The approach to repairing floor or table fans should be rational. The presence of speed, tilt and rotation control units for the fan significantly complicate the design. The main task is to identify the cause. If the problem is simple, then you can try to repair it yourself.
The fan is noisy, but the blades do not rotate
The most common breakdown of floor fans is when the device makes noise, but the blades remain motionless.
The reasons may be as follows.
- The bearing grease has dried out or thickened. It's easy to identify the cause. The engine is disassembled and the presence and condition of the lubricant is checked.
- The mounting of the bearings on the shaft has shifted. This occurs due to the depletion of the life of the bushings, which are made of bronze or brass.
- Motor malfunction. To check, it is necessary to disassemble the engine and check the resistance on the windings of the housing and armature.
- Loss of capacitance due to capacitor failure. It is necessary to check the capacitance of the capacitor with a tester.
If the reason is in the lubricant, you need to remove the remaining thickened lubricant by cleaning the parts with gasoline, and pour fresh engine oil into the bushings. Care should be taken to ensure that no oil gets on the motor windings.
If the bushings wear out, you need to look for new ones in the store or take them from another non-working device. It will not be possible to restore worn-out ones.
If the motor winding is damaged, you will have to rewind it in a workshop or buy a new motor. It is difficult to restore the winding on your own.
If the capacitor malfunctions, you must replace it with a new one from the store. If this is not possible, then it is easier to purchase a new fan.
The fan makes a whistling sound
Whistling sounds may appear several months after purchase. The fan hums or squeaks due to deformation of the propeller or loosening of the plain bearing fasteners. Exposing the blades to direct sunlight or high temperatures leads to bending and imbalance during rotation. Similar sounds are also caused by indentation as a result of mechanical damage to the protective grille, to the surface of which the tips of the blades begin to reach.
If extraneous noise occurs, do the following:
- disconnect the device from the power supply;
- remove the protective grille and inspect it for deformations;
- remove the propeller, inspect the blades for possible bends;
- inspect the bearing fasteners, check that the bolts are tightened.
The bending of the protective grille can be easily corrected by carefully straightening it with your hands to the desired state.
Note! If the geometry of the blades is damaged, the propeller will most likely have to be replaced, since polyurethane cannot be returned to its original shape at home.
If the cause of extraneous sounds is loosening of the fasteners, then you just need to tighten all the bolts until the backlash is eliminated.
The device does not turn on
If the fan does not respond to pressing the power button, it may indicate a broken wire in the cable, a damaged connection between the cable and the terminals in the socket, or a malfunction of the socket itself. The button block or the speed shift buttons themselves may also be damaged.
First of all, you need to check whether the control light comes on when you try to turn on the device.
If the light does not light, you need to do the following:
- measure the voltage in the outlet by connecting a working device to it;
- unscrew the plug and check for damage where the wires are connected to the terminals;
- disconnect the cable and check it with a tester for current flow.
If there is a malfunction in the plug, you need to restore the connection of the wires, possibly soldering the terminals. If a violation occurs in the wires inside the cable, it should be replaced with a new one.
Checking contacts with a tester
If the light comes on, but the fan itself does not work, the following steps should be taken:
- make sure that the device is disconnected from the network;
- disassemble the control panel, which is located on the fan housing;
- Use a tester to check all key contacts for current conductivity;
- check the speed controller with a tester.
If you discover that one of the buttons is broken, you should either purchase a working replacement from a radio store, or make a direct connection, bypassing it. If the speed controller fails, it must be resoldered or also replaced with a new one.
Fan does not turn
The reason why the fan does not turn left and right is that the crank is not working correctly.
To fix the problem you need to do the following:
- remove the back cover by unscrewing the fixing bolts;
- check the connection of the crank with the gear under the gearbox;
- put the crank in place, or replace it if it is broken.
A situation may also arise when turns are not completed completely. In this case, it is necessary to check the travel of the gear switch along the vertical axis. If there is any malfunction in its operation, it is necessary to disconnect the fixing bolt and lubricate the shaft, gear and upper part of the gearbox. If the plastic gear is worn out and you cannot find the part on sale, you will have to accept the fact that the fan does not rotate.
Good gear
When installing the impeller after eliminating the malfunction, you must follow the balancing rules, otherwise the fan will not rotate normally. The simplest and most convenient way is static balancing.
Install the fan manually, set the initial rotation by hand and mark the top point of the impeller with a pencil or marker. They make several more runs and check whether the obtained points of advantage coincide with the initial mark. If they do not match, then there is a fault in the bearings that need to be lubricated or replaced. If they match, take objects with different weights, such as nuts, pieces of electrodes, etc. For fastening, electrical tape, adhesive tape, mastic, plasticine, and thin wire are used.
Then they begin to attach them as a counterweight to the point of preponderance in order to achieve the loss of its permanent place. For a more accurate selection, you can grind off the weights using a hacksaw. After finding the optimal weight, the weight is welded or glued to the non-working side of the disk.
Balancing with screws allows you to quickly determine the required settings experimentally. But this option is not available on all fans.
You can also carry out balancing on balancing trestles by contacting specialists.
CPU cooler
The most commonly considered problem is the CPU fan, so first of all we will look at the most common causes and methods for eliminating them. Most often, the problem may be that your processor simply does not heat up to temperatures at which active cooling is required: for example, many budget solutions, even in relatively complex tasks, may not heat up above 40-50 degrees, and this is, in principle, normal. If we are talking about professional or gaming solutions, then values above 60 are acceptable when idle or under light load. To find out for sure, it is recommended to check the current special monitoring software, for example, AIDA64, and only if a problem is detected, you can take active action.
- After installing the application, open the “Computer” – “Sensors” menu items and check the temperatures in the “CPU” and “CPU 1/Core 1 (2, 3...)” positions.
- Now open the “Summary Information” menu and pay attention to the “CPU Type” line - copy or rewrite the name of your processor model.
- Next, open your browser, go to your preferred search engine and enter a query like *your processor model* temperature, then find a result that links to official sources.
- Compare what you found with the data obtained in AIDA64. If the idle operating temperature corresponds to the standard one, everything is in order, as it should be. If it exceeds the stock values by more than 10 degrees, but the cooler does not work, you are faced with a problem, the solution to which you will find below.
Method 1: Checking BIOS Settings
First, you should make sure that the board's firmware is configured correctly, and only then move on to more complex cases.
- Enter BIOS/UEFI - there are several methods available to perform this operation, described in the guide below.
Read more: How to enter the computer BIOS - Further actions depend on the type of firmware installed and whether it supports managing cooler settings. Look for sections in the list with the names “PC Health”, “Monitoring”, “Fan Control” and something similar in meaning. These tabs should contain options like “Q-Fan Control”, “CPU Smart Fan Control”, etc. To fix the problem we are considering, such tools need to be disabled - move them to the “Disable” position.
- In some advanced UEFIs, a separate fan speed setting is available for different CPU temperatures - usually this parameter is called “Fan Speed for Temperature”. As a rule, there are several of these, on average three, the values for each are configured separately. The fact is that the cooler may not work in cases where the limits are set too high - for example, cooling will not turn on when the CPU temperature is less than or equal to 60 degrees Celsius (or the equivalent in degrees Fahrenheit). The values should be reduced - select the desired number in the “Temperature” item, then in “Fan Speed for Temperature” set the operating speed (in revolutions per minute or as a percentage).
- After making all changes, save them.
It is also worth keeping in mind that not all BIOS allow you to independently adjust temperatures and speed, so if you do not find such options in your version, the reason is something else.
Method 2: Adjusting the rotation speed of coolers
The lack of speed control settings in the BIOS in some cases can be mitigated by using specialized software, for example, the SpeedFan program, which allows you to fine-tune the necessary parameters, or the AMD OverDrive solution, intended for users with red-produced processors. The use of each of these products is discussed in detail in Methods 1 and 2 of the article at the link below.
Read more: Setting up coolers in SpeedFan and AMD OverDrive programs
Method 3: Troubleshoot hardware problems
The last, and unfortunately quite common reason is physical problems with the cooling fans.
- It may be possible to get by with “a little blood” if the computer has not been cleaned of dust for a long time - maybe it just got stuck between the cooler blades or got into the rotation mechanism.
Open the PC or laptop case, carefully inspect the cooling means and clean if there is too much dust. Read more: How to clean your computer or laptop from dust - Also, the cause of inoperability may be drying out and/or contamination of the lubricant in the blade rotation mechanism, especially if the cooler was installed more than 5 years ago and has not been serviced all this time. Some models of such devices can be carefully disconnected from the board, disassembled and cleaned, but it is better to trust a specialist.
- The last thing worth checking is the serviceability of the rotation mechanism. You can find out by trying to manually turn the fan blades. If they move with force or do not move at all, the device is broken and needs to be replaced.
Unfortunately, hardware failures are a fairly common cause, so you need to be prepared to purchase a new cooling.
Possible breakdowns of Timberk fans
Timberk fans have proven themselves to be inexpensive and easy-to-use devices for creating comfortable climatic conditions and maintaining air exchange in an apartment or office. Despite their good quality, they are prone to breakdowns.
During operation, customers noticed the following malfunctions:
- drop in blowing force due to soft plastic blades;
- There are times when a capacitor fails;
- the appearance of extraneous noise during operation;
- electric motor failure;
- the rotor breaks;
- strong backlash appears;
- When working for a long time, the smell of burnt oil appears;
- the legs bend and change geometry under the weight of the motor;
- overheating of the power supply;
- mechanical failures at fastening points.
In terms of price-quality ratio, Timberk products are leaders in their segment. All devices have a manufacturer's warranty and can be replaced when contacting service.
How to protect your cooler from damage
It is easier to protect a cooler from damage than to repair it
It is important to carry out preventive sanitization of the entire device to prevent the appearance of pathogenic bacteria inside the system. In addition, when cleaning, the technician checks the functionality of all parts and pipes, which prevents breakdowns.
It is important to transport the device correctly. They are transported only in a vertical position or at an angle of 45°, not leaning against the back wall, so as not to damage the cooling unit. To prevent the heating element from burning out, you need to wait until the water completely fills the heating tank and then turn on the heating
When installing a new bottle, you must wait until air bubbles stop coming out and open the hot water tap (the device is disconnected from the network). When the water flow becomes smooth, you can connect the electricity. There is no need to subject the device to mechanical stress - knocking on it or kicking it. This may cause equipment failure. It is also recommended to unplug it at night.
Fan malfunctions in car cooling systems
The fan is turned on by a sensor located in the cooling system. Reacting to the signal, the cooler turns on and directs additional air flow to reduce the temperature of the fluid and engine. A number of failures are not associated with breakdowns of the fan itself, but with the operation of electronic sensors that are sensitive to changes in the system.
Fan relay clicks frequently
The fan relay often clicks in automotive cooling systems. The reason may be either oxidation of the relay contacts or temperature surges that cause it to operate. The following are subject to diagnosis:
- sensor;
- wiring;
- the controller has a circuit to control the fan.
A breakdown can cause engine damage, since incorrect operation of the sensors causes incorrect ignition timing.
Cooling fan
First of all, you need to go for diagnostics and ring the nodes with a scanner. If a damaged segment is detected, it must be replaced by installing a new one.
Cooling fan turns on frequently
The cooling fan turns on frequently. It is considered normal when the periods of fan inactivity exceed the duration of its operation. If this algorithm is violated, the reasons may be the following:
- clogging of the cooling system;
- decreased coolant level in the radiator;
- The thermostat is faulty;
- the pump does not work;
- presence of air pockets.
Cooling system clogged
It is necessary to flush the thermostat and radiator, add coolant, check the functionality of the water pump and replace it if necessary. Air plugs in the radiator are expelled by applying pressure of compressed gas. If the sensor malfunctions, if its switching temperature does not coincide with the passport values, the device must be replaced.
Air conditioner fan not working
The reasons why the air conditioner fan does not work may be the following:
- the clutch on the main fan is faulty;
- switch relay contacts have oxidized;
- fuses are blown;
- the power supply terminals have oxidized;
- insufficient refrigerant levels;
- The armature brushes have oxidized.
Air conditioner fan repair
It’s better to call an electrician for service so that he can examine the condition of the air conditioner with a multimeter and find out the cause of the breakdown.
Reducing fan start temperature
In the hot season, the factory settings of the fan relay do not allow full operation of the car. In traffic jams, the engine may begin to boil, which can lead to more serious damage.
In order to reduce the temperature at which the fan turns on, you can use the following methods:
- reflash the ECU settings when visiting the service;
- pour antifreeze with a higher boiling point, for example, 120 degrees;
- check the pressure level and the tightness of the tank cap;
- install a trip computer with the ability to adjust the fan temperature or a forced switch button.
A lower temperature will allow the fan to start earlier, which will have a positive effect on engine operation.
Random fan switching on
The radiator fan must turn on when the engine temperature is high to cool it down. However, sometimes the device turns on randomly, despite the fact that the thermostat sensor shows a comfortable temperature of 25-35 degrees.
Clogged air filter
The reasons for this may be the following:
- low-quality fuel, additives in which reduce the flash point in the engine;
- insufficient level of antifreeze;
- the air filter is clogged;
- climate control turned on;
- The cooler thermal switch has failed.
If you suspect low-quality fuel, you need to measure the temperature of the exhaust gases. A heavily contaminated radiator is washed with plain water from a hose.
On a note! When the air conditioner is running, it is normal for the fan to constantly turn on.
You should stop by for diagnostics and check the functionality of the thermostat. If necessary, add or replace antifreeze.
How the device is activated
The cooling fan can be activated in several ways. It all depends on the make and configuration of the vehicle. If the car has a carburetor engine, then the fluid temperature should reach the range of 105-107 degrees. Then the sensor is automatically turned on, sending a signal to the relay. This, in turn, supplies power to the electric motor and closes the circuit.
Machines equipped with an injector have a slightly different cooling system and fan operation. All processes are started by an electronic control unit. Initially, information from the sensor is processed by the controller and then transmitted to the relay.
Ventilation problems in apartments
Built-in exhaust fans are much simpler in design. But their cost is low and it is often easier to purchase a new one than to look for parts that have disappeared from circulation. Poor ventilation of rooms may not be due to the operation of the device itself, but to errors in the organization of the exhaust system.
Ventilation in the bathroom
If ventilation in the bathroom does not work, the air becomes humid and is not ventilated, laundry does not dry well, and mold may appear.
Normal ventilation pattern
The reasons may be the following:
- the ventilation hole is clogged with dust and cobwebs;
- foreign objects in the shaft;
- The exhaust fan is set to draw in air instead of exhausting it.
The correct solution to the problem would be to contact the management company. Specialists lower a load into the ventilation shaft all the way to the apartment to break through all obstacles. In particularly advanced cases, a camera is lowered into the shaft to determine the location of obstacles. The ventilation shaft is opened from the entrance. You may have to go around the neighbors in the riser and check if they have incorrectly installed fans that are disrupting the hood.
Advice! An exhaust fan with a check valve is suitable for the bathroom, preventing air flow from the ventilation shaft.
Hood in the kitchen
Exhaust ventilation is designed to remove unpleasant odors and stale air from the apartment. However, if the construction technology is violated or due to other reasons, air begins to enter the apartment from the exhaust vent, despite the working fan.
Ventilation shaft contamination
Because of this, foreign odors arise in the apartment. Cooking products are not removed from the kitchen. The reasons may be the following:
- design defects in ventilation shafts and ducts create reverse draft;
- strong gusts of wind in one direction blow air currents into the mine;
- accumulation of vapor masses and frosty air in ventilation;
- mine contamination with snow and waste.
As a result, the axial fan draws air masses from one shaft to another and the hood begins to silently work in the opposite direction.
It is better to invite specialists to resolve the shortcomings. They will evaluate the rational use of equipment in accordance with the documentation and conduct a high-quality examination of the installation and operation of the ventilation system. The resulting report will indicate all the shortcomings of the existing system and measures to correct them. Management company employees are required to clear the ventilation shafts of foreign objects. Also, to get rid of the reverse draft effect, install a deflector in the hood to suck in smoke and create through air flows in the kitchen.
Design and principle of operation of the fan
A fan, regardless of its design, is the simplest household electrical appliance. Rotation of the blades requires little power, which made it possible to install the simplest and most reliable asynchronous single-phase electric motor in the fans, which does not have a commutator unit. Thanks to this, the motor runs quietly and there is no need to periodically replace brushes.
To make a fan, it is enough to attach an impeller to the electric motor shaft. When the supply voltage is applied, the electric motor shaft will begin to rotate in a given direction and, due to the curved shape of the blades, the air will begin to move.
For safe and convenient operation, the engine is placed in a housing, and the blades are covered with a mesh. The shape of the housing depends on where the fan is installed - on a table, on the floor, or in the ventilation shaft of a kitchen or bathroom.
To turn on and adjust the air flow speed, a switch and a push-button or manual speed controller are usually installed on the fan housing. There are fans with remote control, but they are usually twice as expensive as regular ones.