assets/from_origin/upload/resize_cache/iblock/69c/600_450_2/69c993bf6f15762b1122ffaa4a8a5a64.jpg From this article you will learn:
- Where to start replacing electrics in a three-room apartment
- Which method of laying the electrical wire to choose - open or closed
- What does a classic wiring diagram look like in a three-room apartment?
- How much will it cost to replace electrics in a turnkey three-room apartment?
New buildings of the 21st century are completely different from the high-rise buildings built in the eighties. Moreover, the differences lie not only in design, but also in interior decoration, paint and varnish compositions and the materials from which the walls are made. New houses have completely different electrical wiring: its design, material and cable cross-section, sockets and switches.
Most of the inhabitants of our country live in old houses. However, the load on the power grid has increased, because a huge amount of modern technology is now used. Therefore, the electrics in a three-room apartment often need repairs. How to do it correctly? You will learn about this from our article.
Electrical wiring installation methods
Open wiring
Open wiring is not considered the best option for apartments and houses.
But as an exception, it may well be used. Therefore, we will briefly discuss the basic standards for installing this type of electrical wiring, its advantages and disadvantages. So:
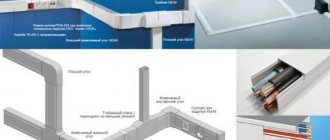
- Open wiring is wiring that is laid directly on the surface of walls, ceilings and other building structures. It is performed in pipes, metal sleeves, boxes, trays or on insulators and cables. The choice of installation conditions depends on the wishes and technical characteristics of the room. In apartments, laying in boxes or trays is usually used, and individual branches can be made on rollers or insulators.
- According to the PUE standards (Electrical Installation Rules) clause 2.1.61, boxes and trays must be selected in such a way that the sum of the cross-sections of all wires laid in them does not exceed the cross-section of the box by more than 40%. In addition, according to SNiP 3.05.06 -85, boxes and trays must be made in such a way as to prevent the possibility of moisture accumulation.
When installing boxes, your apartment wiring diagram should take into account the following factors:
- When laying parallel to the pipeline, the distance between it and the tray must be at least 100 mm.
- When laying parallel to the gas pipeline, the distance between it and the wiring must be at least 400 mm.
- When laying electrical wiring closer than 250 mm from the pipeline, it is necessary to provide protection for the wire from mechanical damage.
- When crossing unprotected pipeline wires, it is necessary to ensure a distance between them of at least 50 mm.
- When crossing wires with gas pipelines, the distance between them must be at least 100 mm.
Laying wires in boxes requires compliance with the following conditions:
- Wires can be mounted scattered or in bundles.
- Individual cables or bundles must be attached to the box. In this case, it is necessary to provide a dielectric flexible gasket between the fastening and the wire. Usually it's rubber.
- Where trays pass through walls, wires must also have a fireproof seal. This is necessary to prevent the development of a possible fire. In this case, it must be possible to replace the wires.
Our instructions also include laying wires in baseboards as an open type of wiring. This type of gasket has recently become increasingly popular, but has a number of limitations. First of all, it is connected to a small number of wires that can be mounted behind the baseboard. Therefore, this type of installation can only be used as wiring around the room.
Open wiring
Now let's look at the advantages and disadvantages of the open wiring method.
The disadvantages include the following:
- Higher price of necessary materials. After all, in addition to the wire itself, you will need trays, metal corrugated hoses, seals and much more.
- They always try to hide utility lines. With the open method of laying the wires, they are visible, which does not improve the appearance of your apartment. In addition, boxes and trays hide free space.
- Due to the fact that the air around the wire with an open installation method does not have the best thermal conductivity parameters, the load characteristics of the wire are somewhat reduced. Therefore, you may need a larger gauge wire.
The advantages of open wiring include:
- Due to the fact that the installation of boxes and wires can be done with your own hands and this does not present any difficulties, the speed of work is significantly increased.
- Open installation can be done without subsequent renovation of the premises.
- The maintainability of electrical wiring increases due to its accessibility.
- Ease of connecting new electrical receivers.
Hidden wiring
Hidden wiring is the most common type of wire installation in apartments. It does not have as many restrictions as the open method, but is quite labor-intensive in terms of installation. In this section we will look at the basic requirements for hidden wiring, its advantages and disadvantages.
So:
- Hidden electrical wiring is a type of installation in which the wire is laid inside building elements such as the floor, walls and ceiling. It is performed in construction voids or special grooves, followed by plastering. In addition, hidden wiring includes wiring mounted behind suspended ceilings, which is laid in flexible metal sleeves.
- The main requirement of the PUE for hidden electrical wiring is the prohibition of its installation in ventilation shafts and ducts. Only crossing these channels with single wires is allowed.
- According to SNiP 3.05.06-85, all wires laid in grooves and prepared for subsequent plastering must be attached to the wall. This should be done at least every 1.2 meters.
- The same regulatory document establishes the rules for installing distribution boxes for hidden wiring. They should not protrude from the wall. If the structure of the wall is such that it is possible for the box to move inward, then it should be left at a level of 30 - 35 mm.
- The thickness of the protective layer of plaster when installing hidden wiring must be at least 10 mm.
Now let's look at the advantages and disadvantages that a hidden wiring diagram in an apartment provides us with.
Hidden wiring
The disadvantages include:
- The high labor intensity of gating and the need for subsequent repairs of the premises.
- Difficulty in repairing and maintaining electrical wiring. After all, in the best case, we only have access to junction boxes and connections to electrical appliances.
- Difficulty in installing additional connections. In fact, without subsequent repairs, this can only be done in an open way.
The advantages of hidden wiring include:
- Attractive appearance, because the cable routing areas are completely hidden from view.
- Higher heat transfer rates of wires mounted in the wall allow the use of wires of smaller cross-section.
Calculation of the expected load of the apartment and choice of scheme
Calculation of the expected load of the apartment
Calculating the expected load of an apartment has no rules and regulations. Therefore, here we should use our imagination or look at the repair plan and, based on it, make subsequent calculations.
The photo shows the approximate power of different electrical appliances
- To better clarify this issue, let's take one room, such as a hall, as an example. In the hall we may have a TV, air conditioning and other video and audio equipment. It is also possible to connect temporary power receivers. For example, this could be an iron. In total this turns out to be about 2 kW.
- In addition, we have a lighting network in the hall. Let's say this is a 300 W chandelier and six spotlights of 60 W each. As a result, we get the total power of the lighting network to be approximately 660W.
- The total power required for our hall is equal to 2660W. Now we make a similar calculation for other rooms and summarize the obtained values. As a result, you will get 10 kW, or even more.
Note! Such large quantities should not be alarmed. After all, you have calculated the possible load of your apartment when you have all possible electrical appliances turned on. In reality, this is almost impossible, and in the future we will use this calculation to distribute loads more evenly across groups.
Choosing an apartment power plan
So:
- Now we have to distribute the loads among the groups. But for this we need to know the rated current, not the power. Ohm's law will help us with this, where P is the rated power, and U is the rated voltage of our network, that is, 220V.
- Based on this formula, we find that a 1 kW device consumes an electric current of 4.55 A. To simplify the calculation and create a safety margin, we take this value equal to 5A.
- Now we have to distribute the loads. This should be done based on clause 6.2.6 of the PUE, which states that circuit breakers with a rated current of no more than 25A should be used to power the electrical network, lighting and sockets. It should be taken into account that clause 6.2.3 of the PUE does not allow powering more than 20 lamps and sockets from one circuit breaker. Therefore, the lighting group is usually powered from a circuit breaker rated at 16A.
Electrical wiring diagram in the apartment
Please note that clause 6.2.3 of the PUE provides for multi-lamp chandeliers to be considered as one connection when calculating the number of lamps. In addition, I would like to note that the distribution into lighting groups and socket group is not necessary. Many distribute groups according to rooms or other criteria. The main thing here is an approximately uniform distribution of loads.
- Having distributed the loads into 1-2 lighting groups, powered by a 16A circuit breaker, and 2-3 groups of sockets, powered by 25A circuit breakers, we begin to see our wiring diagram in a 3-room apartment.
Now let's note some rules for group distribution:
- Since it is possible to install an outlet in the bathroom only through an RCD, it is advisable to connect this outlet to the kitchen outlet group, where such protection will be very useful. If you install RCDs on all groups, then this does not matter.
- If you have heating electrical appliances in your house with a power of 2.5 kW or more, then it is advisable to power them from a separate machine of the appropriate power.
- If you have a three-phase network, then it is advisable to power different groups from different phases. But you should only do this if you are sure that you won’t mess anything up. If you doubt your knowledge, then it is better to limit yourself to power supply from one phase.
Tool you will need for the job
Electrical installation and repair is a complex, labor-intensive process performed by professional electricians. You can’t do this without a set of special equipment. In the work (for installation, replacement of old electrical wiring), the installation team uses the following set of professional tools and devices:
- angle grinder machine with cutting wheels for stone;
- bit;
- perforator;
- screwdrivers with handles made of insulating material;
- phase indicator (indicator);
- wire cutters;
- pliers;
- extension;
- knife;
- level;
- putty knife;
- portable lamp.
Varieties of electrical wiring diagrams
The electrical wiring project in the apartment is very important, so its creation must be approached with the utmost seriousness. A very important step is choosing the type of wiring. At the moment there are three types of wiring.
Using distribution boxes. In this case, a meter and a number of machines are installed in the electrical panel. The electrical panel itself is located in the entrance, but a wire powered from the network extends from it into the apartment. The wire reaches distribution boxes, which are located in each room and are connected in series. And from these boxes cables go to sockets, switches, etc. This type of wiring is very common.
The second type is called a star. In this case, each socket is connected directly to the electrical panel. Each client has his own machine. The main advantage of this type of wiring is the ability to carry out repair work on one of the circuit elements without disconnecting the entire apartment. But you should understand that to install this type of wiring you will have to purchase a large number of wires, as well as pay for the services of specialists, since installation is extremely difficult.
Star wiring
The third type is called a loop. In this case, clients are also directly connected to the electrical panel, but they are formed into groups from which the wire extends. To achieve greater efficiency, you should not use one type of wiring for the entire apartment, it is better to combine them.
Where to start replacing electrics in a three-room apartment
It will take a lot of time and effort to renovate your home. Especially if the electrics in a three-room apartment are outdated and need to be replaced. You must not only know the laws of physics well, but also have the necessary experience and be able to work with certain tools. But the most important thing when carrying out such work is to follow safety precautions and be careful. If you connect the wires incorrectly, a short circuit will occur. Moreover, not only your apartment may suffer. It is possible that you will leave an entire entrance without light.
First of all, you should decide whether the electrics in a three-room apartment really need to be replaced. The fact is that in old houses, over time, it is not the current-carrying aluminum conductors themselves that wear out, but the insulating material and braiding. If the wires are exposed, a short circuit may occur. To prevent this, you will have to replace the old aluminum wiring with copper.
If the wire braid is intact and in good condition, electrical wiring repairs will be minimal. You only need to install modern switches and sockets. These steps must be followed if you are going to carry out surface repair work. But when a major redevelopment or European-quality renovation is planned, then it is better to completely replace the aluminum electrics in a three-room apartment with copper ones. Please note that such repairs will be quite expensive.
Replacing electrical equipment in a three-room apartment begins with determining where the electrical equipment will be located. Then we calculate the number of sockets and switches that we will install. Do not forget about safety precautions, as well as the ease of use of electrical appliances.
The next step is to develop a wiring diagram. Take this action seriously: if you make a mistake, you will have to open the plastered surface to lay additional wires that were not provided for in the diagram. Before we start installing electrical wiring in a three-room apartment, we go to the electrical panel and turn off the electricity. We are also posting an announcement so that no one turns on the switch while repair work is underway.
Triple braided wires will be required. If the house has a ground, use three wires. Otherwise, two cables will be enough. When wiring, be extremely careful. The ideal option is when the wires are connected using welding. They should then be well insulated.
When you are going to connect two wires: copper and aluminum, you will need a special adapter. Do not connect directly. Do you doubt that you can do the electrical work in a three-room apartment with your own hands? Do you have enough experience in carrying out such work? Then we recommend contacting a specialist.
Calculation of wire cross-section by power
Also in the wiring diagram it is necessary to indicate the current strength and materials. To carry out the calculation, you need to use the formula I = P / U. P here denotes the total input power of all equipment that is powered from the network, and U denotes voltage. As practice shows, the current strength for ordinary housing does not exceed 25 A. Based on these data, it is necessary to select the material for wiring:
Table + calculator for calculating cable cross-section
- wire VVG-5*6 - a five-core cable with a cross section of 0.6 square centimeters, it is used for electrical wiring in houses with three-phase power supply, it connects the electrical panel in the entrance to the main panel;
- wire VVG-2*66 - a two-core cable with a cross-section of 0.25 square centimeters, it is used for wiring the network in houses with two-phase power supply, it comes from the electrical panel at the entrance to the main switchboard;
- wire VVG-3*2.5 - a three-core wire with a cross section of 0.25 square centimeters, it is used for most of the wiring in the apartment, this cable connects the electrical panel with distribution boxes;
- wire VVG-3*1.5 – three-core cable with a cross-section of 0.15 square centimeters, it is used to connect junction boxes with lighting fixtures and sockets;
- wire VVG-3*4 is a three-core cable with a cross section of 0.4 square centimeters, it is needed to connect an electric stove.
Where can I buy
You can resolve the issue as quickly as possible by visiting the nearest specialized store. The optimal option, in terms of price-quality ratio, remains purchasing from the AliExpress online store. Mandatory long waits for parcels from China are a thing of the past, because now many goods are in intermediate warehouses in destination countries: for example, when ordering, you can select the “Delivery from the Russian Federation” option:
| 3-pin waterproof distribution IP68 box | Distribution box, IP67 housing | Junction box, IP65 |
| 3-way distributor box, IP68 | Distribution box 2/3/4/5/6 way, IP68, 45A/450V | Mini junction box IP66, size 47*28*18mm |
Options for connecting elements in electrical circuits
In order for the electrical wiring in the apartment to be done correctly, you need to have knowledge in the field of electrical engineering, and ideally also experience in such work. If you do not have sufficient qualifications and experience, then you should not take on the job, but entrust it to specialists.
You can, of course, try to do the electrical wiring in your home yourself, but the consequences can be very sad. It would be best to entrust all the work to a qualified specialist who will draw up the correct diagram and also take the necessary measures to install new wiring or replace the old one. If you know that you can cope with drawing up a diagram, as well as arranging the electrical network in your home, then first you need to remember the methods of connecting electrical circuits.
Sequential method . In this case, each element of a closed circuit must be connected to the previous one, and the circuit does not provide for the presence of node contacts.
Different connection schemes
The most common example of this type of connection is a Christmas tree garland - in it, each light bulb is connected to the next one, and they are all located on one common wire. The main disadvantage of this scheme is the fact that the failure of one of the network elements leads to a breakdown of the entire system.
Parallel method . This scheme is completely opposite to the previous one. Here the elements of the chain are not connected to each other, but are grouped into separate nodes. If one of the elements breaks down, then all the others will be able to function normally.
Mixed method . As the name implies, in this case, the two methods described above are used simultaneously for one electrical circuit.
Typical 3-room layout
In a typical 3-room apartment, living space is distributed in different ways, and some options are very convenient, while others can cause discomfort.
There is an option with two small and one large room, with one isolated room and two adjacent rooms. There is a so-called “airplane” scheme, when the windows of the rooms face different sides of the house.
Apartments with isolated rooms are considered optimal. In the standard type of apartment with three rooms there is a storage room, which, according to many designers, can be converted into a wardrobe.
If there are children in the family, then it makes sense to distribute the premises as follows: set aside one room for the nursery, leave one for the bedroom, and give the larger one to the living room. Many 3-room apartments have a separate bathroom, they are located as far as possible from the stairs and elevator, the area ranges from 56 to 80 sq. m. m.
Location of rooms in “new buildings”
Currently, the bathroom is usually located next to the kitchen room. Also, modern layouts can use an open type of housing, when there are no rooms isolated from each other, which may not be entirely convenient.
The area of three-room apartments in modern new buildings has certainly become larger than in the old apartment stock of the 80s and 90s. They now have spacious balconies or loggias.
Three-room housing can also have a corner location. In this case, one of the rooms becomes a passage and is usually turned into a living room. In this case, such an apartment is often redeveloped.
Often in new houses, premises are rented without partitions, providing future owners with spacious studios with the subsequent layout of such housing at their discretion.
It is impossible not to mention the Czech standard layout of a three-room apartment. It is very thoughtful, but lacks originality. Although in this case you can always make a redevelopment, since not all the walls in it are load-bearing.
The peculiarities of such an apartment are storage rooms and cramped corridors. The standard area is 64 m2. But balconies and loggias are usually made large.
Currently, modern apartment buildings can accommodate a wide variety of room arrangements. New types of layouts for three-room apartments are constantly appearing, which makes it possible to satisfy the most diverse tastes of future apartment owners.
In panel houses
One of the common layouts for a panel house is a three-room walk-through apartment.
Also, old standard layouts in panel houses, with the help of experienced designers, can always be turned into something new and modern, radically changing the appearance of the apartment.
As for apartments in five-story Khrushchev buildings, they are now trying to choose a more comfortable redevelopment. For example, a closet in such an apartment is turned into a dressing room for the hostess.
Another option is to make a studio apartment out of a Khrushchev building.
Partial combinations of rooms are also used, for example, a balcony with a bedroom or a kitchen with a living room. The floor in such an apartment is changed using tiles and removing the old wooden covering and screeds.
One of the interesting options is the redevelopment of a standard three-room apartment in a nine-story building into an apartment with a combined kitchen-living room and two isolated rooms.
In one of the rooms, the area allows you to build a mini-dressing room, and at the dead end of the resulting corridor you can fence off a small storage room.
It should be noted that three-room apartments in five-story buildings were not entirely successful in design. Adjacent rooms and small areas of the premises were not very comfortable. Therefore, at present, to improve living conditions, a radical redevelopment of the apartment is used.
Dividing electrical wiring into groups (lines)
It is much easier to manage and control an electrical network if it is divided into several lines. In the event of a malfunction or emergency, you can turn off one group, while the rest will function as usual.
Option for dividing into 4 groups: Let’s assume that in a city apartment a separate power cable is being laid for a washing machine. This is especially true for older buildings with weak electrical wiring that cannot withstand high power.
- The kitchen usually contains many appliances, the simultaneous inclusion of which also requires the installation of a power cable of a suitable cross-section: hob, oven, toaster, multicooker, microwave oven, dishwasher
- Bathroom – one or two rooms with a high level of humidity. This must be taken into account both when installing the lighting system and when installing sockets, which must have the required degree of protection
Since each room usually has more than one lighting fixture, it is recommended to install several separate groups. For example, divide the lighting of the hall (chandelier, backlight, 2 table lamps), bedroom (2 sconces, overhead light) and children's room (spot lighting, night light, table lamp)
- Group 1 – powerful household appliances
- Group 2 – kitchen line
- Group 3 – bathroom and toilet
- Group 4 – lighting system
Below we will talk about each electric group in more detail.
Stationary household appliances
Large household appliances are usually located in the kitchen or bathroom area. Layout of sockets in the kitchen. Rules: it is prohibited to place sockets directly behind the dishwasher and washing machine; It is better to use waterproof models.
A separate connection for the kitchen area is necessary for repairs. If one of the devices breaks down, a replacement will be required. In order not to turn off the electricity in the entire apartment, it is enough to turn off one protection device responsible for stationary equipment. Unfortunately, even expensive household appliances break down from time to time. Repairs sometimes take several hours. A separate electrical group will allow you to maintain a comfortable stay in the kitchen and other rooms.
What prevents you from simply disconnecting a broken device from the network by pulling the plug from the socket? The fact is that built-in equipment has connection points to the electrical network in hard-to-reach places. In addition, the malfunction may occur not in the device itself, but in the wiring disguised in the wall. In this case, it is much easier to move the circuit breaker lever.
Dedicated line for the kitchen
The kitchen line is traditionally the busiest. Approximately 5-6 units are constantly connected to the network, even when not in use. This applies to the refrigerator, oven, hob, dishwasher, hood, microwave, toaster. Many people use a kitchen electric grill, meat grinder, bread maker, multicooker, etc.
In this case, a separate powerful electrical cable will simply make it possible to use several devices simultaneously. If lighting devices or a water heater are also “hanging” on the common wiring, then when the next device is turned on, the network simply cannot withstand it and an automatic shutdown will occur.
Electrical wiring diagram for the kitchen, divided into 4 groups. For powerful household equipment, separate circuit breakers are installed in the distribution board. A detailed analysis of diagrams and options for the location of sockets in the kitchen is given in the article, which we recommend that you read.
One or more lighting groups?
Considering the number of lighting fixtures in each room, you can make one or several lines. If there is one six-arm chandelier in the hall, and in the bedroom there is low-power overhead lighting and two chandeliers, then all the devices can be combined into one line.
However, if the living room resembles a disco hall - with chandeliers, spotlights, ceiling and wall lighting - then a separate group should be organized only for it.
Wiring diagram for 220 V spotlights or halogen lamps for one room, for example, a kitchen, children's room or hallway. If, in addition to lamps, the network of one room includes transformers or power supplies, then it is also recommended to connect it to a separate protection device.
Rooms with high humidity
Increased requirements apply to electrical appliances and cables in the bathroom, since the close proximity of water is a risk. In order for the electrical network to be safe and functional, a number of rules must be taken into account when drawing up the diagram and installing the wiring:
- The distribution box should be installed outside the bathroom - in the corridor, hall or hallway
- For each device that is used in the bathroom (washing machine, mirror lamps, hair dryer or electric razor), it is necessary to allocate a separate socket
- Regardless of the size of the bathroom, the switch is always installed on the outside. The best place is near the front door
- It is recommended to lay the electrical cable in the upper part of the wall, right under the ceiling, placing the lines parallel to the floor and using an insulating sleeve.
The requirements also apply to the choice of fittings that will be used regularly - sockets and switches. Suppose the degree of protection of sockets should be at least IP 44, and it is even better to purchase special devices with a splash-proof cover.
It is recommended to abandon 220 V lamps in favor of 12 V analogues.
A three-core copper wire is quite suitable for installing sockets in a bathroom, but you should pay attention to the cross-section: for connecting ordinary appliances it must be at least 2.5 mm², for powerful electrical equipment - 4 mm². Domestic version - VVGng
If in an old home there is no grounding provided in the apartment panel, then not only in the bathroom, but in the entire apartment the electrical wiring will have to be replaced with a three-wire one. We suggest that you familiarize yourself with the rules for choosing waterproof sockets for arranging bathrooms and toilets in an article devoted to these issues.
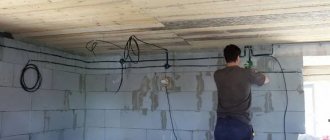
How to properly strip walls in a three-room apartment for electrical installations
The upper part of the walls should be stripped, since the wiring will take place in the upper part of the room. However, the cable can be laid under the screed on the floor surface, as well as along the ceiling - this way the wiring will be hidden from prying eyes. To keep the price of electrics in a three-room apartment to a minimum, it is recommended to lay it under the ceiling or along the floor. This is the only way the cable costs will be small, and it will also be easier to carry out such repairs.
Distribution boxes should be placed at the top, for example, at the front door or at the entrance to the room. Proceed from the same principle as when installing a switch: it is usually located next to the door, at the entrance. This means the box should be placed there too.
Your next steps for electrical repairs in a three-room apartment:
- To prevent dust from spreading throughout the house, we curtain the doorways (from the inside of the room where the renovation is taking place) with a wet cloth. The opening must be completely curtained. If you simply close the door, hoping that the dust will not pass, your entire apartment will become dusty.
- We clean the surfaces. We partially dismantle the wallpaper, prepare the ceiling and walls so that nothing interferes with the movement of the mortar cutter discs.
- We mark the walls. Using a marker and a building level, we draw an electrical diagram on the walls in a three-room apartment. For convenience, use a laser level, which you can make yourself. This way, marking the horizontal lines for the fines will be accurate, and the work will go faster.
- Are you changing the electrical system in a three-room apartment yourself? Make sure that there is no old cable running through the places where you will make fines. If a fence cutter comes across a live wire, you will get an electric shock and a short circuit will occur. How do you know if there is a cable in the wall? Use a metal detector that you can make yourself. You can also take a device to find the cable. Found old electrical wiring? We remove it or isolate it and go around it, while the indentation should be at least 10 cm.
- Then we scratch the surface of the wall for the cable according to the markings made. We use a drill with an attachment (bit of the required diameter - 65 and 80 mm) to make grooves for distribution boxes and sockets.
- Once you've finished scraping, take a photo of your work. This way you can easily determine the location of the breakdown using an electrical diagram and a real photograph.
We finish scraping the walls and start cleaning the grooves. We fix the wire in them using a dowel clamp, gypsum plaster or alabaster.
Important! Surface scraping must be done before plastering. Once the route is ready, you can plaster the entire surface, and then do the finishing touches: wallpaper, decorative tiles, and so on.