Regardless of how familiar each of us is with electricity and the laws of electrical engineering, everyone knows the simplest device “switch”. During the whole day we use it more than a spoon or fork - at home, at work, in public places. Therefore, it is so important to get to know this device better, to find out what it consists of, what types there are, what the principle of operation is based on and how to properly connect it to the electrical network. In this article we propose to talk in detail about a device that is in the middle between the simplest and more complex ones. This is a switch with two keys. Those who independently repair the electrical network at home will probably be interested in the connection diagram for a two-button switch.
Connecting wires to the light switch
You probably noticed that the wires are colored differently: the brown wire is the phase, the yellow-green wire is the ground. (Color-coded conductor insulation standards vary from country to country.) Each of these wires must be connected to a specific terminal.
How to properly connect the switch? There are slight differences in the connection of one- and two-key switches. The main thing to remember is that the phase must open; the phase wire is attached to the connector marked L (usually at the bottom of the switch).
Connecting wires to the switch.
After you place the end of each wire into its connector, secure them with screws, using a screwdriver for this purpose. Make sure the wires are secure or the switch will not work properly.
Connecting wires to the switch.
Once again, make sure that the wires are connected correctly and that they are securely fastened. In the picture below you can see how to wire a two-button light switch.
How to connect a switch with two keys.
Once you've completed connecting the wires, you should bend them to "hide" them in the box. Make sure there is enough space left to place the switch. If there are no problems, you can secure the switch in the box with screws. Take your time to tighten the screws, you should first check how well the switch is aligned.
Placement of the switch in the box.
Use a laser or spirit level to level the switch. In the figure below you can see the technique for this operation. If you notice a deviation in the horizontal direction, loosen the screws and adjust the position of the switch.
Switch alignment.
Finally, do not forget to securely secure the switch with screws. Just don't overdo it, or you risk stripping the screw threads or damaging the switch.
Switch fastening.
The next step is to reattach the frame and switch buttons. You don't need tools for this, just your fingers. A slight pressure, and the elements removed at the very beginning are back in their places.
This operation is perhaps the easiest. In addition, it foreshadows the imminent completion of work.
Installation of switch buttons.
All that remains is to turn on the power on the electrical panel. Turn on the light using the new switch you just installed to make sure your work wasn't in vain and everything is functioning as it should. Has the light come on? So now you know how to connect a light switch.
Installed switch.
Translation source: www.howtospecialist.com
Subtleties of connecting two-button switches in houses with different grounding systems
Depending on the newness of the electrical network in the house, its method of grounding also changes. It is this indicator that influences the difference in the settings of two-button light switches for grounding systems such as TN-C, TN-S, TN-CS.
Connection diagram for a switch with two keys in a network with grounding TN-C
Pay attention to the diagram: here the switch switches only phase conductors
According to the diagram, we see that phase (red) and zero (blue) come from the general electrical panel to the distribution box. The neutral conductor is connected to the corresponding contacts on two lamps. At the time when the phase arrives at the switch at contact L, after which it leaves contacts L1, L2 or “1”, “2”, depending on the device model. Next, the conductor from the first contact goes through the distribution box to the first lamp, and the conductor from the second, respectively, to the second lighting source. All wire connections in the diagram are shown as bold dots.
Installation diagram of a two-key switch with TN-S and TN-CS grounding systems
There may not be a third conductor in the electrical network if it is of an old type
The connection diagram for a two-key device will be made in the same way as the previous one, the only difference is the presence of a yellow-green grounding conductor coming out of the distribution panel. The protective cable, like the “phase” and “zero”, comes together in the distribution box. From where only the lamp leaves and is connected to a cable of the same color.
NOTE!
If your home electrical network does not have a third protective wire, then there is no need to connect the existing conductor on the chandelier anywhere. Only protective grounding can be performed in the apartment.
What to look for when choosing?
Although a standard electrical switch is a fairly simple device, there are a few key points to consider when choosing one:
The first thing you should pay attention to when choosing a product is the type of wiring (hidden or open) and the conditions of subsequent operation. Naturally, a switch designed for indoor operation should never be used outside. Then you should determine the number of contact groups. To turn on/off a conventional indoor chandelier, single-pole switches are usually used, which are connected to the “break” of the “phase” wires.
To control powerful water heating devices, professionals recommend using bipolar products that disconnect both supply wires (“zero” and “phase”) from the device. To ensure that the contacts do not burn during operation, and the product lasts as long as possible, it is better to select the electrical parameters of the switch (operating voltage and rated current) with a reserve. The external design of the switch is also important when choosing. The variety of colors (from standard classic white to ultra-modern steel) of modern key switches allows you to choose a product that will harmonize with the overall design of the room.
And the last (although no less important) indicator that influences the choice of switching device is its price. As a rule, the more expensive the product, the higher quality materials were used to make it. And the design of the mechanism of expensive devices is more reliable and durable. Therefore, you should not chase cheapness when choosing electrical components. Ultimately, not only the period of uninterrupted operation, but also safety may depend on this.
Selecting a switch
Selecting a circuit breaker based on installation technology
So:
- When choosing a switch, first of all, you should decide on its installation location. This can be an outdoor installation or an indoor one. The switch for external wiring has a higher degree of protection from precipitation, and the cable entry points have special seals.
The photo shows a switch for open wiring
- The next important factor in choosing is the installation method. This can be overt or covert execution. For open wiring switches, a box is attached to the wall to hide the inside of the switch. As you can see in the video, the switches for hidden wiring on the wall have only the switch frame and keys. The switch mechanism itself and the protective box are located in a special niche in the wall.
- According to their functional content, switches are divided into one-, two- and three-key switches. Here your choice depends only on the tasks facing the switch and the layout of your electrical network.
- Another important aspect is the switch ratings. Firstly, it must be designed for a 220V network (manufacturers usually indicate a rated voltage of 250V), and also be designed for switching currents in your lighting network. At the moment, there are switches on the market with a rated current of 6 and 10A. Therefore, if more than 10 lamps are lit from the switch, we advise you to pay attention to this parameter.
Switch for hidden wiring
Note! According to clause 6.2.3 of the PUE, each lighting group should contain no more than 20 lamps. If we take the power of each lamp as 100W, then the total load for a 220V network will be about 10A. Thus, manufacturers do not allow you to violate the PUE.
Selecting a switch based on design
Based on the on/off principle, all switches can be divided into the following types:
- Wireless
- Rope
- Dimmers
- Keyboards
- Push-button
- Switches
- Rotary
- Lever
- With motion sensor
- Sensory
The choice of the switch that is right for you is based on your wishes and financial capabilities.
- In our article we will look at models of key switches. After all, they are the most common, and their price is quite affordable. The following switching principles can be used in key switches:
- Oscillating mechanism with compression spring
- Oscillating mechanism with extension spring
- Cam mechanism.
- Whatever mechanism you choose, you should pay due attention to the clarity of its operation and fixation of its position. A good sign of this is the presence of a click when switching a key. If there is no good contact and fixation of the position of the switch, the light in your room will flicker and the switch will quickly fail. And it’s good if there is no fire.
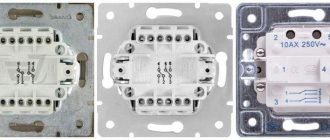
Two-gang switch terminals
- When purchasing, you should pay attention to the method of fastening the wiring in the switch. This may be a screw or clamp fastening. Perhaps I am too skeptical about clamping methods of fastening, but I advise you to choose a screw fastening. Although it is a little more labor-intensive to install, it ensures reliable fixation of the wire and does not weaken even when overheated. What clamping methods of fastening cannot always boast of.
Installation and troubleshooting of a two-key switch
Installation of a two-key switch
So:
We chose a two-gang open-wiring switch as an example because it is a middle option between a one- and three-gang switch. And their installation is almost identical to the installation of a two-key switch. The only difference is the number of connected groups.
Connection diagram for two-button switch
All further operations are performed with the voltage removed on the group in which we install the switch. So, we decide on the installation location of the switch and bring the wires there. One phase wire must go down from the distribution box to the switch. From the switch, a second wire goes to one group of lamps, and a third wire goes to another group of lamps. In total, three wires go to the two-key switch.
- For open wiring, the two-key switch has a protective box that we need to secure. To do this, we disassemble the switch, take out the mechanism (so as not to interfere) and attach the box to the wall using self-tapping screws.
- Now we put the wires into the box and connect the switch. At the bottom of the switch we attach a common phase wire to the live parts. This is the wire that is connected to the phase wire in the distribution box. We attach two wires to the upper current-carrying parts of the switch, connected directly to the lamps.
- Now we assemble the switch and insert all the parts correctly. Believe me, there were no unnecessary details here.
- If we have already installed all the wiring for this group, then we can apply voltage and check its functionality. When you turn on one key, one group of lights will light up, and when you turn on the second key, another group will light up. In addition, if you have a luminous diode on the switch, then after applying voltage it should light up.
Troubleshooting possible switch problems
Checking the functionality of the switch
So:
- First of all, make sure that it is our open wiring switch that is to blame. To do this, take the pressure off our group. Remove the keys to give yourself access to the terminals. Turn on both switch keys. After this, apply voltage to the group. Now, using a probe, check for voltage at the wire terminals connected to the lamp. If there is voltage at both terminals, then the problem is not with the switch.
- If there is no voltage at both terminals, then check for its presence at the terminal of the wire coming from the junction box. If it is not there either, then again it is not the switch that is to blame.
- If there is voltage on the incoming wire, but not on the outgoing wires, then the problem should be looked for in the switch. Unfortunately, today manufacturers leave little chance to repair the switch with their own hands. Therefore, the only thing we can do is check the reliability of the wires in the terminals. This is especially true for switches with clamp terminals. If the wires are securely fastened, then all that remains is to change the switch.
Advantages and disadvantages
Two-key switch
The internal two-key switch has become widespread due to the large number of advantageous features.
Advantages of the device for hidden wiring:
- During installation, only one cable is required, therefore saving cord.
- When working in conditions of high humidity, the structure is protected by a special casing. If installation will be carried out in unfavorable conditions (industrial facilities, street), preference should be given to models made of impact-resistant materials.
- Significant savings in energy consumption. Using the switch you can regulate the number of light bulbs.
- A single switch represents a potential fire hazard; two-key modifications are also no exception, but there are fewer of them in the room, therefore, the likelihood of emergency situations is lower.
- It is possible to choose the optimal lighting brightness. Sometimes the room requires bright light, and sometimes twilight.
- Designed for use in conditions of high humidity and outdoors. The case is made of high quality materials and protects internal parts from moisture and mechanical stress.
It is also worth highlighting the ability to independently adjust the illumination thanks to the sequential connection of individual lamps or groups of lamps.
There are practically no disadvantages. At first, it may be confusing which lamp or chandelier to turn on. A worthy alternative to such a device can only be a three-key switch.
Chandelier installation
In this case, you initially need to install two phase wires and one neutral wire at the place where the chandelier is attached.
The chandelier itself will also have several wires (at least three), where the phase is marked L and zero – N
Pay attention to the markings and remember them
Next you need:
- Find the phase in the switch using an indicator screwdriver.
- Hang the lamp (chandelier) on the hook
- Connect the phase wires to the corresponding ones on the chandelier, and the neutral wire to the neutral wire.
- Carefully isolate twist areas. This guarantees both fire safety and contact strength.
Video instructions on how to connect a chandelier to a two-key switch for hidden wiring:
So, we have considered all the main points regarding two-key switches. This is a very practical electrical accessory that can be used in a variety of places: in a residential building, on the balcony, in the yard. The installation of such devices is no different from any other, so it can be easily done on your own.
Getting acquainted with the rules and preparing materials
First of all, everyone, and especially beginners, need to remember the basic safety rules when manipulating electricity:
- Always turn off the electricity and use a multimeter or an indicator screwdriver to make sure that there is no electricity directly at the work site.
- Do not touch exposed veins with your hands.
- Study the color and other markings of the wires, carefully ensure that the neutral wire is connected to the neutral, ground to ground, and phase to phase. Otherwise, a short circuit may occur and the wiring may catch fire.
- Choose high-quality electrical components and consumables, again do not use old switches and wires.
- To connect wires, use soldering, terminals, connecting blocks, and not twisting or insulating tape.
- Calculate the maximum voltage on the wires and, in connection with this parameter, select the cross-sectional diameter and other operational characteristics of the conductor.
- Familiarize yourself with the installation diagram of the switch of the selected type (with one, two or three keys).
It is also necessary to prepare all the necessary tools and materials in advance. So, to install the electrical wiring of a switch, you will need a drill or hammer drill, a special attachment for making a hole, a multimeter, screwdrivers (including an indicator screwdriver), a spatula, pliers, a knife, a two-core wire, a socket box, a switch, putty or plaster mortar.
Switch: two-key recessed type with hidden wiring
STANDARD GESNm 08-03-591-05
| Name | Unit |
| Switch: two-key recessed type with hidden wiring | 100 pieces. |
| Scope of work | |
| 01. Installation of boxes. 02. Installation of devices. 03. Joining. 04. Testing for ignition. |
PRICE VALUES
The price takes into account the work requirements for 2000
(Moscow prices), calculated according to the
2014 GESN model with additions 1
. Indexation of translation into current prices must be applied to the cost.
You can go to the page of the same standard, which is calculated based on prices for March 2014.
To determine the composition and consumption of materials, machines and labor costs, GESN-2001 was used
LABOR COSTS
| № | Name | Unit Change | Labor costs |
| 1 | Labor costs of assembly workers Grade 4.2 | person-hour | 26,24 |
| 2 | Labor costs for drivers (for reference, included in the price of the EV) | person-hour | 0,03 |
| Total labor costs for workers | person-hour | 26,24 | |
| Workers' compensation = 26.24 x 9.91 | Rub. | 260,04 | |
| Payroll for drivers = 0.64 (for calculating invoices and profits) | Rub. | 0,64 |
OPERATION OF MACHINES AND MECHANISMS
By clicking on the link in the code or name of the resource, you will be redirected to a page indicating the wages of the driver and a list of price codes in which this resource is used.
| № | Cipher | Name | Unit Change | Consumption | St. unit.Rub. | TotalRub. |
| 1 | Truck-mounted cranes when working on the installation of technological equipment 10 t | mach.-h | 0,03 | 134,65 | 4,04 | |
| 2 | Flatbed vehicles, load capacity up to 5 tons | mach.-h | 0,02 | 87,17 | 1,74 | |
| Total | Rub. | 5,78 |
CONSUMPTION OF MATERIALS
By clicking on the link in the code or name of the resource, you will be redirected to a page indicating the weight of the unit of measurement of the material and a list of price codes in which this material is used.
| № | Cipher | Name | Unit Change | Consumption | St. unit.Rub. | TotalRub. |
| 1 | 405-0219 | Gypsum binders, grade G3 | T | 0,00315 | 729,98 | 2,30 |
| 2 | 509-0783 | Insulating bushings | PC. | 0,102 | 270 | 27,54 |
| 3 | 999-9950 | Auxiliary non-standardized material resources (2% of workers’ wages) | rub. | 5,21 | 0,00 | |
| Total | Rub. | 29,84 |
TOTAL BY RESOURCES: 35.62 RUR.
TOTAL PRICE: 295.66 RUR.
Look at the cost of this standard at current prices open page
Compare the price value with the value of FERm 08-03-591-05
To draw up an estimate, the price requires indexation of the transition to current prices. The price is compiled according to the standards of GESN-2001, edition 2014 with additions 1
2000
prices . To determine intermediate and final price values, the DefSmeta program was used
Estimate for the construction of a house, renovation and decoration of apartments - DefSmeta
Rental
The program provides an assistant who will turn the preparation of estimates into a game.
08-03-591-05
08-03-591-05
| : | 100 . |
| 01. . 02. . 03. . 04. . |
2000
( ),
2009
. , .
, 2014 1
| (.) | (.-) | ||||
| 371,41 | 325,38 | 9,68 | 0,54 | 36,35 | 32,8 |
: 371,41 .
2020
08-03-591-05
, . -2001 2009
2000
.
, .
, – DefSmeta
, .
Device
Connecting an illuminated switch is a simple procedure, but it’s worth knowing how to choose a high-quality model or how to remake what you already have. The light in the switch is usually a series connection of an LED/neon lamp with a resistor. This small circuit is connected in parallel with the switch contact. It turns out that regardless of whether the light is on or off, this circuit is always energized.
With this connection, when the lighting is turned off, the following circuit is created: the phase goes through a current-limiting resistor, flows through an LED or neon lamp, through the connection terminals it goes to the light bulb, through the incandescent filament to the neutral. That is, the backlight is on.
When the switch is on, the backlight circuit is shunted by a closed contact, the resistance of which is much lower. There is almost no current flowing through the backlight, it does not burn (it can burn at a third or a quarter of the “incandescence”).
The principle of operation of the backlight in the switch
As already mentioned, a current-limiting resistor (resistance) is installed in series with the LED or neon lamp in the switch. Its task is to reduce the current to an acceptable value. Since LEDs and neon lamps require different amounts of current, resistors are set to different values:
- for neon 0.5-1 MOhm and power dissipation 0.25 W:
- for LEDs - 100-150 kOhm, power dissipation - 1 W.
But connecting the LED backlight only through a resistor is not the best option. Firstly, the resistor gets very hot. Secondly, with such a connection, there is a possibility that reverse current may flow through the circuit. This may lead to breakdown of the LED. Thirdly, in models with LED backlighting, the electricity consumption of one switch can exceed 300 W per month. It seems like a little, but if there is backlighting on every key of every switch... There are more economical and safer schemes for backlit switch keys.
With diode
First of all, it is worth solving the problem of reverse current. The reverse current threatens to breakdown the LED, that is, the backlight will not work. This problem can be solved very simply - by installing a diode in parallel with the LED element.
Illumination option in electrical switch
With this scheme, the power dissipation of the resistor is at least 1 W, resistance 100-150 kOhm. The diode is selected with parameters similar to those of the LED. For example, KD521 or analogues are suitable for AL307. The disadvantage of the circuit is still the same: the resistor heats up and the backlight “pulls” a lot of energy.
With capacitor: to save energy
To solve the problem of a heating resistor and reduce backlight costs, a capacitor is added to the circuit. The parameters of the resistor are also changed, since now it limits the charge of the capacitor. The diagram looks like this.
Illumination circuit for switch keys with a capacitor
Resistor parameters - 100-500 ohms, capacitor parameters - 1 mF, 300 V. Resistor parameters are selected experimentally. Also, in this circuit, instead of a regular diode, you can install a second LED element. For example, on the second key or on the opposite side of the case.
Such a circuit practically does not draw electricity. Monthly consumption is about 50 W. But placing a capacitor in a small space in the case is sometimes problematic. And working with LED and energy-saving lamps is still not guaranteed.
Installation
Installing a two-key electrical switch yourself is no more difficult than a single-key switch. To do this you will need the following tools:
Knife Side cutters Pliers Level Phillips screwdriver Flat slot screwdriver
Indicator screwdriver (can also be used as a straight-slotted one) Chisel
So, in order to install double key hardware, you should:
- De-energize the apartment
- Prepare the wiring. There will be three of them in this device
- Shorten the wires to 10 cm. Strip them
- Using a chisel, make a groove on the wall where the device’s wiring will then hide.
- Connect the wires. Squeeze the stripped ends with pliers, twist and carefully insulate
- Connect the two ends to the lighting fixture
- Stretch a zero from the switchboard to each phase
- Place the box so that the common contact is located at the bottom
- Apply voltage to check
Video instructions on how to correctly connect a recessed two-key switch with hidden wiring:
IMPORTANT! Only wires made of the same metal can be twisted.
Tools
As for tools, their list should consist of:
- screwdrivers for Phillips and flat slots;
- mounting knife or device with which the insulation will be removed;
- side cutters;
- level;
- pliers;
- hammer and chisel (in case you need to make a small groove or hole for the socket box).
Installation of electrical wires
It is worth noting that before connecting the light switch, which is a double switch, you need to lay out the electrical wiring. If the house is just being built and hidden wiring is being installed, then there are no difficulties. The wiring itself is installed before the plaster is applied. After this, you need to connect the switch itself and the lamps to the wiring.
All wires are laid according to the diagram we posted above.
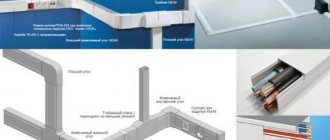
It is clear that if you plan to carry out open installation of wiring, then each cable that needs to be connected to a two-key switch and a lamp is laid in separate cable ducts or corrugated pipes.
If the house has been used for many years and the existing electrical wires are not suitable, then they need to be changed. If they were installed in an open way, there will be no problems. When they were hidden under the plaster, you will have to make new grooves and lay new cables.
Other preparatory work
Once the correct cables are in place, begin connecting them. I would also like to note that it will be very correct and safe if you turn off the power supply in your house or apartment before you carry out any work to replace the wiring and before you connect the double switch.
It is worth noting that it will be enough to turn off the automatic switch, which is located at the beginning of the branch intended to supply current to the lighting fixtures.
If all the circuit breakers in the distribution panel are labeled, then this is very good, since you will immediately turn off the one you need. Otherwise, it is necessary to determine the required machine by experiment. This is noted from time to time in those videos that talk about how to reliably and correctly connect a double switch.
And so, when all the preparatory work is done and the wires are placed according to the diagram, you can begin connecting the two-key switch.
How to connect pass-through switches: connection diagrams and video instructions
In order to more clearly understand how to connect a pass-through switch, we invite the dear reader to watch the video instructions, which will more clearly and completely explain the installation algorithm.
But there are times when it is necessary to install a pass-through switch in three or even four rooms. With this option, it will no longer be possible to use only pass-throughs - there can only be two of them in the scheme. This means additional equipment is required. It's called a crossover switch. Connecting it is also not too difficult. Especially if the home master has already dealt with the previous installation in detail. But we can’t help but talk about crossover breakers.
Connection diagram for a pass-through switch from 2 places: summary of information
We discussed the connection diagrams for 2-point pass-through switches above step by step, but some clarifications should still be made. In general, in electrical engineering, when it comes to designing and planning wiring in a building, there is no such thing as “installing a pass-through switch.” The singular number is unacceptable here. In any such scheme, connecting pass-through switches from two places is an axiom. As the number of control points increases, cross ones are included in the circuit. But still, there will always be only two passers-by, no more, no less.
In the image: 2,3,4 and 5 – cross switches
But if the diagram for connecting switches from two places is clear, then what to do if it is necessary to control from several points? We'll figure out.
Connection diagram for a pass-through switch with 3 places: installation nuances
We should start with the fact that, to be extremely precise, there are no diagrams for connecting pass-through switches from 3 places. Indeed, in this case, additional contacts are needed for switching in such devices. But this expression has already become firmly established in the everyday life of electricians. Everyone understands perfectly well what we are talking about.
Pass-through switches can even be like this
The fact is that installation of a 3-point pass-through switch connection diagram involves the inclusion of an additional link - a cross switch. Connection is quite simple. According to the diagram located on the back cover of the switch, it is included in the gap between the pass-throughs. You can learn more about this in the following video.
How to connect a pass-through switch from 4 places
The connection diagram for a 4-point pass-through switch is completely no different from the previous one. Here we just add one more cross. Thus, by adding cross switches, you can increase the number of control points.
Useful tips
During the installation of the switch there are several very important points that must be remembered. Moreover, this applies not only to the installation process itself, but also to the selection of the necessary equipment. By following a few simple rules, the system will be more reliable and secure.
Below is a list of recommendations and rules that must be followed for safety reasons:
To summarize, connecting a two-key switch to two light bulbs is quite simple, especially if you have at least some skills in this area. But if you have no experience working with electrical equipment, it is better to leave this matter in the hands of professionals. Remember that working with electrical power can be life-threatening. Improperly installed wiring may cause a short circuit and fire. Don't risk your life and contact specialists!
Types and design, recommendations for selection, price
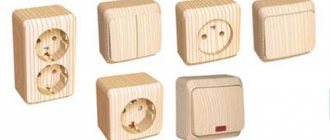
Like other similar devices, two-gang flush-mount switches come in a wide variety of designs. Their cases can be made of plastic of various colors, have a metal finish, and backlighting. The shape can be square, rectangular, round or oval.
Electrical fittings are made in retro style, especially for children's rooms in the form of flowers or animals, decorated with Swarovski crystals... Designers are inventing more and more new types of fittings.
As for the appearance, the choice depends entirely on the owner of the room and on the features of the interior. Such devices are always in sight and should not stand out from the general style.
Electrical switches are divided into:
- Keyboards (most popular)
- Rotary
- Push-button (can be two or three-button)
- Touch (can also play the role of two or three keys)
- Rope
- Dimmers
Keyboards, despite the new products that have appeared, are still in maximum demand. They are:
- Single and multi-key
- Walk-through (allowing you to turn on the light at one end of a long room and turn it off at the other)
If we talk about technical characteristics, when choosing a double electrical switch you should pay attention to:
- Material from which the body is made
- Build quality, presence of latches
- Technical characteristics that are usually indicated on the inside of the product
- Certification information
- Material from which the contacts are made
The average price of switches with two keys varies from 100 to 300 rubles. But you can buy accessories for 60 rubles or 1000. Basically, the cost depends on the design of the case.
2-way Plexo switches
Two-key switch for controlling 2 loads up to 10A 250V (2500W). Can be used in control circuits from 2 places. Surface mounting, supplied assembled. Degree of protection - IP55. Color – Gray
Two-key switch for controlling 2 loads up to 10A 250V (2500W). Can be used in control circuits from 2 places. Degree of protection - IP55. White color.
Two-key switch for controlling 2 loads up to 10A 250V (2500W). Can be used in control circuits from 2 places. Degree of protection - IP55. Color - Gray.
- Back
- 1
- Forward
Selecting 2 Rocker Plexo Switches
A certified representative of the French manufacturer Legrand - Legrand Russia - presents two-key switches of the Plexo series. This is reliable and high-quality equipment with a high class of protection against dust and moisture (IP55), which is actively used in industrial, warehouse and technical premises, even in ports, as it is not afraid of heavy contamination and even directly directed jets.
Plexo two-way switches are useful when you need to control two circuits of light, such as in two adjacent rooms, or when there is more or less light in the same space.
Features of Plexo Two-Gang Switches
The two main features of the models presented in this section of the catalog are their dust and moisture protection class, and also the fact that they have two keys neatly fitted into the square shape standard for front panels of this series. In addition, these models have the following characteristics:
- two installation options - these can be open-mounted two-button Plexo switches 10A, which are mounted in an overhead box (and also supplied assembled), or hidden installation models, which are installed on a special support;
- enhanced moisture protection system, thanks to membranes for wires and fasteners, rubber gaskets along the contour, etc.;
- simple and safe installation that eliminates contact with live elements;
- safety and practicality of use, long service life;
- laconic and strict, neutral design, thanks to which the devices fit perfectly into almost any room;
- possibility of installation in a row with other mechanisms in multi-post frames;
- affordable price.
How and where to buy two-gang Plexo switches?
If you want to buy Legrand Plexo series switches with two keys, please contact our online store. Consultants will tell you everything about this electrical installation equipment, help you figure out whether this model is suitable for solving your problems (or choose another one), and tell you how to place an order.
We work with both private clients and large companies, delivering batches of any size directly from the manufacturer, which allows us to set fair, fair prices for products. In addition, we provide a factory warranty on all products.
Types, design and recommendations for selection
Construction stores offer a large assortment of two-button switches for hidden wiring.
Despite the emergence of improved varieties, key switches are still in greatest demand. They are made from different materials, they have different colors, shapes, and textures. Also, switches can be traditionally square or oval or round. Most often, structures are made from high-quality plastic and metal.
When choosing a double switch, you need to pay attention to the following technical characteristics:
- The quality of the materials from which the contacts are made.
- Materials used to make the case and keys.
- Availability of latches or buttons, build quality.
It is necessary to study the parameters that are fixed on the body.
The average cost of two-key switches ranges from 100-300 rubles. Most often, the fundamental factor in pricing is the design of the case.
Features of installation on walls
For buildings made of reinforced concrete and brick, it is recommended to install a hidden type of wiring, and install distribution boxes and switches in pre-made grooves. It is recommended to choose plastic socket boxes. Such socket boxes are secured with screws and then covered with plaster solution.
A two-key switch can have two fixation options:
Sliding mechanism in which the slats rest on opposite walls
It is important here not to overdo it when tightening the bolts, as the ceramic may crack. Galvanized plate located around the perimeter of the body. It has holes for bolts that secure the part to the socket box and the wall.
Self-tapping screws and dowels are used for fixation.
Two-key switches (when it comes to external wiring) are often fixed with screws, just like distribution boxes. The wires are laid in plastic cable channels.
Application
The use of such a control device, as a rule, follows two scenarios. In the first case, wires from two different devices are connected to one switch. Most often, we are talking about lamps that provide lighting in adjacent rooms. However, any electrical appliance can be controlled, from a kitchen hood to a heated floor.
The second option for using the switch allows you to provide different modes of operation of the device. For example, adjusting the level of lighting in a room.
When using lamps with several light sources, this type of switch controls the connection of a different number of lamps. Therefore, pressing one of the keys leads to the corresponding lighting of the light bulbs connected to it.
Criteria for selecting a switch and other components
Before connecting a two-key switch, you should resolve the issue of the required network characteristics and type of wiring, power ratings of consumers, current strength and wire cross-section.
For a lighting fixture that has two groups of light bulbs (one 100-watt and three 40-watt), the power consumption will be P = 220 W. To calculate we use the formula:
For such a load, you will need a two-key switch with a 3 Ampere plastic housing and a wire cross-section of 0.75 millimeters.
In another case, it is necessary to provide lighting to a large room, where two groups of 8 light sources are used with three 80-watt fluorescent light bulbs for each lamp. Power characteristic: P = (80 x 3 x
In the above example, you will need a ceramic two-gang switch with a load rating of 10 Amps. The wire cross-section is selected according to special tables available in the PUE. For the most part, a three-core copper cable with a cross-section of 0.75 - 1.5 millimeters is used.
The most common cable types:
- VVG - cable with three copper wires and PVC insulation in a common insulating sheath;
- PUNP - stands for flat installation wire. Used to create hidden wiring without grooves. It is fixed on the walls using brackets, and is masked on top with a layer of plaster. The cable is equipped with a double layer of PVC insulation and a plastic overall sheath.
