How 3 color LED diodes work
From a design point of view, RGB LED is three color LEDs installed in one housing, or, as experts say, on one matrix. Common types of high-power lighting fixtures contain three chips of the same color. Multi-color LEDs use red, green and blue crystals (Red Green Blue is an abbreviation for three-color LEDs).
Each of them has an independent connection to the power source, so instead of the usual two pins, they have at least 4 contacts - one for each crystal and one common. This allows you to use one of three chips, create different combinations, change and mix colors in a group. If you arrange the connection mode of individual crystals using a microcontroller, you can get a lot of interesting lighting effects. Similar technologies have been known for a long time and are used in color printing, color televisions, etc.
Varieties
The variety of applications of multicolor LED light sources determines the main types of external design of RGB LEDs:
- low-power products are produced in standard round cases with a spherical lens and leads for conventional soldering;
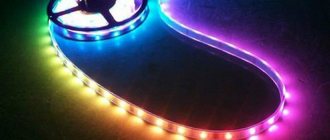
- low-power RGB LEDs in surface-mount SMD packages are widely used in LED strips or large-area full-color LED screens;
- in Emitter-type housings they produce powerful RGB light sources with independent control of each LED crystal;
- Super bright LEDs in Piranha packages do not require heat dissipation and are easily mounted on printed circuit boards.
To simplify light control systems, control chips are built into the housings of some series of multicolor LED light sources.
Kinds
There are several types of RGB LEDs:
- common-cathode elements that are driven by positive signals applied to the anodes of the chips. Such elements are marked with the letters CA;
- with a common anode. Commands to change the operating mode are sent to the cathodes of the elements. CC marking;
- own pair of contacts for each crystal (6 pins).
This variety of options was created to facilitate the management of groups of devices. The third group demonstrates the greatest independence - with 6 conclusions. A unified pinout standard has not yet been adopted, so in each case it is necessary to determine the type of polarity of RGB LEDs.
Full text of the program
const int buttonPin=2; boolean lastButtonState = LOW; boolean buttonState = LOW; int RLED = 9; int GLED = 10; int BLED = 11; int ledMode = 0; void setup(){ Serial.begin(9600); pinMode(buttonPin, INPUT); pinMode(RLED, OUTPUT); pinMode(GLED, OUTPUT); pinMode(BLED, OUTPUT); } void setMode(int mode){ if (mode == 1){ digitalWrite(RLED, HIGH); digitalWrite(GLED, LOW); digitalWrite(BLED, LOW); }else if (mode == 2){ digitalWrite(RLED, LOW); digitalWrite(GLED, HIGH); digitalWrite(BLED, LOW); }else if (mode == 3){ digitalWrite(RLED, LOW); digitalWrite(GLED, LOW); digitalWrite(BLED, HIGH); }else if (mode == 4){ analogWrite(RLED, 127); analogWrite(GLED, 0); analogWrite(BLED, 127); }else if (mode == 5){ analogWrite(RLED, 0); analogWrite(GLED, 127); analogWrite(BLED, 127); }else if (mode == 6){ analogWrite(RLED, 127); analogWrite(GLED, 127); analogWrite(BLED, 0); }else if (mode == 7){ analogWrite(RLED, 85); analogWrite(GLED, 85); analogWrite(BLED, 85); }else{ digitalWrite(RLED, LOW); digitalWrite(GLED, LOW); digitalWrite(BLED, LOW); } } boolean debounce(boolean last){ boolean current = digitalRead(buttonPin ); if (last != current){ delay(3); current = digitalRead(buttonPin); return current; } } void loop(){ buttonState = debounce(lastButtonState); if (lastButtonState == LOW && buttonState == HIGH){ ledMode++; if (ledMode == 8){ ledMode = 0; } setMode( ledMode ); } lastButtonState = buttonState; }
Connection
The easiest way to connect RGB LEDs to a power source is to connect to an Arduino microcontroller. The common lead (usually the longest one) is soldered to the "Gnd" pin, and the rest are connected to the corresponding points marked D12, D10 and D9. Contacts cannot be soldered directly; each of them (except the common one) must have a current-limiting resistor.
When connecting an LED with a common anode, the negative contact “Gnd” is used, located in the same row as the cathodes. If a common cathode connection is used, the positive “Gnd” contact from the opposite row is used.
Why do this
The era of table lamps seems to have already crossed the equator of its life cycle. You can illuminate the space near the monitor or keyboard using an LED strip - this option will be much cheaper both in terms of capital costs and energy consumption, and the end result will at least be no worse.
In what cases is such illumination used? There are several options:
- to illuminate the workspace in the computer work area. Here the main emphasis should be on ensuring that the tape is mounted as high as possible;
- for soft illumination of the workplace to quickly find your way in the dark. If the monitor is located on the wall, the tape can be mounted in its rear part; it is advisable to use LEDs of the same color;
- for illuminating the system unit. Today, a designer computer is no longer exotic; there are system units with a transparent side cover so that you can see the insides of the PC. In the dark, the lighting function can be assigned to RGB lighting installed around the perimeter of the wall;
- to illuminate the keyboard if you stay at the computer late into the night. Typically, monitor radiation is not enough for these purposes;
- Finally, the LED strip can be used for decorative lighting of the desk, which is your workplace. There are a lot of options for its location - for example, at the end of the tabletop, under it or on the wall. Such lighting will allow you to do many things without having to turn on the general lighting of the room.
An important advantage of using an LED strip is the lack of need for additional wiring - there are always a lot of wires coming from the computer and peripherals. And you won’t need a separate outlet, which is also where problems often arise. Such lighting can operate for up to 10 years without noticeable deterioration in performance.
Control
The easiest way to control the operation of RGB LEDs is using an Arduino microcontroller. Changing color occurs by mixing two or three colors in different ratios. If all chips are lit at full brightness, the result will be a white glow. To change the hue and obtain the desired colors, it is necessary to control the brightness of each crystal. This is done using pulse width modulation. Rectangular signals with different depths are supplied to the control contacts. The wider the peak (or lower the borehole), the brighter the crystal glows.
There are ways to control RGB LEDs using analogue methods. A circuit is assembled using transistors that regulate the brightness of the corresponding crystals. In both cases, it is important to correctly determine the polarity of the LEDs, otherwise the expected effect will not occur.
Pioneers of color perception research
Today we know that the retina of the human eye contains three different types of photoreceptor cells called cones. Each of the three types of cones contains a protein from the opsin family of proteins that absorbs light in different parts of the spectrum:
Light Absorption by Opsins
Cones correspond to the red, green and blue parts of the spectrum and are often called long (L), medium (M) and short (S) according to the wavelengths to which they are most sensitive. One of the first scientific works on the interaction of light and the retina was the treatise “Hypothesis Concerning Light and Colors” by Isaac Newton, written between 1670-1675. Newton had a theory that light of different wavelengths caused the retina to resonate at the same frequencies; these vibrations were then transmitted through the optic nerve to the "sensorium".
“Rays of light falling on the bottom of the eye excite vibrations in the retina, which propagate along the fibers of the optic nerves to the brain, creating the sense of vision. Different types of rays create vibrations of different strengths, which, according to their strength, excite sensations of different colors ... "
(I recommend that you definitely read the scanned drafts of Newton on the Cambridge University website. I'm stating the obvious, of course, but what a genius he was!)
More than a hundred years later, Thomas Young came to the conclusion that since resonance frequency is a system-dependent property, in order to absorb light of all frequencies, there must be an infinite number of different resonance systems in the retina. Jung considered this unlikely, and reasoned that the quantity was limited to one system for red, yellow and blue. These colors have traditionally been used in subtractive paint mixing. In his own words:
Young's assumption about the retina was wrong, but he concluded correctly: there are a finite number of cell types in the eye. In 1850, Hermann Helmholtz was the first to obtain experimental proof of Young's theory. Helmholtz asked a subject to match the colors of different patterns of light sources by adjusting the brightness of several monochrome light sources. He came to the conclusion that to compare all samples, three light sources are necessary and sufficient: in the red, green and blue parts of the spectrum.
RGBW LEDs
It is quite difficult to obtain pure white light on standard RGB devices. The problem is adjusting the brightness. If you need a white, but rather dull shade, you have to very accurately adjust the power supply of the three crystals. Given that each of them has its own voltage rating that varies nonlinearly, obtaining soft tones is a difficult task.
To simplify the process and increase the capabilities of LEDs, four-color, or RGBW, devices are produced (from the English Red, Green, Blue and White). The additional white chip takes the load off the controller, makes calculations easier and improves color rendering quality. Power for such devices is provided by special controllers with infrared remote controls.
LED strip installation algorithm
Initially, the tape comes with pieces of wire of 4 colors soldered to the contacts, where yellow is intended to supply a general positive impulse.
The rest are connected according to shade - red, blue and green. But it often happens that the length of a segment is long and needs to be shortened. The RGB tape indicates the places intended for division. The contacts on them are marked (R, G, B and +V). After the required length is cut, wires for switching are soldered to them. Now in stores you can also find special connectors that allow you to do without soldering. They can be simple (without rigid fixation) or professional. To clamp the contacts of such connectors, a special tool is used - a crimper.
Application
All RGB LEDs are used for decoration and design of objects. They perform different tasks:
- create advertising backlight;
- lighting effects at concert venues;
- design of entertainment events;
- decoration and ceremonial lighting of buildings;
- decoration of fountains, monuments, bridges, etc.
Interesting! In addition, lighting design of interiors is becoming fashionable, in which designer multi-color solutions are actively used. When you change the shade of the glow, the color of the furniture visually changes, and the room gets a new, unusual look.
Program and modes
When you press the button, the program will switch LED modes. To do this, we will write a function that will take the counter state as an input and light the LED in a certain way.
void setMode(int mode){ if (mode == 1){ // red only digitalWrite(RLED, HIGH); digitalWrite(GLED, LOW); digitalWrite(BLED, LOW); }else if (mode == 2){ // green only digitalWrite(RLED, LOW); digitalWrite(GLED, HIGH); digitalWrite(BLED, LOW); }else if (mode == 3){ // blue only digitalWrite(RLED, LOW); digitalWrite(GLED, LOW); digitalWrite(BLED, HIGH); } }
Let's add a few more color mixing modes in order to get different shades. As a result, we will see what RGB LEDs are capable of and why they are so often used in modern lighting sources.
You can add any modes for the LED yourself and even use the capabilities of Arduino PWM pins to smoothly change colors.
Switching modes
Main conclusions
The use of RGB LEDs is constantly expanding. They perform various tasks:
- creating dynamic lighting effects;
- decoration of buildings, structures, interiors;
- illumination and accentuation of advertising structures;
- design of public events, concerts, performances.
The area of use of RGB LEDs is increasing and actively developing. New lighting options are emerging. Software packages are being developed for use in microcontrollers. Share your ways of using RGB LEDs in the comments.
Where is it used?
The use of linear LED lamps has become widespread and is found in many areas of human activity. The main focus is design:
- interior design;
- decoration of building facades;
- illumination of areas, landscape design elements;
- design of gaming keyboards;
- illumination of vehicle interiors and exterior elements;
- decoration of shop windows, stands, various panels and boxes
- Waterproof types of RGB lighting are installed in swimming pools, saunas and other wet areas.
Special gaming computer keyboards with RGB backlighting have become popular among gamers. They are equipped with various types of mechanical switches like the Cherry Blue Switch or their equivalents. The main purpose of such backlighting is to decorate the keyboard, but users note the ease of use in dark rooms and the ability to change the lighting mode in different situations or conditions.