In winter, one of the most significant holidays of the year is celebrated - New Year. The celebration stretches over several days, extending into the Christmas holidays. By this time, every person strives to decorate their apartment or private house using festive illumination.
It is absolutely not necessary to buy lamps in a store: you can make an LED garland yourself, and we are talking about autonomous devices that are powered by batteries, or more demanding industrial ones connected to a 220 V AC electrical network. A product made with your own hands will seem much more attractive and brighter, so it will become the main New Year's decoration in the house.
LED garlands are not too expensive, but it is still much more pleasant to enjoy your own creation. In addition, you can create a light source that fully satisfies individual needs. Finally, the cost of homemade products will still be several times less.
Unusual option
Instead of mains power, sometimes you need to make a battery-powered garland. In this case, even a sudden power outage will not be an unpleasant surprise. Lithium-based batteries are usually used. The recommended voltage is 3 V (no longer necessary). The diode mounts are attached to the batteries using epoxy glue.
Similar designs can be used for a veranda or hung on an arch, as well as on another decorative element in the garden. Typically, the anode is attached to the positive pole, and the cathode, respectively, to the negative part of the battery. After the glue has set, you need to strengthen the connection by wrapping it with tape. It is recommended to use from 10 to 20 light bulbs in such a garland. If there are fewer of them, there will be no aesthetic effect. If it’s more, the complexity of the work will increase unjustifiably.
Finally, it’s worth mentioning the basic safety rules when using homemade garlands:
- you should not place them where splashes of water will occur at least periodically;
- it is necessary to clearly understand the difference between indoor and outdoor decorative elements both when designing and when hanging;
- You cannot install garlands in aisles or in places where water or snow can fall on them;
- It is unacceptable to install such structures close to the ground or very low, since it is easy to get caught on them or tear them;
- each garland must be connected to a strictly separate outlet;
- Before connecting, you need to check the serviceability of sockets, decorative lamps and insulation.
To learn how to quickly make a retro garland, see the following video.
Additional recommendations
A retro-style garland with incandescent lamps cannot be used in the following conditions:
- under snow, rain, temperature changes (the bulbs will burst or a short circuit will occur);
- near flammable materials (paper, fabric);
- leave it turned on unattended for a long time, for example, at night;
- install on the ground or a short distance from it, because It's easy to get caught and break the wire.
Plastic sockets have cable terminals that are not designed to support more than the weight of the lamp and socket. Therefore, when using them, you need to attach a garland every 1.5 m.
When connected in parallel, lamps of different sizes and power can be screwed into one garland. If you want to make 1 long decoration, you need to take into account the power of the power source. The standard plug and socket are designed for a load of 5 A (1 kW). If there are several garlands, each should be connected to a separate outlet.
Lamps can be painted with watercolors or gouache. Store the garland in a box, avoiding mechanical pressure.
What else do you need to know?
There are several important points that are also worth considering:
- To make a garland with running lights, you need to purchase a three-phase multivibrator. It only works with LED equipment.
- For outdoor use, use only diode products; it is best to additionally protect the connections with heat-shrink tubing, and place the socket and control unit indoors. An outdoor garland should be an order of magnitude stronger than a home one.
- If there is an old garland that is not working, it can be repaired. To do this, first remove the power supply, measure the diameter of the used diodes to find out their characteristics via the Internet. The power of the resistor is calculated, it is soldered in place of the block, after which you can turn on the lights.
How to choose illumination for outdoor use
Although any electrical devices should be chosen wisely, since they are potentially fire hazardous, outdoor New Year's illuminations require special attention.
They will have to be operated under high load conditions. These are temperature changes, especially frost, high humidity, potential shocks and stretches. Battery-powered LED Christmas tree lights are more reliable in every sense. It can withstand up to 100,000 hours of operation if the operating rules are followed. Tiny LEDs are enclosed in housings that are almost impossible to damage.
They shine brightly enough, but do not heat up. This means that there is no risk of the tree catching fire. You can actually build the simplest lighting structures of this type with your own hands.
You should choose the right New Year's garlands according to the type of wire. There are different options: individual LEDs are attached to a PVC cable. Traditionally, this solution is welcome for interior illumination: wire of this type is relatively poorly resistant to temperature changes and atmospheric influences.
A newer word in electrical engineering is rubber and silicone cables. They are highly durable, resistant to moisture, low and high temperatures. They can also be considered reliably protected from possible mechanical damage. And this means safety in operation: the risk of electric shock is eliminated. However, using battery-powered illuminations, you don’t have to worry about such a threat in principle.
The best solution is a silicone LED garland. It can withstand frost up to 50 degrees. High humidity also does not harm this material. For comparison, it is worth pointing out that a high-quality PVC cable is designed for -20 degrees maximum.
Safety regulations
Despite the fact that garlands made from LED lamps are considered one of the safest, care must be taken when using them. This will help avoid unusual situations that could lead to electric shock and its negative consequences. To prevent this from happening, you must follow a few simple rules:
- All garlands used for decoration should be located high above the ground or floor. If you neglect this rule, you may accidentally tear the jewelry and receive an electric shock. In addition, such a precaution will protect small children and pets from contact with a potentially dangerous object.
- When using the garland outdoors, you need to tighten the wires well and make sure that they do not sag. Failure to comply with this condition may result in the appliance falling into a puddle. In addition, you can simply get caught on the wire and fall.
- It is recommended to use wires that are not too thin, as there is a possibility of rapid wear or chafing from external factors.
- It is imperative to check the garland for functionality. Only after this can it be hung on the New Year tree or any piece of furniture.
- It is prohibited to connect several garlands to one outlet at the same time. This may cause overheating and failure.
- You cannot leave home and leave the garland on. Such carelessness can lead to fire and other unforeseen situations.
- When decorating a holiday tree, you need to check the insulating layer of the wiring. If it has even minimal defects, then it is better to refuse such a garland. Otherwise, you can provoke the appearance of a spark, which will lead to a rapid ignition of the Christmas tree.
- If any emergency occurs, you must immediately turn off the power to the luminous decoration.
A garland of LED lamps is a wonderful decoration option for the entire apartment. They can be placed not only indoors, but also outside, which ensures maximum effect from observation from the outside. With proper manufacturing and compliance with safety precautions, you can reduce the risk of an unusual situation and avoid negative consequences. A well-made garland will delight all people and give them a festive atmosphere.
Garland assembly:
- We divide (or cut) the wire into 9 parts of 50 cm, the remaining end will be 1.5 m.
- If you cut it, we clean the ends with a knife or wire cutters. It is best if you have a special tool for stripping wire insulation.
- If you left the wire intact, then remove the insulation from a small area between the marked zones.
- We prepare the cartridges, remove the upper part from them, insert the stripped ends or “ears” into the base.
- Connect a plug to the long end. Instead of a plug, you can attach a dimer using a special adapter.
That's it, your DIY incandescent lamp garland is ready! It looks stylish and beautiful and will decorate any friendly gatherings both at home and in the yard.>
Idea No. 2 – Modernize an old electric garland
If you just don't like what was on the tree last year, you can decorate an electric garland in an original way using regular paper coffee cups. Making a beautiful New Year's product is quite simple. To begin, prepare glasses, scissors, glue, tape and scrapbooking paper.
After this, cut and unfold one of the cups, which will become a template for cutting out the decorative wrapper. Having cut out the blanks, glue them onto the glasses using glue or double-sided tape.
After this, we cut out a place in the bottom of the homemade lampshades for the glowing bulbs and insert them there, securing them on the outside with a thin strip of tape.
That's all - the electric garland is ready! In this way, you can make an LED or regular garland for the New Year tree more elegant and festive!
Idea N5. Retro garland
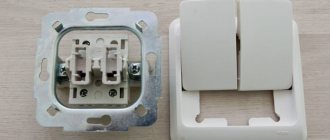
Retro garlands are popular when decorating photo zones, terraces, gazebos, shop windows and other objects. And it is not at all necessary to purchase a finished product, since anyone can assemble it. To do this, you will need: a connecting wire (it’s a good idea to get wires in fabric insulation), sockets (the most convenient models with clamps for wires), the incandescent light bulbs themselves (you can also take LED ones), a plug and a switch. In this example, we will consider a series connection of light bulbs; we will use some sockets with a built-in switch.
- Cut the wires into pieces of the required length - they will determine the distance between the glow points. Rice. 13: cut the wires into pieces
- Strip the insulation of the wires at the ends; in these places they will be connected to the cartridge, so the length of the core must be appropriate. Rice. 14: Strip the ends of the wires
- If you are using a wire with fabric insulation, then its edge must be fixed with electrical tape so that the fabric does not fray further. Rice. 15. Secure the insulation with electrical tape
- Disassemble the cartridge itself and thread the wires into the cartridge cover. Rice. 16: insert the wires into the socket cover
- Connect the ends of the wires to the contacts of the socket Fig. 17: Connect the wires to the socket
- Assemble the cartridge body; the excess length of wires from under the cover should be carefully pulled out, avoiding excessive force, so as not to loosen the contact. Rice. 18: Assemble the chuck body
- Repeat the same procedure with the remaining sockets, after which you can fix the light bulbs in them.
- Cut the wire from the last light bulb; you will need one core from it, which you need to connect to the switch gap. Rice. 19: Connect the switch
- Connect the edges of the wire to the plug; to do this, they must be inserted into the groove of each contact and clamped with a screwdriver. Arrange the rest of the wire so that it does not protrude; the plug body should close normally. Rice. 20: connect the edges of the wire to the plug
The retro garland is ready for use - plug in and enjoy. If you wish, you can complement the garland’s surroundings with a darkened wire or socket - they can be painted in the appropriate color. For greater gloss, the wires are painted with gold or bronze paint.
Ready-made retro-style garland of light bulbs
How to fix a garland if it blinks randomly in any mode
How to fix
Carefully inspect the capacitor. If it is swollen, darkened, or electrolyte leaks are visible on it, then replacement is necessary. Examine the case to find out the rating and voltage, and then find an analogue with parameters no less than the original ones. Carefully unsolder the old capacitor and install the new one, observing the polarity.
Burnt resistors also cause problems with the controller and unstable operation of the lighting modes.
How to fix
Check the resistance of the resistors with a multimeter and replace the faulty ones with working ones of the same value. If the parts are visually intact, it is still better to replace them to eliminate the malfunction.
Selection of necessary materials and components
LED selection
For a homemade garland you will need multi-colored LEDs with a diameter of 4-5 to 10 mm with a permissible current of 20-30 mA and a voltage drop value of 2.1 to 3 V.
LEDs
The number of LEDs is selected taking into account the fact that the optimal distance between them should be 20-25 cm.
Resistor selection
The number of resistors and the value of their resistance are calculated based on the LED connection diagram:
- When connected in series, one resistor is installed. Its resistance is calculated by the formula:
R=(Uip-(К×Upad))/I,
Where:
- Uip – power source voltage, V;
- Upad – voltage drop across the LED, V;
- K – number of LEDs, pcs.;
- I – current strength of one LED, A.
Those. when assembling a garland of 10 LEDs with an operating current of 20 mA (0.02 A) and a voltage drop of 2.1 V, powered from a 24-volt power supply, the resistance of the only resistor installed in front of the first LED will be equal to:
R = (24-(10×2.1)/0.02= 3/0.02=150 Ohm.
- When connecting LEDs, a separate current-limiting resistor is soldered to each anode of a semiconductor radio component, the resistance of which is calculated by the formula:
R = (Uip-Upad)/I.
Those. when assembling a Christmas tree decoration similar to the previous point, in which the LEDs will be connected in parallel, a resistor with a resistance of 1 kOhm is soldered to each of them.
Selecting a power supply
The power supply for homemade Christmas tree decorations made from LEDs is selected taking into account their quantity and characteristics. In order for all the decoration lights to burn equally brightly, their total voltage and power must be less than those of the power supply used.
power unit
This indicator is calculated using the following formula:
P=U×I,
Where:
- P – power, W;
- U – voltage, V;
- I – current strength, A.
Thus, for 10 LEDs with a voltage drop of 2.1 V and an operating current of 20 mA, at least a 24 V power supply with a power of 0.42 W is required.
Fork
When connecting a garland with a large number of LEDs directly to a 220-volt network, use standard dismountable Euro plugs that match the color of the wire being used.
Wires
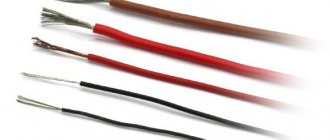
To install the garland, soft 2-core stranded conductors with a cross-section of 0.75 mm2 are used.
This is interesting: How to determine phase, zero and ground - instructions with video
What models are there and how do they differ?
As already written above, fringe garland models differ in the type of design (degree of tightness), the number of LEDs used (garland length), as well as the type of light sources used (LEDs).
Here are some popular models of garlands of this type among users:
"Icicle" or "Icicle".
The model simulates icicles of different lengths hanging from the main wire laid horizontally.
Product Specifications:
| Length, mm | Number of vertical threads | Number of operating modes | Glow color | Degree of protection | Number of LEDs | Electrical power, W |
| 2400 | 24 | 1 | white | IP44 | 88 | 5,5 |
“Icicle” can be used indoors or as an outdoor “fringe” garland, which is possible due to the appropriate degree of protection. The supply voltage for this model is 220 Volts.
As of the second quarter of 2022, the average cost of Icicle is 1,500.0 rubles.
"RGB Chameleon Rich LED 5x0.7."
This model uses RGB LEDs, which makes this garland in demand when decorating an area in color. The color of the LEDs changes dynamically for 4 minutes, after which the cycle repeats again. The product is supplied with a connecting cord, with which you can connect two garlands together. If it is necessary to install a larger number of products (up to 6 pieces), an additional power supply will be required to ensure normal operation of the assembled structure (model RL-220AC/DC-10A-ARGB or similar). Supply voltage – 220 Volts.
Model specifications:
| Length, mm | Number of vertical threads | Operating mode | Glow color | Degree of protection | Number of LEDs | Electrical power, W |
| 5000 | – | glow with dynamics | RGB | IP54 | 198 | 23,0 |
As of the second quarter of 2022, the average cost of this model is 6,000.0 rubles.
"Melting Icicles"
Garlands such as “Clip Light Spider Melting Icicles” (“LED ClipLight”) are also very popular when decorating outdoors. As a rule, LED ClipLight garlands are hung on trees and serve as decorative elements in parks and squares. The supply voltage for such products is 12 (24) Volts, and a special power supply is used to connect to the electrical network.
The length of the main wire and the number of icicles may vary in different configurations.
The technical characteristics of one of the configuration options are presented in the table below:
| Length, mm | Number of icicles | Number of operating modes | Glow color | Degree of protection | Number of LEDs | Electrical power, W |
| 10000 | 10 | 1 | white | IP54 | 800 | 8,2 |
As of the second quarter of 2022, the average cost of this modification is 7,000.0 rubles.
Currently, the illuminated advertising market is dominated by Chinese-made models, so when choosing an LED garland, you should study the reviews of experienced users that can be found on the Internet, so as not to make a mistake when choosing a product.
In addition, the following video will help a potential buyer:
Previous LED How to choose an LED lamp for your home Next Garlands How to make a retro garland from light bulbs and LEDs
Thank you, it helped! It didn’t help
Making a garland of LEDs
Series connection of all diodes in the circuit allows you to get a flickering garland connected according to the simplest circuit. Anyone who has some knowledge in electronics and electrical engineering can cope with such a task, but for a real radio engineer this is generally a task that can be solved in one or two minutes. The only rule is to strictly follow the instructions.
The sequence of actions when assembling an LED garland with your own hands:
Determine the optimal distance between adjacent diode bulbs. Unwind the wire and use a marker to mark the probable locations of the lights.
It is best to retreat 20-25 cm from one diode to another. In the marked areas, use a sharp knife blade to cut off the insulation from the wire, only be careful not to damage it. This will make it easier to mount the LEDs. Apply rosin and a little solder to bare areas up to 3 cm long, simplifying the process of attaching the LEDs. Diodes are attached to the resulting influx, soldering the legs of the parts to the wire
Such fastening is not reliable, therefore there is a reinforcing fixation, which at the same time covers the exposed areas of the LED garland, made by hand. Narrow tape is cut into pieces of 3-4 cm, which will be used to insulate diodes. It is worth doing the work in such a way that as a result the light ends up in a kind of pocket that holds it tightly to the wire. This is how they wrap each of the lighting points along the entire length of the wire of the future garland. After completing the previous step, they begin to seal the upper part of the pocket, which is sealed with silicone sealant. This will not only give the structure additional strength, but also give the diodes an additional glow. Having completed seven simple steps, the final stage is to connect the resistor and power supply to the 220 V LED garland. The result is a beautiful and bright decorative element for your home, yard or Christmas tree.
This LED garland can be used for outdoor illumination. But in this case it is recommended to use an 8-12V power supply. The installation diagram of the garland is simple, but in any case it is impossible to do without knowledge of electricians.
Step-by-step instruction
To assemble a garland of light bulbs with your own hands, you do not have to be a professional electrician. The instructions are designed for parallel connection of lamps.
Preparing twisted wire
The basis of the retro-style garland is a twisted wire, similar to the one that was actively used for external wiring until the middle of the last century. The cables are intertwined like this:
- Fold in half, cut, lay out, align the ends and secure them with a tie.
- 1 end is attached to a bent nail inserted into a drill, the second is tied at a distance to some object - a hook, a table leg.
- Turn on the drill. From a simple wire 15 m long you get 7.3-7.4 m retro.
- Without removing it from the hooks, knead the cable slightly along its entire length and let it lie for a while in such a position that all the wires are fixed in a new shape.
Wire processing
At this stage, the points where the lamps will hang are determined and prepared for connection:
- Measure out a section of at least 1.5 m for connection to the socket on one side of the cable. Choose the design option for the other side; it can end with a lamp or an additional socket.
- Measure and mark with a self-adhesive marker the location of the lamps (depending on the size, they are placed in increments of 45-60 cm). It is better to make markings along the entire length of the product at once in order to adjust the distance between the elements.
- Insert a flathead screwdriver at the marked point and push the cables apart so that a ring-shaped section is formed between them.
- They expose 1-1.5 cm in the center of both wires opposite each other using a stripper or knife. The insulation layer is removed carefully so as not to damage the conductors.
- Twist the exposed areas into loops using a screwdriver or thin nail.
As a result of processing, sections with loops arranged in pairs appear on the cable; a cartridge will be attached to each pair.
Fork
The plug is selected according to its appearance, without grounding. First you need to disassemble it and then connect it to the cable:
- Expose the ends of the wires by 1.5 cm. The part that will be pressed by the clamp should remain insulated, this will protect the cable from severe kinks.
- Clamp the ends of the wires with the fixing screws so that the exposed parts do not touch each other.
- Put on and secure the cover.
If you plan to make a garland with a dimmer, you will also need a connecting block that quickly provides contact and good insulation. Loosen the screws in the block (4 pieces), then insert the garland wires into the sleeve channels on one side, and dimmers on the other, and tighten the screws.
It is better to purchase a dimmer with a cable and plug - it is easier to install (according to the technology, connection to the device is carried out by soldering).
Installation of cartridges
In a garland, it does not matter which cable is connected to which contact. For retro-style products, old-style cartridges are more suitable - carbolite, which consist of 3 parts:
- cylindrical body with thread;
- bottom (skirt);
- ceramic liner.
The cable is passed through the bottom of the cartridge, the wires twisted into loops are put on the contacts of the ceramic insert and secured with screws so that the exposed parts do not touch each other. Then the housing is screwed on.
Connection
The garland, which is a wire without breaks, is reliable when stretched and sagged. It is designed for 220 volts. It is recommended to check each lamp for integrity using a multimeter before screwing it in. Only after this can it be included in the network.
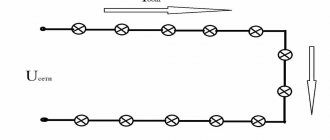
LED garland diagram
The AC mains voltage is supplied to the power controller through resistors and a diode bridge, already rectified and smoothed through a capacitor.
In this case, this voltage is supplied through the button, which is open in the normal state. When you close it, the controller modes switch.
The controller in turn controls the thyristors. Their number depends on the number of backlight channels. And after the thyristors, the output power goes directly to the LEDs in the garland.
The more such outputs, the more varied the colors the product can have. If there are only two of them, this means that only two parts (or halves) of the garland will work in different modes - some bulbs will go out, others will light up, etc.
In fact, these two lines of diodes will be connected on two channels in series. They will connect to each other at the end point - the last LED.
If for some reason you are annoyed by the blinking of the garland and you want it to glow evenly with only one color, it is enough to short-circuit the cathode and anode of the thyristor on the back side of the board using soldering.
The more expensive the garland you have, the more outgoing channels and wiring will leave the control board.
At the same time, if you follow the traces of the board, one of the mains voltage outputs is always supplied directly to the final LED of the garland, bypassing all elements of the circuit.
Typical frequently asked questions from readers
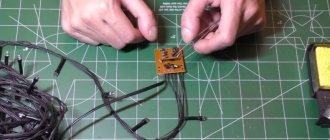
On the Chinese garland, two of the four channels stopped working. The lights rang, everything is normal. As I understand it, the fault is in the control board itself. Is there a way to repair it yourself or do you need to buy a new garland?
Everything the Chinese have done can, theoretically, be repaired. Most likely, the diagram of your garland control board is similar to the one shown in the figure.
Since two of the four lines are working, there is a high probability that two control thyristors (VS1-VS4) have failed. All you need to do is check the thyristors and replace the burned out ones. You can read about how thyristors are diagnosed in the article:
Making a garland of LEDs
With LEDs connected in series, you can create a flickering garland. Its creation will take a minimum of time, and almost anyone with basic electrical knowledge can cope with the task. The most important thing in this case is to strictly follow the instructions.
To assemble an LED garland yourself, you need to follow the steps in the following order:
- Decide on the desired distance between adjacent sources (diodes).
- After unwinding the wire, use a marker of any color to make the appropriate marks on the places where the LEDs will presumably be installed. Ideally, the distance between them should be 200-250 mm.
- At those points where marks were left, remove the insulation from the wire, creating “bare islands” 20-30 mm long. You need to act carefully so as not to damage the cable itself. This will simplify the process of future diode mounting.
- To such areas you need to apply rosin and solder.
- Attach the LEDs to the resulting nodules by connecting their legs to the wire with a soldering iron. Please note that this fastening option will be less reliable, so you will have to use reinforcing clamps, which will also cover the exposed parts of the garland.
- Cut the narrow tape into different pieces 30-40 mm long, then use it as insulation for diodes. As a result of these steps, each LED should be located in a “pocket” that holds it firmly to the cable. You need to wrap all the light sources on the wire.
- Then you need to ensure the top of the “pocket” is sealed. For this purpose, silicone sealant is suitable, which not only increases the strength of the structure, but also improves the glow.
- All that remains is to connect the resistor and power supply to the circuit, and then test the operation of the homemade equipment.
Preparing to create a battery-powered LED garland
An LED garland connected to batteries looks no less beautiful. In addition, such a product will be as safe as possible for children. This type of illumination is used as an external light source. When moving in the air, a bright multi-colored trail will remain, which designers often use to create various patterns in space. The product must be protected from wind, precipitation and low temperature.
To produce a battery-powered garland you will need:
- LEDs with a diameter of 10 mm of different colors with a scattering effect;
- magnets with a diameter of 1.3 and a thickness of no more than 30 mm;
- electrical tape or narrow tape;
- lithium battery (for example, CR2032 3V);
- epoxy adhesive.
The process of making a garland using lithium batteries
To create a bright shimmering garland you will need to perform high-quality soldering. There is no need to rush while completing the work. Be patient, be careful and attentive, follow the steps:
- Test the LEDs to see their light levels. Connect the components to the lithium battery one by one (connect one longer leg to the “plus”, the other short leg to the “minus”).
- Fix the position of the diodes, then wrap each element along with the battery with adhesive tape or electrical tape in 2 layers.
- Align the magnet with the positive contact of the battery, fixing it.
- Each part of the structure must be installed on a thin wire. Check the functionality of the product!
What types of luminous Christmas tree decorations are there?
New Year's designs sparkling with lights for decorating a thorny tree are sold in a wide variety.
The peculiarity of modern lighting is the use of special lighting devices - these are tiny LEDs, which are distinguished by a number of positive qualities:
- low power consumption;
- long service;
- low heating temperature;
- resistance to mechanical damage and temperature changes.
But if ordinary LED illumination is no longer a curiosity, then battery-powered street lighting structures are not yet so common. By the way, this is a very convenient and practical solution.
It will be especially appreciated by residents of private houses who, for one reason or another, cannot count on connecting to the power grid. They will hang the wires along the branches of the forest beauty with their own hands, and then simply turn on the button on the block where the batteries are inserted. The Christmas tree will blink with cheerful lights, even if there is no light in the house.
Also, a Christmas tree LED garland is convenient if there are frequent power outages. It looks impressive, especially since there are no extension cords or wires attached to it: only tiny flickering lights are visible to the eye, and nothing superfluous.
It is also rightly called mobile: you can place a New Year’s tree in any corner of the yard and even move it from place to place, without worrying about connecting to the network.