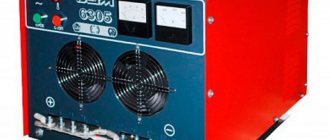
Characteristics of a homemade inverter
One of the important questions for welding specialists is how to make a welding inverter with your own hands. The process can be performed using the circuitry of welding inverters.
Before assembling an effective welding inverter, it is necessary to highlight the following technical characteristics of the equipment:
- on one of the transistors, the current that passes through the input should be 32 amperes;
- 250 amperes is an indicator of the current strength that is created when leaving the device;
- the voltage should be up to 220 volts.
In order to create the simplest welding inverter, it is necessary to combine the following elements into one mechanism:
- power block;
- thyristor power supply unit;
- drivers for power switches.
Improvements to inverter circuits
The devices presented in the article are extremely simple and in a number of functions cannot be compared with factory analogues . To improve their characteristics, you can resort to simple modifications, which will also allow you to better understand the principles of operation of pulse converters.
Increased power output
All described devices operate on the same principle: through a key element (arm output transistor), the primary winding of the transformer is connected to the power input for a time specified by the frequency and duty cycle of the master oscillator. In this case, magnetic field pulses are generated, exciting common-mode pulses in the secondary winding of the transformer with a voltage equal to the voltage in the primary winding multiplied by the ratio of the number of turns in the windings.
Therefore, the current flowing through the output transistor is equal to the load current multiplied by the inverse turns ratio (transformation ratio). It is the maximum current that the transistor can pass through itself that determines the maximum power of the converter.
There are two ways to increase the power of the inverter: either use a more powerful transistor, or use parallel connection of several less powerful transistors in one arm. For a homemade converter, the second method is preferable, since it not only allows you to use cheaper parts, but also preserves the functionality of the converter if one of the transistors fails. In the absence of built-in overload protection, such a solution will significantly increase the reliability of a homemade device. The heating of the transistors will also decrease when they operate at the same load.
Using the last diagram as an example, it will look like this:
Automatic shutdown when battery is low
The absence of a device in the converter circuit that automatically turns it off when the supply voltage drops critically can seriously let you down if you leave such an inverter connected to the car battery. Supplementing a homemade inverter with automatic control will be extremely useful.
Materials for its assembly
Drawing of an inverter welding machine.
Before starting to assemble an inverter-type welding machine according to the scheme, the master must prepare the necessary tools and materials that he may need in his work.
First of all:
- various types of screwdrivers;
- a soldering device to connect parts in an electronic circuit;
- knife;
- tool for cutting on a metal surface;
- thread, as a fastener;
- surface with a small thickness of metal;
- parts that form the electrical circuit of an inverter welding machine;
- copper wire and strips to wind the transformer will be required;
- fiberglass;
- mica;
- textolites;
- ordinary thermal paper used in cash registers.
The welding machine circuit is used to assemble equipment at home with an electrical voltage of 220 volts.
But if there is a need, then they use welding machine circuits operating on a three-phase power supply with a voltage of 380 volts. Such equipment has advantages, among which is a high efficiency rate, in contrast to single-phase designs.
Unit power supply
In the power supply of a welding inverter, the most important part is the transformer, which winds with ferrite in Ш7*7 or 8*8.
Inverter power supply.
Using this mechanism, a regular voltage is supplied and is created by 4 windings:
- Primary. One hundred circles of PEV wire with a diameter of 0.3 millimeters.
- The first is secondary. 15 circles of PEV wire with a diameter of 1 millimeter.
- The second is secondary. 15 circles of PEV with a diameter of 0.2 millimeters.
- The third is secondary. 20 circles with a diameter of 0.3 millimeters.
After the primary winding is completed and its sides are insulated using fiberglass, it is also wrapped in shielding wire. Each turn must completely cover the protective layer.
The shield wire winding should be in the same direction as the primary winding. It is worth paying attention to the same diameters of the two types of windings.
The same rule is used for other types: when winding the transformer frame, insulating wires from each other using fiberglass, or using simple masking tape.
To stabilize the voltage in the region of 20-25 volts, which enters the power supply through a relay, a resistor is selected for electronic circuits. The main feature of the mechanism under consideration is the change from alternating current to regular current.
This can be achieved by using a diode formed when performing an “oblique bridge” circuit. It happens that during operation of the device the diode overheats, which is why it is necessary to install it on radiators and often repair the power supply. An alternative to radiators is a cooling part from old equipment.
Installation of a diode bridge involves the use of 2 radiators: the top is connected to one battery through a mica gasket, and the bottom is connected to the second battery through the surface of thermal paste.
The bridge of diodes should be output in the direction where the transistor output is directed. Due to this, direct current turns into alternating current with high frequencies.
The connecting wire of these terminals can reach a maximum length of 15 centimeters. The metal sheet must be placed between the power supply and the inverter part of the device and welded to the “body” of the equipment.
Power block
Manufacturing of a welding inverter.
The power unit is the basis of the transformer in the welding inverter. With its help, the voltage indicator at high frequencies decreases, and the power, on the contrary, increases. To create a power block in a transformer, the use of cores is required. To create a small gap, it is recommended to use regular newsprint.
With each applied layer, to ensure thermal insulation, it is necessary to wind cash register tape to achieve good wear resistance. The secondary winding is created on the basis of 3 strip layers of copper, insulated from each other by a fluoroplastic tape.
Most craftsmen wrap a step-down transformer with a thick copper wire, however, this is a mistaken action. With such a transformer, a simple welding inverter will work with high-frequency current, displacing the conductor outside without heating the parts inside.
It is best to form windings using a conductor with a wide surface, in other words, use a wide copper strip.
Instead of a thermal insulating surface layer, experts sometimes replace it with plain paper. It is not as stable as thermal insulation tape or cash register tape. Elevated temperature only affects the darkening of the tape, but its wear resistance remains at the original level.
Inverter unit
The main function of a simple welding inverter is to convert direct current, which is generated using the rectifier of the device, into alternating high-frequency current.
To solve this situation, experts use a power transistor and high frequencies with an opening and closing channel. The mechanism in question in the equipment is responsible for changing direct current into alternating current at high frequencies.
It is recommended to use not one powerful transistor, but a pair with medium power. Thanks to a constructive approach to the problem, the current frequency is stabilized and noise during welding is reduced.
You can make an inverter welding machine with your own hands according to the electrical diagram, which indicates how to connect the capacitors in series.
They are used in the following cases:
- Minimizing surge in the transformer.
- Minimization of losses in the transformer block that appear when the device is disconnected from the network. This occurs due to the fact that the transistor opens at a higher speed than it closes - the current loses its power, which entails overheating of the switches in the transistor block.
Unit cooling system
Electrical circuit of an inverter for welding.
It is worth noting that most power elements in welding equipment tend to become very hot during operation, which can cause it to break.
In order to avoid such situations, it is most effective to install a fan in all units of the device, in addition to the radiator, a cooling mechanism during operation - a kind of cooling system.
You can do it yourself if you have a powerful fan. Often one is used with the air flow directed towards the step-down power transformer.
With a fan that has little power from a computer, for example, you may need up to 6 pieces, of which three devices are installed near the power transformer with the air flow directed in the opposite direction.
To avoid overheating, a homemade welding inverter must work together with a temperature sensor. It is installed on a heating radiator. If the radiator reaches the maximum temperature, it automatically turns off the current supply.
For more efficient functionality of the cooling system of the unit, the housing must be equipped with an air intake with its correct implementation. Air flow passes through its grilles into the internal systems of the device.
Testing
Before testing the “balcony” system, one problem emerged - inverters for such a small scale are simply not produced. Typical parameters of a grid tie inverter are power from 250W and panel voltage 22-65 or 45-90V. I have 2 parallel connected solar panels of 50W each giving 12-21V. Finally, after searching on ebay, almost the only model with a long name was found: 500W MPPT Micro Grid Tie Inverter 10.5-28V. The word “micro” here is clearly marketing, because... There is no possibility of mounting on the panel. The inverter looks something like this (photo from the seller’s page).
And actually testing. Everything is simple, the inverter is connected to the outlet via a wattmeter, which is convenient for assessing the readings. The solar panels face the east side, and already at 9 am in sunny weather the generation was 30W.
Everything is fine, I just have time to rejoice at how far technology has come when I hear a very loud noise - the cooler in the inverter has turned on. The Chinese have saved on the size of the inverter, and the high-speed 40mm cooler makes such noise and air whistling that it can be heard in the next room. Of course, ideally the cooler speed would be adjusted depending on the inverter temperature, but in my case this did not work. Because I don’t plan to use the inverter at full power of 500W, I just ordered another, less noisy cooler, which should be enough for 100-200W.
By the way, the insides of the inverter look like this:
This is how its parts heat up during operation, the temperature of the components is up to 40 degrees:
This is basically not much, on the other hand, and the power is only 1/10 of the maximum. It would be interesting to check its heating at the full 500W, but this is not possible.
Another drawback appeared in the evening, when the solar panels provide little energy - the inverter tries to turn on, the LED lights up, but the voltage of the panels sags from the load and it turns off, then the process repeats again. It is unlikely that such on-off switches are useful for electronic components; on the other hand, there is nothing very bad here in principle. The developers could have provided a more intelligent way to turn off the inverter, on the other hand, this is the cheapest model on the market, and running from a 100W panel is not standard for a 500W inverter.
Bottom line
: judging by the wattmeter, on an entire sunny day 0.25 kWh was transferred to the network from a 100-watt panel. Anyone can calculate the price of electricity themselves, as well as the payback period of the inverter (its price is about $80). The peak power recorded by the wattmeter was 65W, and the average power in the morning (the panels are directed to the east) was 30-40W. (Theoretically, a 100-watt panel could produce 80-90 watts of power if deployed more correctly and using thicker wires).
The next day was cloudy with rain, and the inverter, quite expectedly, did not start at all. He tried to turn on every 5 seconds in the morning, while starting the cooler, and the “zzz-zzz” could be heard throughout the room. In general, with such an inverter you definitely don’t need an alarm clock in the morning. Although this is not a problem with the inverter per se - firstly, a 500-watt inverter is simply not designed to handle a 100-watt panel, and secondly, it is not designed to be installed in a room. When the rain stopped and the sky became relatively clear, the inverter started up and the power supplied to the network was about 12W.
DIY inverter assembly
The important question remains: how to make a welding inverter with your own hands? First of all, you need to choose a case with reliable protection or form it yourself using sheet metal, where the thickness should be no less than 4 millimeters.
For the base where the transformer is mounted for inverter welding, getinax sheets with a thickness of no less than 5 millimeters are used. The structure itself will be located on the base thanks to brackets made independently from copper wires with a diameter of 3 millimeters.
To create electronic circuit boards in the electrical circuits of a welding machine, foil-coated textolite is used, the thickness of which reaches 1 millimeter. When installing magnetic cores, which tend to heat up during operation, it is necessary to remember the gaps between them. They are needed so that air can circulate freely.
In order to automatically control the welding inverter, the welder must buy and connect to it a special controller that is responsible for the stability of the current. It also determines whether the supply voltage will be powerful.
For more convenient operation of a homemade unit, a control element is mounted in the outer part. It can act as a toggle switch to activate the device, a knob in a variable resistor, thanks to which it controls the supply of current or a cable clamp and a signal LED.
Assembling a welding inverter with your own hands is quite simple if you adhere to all the rules, follow the instructions and strictly follow the prescribed scheme.
Do-it-yourself inverter manufacturing diagram.
Diagnostics of a homemade inverter and its preparation for operation
Assembling a homemade welding inverter is not the whole process. The preparatory stage is also considered an important part of the entire work, where it is necessary to check whether all its systems are working correctly and how to configure the necessary parameters.
First of all, equipment diagnostics are carried out, namely, supplying a voltage of 15 volts to the controller and cooling system of the welding machine in order to check their endurance. Thanks to this, the functionality of the mechanisms is checked and the avoidance of overheating during operation of the unit.
When the capacitors in the unit are fully charged, a relay is connected to the electrical network, which is responsible for closing the resistors. With direct supply, without a relay, there is a risk of the device exploding.
When the relay is functioning, voltage is supplied to the device for up to 10 seconds. It is quite important to find out how long the inverter can function during welding. To do this, it is tested for 10 seconds. If the radiator remains at the same temperature, then the time can be set to 20 seconds, etc. up to a full minute.
Maintenance of a homemade welding inverter
Drawing of a welding inverter for DIY assembly.
In order for a simple homemade welding inverter to work for a long time, it requires proper care. If the welding equipment breaks down, you need to remove the housing and carefully clean the mechanism with a vacuum cleaner. In parts where it cannot be reached, you can use a brush and a dry cloth.
First of all, for homemade inverters, you need to diagnose all welding equipment - check the voltage, its input and flow. If there is no voltage, it is necessary to monitor the functionality of the power supply.
The problem may also be burnt fuses in the structure. The sensor that measures the temperature, which is not repaired but replaced, is also considered a weak point.
After diagnostics, it is necessary to pay attention to the quality of the connection of the electronic systems of the equipment. Then identify poor-quality fastening by eye or using a special tester.
When these problems are identified, they are eliminated immediately using available parts, so as not to provoke overheating and breakdown of all welding equipment.
What is a car inverter?
Modern cars are equipped with a huge number of battery-powered devices. They are all rated for 12V, but what about situations where 220V is required? A car inverter will come to the rescue - a voltage converter from 12 V to 220 V. This is a real lifesaver for motorists, which will allow you to use household appliances in the car, such as a home audio system, TV or refrigerator. A high-quality converter is equipped with protective mechanisms that protect the device from fire if it overheats. There are also models on the market that provide active air-type cooling.
Externally, inverters are small boxes connected to the cigarette lighter or to the vehicle's electrical system. They are equipped with multiple outlets for household appliances, and some units even include USB ports for connecting mobile gadgets.
♥ ON TOPIC: Car charger for iPhone and Android gadgets: how to choose + 10 best options.
Bottom line
It is a mistake to assume that a device you create yourself will not allow you to effectively perform the necessary work. With a homemade device with an easy assembly circuit, you can weld elements using an electrode with a diameter of up to 5 millimeters and an arc length of up to 10 millimeters.
After the homemade equipment is connected to the circuit, it is necessary to set the automatic mode with a specific current value. The voltage in the wire may be about 100 volts, which indicates some kind of problem.
To fix the problem, you need to find the circuit diagram of the welding inverter, disassemble it and check how correctly it was assembled.
Thanks to such a homemade apparatus, the welder can not only weld homogeneous, dark metal, but also non-ferrous and various alloys. When assembling such a device, in addition to the basics of electronics, you also need to have a free period of time to implement your plan.
The welding process using an inverter is a necessary thing in every man’s home for any domestic and industrial purposes.
How to use a homemade device
After connecting a homemade device to the circuit, the controller will automatically set a certain current strength. If the wire voltage is less than 100 Volts, this indicates a malfunction of the device. You will have to disassemble the device and recheck the correct assembly again.
Using this type of welding machine, you can solder not only ferrous, but also non-ferrous metals. In order to assemble a welding machine, you will need not only knowledge of the basics of electrical engineering, but also free time to implement the idea.
Inverter welding is an indispensable thing in any owner’s garage, so if you have not yet acquired such a tool, then you can make it yourself.
