Technologies 1369 08/09/2021 read 5 minutes Share
Technologies Share
1369 08/09/2021 read 5 minutes
Emelyanova Veronica | Chief Editor
If earlier working with a computer required education in the field of physics, mathematics, and sometimes cybernetics, then over time the technology has become much more user-friendly. In most cases, you can bring a computer or laptop from the store, plug it in and use it. In addition, the average user has become significantly more prepared. If 20-25 years ago reinstalling and configuring an operating system plunged most people into sacred awe, today even a child who has learned to read and is familiar with the basics of formal logic can cope with this.
Today, a computer connected to the Internet is no longer enough for a user. I already want to connect network storage (NAS), create a video server, or even a home server with a secure web interface. Fortunately, there are enough instructions on the Internet so that anyone can do what they want.
The substrate for the entire infrastructure is a local network, which is formed by cable or simply twisted pair. Let's figure it out.
What is twisted pair for?
Despite the rapid development of wireless technologies in the last decade, cable has not gone away and is still used in corporate and home networks. Why? High stability and safety, predictability in operation, speed that is available to wireless technologies only at their peak and in ideal conditions.
In addition, twisted pair cables are used not only in computer networks, but also when creating a video surveillance system for a house or site.
Even a beginner can create such a network if he follows our advice and acquires the necessary tools. What do you need for work?
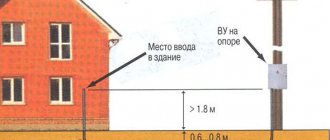
Today you can buy ready-made cables, but it is almost always better to make your own to avoid unnecessary twists if the distance between the terminal and the router is short. If the distance is a couple of tens of meters, then it is unlikely that you will be able to find such a ready-made cable. Yes, and other difficulties arise. It is not always possible to “start” a crimped cable. For example, an uncrimped cable requires a much smaller hole in the wall, so there will be less damage to the finished repair. To create a network based on twisted pair, you will not need many materials and tools.
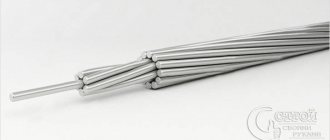
- The wire. For a home network, a Category 5e cable is sufficient. It can be better, but it is often a waste of money. It is important that the cable cores are made of copper and not aluminum.
- Connectors. Selected according to cable category. Did you choose wire 5e? We select connectors of the same category. It is important that the contacts are entirely gold-plated, and not partially.
- Crimper or crimp. The tool needed to crimp the cable. If you need it once, take an inexpensive model or even ask your friends. If you plan to use it often, don't skimp.
- Knife Useful if the crimper does not have a cutting edge. Often it is more convenient for them to cut the wires and strip them.
- Screwdriver.
- Twisted pair tester. Allows you to determine the quality of the connection and the presence of a short circuit in the network. It's better to rent or borrow. If the extra 1200-1500 rubles will not greatly burden the budget for building a home local network, you can buy it.
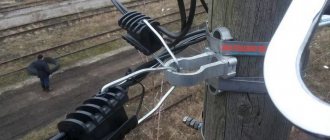
Connecting and splicing optical cables
All the work described below is usually done by craftsmen for a decent fee, although as you can see, they are quite simple if you have the equipment and tools. In my opinion, mastering the connection of optics is just as easy as the correct soldering of conventional copper wires.
True, such a need rarely arises, but let's look at the future; perhaps soon optical fiber will replace copper everywhere, and end devices will connect to it directly, and not through ONT.
Installing optical connectors
Let's look at how the most common SC type connectors are mounted. The vast majority of modems and sockets use this type. For installation we will need a set of special tools and materials.
Although it costs a decent amount, it is still cheaper than a fiber optic splicer. Such kits usually come with detailed instructions, so we will provide an approximate procedure for your reference.
Optical connector mounting kit
The steps for installing the connector on the cable are as follows:
- We remove the insulation with special wire cutters - a stripper. This tool has calibrated gaps between the cutting edges, allowing you to remove layers one by one without damaging the fiber itself.
- The Kevlar fiber is then cut to reinforce the wire sheath. This cannot be done with ordinary scissors due to its great strength. You will need stronger blades, which are most often found in strippers.
- Then the part of the connector is put on, which will fix it on the cable.
- Next, using a special compound or simply alcohol wipes, the hydrophobic coating on the glass fiber itself is removed.
- Next, glue is prepared and filled into a syringe, which will fix the fiber in the connector. A strictly measured amount of it is introduced into the channel, into which the exposed fiber is then threaded.
- After the glue hardens, the optical fiber is cleaved with a special tool.
- Then its end is polished.
- Finally, the remaining parts of the connector are put on, and it is crimped with a special crimp.
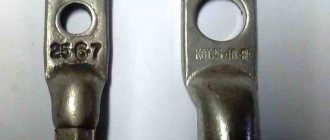
Connecting fiber optics with a mechanical connector
This method is simpler than the previous one: pieces of fiber optic cable are taken, with industrially mounted connectors (pig tails), and joined together with mechanical connectors. The disadvantage of this method is signal loss at the connections; it is comparable to a decrease in light intensity in the connectors themselves (it is clear that connectors cannot be abandoned). So it’s better to either weld or mount the fiber into the connector.
Interesting. Pig tail is translated from English as “pig tail”, a rather apt comparison.
Using the SNR-Link connector as an example, we will describe the execution of the work.
Mechanical connector
- The cable is stripped of its insulation and chipped.
- The ends of the cleaned cable are installed in the connector.
Inserting the ends of the wire into the connector
- Then the latch securing the joint is simply pressed.
Fixing wires in the connector
This is where the work ends. As you can see in the photo below, the test of this connection shows a loss of 0.028 dB, this is comparable to the losses in the connector, although according to the connector’s passport data, losses of up to 0.04 dB are allowed. By the way, the device is reusable.
Mechanical fiber connector test
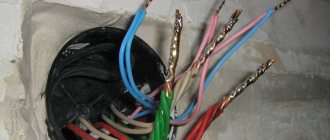
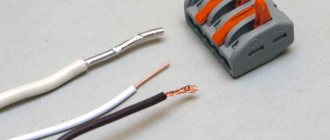
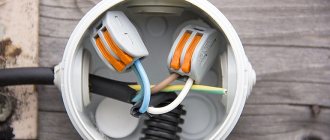
Preparing twisted pair and connector
- The ends of the wire need to be stripped from the outer braid to approximately 2-2.5 times the length of the connector.
- Each pair of cores must be untwisted into a braid.
- We distribute the cores in a plane according to the pinout diagram.
- We try on the length of the twisted pair cores and the connector to cut off the excess and ensure a tight fit of the braid to the connector.
- Pull the nylon thread aside.
- Press the bundle of wires with your finger and carefully insert it into the connector.
- Make sure that each core is in place and reaches the extreme points in the slide and will be covered by the contact knives when crimping.
Finalization
If the crimper turns out to be of poor quality or the hand trembles slightly, one or more contacts will be under-pressed.
Therefore it needs to be improved. This is where the flathead screwdriver mentioned above comes in handy. You need to place the slot on the contact of the under-compressed core and press firmly, but gently. The force should be enough to just press the contact and cut through the shell, so don’t overdo it. The same actions must be carried out with the shell retainer. Checking the operation of the twisted pair
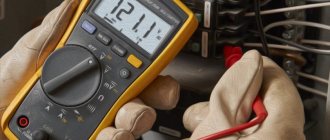
To do this, you will need a tester specialized in working with twisted pair cables. He will help you find a break, if any, a short circuit and check the crimp pinout. If you saved on a tester, then there is only one way to check the “quality” of work - simply connect one end of the cable to the router, and the other to the connected equipment (computer, laptop, surveillance camera or other network equipment. If everything works at the stated speeds, it means crimping of the twisted pair was successful.
Do you want to receive news regularly?
Leave your email and receive the latest articles from our blog. Subscribe so you don't miss anything
You have successfully subscribed!
Subscribe
0
(No votes)
Types of optical patchcords, pigtails, adapters
The classification of optical pigtails, patch cords and adapters is generally the same and is based on the following parameters:
- connector standard;
- type of grinding;
- fiber type - multimode or single-mode;
- type of connectors - single or duplex.
As a result of various combinations of all these types, a huge variety of modifications of connectors and adapters are obtained. Not everything is in this picture:
What do all these letters mean?
Let's take a typical marking of an optical patch cord. For example, SC/UPC-LC/UPC MultiMode Duplex.
- SC and LC are connector types. Here we are dealing with a patch cord - an adapter, since there are two different types of connectors;
- UPC - grinding type;
- Multimode is a type of fiber, here multimode fiber can also be designated by the abbreviation MM. Single-mode is labeled as SingleMode or SM;
- Duplex - two connectors in one housing, for a denser arrangement. The opposite case is Simplex, one connector.
Duplex example:
Types of polishing (grinding) of fiber optic connectors
The purpose of grinding or polishing fiber optic connectors is to ensure that the fiber optic cores are in perfect contact. There should be no air between their surfaces, as this degrades the signal quality.
The types of polishing currently used are PC, SPC, UPC and APC .
PC is the progenitor of all other types of polishing. The connector, processed using the PC method (including manually), has a rounded tip.
Please note that the figure shows that connecting connectors with a flat end is fraught with the formation of an air gap. While the rounded ends are connected more tightly.
Can be used in short-range networks that require low data transfer rates.
SPC is an improved version of PC, but grinding is done only by machine.
UPC is a nearly flat (but not flat) connector that is manufactured using high-precision surface finishing. It provides excellent reflectivity (compared to PC and SPC), therefore it is actively used in high-speed optical networks.
Connectors with this type of connector are most often blue.
APC is a connector processed according to a completely different principle: the ends are beveled at an angle of 8 degrees. This surface polishing gives the best results. Back reflections of the signal leave the optical fiber almost immediately, and due to this, losses are reduced.
APC polished connectors are used in networks with high requirements for signal quality : transmission of voice and video data. An example is cable television .
Connectors with this type of connector are green.
Attention!
Connectors with APC polish do not fit into connectors with other polishes (PC, SPC, UPC) and cause mutual damage.
PC, SPC, UPC polishes are mutually compatible.
Comparison of tip shape and reflected signal path in UPC and APC polished connectors:
The dependence of line losses on the type of polishing of the optical connector is shown in the table:
As you can see, polishing UPC (rounded ends) and APC (beveled ends) are the most effective. Therefore, patchcords and pigtails with this type of grinding are most often used.
Types of optical connectors
In practice, our fiber optic network installers in the vast majority of cases work with FC, LC, SC types. We will not dwell on rarer types of connectors for now.
F.C.
An old, proven standard. Excellent connection quality , especially FC/UPC, FC/APC.
- spring-loaded connection, due to which “pressing” and tight contact are achieved;
- metal cap - durable protection;
- the connector is screwed into the socket, which means it cannot jump out, even if accidentally pulled;
- Moving the cable does not affect the connection.
However, it is not suitable for dense placement of connectors - space is required for screwing in/unscrewing.
S.C.
Cheaper and more convenient, but less reliable analogue of FC. Easy to connect (latch), connectors can be placed tightly.
However, the plastic shell can break, and even touching the connector affects signal attenuation and back reflections.
In general, it is used most often, but is not recommended on important highways.
L.C.
A smaller version of the SC. Due to its small size, it is used for cross connections in offices, server rooms, etc. — indoors, where a high density of connectors is required.
The author of the development of this type of connector, a leading manufacturer of telecommunications equipment, Lucent Technologies (USA), initially predicted the fate of a market leader for his brainchild. In principle, this is how it is. Especially considering that this type of connector refers to connections with increased installation density.