Drilling a wire into a wall is difficult. Usually the installation is done very carefully. Trouble occurs in 2 cases out of 100, a person urgently looks for a way out, since the problem is quite serious.
When replacing a damaged wire, the electrician must completely remove the damaged fragment. The procedure is carried out by drilling the wall, which is then restored.
Options for solving the problem
When a break is detected, there are several options for solving the problem:
- Do wall grooves;
- Use decorative skirting boards for external wiring;
- Replace the damaged cable by pulling it.
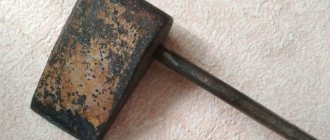
The most effective method of repairing a break is to make a groove at the level of the break and install an additional connection. For this work you will need a chisel and a hammer. On each side of the cliff you need to punch a 15 mm wide groove. This work must be done carefully so as not to damage the cable elsewhere. When the wires are freed, the damaged area is connected with special brands and everything can be reassembled. Mostly, owners refuse this method, since a lot of debris remains and they will have to refinish the wall.
A less drastic fix is to use external cable routing. If there is a break in the line, and there is no desire to destroy the wall surface, you can use decorative boxes to camouflage the wires. Today, construction stores offer a wide selection, so it won’t be difficult to choose according to style and size. The wire is laid on top of the wall, with internal wiring disconnected to minimize the likelihood of a short circuit.
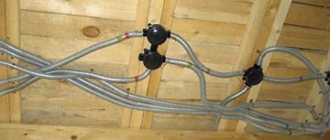
The third method is suitable for those who have recently replaced electrical wiring, and all work was carried out taking into account the installation rules. Today, for hidden installation of wires, special corrugated sleeves are used, in which the wires pass quite freely. Having determined the location of the break, you can stretch a new wire through the socket or switch to replace the damaged one. This method is perhaps the simplest and does not require extensive labor processes.
When a wire breaks inside a wall, there are several options for solving the problem, but everyone can choose for themselves what is best for them.
How to detect a break
To fix the problem, you first need to determine where exactly the wire is broken. If you made one hole, then you won’t have to search for long, but sometimes many holes are made before discovering a breakdown and then you will have to suffer. You can find a break in the wall using a special indicator. The voltage in the socket is checked; if the indicator lights up, then the phase is working, but zero is missing. Otherwise, the phase will not light up. To determine the location of the break, you can use the so-called “poke method”. An indicator screwdriver is inserted into each hole until the sensor indicates that there is a phase.
How to drill a wall
Before drilling a hole in the wall, you should familiarize yourself with the work algorithm. At the first stage, marking is carried out. Then you can proceed directly to the process itself. To begin with, the tool is turned on several times to mark the future hole. During the process, the drill should be periodically removed and the tool allowed to rest so that the equipment does not overheat and the motor does not fail. Some craftsmen dip the drill in cold water.
How to avoid getting caught in a wire
First you need to ask where the wiring is located in the wall. A wiring diagram will help you with this. If you can't find it, you have to think about how to avoid getting caught in communications.
To determine the location of the wires, you need to use a detector. It is applied to the place where drilling is supposed to take place. The device, however, has an error of several centimeters. To avoid getting caught in the wiring in the ceiling, you should look at where the light fixture and switch are located. From the first to the second, the wiring goes along a flat path without slopes.
In order to avoid unpleasant consequences, the wiring must be de-energized before starting work. Then, if you failed to get into the communications, at least you will eliminate the risk of getting an electric shock. Now you know how to avoid getting caught in wiring when drilling into a wall. But immediately after completing the manipulations, you should turn on the machine. If it doesn’t get knocked out, everything is in order, and the wiring remains intact.
Drilling holes in reinforced concrete
Markings must be made on the surface of the wall. The tool is first turned on at low speed to make a small indentation. When installing a plastic dowel is intended, the hole needs to be made slightly deeper
It is important to take into account that dust will accumulate inside the recess, which is not always realistic to remove from there, therefore, when calculating the depth, you should include a small reserve
Drilling tiles
When the choice of drill has already been made, you can proceed to work. If you have a tiled wall in front of you, you need to prepare some tools and materials:
- electrical tape;
- vacuum cleaner;
- drill;
- felt-tip pen;
- drill.
When the recess is supposed to be made small, you should stock up on equipment, which is known among the masters as a ballerina. In the central part of the future hole, the enamel of the lining is slightly chipped; for this, the tool is set at low speed.
Place electrical tape at the drilling point to prevent the drill from slipping. An alternative and more technologically advanced solution is to use a jig, which is a board with holes.
First, the tool is turned on at low speed, and then the rotation speed increases. Using a vacuum cleaner, a second person will immediately remove dust from under the equipment.
Drilling large diameter holes in the wall
When you don’t plan to get into the wiring and know how to avoid it, you should also take an interest in how to make a hole of impressive diameter. If you work in accordance with the recommendations, the result will meet your expectations. If you need to make a 150mm hole, you should use a Pobedit drill. If this parameter should be higher, you need to purchase an auger drill.
Drilling depth limiter
When choosing such components, you need to be guided by the diameter that should be obtained in the end. This element consists of two parts, one of which will be in contact with the surface and will not damage it. Typically, such a limiter is purchased complete with a screw fixation. The uniqueness of this addition to the tool is that it eliminates the distortion of the drill. This tool comes with an Allen key. It is fixed on the drill.
Precise hole drilling
Sometimes high precision is required when drilling holes in a wall. In order to achieve a positive result, you should glue a sheet of sandpaper on the conductor side. The dimensions of the element will be influenced by the area where the future hole is located. This will increase the adhesion of the wall to the device, and the master will be able to make a recess in the place where necessary.
Laying open electrical networks as original decor and getting rid of old wiring problems
Repair of hidden damaged electrical wiring is often accompanied by construction and restoration work that requires considerable effort: removing finishing materials, chipping walls, further sealing them, plastering the wall surface, covering it with decorative materials. This is reasonable when repair work to restore wiring is combined with major repairs.
But if the room does not require major repairs, then in some situations it would be more rational to lay new electrical wiring on the surface of the wall.
When laying a new electrical wire, you can provide for the allocation of special lines to different rooms or devices. Also in the distribution board you can install separate circuit breakers for powerful electrical appliances: refrigerator, washing machine, boiler, microwave oven, air conditioner, etc.
It will also be convenient to allocate socket and lighting groups room by room.
Regulatory documents for laying
The wiring of electrical cables through walls must be carried out in compliance with the requirements of two regulatory documents:
- Rules for the construction of electrical installations (PUE) are one of the main sets of laws in the electric power industry. This book is “sacred” for electricians. She explains in as much detail as possible what equipment is installed where and how correctly.
- SNiP 3.05.06-85 (in clause 3.18) (building codes and regulations) - considers the principles that should be taken into account when constructing buildings and laying electrical communications and cables in them.
Rules for electrical installations In addition, installation rules can be found in the Federal Law of June 22, 2008 - “Technical Regulations on Fire Safety Requirements.” Article 82 of this document describes the standards.
Search procedure
To find a cliff you will need:
- Indicator screwdriver;
- Locator or other device for searching for a break in hidden wiring in the wall;
- Screwdriver;
- Multimeter;
- Pliers;
- Knife with insulated handle;
- Insulating tape.
First of all, you need to define an emergency connection group. If you have a wiring plan, there is nothing complicated about it. If there is a phase on the damaged socket, then by turning the circuit breakers on and off, you can find the wire you are looking for. The presence of a phase is checked by an indicator. The connection group in which a problem is detected should be completely disconnected from the machine, disconnecting all cable cores.
After this, you need to sequentially ring all the connections, starting from the cable in the switchboard to finding the place where the sockets are connected by one wire. If there is access to distribution boxes, they need to be opened. If there are no internal problems, the damaged core is dialed from the connection.
If the boxes are inaccessible or the wiring is done without them, you need to remove the sockets along the entire length of the damaged area and ring through them. Most often, problems arise in the first outlet, since it bears the maximum load. If the damage is not found, then it is inside the wall.
How to restore wiring if a broken wire occurs under a wall
Sometimes it happens that you make a hole to hang a shelf, and suddenly the light on the lamp goes out or the socket stops working. In this case, there can be one reason: the wiring cable was damaged during drilling. Of course, completely changing the wiring in the house is impractical, especially if this communication was replaced quite recently; it is much easier and more profitable to eliminate a break in the wall.
Walls
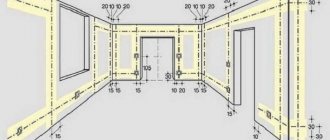
Things are much easier with walls, because... You can rely on logic and generally accepted standards to determine where the wiring goes, so you can avoid hitting it with a hammer drill. So, as a rule, the cable line runs parallel under the ceiling at a distance of 15 cm from it and goes down to the electrical points at right angles, as shown in the photo below:
To avoid getting into electrical wiring when drilling, it is enough to detect distribution boxes in the walls (this can be done with the naked eye), which will show the exact height of the wires. After that, you need to look at where the sockets, switches, and electrical panels are located. From all these points the cable rises upward, so it is better not to drill into the wall above them, otherwise the chance of getting into the wiring will be almost 100%.
However, this method of laying cables is not always found. In panel houses, the wiring is laid in channels (cavities) in the slabs. Due to the design features of the slab and the requirements for its rigidity, they run diagonally. You can see an example of their location in the figure below.
If you are unable to determine the location of the electrical line in an apartment or house using the methods described, it is better to use a special detector. There are inexpensive devices for finding hidden wiring. Their accuracy, of course, is not at the highest level, but with an error of 10-15 cm you can find the wires in the wall, which will allow you to avoid hitting them with a drill.
If you just need to hang a TV on the wall or install a kitchen (meaning hanging cabinets), it is not advisable to buy a detector. In this case, we recommend making a metal detector yourself. A simple homemade device will also show the approximate location of the wiring.
You can also try using an indicator screwdriver to detect hidden wiring, but not the one with a neon lamp, but the one with batteries and an LED. If you take it by the sting and move the back side along the wall, it glows near the line, although this method is not very accurate. We also recommend tapping the wall around the intended drilling location - this will likely “tap out” cavities and cable lines.
https://www.youtube.com/watch?v=6FCggE6q—U
Ceiling
The desire not to touch the wiring when drilling the ceiling most often arises during the installation of a chandelier. If a hook for hanging the lamp is not provided, but the wires are laid out for connection, it is first of all important to know the following:
- In panel houses, cables are most often routed along the ceiling in voids, so in order to avoid getting caught in the wiring when drilling the slab, we recommend that you initially pick out the place where the wires exit a little. This way you can see where they are going and can retreat to a safe distance. The hole can be plastered over later; besides, the plate from the chandelier will hide all the defects.
- If the ceiling is made of a monolith, then, as a rule, the electrical wiring to the chandelier is routed vertically from the floor located above, so you need to step back a little from the lead-out wires and drill a hole.
- In a private house, electrical work is carried out under the plaster, therefore, as in the first case, it is recommended to dig up the ceiling a little and determine the direction in which the electrical wiring runs.
To avoid getting into the wiring when drilling the ceiling, you can also use a special detector, so if you doubt your abilities or for some reason could not find the wire in the wall using our advice, it is better to call a professional electrician. For a small fee, the master will do everything safely using his experience and with the help of a detector, and this is the main thing.
Finally, we recommend watching a video that clearly shows how the hidden wiring detector works:
We hope that now you know how to avoid getting caught in wiring when drilling walls and ceilings with a hammer drill. Do not forget that you need to drill only when the voltage is turned off, and after creating the hole, you can turn on the machine and check if it works.
Is it possible to lay VVGNG cable without corrugation?
Many people, faced with installing or replacing wiring for the first time, are wondering whether it is necessary to lay electrical cables using corrugated cables.
It is important that electrical wiring is installed by a professional. Many unscrupulous workers may neglect the rules, which can lead not only to a lack of lighting, but also to a fire.
The fastening of the wires depends on the type of base. Wires can be laid on a concrete or wooden base. The wiring can also be installed in a groove, which is covered with a thick layer of plaster, or on an open surface. If the cable has a fireproof sheath, then it can be secured without the use of corrugation.
In what case is corrugation necessary:
- Hidden wiring with combustible bases;
- If you need a fireproof gasket.
Corrugation is capable of not supporting combustion. If we are talking about a wooden house or frame structure, the rules do not allow laying an electrical cable using a corrugated pipe. To find out more detailed information, you can study the rules for design and installation of electrical wiring.
Methods for identifying hidden wiring
You can find wires hidden in the wall without the help of special tools. One of these is the voltage indicator. However, here it is worth considering exactly at what depth the wires are hidden, since in concrete walls it is most likely impossible to determine the place where the wire goes with a voltage indicator.
To search for hidden wiring, the voltage indicator is turned over and brought upside down to the wall. To find the wires, therefore, it is enough to move the indicator along the wall. When electricity is detected, the device's LED will turn on.
Also today there are professional devices on sale that can determine the presence of voltage or some material in the wall, for example, metal or wood. The cost of such devices is quite high and depends on the depth at which they can detect hidden wiring.
If you have knowledge in electrical engineering, then you can make such a hidden wiring tester with your own hands. To do this, only a few transistors, an LED and a regular battery are used as a power source. The diagram is not difficult to find on the Internet, but as for functionality, a homemade hidden wiring detector is capable of detecting a wire in the wall at a depth of up to 3 centimeters.
Source
Drilling walls and ceilings is a common task for an electrician, installer, or repairman. And the average person may occasionally need to drill a hole in the wall or ceiling. And if you have a drill or hammer drill at home, then you can do everything yourself, only by answering the question of how to avoid getting into hidden wiring.
If you get a drill or auger into the wiring, then in the most optimistic case, you will break the cable and your sockets will stop working. With less luck, a short circuit will occur through the tool, the circuit breaker at the entrance to the apartment will trip, but the wiring will again have to be repaired. In the worst case scenario, a person will suffer an electric shock or even a fire. Therefore, when drilling, it is better not to get into the wiring. How to avoid getting caught in the wiring will be discussed in our article.
Rules for laying wiring in an apartment
These rules are based on PUE-7 clause 7.1.32-58. We will not quote the instructions in full, but will only explain in an accessible form the basic rules for running electrical wiring in the wall
So, if you pick up a drill and plan to drill a wall, then first pay attention to the following points:
- The wire in the wall must lie strictly horizontal or vertical relative to the floor. It is not allowed to let it go along a curve or any other trajectory.
- Rotations (corners) of the cable must be made at an angle of 90°. Turns at any other angle are not allowed, so with a 99% probability the wiring in your apartment will not be laid diagonally (if you have the same case of 0.1%, then scroll down the article).
- Switches must be located at a height of at least 0.9 - 1 m from the floor and at a distance of at least 10 cm from the edge of the door frame on the handle side, so that when opening the switch is not covered by the door. The cable (phase wire from the panel and phase wire to the chandelier) always extends upward from the switch, so it should not be at the bottom. In children's institutions, the switch should be located at a height of 1.8 m from the floor.
- The minimum distance from the ceiling to the wire should be 10 - 15 cm (except for the exit point to the chandelier). The same distance should be from the top edge of the door frame and from the top slope of the window (see figure).
- The socket should be located at a distance of at least 30 cm from the floor, so the wire coming from it will be located at the same height.
- The minimum distance from the wire to the corner of the room should be 10 cm.
- The minimum distance of the switch and socket from the shower stall should be at least 0.6 m; accordingly, the wiring will also be located at this distance, so everything that is closer can be safely drilled.
- The minimum distance of the switch or socket from the gas pipeline must be at least 0.5 m, which means the wall above the gas stove is definitely without wires and you can freely hang a shelf or hood there.
- It is allowed to install the socket (and along with it the wiring supplying it) at a distance of at least 0.5 m from the radiator battery.
In most cases, conscientious electricians install the wiring in accordance with the standards, so taking into account the above requirements, it is almost impossible to hit the wire with a drill. However, if your house is already decades old, and you doubt that the cable was laid according to the instructions of the PUE, then you will have to use heavy artillery.
How do you know which wire goes where?
The easiest way to detect a phase wire is to search with an indicator screwdriver. Any home craftsman who does electrical work in an apartment should have this simple tool - be it full electrical installation, simple replacement of lamps or installation of lamps, sockets and switches.
Interesting materials:
How to change the title block in the specification in compass? How to change the specification in compass? How to change the frame color in a compass? How to change the color mode in Corel? How to change skin in Minecraft? How can I change my passport details in Mokka? How to change personal data in Odnoklassniki? How to change distribution group in Outlook? How to change your voice to Russian in Pubg Mobile? How to change controls in PES 2019?
How to properly extend and connect two electrical wires and cables.
Often in everyday life, many are faced with a problem: how to extend or restore a broken electrical cable or wire, in the following cases:
- When you drilled or cut a wall or floor with a grinder, and at the same time accidentally cut an electrical wire or cable laid in the wall and not visible to the eye. In this case, as a rule, sparks are visible at the site of damage and the Machine turns off or knocks out the plugs. In addition, sockets and lighting that were connected after the damaged section of electrical wiring stop working.
- It often happens that one or two wires break off in the wiring box for a socket or switch, and the remaining length is not enough to connect them.
- And sometimes it is necessary to move the outlet a little higher or closer to the places where electrical appliances are connected.
You should know that the best option for repairing damaged sections of electrical wiring is to completely replace the damaged section from the junction box to the outlet or switch. But this work often requires chipping and damaging finishing materials - tiles, wallpaper, decorative plaster, etc.
Some people connect damaged wires or cables by simply twisting them together and then wrapping them with electrical tape.
But doing this is neither correct nor reliable - due to the lack of reliable contact at the connection point, over time the twist oxidizes and begins to heat up!
You can restore or extend an electrical wire yourself, but it is important to remember that splicing is permissible when only wires of the same metal are in joint contact with each other. Only in the terminal block is it permissible to connect copper and aluminum conductors, i.e.
Because in it the wires do not directly touch when connected. In other cases, do not twist copper and aluminum together or press them together, since these two metals, when in contact with each other, begin to oxidize and the electrical contact disappears over time.
If your electrical wiring in the switchboard is connected to RCDs or differential circuit breakers, which are triggered when current leaks from the electrical network, then it is necessary to very carefully and reliably isolate from each other not only the phase and neutral connections, but also the grounding conductor.
The best option would be to use a heat-shrinkable tube, which is first put on the wire, and after the wires are connected or extended, it is put on the junction and heated with a lighter, gas burner or a special hair dryer.
When heated, the tube contracts and seals reliably.
In humid areas, reliable and durable connections by soldering (welding) only and improved insulation of connections are recommended.
Connect electrical cables with a cross-section of 4 or 6 square millimeters to the electric stove using soldering.
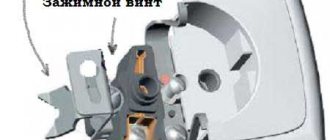
If one wire or two has broken off in the wiring box for installing switches and sockets, but there are still ends of at least 1.5 centimeters, then I advise you to extend the wires using a terminal block (on the left in the picture below), strip the wires, insert them on both sides one at a time and tighten them with a screwdriver. Fast and reliable. But if there is not enough length, then you will have to break the section up to the box to extend a new cable section to the socket box. The connection procedure is similar to restoring a broken cable.
Welding of cores is carried out using a special factory-made apparatus.
Always connect two cables according to the corresponding core colors. This will help you correctly connect the grounding conductor on the outlet.
drilled the wiring. what to do?
In general, a friend of mine was drilling a hole in the wall and probably hit the wiring because the plugs were immediately knocked out. Now everything seems to be working (probably I shorted the wires with a drill), but it’s also scary to leave it in this state. I didn’t see the situation myself, perhaps the plugs were knocked out for some other reason (the drill shorted out), but as they say, we will consider the extreme case - the wiring in the wall is damaged
What can you do about it?
If we consider the extreme case, then the case is not entirely pleasant. It is also more unpleasant because the wiring is damaged, but not broken. If you leave it like this, it will fail at any moment. Better to fix it right away. To do this, you need to get to the wiring, cut it off at the point of damage and carefully strip off the ends of 60-70mm. Then you need to make an insert by connecting the ends with a twist - this is the most reliable connection (the twists will be about 50mm) and insulate it very well with PVC tape. Here you need to pay attention to the uniformity of the wires being connected - copper-copper, 1.5 square-1.5 square, etc. Well, all that remains is to properly deepen the groove so that all this equipment will fit and plant it on alabaster. This connection will last no less than the wiring.
Carefully hollow out a recess in the wall - do not damage the wire - and install the junction box. Or start a major overhaul.
avmal wrote: twisting is the most reliable connection
SAver wrote: because the traffic jams were immediately knocked out. Now everything seems to be working (probably I shorted the wires with a drill), but it’s also scary to leave it in this state.
If he took out the wiring and knocked out the short-circuit plugs, then this should be noticeable on the drill. If the wiring is damaged, then definitely install a junction box. It is better to avoid twists - this is the first thing that fails in apartment wiring. And especially not to cover up the joint tightly. By the way, you can immediately think about how to use the unexpected joy in the form of additional wiring - is there a need for an outlet nearby?
Related article: How to remove the gap between the bathtub and the wall
The stupidest thought I've heard today, Slawa, is about twists. Remember once and for all, if the connection cannot be avoided, then the most reliable place in the apartment wiring will be a GOOD twist. If you are confident in the quality of the twist, then there is no need for a junction box, although the PUE says the opposite. The junction box, in this case, serves for access to connections, their inspection and periodic pulling. The twist does not require such maintenance. Although, if such a box will pleasantly complement the interior of the room, then that’s another matter. I doubt it, of course. In any case, the design of the apartment is the owner’s business.
avmal wrote: Remember once and for all, if the connection cannot be avoided, then the most reliable place in the apartment wiring will be a GOOD twist.
I can send you a photo of two aluminum strands heating up well
Please send it - it’s very interesting to look at a PROPERLY made heated twist. I have never seen anything like this in my life.
They are 40 years old Al 2.5 mm2 at 10A are already hot - both phase and zero.
Perhaps we are talking about Insulated Twists (PPE)? Then I will agree with “reliability”.
avmal wrote: The stupidest thought, Slawa, that I have heard today - about twists.
I'm flattered. It's not every day that I get to say the stupidest thought of the day.
avmal wrote: Remember once and for all, if the connection cannot be avoided, then the most reliable place in the apartment wiring will be a GOOD twist.
Yes Yes. I've already heard this somewhere. I remembered that the housing office electrician explained why he didn’t use terminals for connections. Indeed, what idiots they are - they come up with all sorts of terminals, and you carry them. Either it’s with pliers, or the aluminum is from the 19th year. Moreover, smearing a box is the same as hammering a wall, not picking out alabaster - what nonsense. They'll write to the PUE, by God. And if there's an electric shock coming from the wall, there's no point in leaning on it, not on a tram! I twisted it, covered it up, got a fifty-kopeck piece - and hello, what a PUE!
It’s in vain that you, Slawa, are being ironic about the terminal blocks. They were invented not to improve contact, but to simplify installation. At the same time, do not forget that copper and aluminum have fluidity and screw terminal blocks must be periodically tightened. And WAGO is also not a panacea - the spring ages and weakens over time. This is no longer from theory, but from practice. And regarding energized walls, I wrote that it is necessary to insulate VERY WELL, i.e. the insulation must be equivalent to that of the wire. You also probably read about this in PUE, SNiPs, GOSTs, etc. Gouging out a wall is also not a tricky thing, just ask the owner if he needs it. As for aluminum from the 19th year, it just needs to be changed.
Open the wall, remove the broken wire, drill a hole for the box, glue the box, insert wiring into it, make connections, close the box with a lid.
avmal wrote: Remember once and for all, if the connection cannot be avoided, then the most reliable place in the apartment wiring will be a GOOD twist.
“But the men don’t know. » If you strip 7 cm of wires and carefully twist them, will you get a GOOD twist? or are there additional conditions?
From practice: In my apartment, a brick walled up in my apartment caught fire. And she lived for a long time. About 10 years ago. But as soon as they started turning on the microwave and electric kettle, there was a smell of smoke coming from under the plaster. I picked it apart, and around the twist all the insulation was charred. Even as a child, I understood a simple thing - if something does not work and there is a twist on the power cord, then the fault is almost certainly in this twist.
From the theory: The contact area of any two round objects tends to zero. To increase the contact area, you must either solder, or boil, or compress the wire with all sorts of clamps to deform the wire. Due to the weak mechanical strength of the twist, weak movements of the twisted wires are possible (including thermal deformations). Any such movement can lead to the fact that the flattened section of the twisted wire falls on the unflattened one, that is, the contact area will sharply decrease. That's all reliability is.
This happens quite often. With great difficulty we hang the carpet on the wall, but we are not happy with the result for long: for some reason the lamp in the room stops burning. Or we drill a hole in the wall to hang a shelf, but sparks fly out from under the drill, a crash is heard, and the apartment plunges into ominous darkness and silence.
The reason for the misfortune is simple to the point of disgrace - we were unlucky and damaged the hidden electrical wiring cable . In the case of a carpet, most likely the phase or neutral conductor was broken. And when they were preparing the holes for the shelf, they damaged the insulation of both cores and caused a short circuit (the drill, of course, can be immediately thrown away).
Related article: How to hang a pear on the wall
To resolve the situation, the line damage must, of course, be found. In the case of a shelf, this will not be any difficulty - where they fought at the time of the short circuit, there is a damaged area.
It will be more difficult with the carpet, which we successfully hung after punching a dozen holes. Two questions arise. First: “Which wire is damaged - phase or neutral?” And the second: “Which hole exactly did we damage the cable line?”
If, when installing a dowel and a self-tapping screw in a hole, we break the phase wire , then there is a danger of electric shock. Self-tapping screws, metal profiles, metal decorative and interior elements - all of this can be energized if installation is unsuccessful. You can verify the absence/presence of danger using a working and reliable indicator. In addition, we must remember that there can be not one damage, but two or more. The identified danger should be eliminated by first disconnecting the voltage: unscrew the screw, dismantle the metal parts.
Next, we need to decide which part of our apartment electrical wiring has failed as a result of damage. It is extremely rare that after a line is damaged, the light in the entire apartment goes out; usually one lamp or one or more sockets simply stops working.
If the socket does not work, then you can check the presence of a “phase” in it using an indicator. There is a “phase” - the neutral conductor is damaged. There is no “phase” - we look for the place where it breaks using devices that respond to changes in the electromagnetic field, for example, an indicator screwdriver with a phase detector.
Just remember that extraneous cable lines running parallel to the test subject can cause interference and distort the instrument readings. Therefore, group circuit breakers that are not related to our tests must be turned off.
If the lamp refuses to work, the input cable of the box, the switch cable, or the lamp cable itself may be damaged. Usually, by the location of the box, you can understand which cable we are dealing with. Damage to the phase conductors of the luminaire wiring is detected when the switch is on.
In any case, the points where the phase conductors are broken are usually quite easy to find.
With a damaged neutral conductor the situation is a little more complicated. It will be necessary to do some preparatory work: turn off the circuit breaker of the affected group, disconnect the damaged neutral wire from the bus and apply a “phase” to it. Further, the damage can be found in the same way as in the case of damage to the phase wire.
A similar method is used to detect damage to the lamp switch cable if it is located after the switch itself. Since both conductors of this cable are phase conductors, it will not be possible to find out anything under voltage in this situation. It will be necessary to turn off the circuit breaker and the switch, and then apply voltage to the phase conductor from the lamp side - then it will be possible to find the break point.
When searching for faults in neutral conductors, it is often unknown which of the wires on the N bus in the distribution board belongs to the damaged line. Then you can disconnect the input neutral conductor from the common bus, open the nearest branch box of the affected group and, having determined the neutral wire, apply a phase to it from the load side. Then everything continues as before.
But finding the damage is only half the battle. As a matter of fact, you don’t have to do this at all, but immediately replace the damaged cable section. A lot depends on the situation. Let's say a damaged wire runs from a junction box to a light fixture, outlet, or switch. Then it makes sense to change the cable completely.
But if the group cable coming from the apartment panel is damaged, replacing the entire cable may seem impractical. After all, the cable can run along the walls of several rooms and have a large length. And in order to replace part of the cable, you will need to install at least one additional branch box, and this already involves clearing part of the groove. The groove will need to be cleared to free the ends of the cable running in the wall and to prepare the hole for the box.
Clearing a groove is a responsible matter and requires caution. This is best done with a hammer and chisel, breaking off small pieces of plaster and being careful not to damage the cable. Of course, the voltage must first be turned off. You should refrain from using power tools, because all it takes is one careless movement and the damage will become even more serious.
It is necessary to clear the groove approximately 15 centimeters from the damage in both directions. Then you need to move the ends to the side and use a hammer drill with a crown to punch a hole for the branch box. We install the box using alabaster, and insert the cable from the groove into it. If the damage has not significantly shortened the length of the cores, or there is some reserve, then you can insert the cable into the box on both sides and connect the cores with standard terminal blocks. That is, it is possible to do without replacing the cable by simply connecting the old cores by color. This is especially useful if the cable is damaged in only one place.
Related article: Do-it-yourself wall gating for wiring
The new part of the cable wiring, if any, is usually mounted in a plastic box (cable duct). The most important thing here is not to overdo it and damage other cables while drilling holes for the dowels. Well, don’t forget to disconnect and plug the old and no longer needed part of the wiring.
We close the newly mounted branch box with a lid, plaster it, level the wall and glue the wallpaper - the work is completed, you can apply voltage.
Conclusion.
Although it is absolutely clear that damage to a hidden wiring cable is not a “tragedy,” when performing repair work, it is still better to first use devices to search for live conductors so as not to create unnecessary problems. Better yet, have a detailed plan for the location of electrical wiring lines with an exact indication of the height of the cables. Still, repairing damage is quite a troublesome and dirty task. And such repairs will not benefit the interior decoration of the premises in any way.
Looking in the wall
The fastest way to detect the location of a phase conductor break is to search using a locator. The device consists of a receiver and a generator. The generator is connected to the damaged wire: the negative terminal of the device is attached to the whole core and grounded on the access panel, the positive terminal is connected to the damaged core.
After this, the generator is turned on in the whole core, and pulses are sent from it. The locator receiver must be moved along the wiring route.
The receiver responds to impulses from the generator and emits a sound signal. Above the rupture point, the sound signal stops.
To clarify the location of the break, the generator is connected to the other end of the damaged area and the search procedure is repeated. Ultimately, the sound signal disappears at the previously detected point.
A counter search for the accident site is a necessary condition, since the accuracy of determining breaks is usually approximately 10-15 cm. The more accurately the location of the damage is detected, the less work will have to be performed.
Sometimes problems arise with the neutral wire. In such cases, when checking the contacts, a faint glow is observed on the indicator screwdriver when it comes into contact with the zero contact. People who have no experience troubleshooting electrical faults interpret this as “two phases”. When checking with a multimeter, any voltage in the range from 0 to 220 V can be detected on the contact.
It should be remembered that if the zero is broken, the faulty socket can produce an electric shock, since it has a phase. Searching for a zero break is carried out in exactly the same way as searching for damage to a phase conductor.
If you don’t have a locator at hand, you can find the break point using a radio receiver. The receiver is tuned to any medium-wave channel, and a low-power electrical appliance, for example, an electric razor, is plugged into an emergency socket. The switched on receiver is slowly moved along the route.
The integrity of the wire is indicated by noise, crackling or other interference. Above the damage, the nature of the interference changes or it disappears altogether. Find out what other devices you can use to determine the breakage of hidden wiring in this article.
In the place where the integrity of the cable is broken, the groove is opened with a perforator or a hammer.
Elimination of broken phase and neutral wires
Having found out the exact location of the cable break and determined its peculiarity (damage to the “phase”, “zero”), you can begin to repair it.
To eliminate a damaged phase wire, follow these steps:
- First of all, you need to disconnect the phase wire.
- Using a hammer or other tool, remove plaster or other finishing from the wall surface. It is necessary to clear the area along the route by approximately 10-15 cm, covering the area to the right and left of the expected center of damage.
- It is necessary to separate the damaged core from the network, being careful not to touch the insulation on other cables.
- It is better to connect copper wiring by soldering. To do this, you need to take an additional piece of a similar product from which the repair jumper is made.
- It is also advisable to first place a polyvinyl chloride or heat-shrink tube on the core of the damaged cable. The ends of the jumper are twisted with the ends of the broken wire, after which the connections are soldered.
- Insulating tape is applied tightly (in several layers) to the repaired area, after which the tube covered with the wire is carefully pushed onto it. This ensures the tightness of the fastener.
Aluminum wires are less amenable to soldering, which also requires special solder and flux. In this case, the most reliable connection method will be the WAGO terminal, and the place of its attachment must be wrapped with electrical tape and additionally covered with sealant.
The wires can also be connected using a junction box. To do this, the insulation is removed from the broken wire, after which its ends are separated in different directions. Using a hammer drill equipped with a special crown, a hole is punched in the wall, the dimensions of which coincide with the parameters of the branch box.
The device is inserted into the opening, after which it is secured with alabaster. The wires are placed in the box, while the damaged wires are connected by color and wrapped with insulating tape. Finally, the box with the restored wires is closed with a lid.
If the cables are placed in special tubes, the damaged wires should be carefully pulled out, and new wires should be inserted in their place using a pulling device.
If the neutral cable is damaged at the beginning of work, it must be disconnected from the bus by attaching the phase conductor. The rest of the process coincides with the regulations described above.
After any type of repair, the grooves are covered with plaster. It is possible to apply voltage to the repaired wiring only after the coating has completely dried.
