Plasterboard finishing of walls and ceilings of premises includes not only the assembly of the frame base and its covering with panels, but also many other related works, including laying communication lines in the box. Some of them are carried out preliminary before starting upholstery repair work, while others can be carried out in a complex.
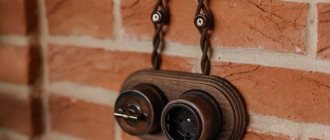
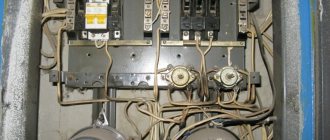
Example of wiring under drywall
Wiring under drywall can be laid in several ways, using various technologies. How is this done and what is required for electrical work, taking into account its implementation in conjunction with finishing?
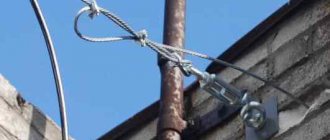
Diagram of wiring under drywall
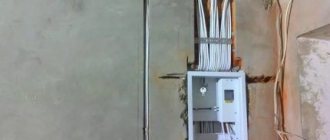
How to properly install electrical wiring in plasterboard walls
Ideally, cable laying in drywall should be carried out in parallel with finishing work.
If you compare this process with installing electrical wiring using other methods, then much fewer difficulties arise. The main thing is to follow the list of technical recommendations and rules. For example, the electrical network should be reliably protected from any mechanical damage associated with the installation of sheathing on the frame.
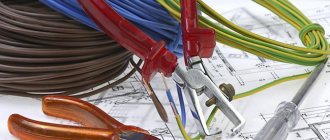
Laying cables in a plasterboard wall
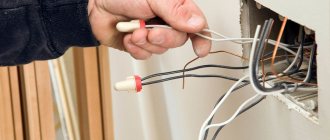
The finished system must guarantee complete safety during operation. It is imperative to think about situations where there is a need to replace components installed under sheets of drywall. In this case, you will need free access to cables and other elements without damaging the wall finish.
Specific features of gating
Next, we will consider in detail the gating of walls made of different materials.
How to make grooves in wood
All of the above tools are suitable for wooden walls with the exception of a hammer drill. Instead of a chisel, it is better to use a chisel, but the principle of operation remains the same. Create two parallel cuts at equal distances and remove the wood between them using a chisel. More specific tools can also be used:
Thus, there are more tools for chipping wood, as well as opportunities to do this. Ideally, you should choose one of the listed tools as they are designed for woodworking.
How to make grooves for wiring in aerated concrete
Ideally, you should use a manual wall chaser for aerated concrete, since the blocks are easy to process. The tool is a metal tube with a handle and a protrusion on the other side. It is easy to use and leaves behind a minimal amount of dust. An alternative is to use a circular saw or angle grinder, but you will need good respiratory protection.
There are certain nuances. Walls made of aerated concrete or foam concrete blocks often contain reinforcement, so the process of gating them requires a special approach. Before making recesses, make sure that your actions will not reduce the strength and integrity of the structure.
Shooting brick walls
If you need to lay wiring in a house without finishing the walls, then usually they do not do gating. Instead, a flat cable with cores of the required cross-section is installed on a brick wall, after which it is hidden under a layer of plaster with a thickness of 30 mm. This is enough to hide a 3x2.5 or 3x4 cable. Larger gauge wire is used much less frequently.
Wall chipping, if it is still required, is carried out using any of the listed tools. The process is identical to creating recesses in concrete walls. However, brick is softer and easier to process.
Drywall cutting
Sheets of drywall are very thin, so it is impossible to make grooves in them. Usually the cable is hidden under the fragile sheet structure, and the only option may be to drill the holes necessary to install an outlet or a seat for a switch. This is done using a hammer drill.
Strobe in tiled floor
Ceramic tiles are often used as finishing in the bathroom or kitchen. Often there is a need to make grooves in the wall. And there shouldn’t be any problems in this regard: the only caveat is that you need to install special diamond wheels on a grinder or wall chaser. To prevent cracks from forming in tiles, avoid using a hammer drill.
Nuances with load-bearing walls
Before carrying out repairs related to laying new or replacing old electrical wiring, you need to draw up a project. Approval documents will be required, which indicate the location of load-bearing walls and the possibility of making recesses in them. The resulting plan clearly indicates where, where and how to lay the cable, what width and depth the grooves should be, etc.
If you have doubts about the feasibility and admissibility of making grooves in a load-bearing wall, then try to obtain the appropriate permission from the BTI. The organization that designed the house will provide all the documents and clarify the safety margin of the building. A permit will be issued in most cases.
Grilling walls for air conditioning
Particularly large grooves are required for the installation of standard air conditioners consisting of indoor and outdoor units. The width of the groove must be at least 60, depth - 50 mm. This will allow you to hide all copper tubes with insulating materials, wires and corrugation used as a condensate drain.
Features of the work
Since there is no universal method for installing electrical wiring under plasterboard sheets, the main methods will be discussed below. In any case, you should start by drawing up a detailed diagram. The locations of the sheets themselves, joints and screws for fastening are indicated on the walls.
Any socket or switch must be installed at least 200 mm away from the edge of the drywall. The requirements are similar when working with metal profiles, so installation lines are calculated with an eye to future installation. After this, they begin to take measurements and transfer the diagram onto paper. Having completed all the steps, upon completion of the installation of the gypsum board, you will know where to lay the communication elements.
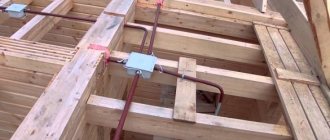
Cable wiring and installation of the frame under the gypsum board
Work order and groove location rules
The preparatory stage includes drawing up a plan for future cable laying. Follow the following step-by-step instructions:
Then you can proceed to the processes of laying and fixing the cable inside the groove. It would not be superfluous to re-check the integrity of the product (insulation) before installation. This check is then repeated after the installation is completed. A special device, a megohmmeter, or a regular tester used to test the wires is suitable. Then the grooves are sealed with cement mortar and the cable must be re-tested with a tester.
Rules for laying grooves with your own hands
When driving a nail into the wall to place a mirror, shelf or picture, first make sure there are no hidden wires. If this is done in a new apartment or a relative’s house, then you are unlikely to have a documentary record of the wiring with a cable layout. Therefore, certain rules and regulations have been adopted. A professional electrician can look at an outlet or switch to mentally determine where the wires powering the device are located. Thanks to this, he will avoid damaging the integrity of the wiring when he drives a nail into the wall.
When planning the location of cable grooves, follow simple rules:
The average depth of the groove is 20 mm, and the width directly depends on the number and dimensions of the wires being laid. However, usually the overall size is 20-25 mm. Compliance with these rules is a mandatory and sufficient condition for performing high-quality and technically competent wall gating.
Features of reinforced concrete walls
The previously listed rules are universal regardless of the materials from which the walls are made. Depending on the surface structure, certain features are added. Reinforced concrete products contain reinforcement that absolutely cannot be cut.
The overall dimensions of the future groove directly depend on the depth of the reinforcement in the reinforced concrete blocks. To search for a metal frame, a regular wire detector is suitable. Rarely, small recesses are made for panel houses, then the wiring is mostly hidden not inside the wall, but under a thick layer of putty (plaster).
The second option is to use the open installation method, fixing cable ducts along the walls and ceiling or choosing retro wiring. It is allowed to tap reinforced concrete walls if there is a special permit issued by the design organization involved in the construction of the residential building.
Which cable to choose for electrical wiring under gypsum boards
Finishing in a house or apartment can be done with three different types of plasterboard sheets: ordinary, moisture- or fire-resistant (GKL, GKLV and GKLO, respectively). GCRs are suitable for ceilings and walls: they are inexpensive and look aesthetically pleasing. The main disadvantage is poor protection from moisture, the possibility of smoldering of the internal part with subsequent inflammation and release of toxins. For this reason, when installing hidden wiring, it is important to use gypsum boards.
As for the wire, the VVGng cable is suitable here. The last two letters indicate that the product is non-flammable. When installing the cable under the ceiling and in a free space with a height of at least 15 mm, you can additionally use corrugated PVC pipes. If clearance is limited, pay attention to the VVGng-LS wire, which has double insulation. However, its cost in comparison with conventional VVGng will be 1.5–2 times higher.
Power cable VVGng-LS 3x1.5 with double insulation
Wall chaser
With this electric tool you can professionally make furrows of excellent quality in any mineral substrate: from brick to foam concrete. Many people believe that a wall chaser is a type of grinder. However, it has a number of design features that allow work to be carried out 2 times faster and with a minimum level of dust.
Differences from the grinder:
- It has two parallel diamond-coated saw blades; the depth of the saw can be set independently.
- The stability and accuracy of the tool is ensured by a slide with guide rollers.
- The protection of the surface from damage by the discs and the safety of the worker is ensured by the immersion system: when removing the cutting elements from the grooves, the spring-loaded slides are lowered and the discs become inaccessible for contact.
- Dust absorption occurs in the protective casing and is transferred through the pipe to the collection box of the industrial vacuum cleaner.
The principle of operation of the furrow maker is simple and consists in the fact that the operator sets the required groove depth on the disks and guides the device along the intended line. Then the inside of the gutter is removed with a chisel. The lines are perfectly straight. Buying this tool for personal use is quite expensive, so it is better to invite a professional.
Wiring protection
Modern cable for electrical networks is made of copper and covered with a special sheath. When installing systems under a plasterboard finish, there is a high probability of damage to the wires, since the gypsum boards are attached directly to the perforated frame with self-tapping screws. Thus, it is important to use protective corrugation to eliminate the possibility of damage to the wire by self-tapping screws.
Corrugated tubes are characterized by increased flexibility, so they do not complicate the installation process, providing reliable protection from mechanical stress. This approach eliminates the risk of short circuits. Additionally, such products increase the waterproofing properties of the wiring, which is important when using the network in the kitchen, bathroom or toilet, and also protect the cable from rodents (in private homes).
Installation of wiring under plasterboard in corrugation
Alternative options are polyvinyl chloride tubing and plastic cable ducts. Their protection is slightly better, but the installation process is significantly more complicated. Unlike corrugation, it is almost impossible to bend ordinary plastic.
Materials for sealing grooves
Before caulking the grooves under the wiring, you need to select the appropriate material:
- Gypsum plaster. Used in rooms with high humidity, complete drying time is 24-26 hours.
- Plaster mixture based on cement and sand.
- Ready-made mixtures, for example, Volma, Osnovit and Rotband.
- Gypsum glue, for example Perlfix.
It is important that the wire is intact and not insulated in several places. It is strongly recommended not to use foam or sealants to seal holes.
Laying and fastening of wiring
Plasterboard sheets can be installed on walls or ceilings with or without a frame. Even partitions in the house can be created from them. The second option has recently become less relevant. However, if this is the one chosen, then you should prepare in advance special places where the cable will be laid. You will have to groove the surface of the walls, and then hide the electrical wiring inside the groove.
The situation is similar with the installation of sockets, switches and panels, only you will have to make not grooves, but entire “pits”. To fix the cable on the wall, use special clamps.
The frame method of installing gypsum boards looks different. As in the option discussed above, you can hide the wiring inside the groove, holding it with clamps. However, it is much more convenient to fix the cable on a metal frame to which the drywall is attached.
Fastening the cable to the metal frame with plastic ties
The frame may have pre-drilled holes for plastic ties. If they are not available, they can be done independently using a drill. This option is the most preferable.
Tools and materials
The list shows all possible accessories. You can reduce their number while ensuring general fire and electrical safety.
- Corrugation for laying cables. Desirable for installation between gypsum boards and the base wall. Can be plastic or metal. The latter is used if the insulation is made of a material that supports combustion.
- Instead of corrugation, you can use a cable box, but this is overkill from a cost point of view.
- Power cable. When laying in corrugation, one layer of insulation is allowed; if the wiring is without corrugation, the insulation must be three layers.
- When installing into a base wall (grooving), double insulation is sufficient.
- Grounding cable to create an additional potential equalization system. Profiles under drywall should be grounded.
- Accessories for fixing the cable (corrugation): clips, plastic bushings for holes in the profile, ties.
- Installation boxes for drywall or regular installation boxes if the gypsum boards are glued to the wall.
- A device for making holes in profiles and drywall - so-called “ballerinas”, or crowns. Of course, a drill.
Methods for installing wiring under gypsum boards
Below are four options for laying wiring under plasterboard walls.
If the sheets are glued to the base wall
In construction, this finishing method can be compared to applying conventional plaster: between the wall and the finishing material there is only a thin adhesive layer. Therefore, to lay the wires you will have to ditch the walls. Unlike plastered walls, grooves can be made less deep. However, remember: the distance between the inside of the drywall and the outer protection of the wire should be 5 mm or more.
Important! Under no circumstances should you try to lay sheets directly on the wiring. Drywall is less durable than plaster, so it can be easily damaged, which increases the risk of mechanical stress on the cable.
Let's move on to the socket boxes. There are two types of products: internal and external. External ones are attached directly to the wall surface (in our case, drywall). For internal ones, you need to make a 20 mm recess in the base wall. The cable is hidden in grooves, the end is placed in the form of a ring directly in a pre-made “hole” for the socket box. The recess in the drywall is drilled after finishing work is completed (most importantly, do not forget to mark where the recess for the socket is located).
Specific features of gating
Sometimes you have to deal with non-standard situations in which general knowledge and a little more advice are needed. Among the most common ones, those presented below were selected.
Grilling walls for air conditioning
For a household-type air conditioner with two standard units - internal and external, special dimensions for the groove are required. The minimum width should be 60 mm and depth 50 mm. These dimensions will allow you to place the entire “filling”, consisting of two copper tubes with insulation, two wires and corrugations for draining condensate without damage.
Grilling wooden walls
When carrying out electrical wiring in a wooden house, incl. bathhouse, wall chipping is prohibited by fire safety rules. At its core, physically this would be simply cutting out a groove, which would be an impractical process. For such cases, there is external wiring hidden by special cable ducts disguised as wood.
Drywall cutting
Grooving in plasterboard sheets is impossible due to its thin and fragile structure. The cable is laid behind the sheet. The only possible option is to make holes for the socket using a special crown attachment for a hammer drill.
Strobe in tiled floor
The bathroom and kitchen are two rooms where you may need a groove in the wall. There shouldn't be any problems with this process. The only caveat is to install the appropriate diamond discs on the angle grinder or wall chaser. It is not recommended to use a hammer drill to avoid cracks in the tiles.
What to do when drywall is already installed
Options for installing electrical wiring in parallel with wall finishing were discussed above. Now let's figure out what to do if the finishing materials are already installed on the walls. First, decide what is between the drywall and the base wall.
The first option is to place drywall on the wall using an adhesive compound. You will need to cut through the finishing surface and then groove the material for the cable installation. After such installation, you will be forced to restore the wall by painting it or wallpapering it.
The second option is simpler. It implies that the sheets of drywall were fixed to a metal profile. However, it is important to know the electrical wiring diagram and where exactly the metal frame is located. If you don't want to damage the front part, try running the wire through the baseboard. Drill a hole for the outlet or switch, then use a regular plumb bob to determine where to insert the cable. Remove part of the plinth, lower the rope along the plumb line, threading it through the hole. Tie a cable to the rope and pull it up. After this, the box is placed using any convenient method, and the cable is pulled to the shield.
Tools for wall chiselling
When doing home renovations, many are faced with the question of how to tap a concrete wall for wiring with their own hands. There are various tools for this, which will be specifically discussed below.
Hammer and chisel - ideal partners
This work is carried out in separate stages. First you need to use a chisel one or two times the width of the spire to mark the edges of the groove. Then, placing the point across the groove, you need to knock out a small piece of the wall in depth. Then you can proceed in two ways - first remove the entire top layer of the intended recess and only then knock out the depth of the groove, or “dig” deeper to the end after every centimeter of the top layer removed.
Important! Using a hammer and chisel to make a groove in concrete is almost impossible.
Hammer. He's a hammer drill
To perform gating with this tool, you need three attachments - two drills of different lengths and a spatula. First you need to drill holes 2.5 cm deep along the entire length of the intended line. They should be evenly spaced at a distance of 1-1.5 cm from each other. Then, replacing the drill with a blade, walk along the furrow from point to point, forming a continuous groove. You can work with a hammer drill quickly and cleanly. And after the work is completed, you will get a highway of the given depth and width. And the unattractive appearance can later be masked with putty.
Important! Do not place the hammer drill blade across the furrow. Otherwise, an unplanned piece of the wall may break off.
Universal grinder
In order to use an angle grinder for slitting, it needs a diamond disc. High-quality cutting with such a disc is particularly precise and in the process does not leave any chips or cracks on the working material. An important factor is also the reduction of noise levels.
First you need to make parallel cuts, which will be clear boundaries of the future groove. The width between them must correspond to the standard dimensions necessary for laying the cable. Then, using a chisel or hammer drill, deepen the furrow to the desired size. The differences between the previous methods are essentially minimal. However, the edges of the grooves are smooth. This is very important when damage to the wall material needs to be reduced to “zero”. But, it should be taken into account that the grinder produces a lot of dust, which in a short time can cover the entire room. To avoid this, you can involve a person with a construction (not household!) vacuum cleaner, who will hold the suction pipe close to the source of dust.
Cable under suspended ceiling
This option has several fundamental differences from installing wiring in plasterboard walls. The wires for ceiling lights are routed along the top edge of the walls. You need to drill holes in the plasterboard sheets in order to thread the cable through them. Run the cable before the drywall is installed. As a last resort, you can dismantle the sheets to provide convenient access to the space under the ceiling.
Organization of electrical installations under a suspended ceiling
Step by step laying
Below are step-by-step instructions for installing electrical wiring under drywall trim.
Step 1. Preparation
Assemble the metal profile, but do not rush to install the plasterboard sheets. Decide where to place the wiring: under the ceiling or along the walls. It all depends on the specific situation. If you have a suspended or suspended ceiling, it is better to hide the wires at the top and then lower them vertically to sockets, switches and other boxes.
If the ceiling in the house is made of concrete or wood, and only the walls are plasterboard, then the wiring should be placed in them, closer to the top. The distance from the ceiling must be at least 10 cm. Remember: when choosing places to install sockets and other equipment. Once you have your diagram on a piece of paper, transfer it to the wall. Calculate materials and proceed with installation.
Step 2. Installation of the box
Place distribution boxes. There should be one of these in every room of the house. Attach the component to the wall or ceiling using self-tapping screws.
Installing distribution boxes under drywall
Step 3. Laying the wires
Prepare the necessary materials and tools, and then proceed with installation. Secure the clips along the cable route. The distance between the fastening elements must be at least 30–40 cm. It is possible to use plastic clamps, which will speed up the work, but will increase the likelihood of damage to the corrugation due to the sharp ends of the profile.
Before pulling the corrugation through the metal frame, drill holes of a suitable diameter. You can buy a profile with holes already made. A similar method is used to connect the junction box and the points where sockets and switches will be installed. Mark on the drywall where the corresponding component will be, and then sew the sheet to the frame.
Step 4. Switching electrical installation products
All that remains is to install sockets and switches. They are usually called electric points. Using a drill, make holes in the places where they should be located. Install the socket boxes into the drywall. You need to make holes in the bottom to thread the wiring through. Pull out the cable and place the socket box in the groove. When everything is done, check the electrical circuit by supplying power to the apartment or house from the distribution panel.
Installing sockets and switches in drywall
Laying through the frame
A similar technique is relevant when laying soundproofing and insulation under plasterboard finishing. All work is carried out during the renovation process.
- First of all, a frame base is assembled from a metal profile. If necessary, insulator slabs are placed between the racks.
- The wiring, enclosed in a corrugated pipe (required), is pulled under the frame posts and fixed with clips or plastic cable ties to the base parts (for example, hangers).
- It is possible to drill openings in the racks. In this case, the drill diameter corresponding to the corrugated pipe is selected. Wiring can be routed through the holes.
An example of mounted wiring in a metal frame
A good solution would be to purchase a profile for the frame with ready-made perforation for power lines.
If all technological nuances are properly observed, power supply lines will last for decades without any problem situations arising. You should not skimp on materials, otherwise low-quality wire or poor protective material (or lack thereof) can lead to dangerous consequences.
How to save money
Here are some practical recommendations that will allow you to install electrical wiring while spending a minimum of financial resources:
Remember that the open method of wiring on drywall violates all electrical and fire safety rules. Therefore, it is not used in this case. Do not forget to turn off the circuit breakers before installing or replacing the cable. All electrical installations (sockets and switches) should be installed at the very end. This approach will prevent damage to the decorative part.
Source
The best way to seal: the best materials
The choice of material to fill the groove after laying the wire or cable is a matter of personal taste. For example, builders use a mixture of sand and cement (3:1 ratio) to weigh down the putty. At the same time, this mixture is quite plastic. Craftsmen recommend alabaster mixed with PVA glue - the mixture is plastic, has increased stickiness, and hardens slowly.
The cheapest and most common material is a mixture of cement and sand, the heaviest and most durable mortar. The density of the solution can be adjusted. Often builders use gypsum mortar. It is important to remember that plaster requires quick hands. The material hardens within a maximum of five minutes. To create strength, the gypsum solution is thickened.
There is no point in using gypsum that has already hardened, because... there will be no strong adhesion to the surface of the groove. A neat, finished look will be given to the wall by putty on plasterboard, the advantage of which is that it does not need to be mixed in certain proportions, just dilute the powder with water.
To seal grooves in walls, a durable and moisture-resistant material is required. Which solution to prefer is chosen by the master himself, focusing on cost, his own experience and ease of use. The main thing is a careful and responsible approach to wall gating.
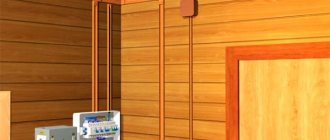
SIP house: difficulties in laying electrical cables
Let us remind you that a SIP house is a prefabricated dwelling, which is assembled from structurally insulated panels. SIP panel is a composite material consisting of three layers:
Building materials according to GOST 30244-94 have a classification according to flammability group: G1 (low-flammable), G2 (moderately flammable), G3 (normally flammable), G4 (highly flammable).
Let's turn to the PUE (Electrical Installation Rules), which says that electrical wiring through combustible wooden structures, and SIP is one of them, can only be done in a metal pipe . We will give below the opinion that these requirements are already outdated, and now we will tell you how to install an electrical cable and mount an internal socket box in a SIP panel according to the PUE.
How to make electrical wiring in a house from SIP panels
There are 3 main ways to install an electrical cable in a SIP house:
1. External laying of cables in a SIP house in cable ducts and in an open way - by wire along the walls.
This method is a classic option, well known to owners of wooden houses. Advantages of open wiring:
2. Hidden cable laying in a layer of stone wool under plasterboard mounted on galvanized profiles.
3. Hidden installation of electrical wiring in a SIP house in a layer of plasterboard screwed directly to the OSB.
As practice shows, this method is most popular among owners of houses built from SIP panels. And it raises the most questions. Let's tell you more about it.
Preparatory work
These types of work include preliminary shutdown of the power supply and checking for lack of voltage. Then you need to remove as much dust as possible from the electrical grooves and treat them with a primer. To do this, you need to use a brush and go through everything, even the most inaccessible places. This work must be carried out wearing safety glasses to prevent the chemical mixture and dust from getting into your eyes. The grooves must be primed carefully and generously; this procedure can be carried out both before and after laying the cable.
Alternative primer option:
SIP house: installation of cable in a layer of drywall step by step
I have a house made of SIP panels. I was wondering how to do electrical wiring on structurally insulated panels. I want to hide it in a layer of drywall, because... The option of installing profiles under gypsum boards is eliminated. There is already little space in the house, and with them it will become even less. Questions:
I heard about 2 ways of laying electrical cables in drywall in a SIP house. "Pies" of the walls:
Let us add that another disadvantage of the second method is its high labor intensity. Imagine for a moment how workers will be able to cut and bring gypsum board sheets to a cable already laid on OSB boards?
Step-by-step diagram for installing an electrical cable in a layer of drywall, based on the experience of FORUMHOUSE users:
1. Seal the joints in the SIP boards with self-adhesive tape for vapor barrier.
2. Using a stapler, nail a 3 mm thick laminate backing onto the SIP panels and secure the first layer of 9.5 mm thick drywall with self-tapping screws, using special bits for a screwdriver.
3. Attach a second layer of plasterboard, 12.5 mm thick, to the SIP walls and make grooves in it, without cutting through the first layer of plasterboard, for laying the electrical cable. After cutting the grooves, lay the eclectic cable in them. Putty and reinforce all joints to prevent them from cracking.
Laying additional wiring for ready-made gypsum board finishing
How to stretch the wire and install a socket box under the mounted drywall? It all depends on what is between the wall and the sheets.
- If the drywall is glued to the wall, you will have to cut through the finishing surface and make shallow grooves. In this case, it will be necessary to restore the front layer (paint or glue a strip of wallpaper).
- When mounted on a profile, the task is simplified. Of course, you need to know the layout of the metal guides. In order not to spoil the upper part of the wall, the power cable can be routed from below, from under the baseboard. First, a hole is drilled for the socket box. Then, the plumb line determines the location of the cable entry (the plinth in this place is temporarily dismantled). A rope with a plumb line is lowered into the prepared hole, which is pulled out from the lower hole for entering the cable. The wire is attached to a rope and pulled up.
Next is the usual scheme: installing the box in any way. The input cable is pulled under the baseboard to the distribution panel.
- If there is soft insulation between the drywall and the wall, you can use steel wire instead of rope (which remains after installing the corrugation). This method does not work with rigid insulation boards.
Considering the uncontrolled position of the cable under the plasterboard, it is recommended to use corrugation. As a last resort, a wire with three layers of insulation.
After installing additional wiring, be sure to make changes to the current power supply circuit. Otherwise, during repairs you will damage the new cable.
How to install socket boxes in SIP panels and how to make grooves in gypsum boards
We figured out how to lay electrical cables in SIP walls using gypsum plasterboard. Now we’ll tell you how to mount an internal socket box in a SIP panel.
SIP house and electrics in it: a modern installation method
Interesting opinion from a member of the portal with the nickname Oldvist. The FORUMHOUSE user believes that the requirements of the PUE are long outdated and the main thing is to install a security group in the house.
The PUE requirements, in my opinion, are stuck in the Middle Ages. There are many electrical protection devices on the market now, so I don't understand why you would put cables in metal pipes. OSB boards, if they burn, do so only in the presence of oxygen, but where does it come from under a layer of plaster? In the SIP house I installed VVG-ng cables with self-extinguishing insulation. From the electrical panel, each room has its own routes to sockets and lighting, protected by automatic circuit breakers. The switchboard contains several pieces of RCD and UZM-51M, which monitors the voltage in the network and, if it goes beyond the range, turns off the entire house. I covered the SIP walls with one layer of plasterboard 12.5 mm thick. Underneath is a 5 mm thick foamed polyethylene backing. I cut the grooves in the plasterboard with a knife to OSB. I placed corrugation with a diameter of 16 mm in the groove, now I understand that it is not needed there at all. The wiring is in the corrugation. I putty all over the top. I buried the socket boxes 2 cm deep in polystyrene foam. There is no putty there. Abroad, in frame houses they lay wiring directly through wooden posts, without embedding the cables in concrete or pulling them through metal pipes.
Everyone has the right to their opinion. Below we will summarize how to install electrical wiring in SIP houses and how to prevent fire due to faulty electrical equipment in SIP panels.
Choosing a tool for the job
Wall chipping can be done with different tools. This can be a chisel with a hammer, a grinder or a hammer drill with certain attachments, or a wall chaser specially designed for this purpose. When operating the latter device, you risk incurring serious financial costs, but the grooves made will turn out to be perfect.
The cost of work when using a hammer drill will be average, while the process itself takes a minimum of time. The grinder is capable of creating even grooves, but leaves behind a lot of debris. Finally, the cheapest method involves using a hammer and chisel. However, low cost is the only advantage of this approach.
The choice of a specific tool is related to the individual preferences of the master and the owners of the house, as well as capabilities. Ideally, this should be a high-quality tool that allows you to create an even groove, which will eliminate potential rework.
Chisel and hammer
For a concrete wall, a hammer and chisel are absolutely useless. This is a very strong material, so the walls will be so strong that you simply cannot break through them with a hand tool. But for a brick wall, a hammer and chisel would be almost the best option.
Follow the following workflow:
After finishing the wall grooves, you need to clean the resulting grooves. Cover the surface of the groove with a special primer. When it dries, the wires are laid in the ditch, then you need to hide them under a layer of plaster. Using a chisel and hammer for grooves is dangerous because it requires a certain amount of skill. You need to perform this procedure yourself using modern and professional equipment.
Grinder (angle grinder)
Another equally popular tool used for grating walls is a grinder. There are no particular difficulties when operating the device. First, prepare a disc with a special diamond coating. Such a canvas is required if the wall is made of concrete. The diamond blade is characterized by high strength and durability, making the cutting process much faster.
To begin, use a grinder to cut two strips along a section of the wall along the marked lines. These slots should be placed parallel to each other at a distance of about 20 mm. But one grinder is not enough: after the slots you will need to use a hammer drill to get rid of that part of the wall that is located between them. Then you can immediately lay the wiring in the resulting grooves, and then seal them with plaster.
Advice! The depth of the grooves is selected in such a way that the plastering process does not cause discomfort or inconvenience. By hiding the wire under the finishing layer to a good depth, it will be easier for you to finish the walls.
Drill
From the holes located in a row you need to create a solid groove. A chisel with a hammer or an angle grinder (angle grinder) are suitable for this.
Hammer
When using a hammer drill to make grooves, maximum savings in financial resources and time are achieved. The preparatory stage is the same regardless of the chosen tool, and the execution of grooves is as simple as possible. First, make sure there is no old cable. If the detector detects a wire, it should be removed by first disconnecting it from the junction box.
Next, the wall is marked: lines indicating the location and direction of the grooves between the distribution box and the sockets. Doors and windows should be curtained, and the gaps between frames, door or window panels should be plugged with a dampened rag.
Using a hammer drill, drill several holes along the marked area. The distance between each hole should be up to 15 mm. In principle, the process is no different from using a drill, only a hammer drill is a more reliable and powerful tool. Then the hammer drill is switched to the second operating mode, used to create grooves. To do this, change the working nozzle. In this mode of operation of the hammer drill, all holes are connected to each other, resulting in a solid ditch.
Important! Do not attempt to groove directly without making holes. Such work can be done by professional and experienced craftsmen, but for beginners it is recommended to make holes.
Wall chaser
A common drawback among all the listed tools used for wall chiselling is the huge amount of dust that is released during their operation. The layer of dust can reach large sizes, which is why you will not be able to completely clean the room even with the use of special equipment. If you want to maintain a high level of cleanliness when performing work, we recommend using a wall chaser - a tool specifically designed for such procedures.