Correct installation of a socket in a concrete wall is done in several stages, the most difficult of which is cutting a hole in the wall where the device will be mounted. If you have the necessary tools, experience, or at least a great desire to do everything yourself, then this task will be completely within the capabilities of any home craftsman.
Advantages and disadvantages
The desire to “hide” the outlet input as much as possible is explained by several reasons:
- Practicality, since the flat product will not collect dust and dirt;
- Convenience consisting in the free movement of furniture and household appliances, the placement of which will not be hampered by a protruding plastic box;
- Safety, because the wiring and phases are securely hidden in the wall or furniture frame;
- Wide range of colors, textures, shapes and materials;
- Aesthetics up to the ability to artistically decorate the rosette in the interior by making a special frame, decorative doors or painting.
In addition to the above advantages of hidden sockets, they also have some disadvantages compared to their open counterparts. For example, high cost, complex installation, as well as difficult installation in utility rooms, on brick and wooden surfaces.
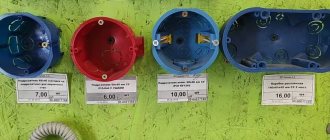
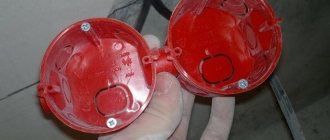
Installing a new socket box
We use plaster or alabaster (if you need it quickly). If you don’t have enough experience, but you have time, it’s better to dilute alabaster (construction plaster) with any plaster in a 1:1 ratio. We install the socket so that its edge is flush with the wall, or recessed by 1-2 mm, taking into account the wallpaper. And the fastening screws are perpendicular/parallel to the walls/floor.
The socket box is installed, the alabaster is frozen, the wires are minimally disturbed
You can make a small turn of the socket - 3-4 degrees counterclockwise, if you can’t exactly set the parallel. Although there are mounting holes on the socket flange that require clockwise rotation.
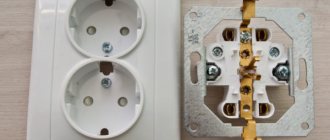
Before installation, you need to decide which socket will be installed - single or double; there are features that will be discussed below.
Types and configurations
The modern market offers a wide selection of various types of hidden sockets, among which it is easy to find an option suitable for a specific design. However, the entire variety of electrical assortment can be distinguished into the following classification of types and modifications:
- By location (wall-mounted, built-in, retractable);
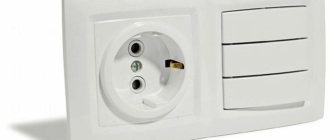
- By the number of nests (single, double, block);
- According to the availability of grounding (with grounding, without grounding);
- According to installation option (horizontal, vertical);
- According to the degree of protection (standard, with increased moisture protection);
- According to the presence of additional elements (with and without an additional cover).
The main one is the separation according to the first sign, since the installation of hidden models on different surfaces differs in installation features. The main options will be discussed below: wall-mounted, retractable and built-in models.
Quality manufacturers
Having become interested in this topic, a completely logical question arises: where to buy built-in sockets? After all, while this product is gaining popularity, it is unlikely to be found in an ordinary small hardware store.
At the moment, there are several representatives that have proven themselves to be of good quality and long service life in the Russian markets.
Of course, the first country that is associated with strength and precision is Germany. introduced three series of built-in sockets, differing in arrangement: vertical, horizontal and retractable sockets.
Sweden is not far behind. dedicated two series to convenience and space saving: creating built-in retractable sockets.
And in third place is Italian, which concentrated on solving office problems. Their “roses” have a huge advantage in the form of HDMI, USB, Enternet, TV connectors.
Option 1 – On the wall
The most popular and usual place for placing an outlet of any type is a wall. To correctly remove power from an electrical appliance or household appliance, the following steps should be taken:
- Determine the location for the future outlet, draw its outline on the wall.
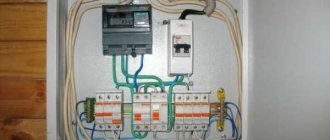
- If there is no wiring near the selected location, then it is necessary to supply electricity: find the nearest distribution box and a suitable machine, identify the phase wire, cut a channel from the panel to the designated location, lay the wire.
- De-energize all rooms by turning off the panel or unscrewing the plugs.
- Make a neat hole in the wall of the required size using a drill with an attachment, drill bit, chisel and hammer.
- Install the socket box and secure it with plaster, cement or plaster.
- After the solution has cooled, it is necessary to level the surface and sand it.
- Pull the wires out through special holes in the box.
- Strip the phases of the conductors a few centimeters, connect the contacts of the socket and the shield.
- Seal the groove with plaster.
- Secure the decorative part to the box with special “claws”, latches, screws or screws.
- Check the functionality of the device.
- If necessary, equip with additional elements: protection, cover.
Wiring connection
The most important part of the whole work is that you only need to connect two or three wires (depending on the presence of grounding), but do it without errors.
First of all, use an indicator screwdriver to make sure that the wiring is de-energized. Taking a minute or two to turn off the circuit breaker and check for voltage will make the job much more comfortable and safer.
Stripping wires. 1.5-2 cm of insulation must be removed from the ends of the cores. Next, the bare piece is bent into a ring, and if it is multi-core, then it can still be divided in two so that the ends of the wires take on the shape of the letter “V”.
To increase the contact area of the wire with the terminal, the core must be slightly flattened with pliers.
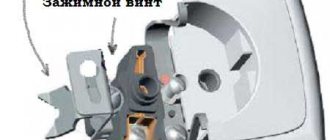
Connecting wires. The socket has only two terminals for current-carrying contacts and a third for grounding. They are all clamped with bolts and there is simply nowhere else to insert the wires. If wiring with the correct color marking is used, then the yellow-green wire goes to the ground contact (it “hangs” on the plate with the “whiskers” sticking forward), blue to zero and the remaining to phase (can be any other color). Grounding must be connected to the contact intended for it, and the phase with zero to the remaining ones - no matter in what order.
The socket block is connected with a loop or star. In the first case, wires from the previous one come to the contacts of one socket and immediately go to the next one. In the second, the wires from each socket go to a common “collection point” and are connected there – phase to phase, zero to zero. It should be taken into account that the PUE prohibits the connection of grounding with a loop - this way you can connect the phase and zero, but the “ground” must be connected with a star.
Option 2 – Pull-out sockets
Retractable hidden sockets provide a chance to reliably hide access to electricity from children and pets and thus not spoil the ideal interior. Also, devices built into the countertop or furniture body significantly save space and make it possible to connect a large number of devices.
You can install models of this type yourself:
- Read the instructions included with the built-in kit;
- Mark the dimensions of the hole where the hidden structure will be installed;
- Carefully cut a hole;
- Secure the sockets with special fasteners, which are necessarily included in the kit;
- Pull out the cord and plug into the nearest power source.
- Check functionality.
How to choose
The variety of electrical elements gives rise to a logical question: “Which outlet is better to choose?” The answer depends on many factors, such as personal preferences, type of room, financial capabilities, area and layout of the room.
However, the following tips and recommendations can help with your choice:
- One socket is allowed per six square meters;
- For powerful electrical appliances (electric stove, refrigerator), it is necessary to purchase models with grounding;
- Sockets for the kitchen, bathroom, toilet, bathhouse, sauna, street must be equipped with additional protection against moisture;
- Do not take models without markings;
- IP22, IP44 brand models are considered optimal;
- Pay attention to the indicators of the nominal value, current value, permissible voltage;
- With open wiring, it makes no sense to install a hidden model;
- The recommended height for placing the power source is 30-80 cm, while the distance from the gas pipeline and water supply must be at least 60 cm.
It is important to always remember safety precautions: each time check that there is no voltage in the network with a special indicator screwdriver, use non-conductive tools, stand on a dry rubber surface, do not touch exposed wires and warn other residents and neighbors about the time of electrical work.
Photos of hidden sockets placed in the interior look fashionable, unusual and interesting, so if you have the desire, tools and experience, you can safely begin installing them yourself.
Finishing
Finishing work can begin only after the fixing composition has completely dried. If you rush and start plastering the grooves and holes earlier, there is a high risk of the built-in device moving.
Finishing is done as follows:
- We use a primer to treat all noticeable defects, which may include irregularities, chips, and holes. Once again we trim the surface around the socket boxes.
- When the wall is dry, we begin to putty the surface. After the putty has dried, sand the coating. As a result, it is necessary to obtain the most even concrete surface possible.
- Apply another layer of primer and wait for it to dry.

