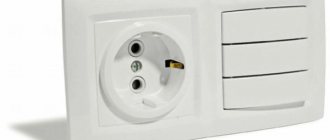
The electrical wiring of any room consists of three mandatory elements - lighting fixtures, switches for controlling lamps and sockets for connecting equipment. And if in public places we are not very concerned about what, where and how it is connected, then at home we want maximum convenience, aesthetic appearance and at least a little savings. In terms of economic effect, an advantageous device is a socket with a switch in one housing. We will look at what this benefit is below, and also talk about the design features of such a device, its varieties, disadvantages and how to connect an outlet with a switch to a general electrical network.
What are the advantages and disadvantages?
The main advantage of such a device as a socket and switch combined in one housing is the savings in labor and material costs. If you installed these devices separately, you would have to mount two holes in the wall for mounting boxes, buy and install two socket boxes, and lay two separate two-core wires to the switch and socket. If you install the block, you will need one three-core wire and one socket box (only it will not be round, but a special oval shape), which will at least slightly reduce your time and labor, as well as financial expenses.
Sometimes an additional advantage of a device in which the socket and switch are combined in one housing is that they are located at the same height.
The disadvantage of this combination is that if one device fails, the entire unit must be replaced.
Another disadvantage is that the block of switches combined with an outlet is problematic to install in a concrete wall. For such a device, you will need an oval rather than a round hole; knocking it out in concrete will be more difficult.
Wire selection
The wire is selected according to this principle:
number of cores If you decide to install a socket with a grounding contact (see above), it is connected with a 3-wire wire. Otherwise, use 2-wire;
material. In general, when installing wiring, it is recommended to use copper cable - brand VVGng (in non-flammable insulation) or NYM (imported analogue). Copper is superior to aluminum in electrical conductivity and ductility (the aluminum core breaks off after several bends). But with a daisy chain connection, a wire made of the same material is used that is connected to the first outlet. If a copper conductor is directly connected to an aluminum conductor, when current flows, both materials are destroyed due to an electrochemical reaction. A special neutral alloy adapter is required. Aluminum wires (brand AVVG, etc.) are found in old houses
Therefore, before installation, it is important to open the existing outlet and see what it is powered by;
core section Also selected according to the wire connected to the first socket (when using cables of the same material)
There is no point in using a wire with a larger cross-section, since the throughput of the “chain” is still determined by the capabilities of its weakest link.
For household sockets, the minimum recommended core cross-section is 2.5 mm2 (for copper wire). Such cables, when laid hidden, can withstand a current of up to 16 A (when open, even more due to good heat dissipation), so you can safely plug in any device into the outlet, except for particularly powerful ones - an electric stove and an instantaneous water heater.
If the first socket of the loop is powered by a wire with 1.5 mm2 cores (mainly used in lighting networks), you should think about replacing it. Otherwise, only the lowest-power devices can be connected to the loop sockets.
Where is the best place to install?
It is very convenient to install such a unit in places where you do not need to constantly connect electrical appliances to an outlet.
Before you connect a double switch for the corridor and the adjacent combined bathroom (bathroom with toilet), think about installing a common unit with an outlet? One button turns on the light in the hallway, the second in the bathroom, and the socket can be used to connect a hair dryer, electric drill, vacuum cleaner, or charge a mobile phone.
The block, which has a socket with a one-key switch, is suitable for installation in garages, sheds, basements, gatehouses, change houses and other outbuildings. In this case, just one switch key is enough to light up the lamp in the room, and the socket is useful for connecting a power tool, kettle, fan or radio.
In other rooms (living room, kitchen, bedroom, children's room), connecting a combined socket-switch unit is unlikely to be advisable. It will not have the aesthetic appearance to fit into the overall interior. After all, the light switch is usually installed at the entrance to the room. Imagine how ugly it will be if the cord of a TV, computer, refrigerator or air conditioner runs here, to the outlet.
Therefore, before you connect a unit that combines an outlet with a switch, think carefully about where you want to put it, and whether it is needed there.
Changeover switch
It is equipped with two inputs and outputs, has four terminals, and immediately switches a pair of contacts. Not used as often, but in some cases indispensable. Makes it easier to move around at night:
- in a large corridor or hall with many doors;
- in an apartment with three levels;
- a bedroom with a switch at the entrance and two next to the bed;
- while in the house, it is possible to control the lamps in the garage, on the terrace, in the gazebo.
To equip staircase lighting in a three-story building, it is necessary to create three control points. The cross type rocker switch is not used by itself. It must be connected in the gap between the pass-through switches. Knowing the procedure for connecting a pass-through, it’s easy to figure out how to make a rocker switch.
Their number can be up to 10, but they should always be located between the passageways.
There are several schemes for controlling lighting from 3 or more places. You can assemble the circuit through the distribution panel, or bypassing it. It is possible to connect several types of lamps at once.
Varieties
There are several options for units on the electrical goods market, where a socket and a switch with one, two or three keys are located in a single housing. They differ in price, installation method (indoor or outdoor), and can be equipped with additional functions - lighting or various types of protection (from children, moisture, dust).
- An indoor unit consisting of a switch and a socket without grounding. This is the simplest and cheapest model. However, with modern household appliances, the lack of grounding is a disadvantage.
- Indoor unit with switch and socket with grounding. The switch key may have a special light indication, which will help you easily find the switching device in the dark.
- An outdoor unit with a single-key switch and a socket equipped with a special plastic cover and having a degree of protection IP 54 (against dust and water).
Exactly the same models can be made using a triple or double switch.
external waterproof switch-socket block
Based on the location of the switch and socket themselves, the blocks are divided into horizontal (switching devices are located nearby) and vertical (the switch is located on top of the socket).
vertical block with illuminated switch
Outdoor units are used for installation with open electrical wiring, when the switch and socket are not recessed into a special hole, but are fixed with a strip on the wall surface. In this case, the wires are laid along the walls; they can be laid in special plastic boxes, inserted into corrugated pipes, or simply openly attached to the walls using porcelain insulators.
Indoor units are used for hidden wiring. The device itself is inserted into a socket box located in a wall mounting box, and the wires are laid in special grooves inside the walls.
When choosing sockets combined with switches, give preference to models made of high-quality plastic and grounded.
If there are small children in the house and to prevent them from becoming familiar with electricity on their own, choose models where the outlet has special protective curtains. They cover the contacts, and if a child starts poking something metal into the socket, at least the possibility of him getting energized will be excluded (the curtains open only when two pins of the plug are inserted at the same time).
Basic mistakes
Brown wire - phase, blue - neutral, yellow-green - ground
Installing an additional outlet is usually not difficult. But beginners can make the following mistakes:
Wrong choice of wire cross-section. You need a cable of the same thickness as the main outlet. Using a wire made of a different material. Connecting two different wires causes additional difficulties, and the contact itself is less reliable. Violation of the order of connecting wires
Particular attention should be paid to the grounding conductor. If it is not available in the house (especially in old buildings), it is better to purchase sockets without ground. Unreliable contact
You need to familiarize yourself in advance with the existing methods of creating a contact and practice connecting on spare sections of wires. Installing wires diagonally. Standards only allow vertical cable routing.
There is also a risk of buying a model that is not suitable in design. This is not a critical error from a technical point of view, but can disrupt the overall concept of the room. Therefore, when purchasing, it is recommended to select the color of the product, its shape and size in advance. Manufacturers of electrical products offer a wide range of products; any buyer will find a product that suits the style.
Device
Before connecting the switch block with socket, let's talk a little about its design.
Let's look at the example of a switch with two keys:
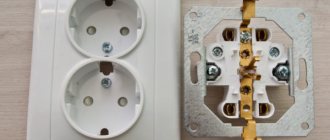
- In the middle of the socket there is a screw with which the child safety curtain is attached. Unscrew this screw and remove the curtain.
- Carefully remove both switch keys.
- The top plastic cover of the general housing is secured with two screws; unscrew them and remove the cover.
- Now you can clearly see that the device consists of a regular socket and a switch with two keys, they are located in one housing.
- The switch has an incoming contact, to which a phase from the supply network is suitable, and two outgoing contacts, to which the phase wires of the lamps are connected.
- The socket consists of a receiving socket into which a plug is inserted. This socket is connected to the contact part, where there are two terminals; the phase and neutral wires from the supply network are connected to them.
Socket - what is it
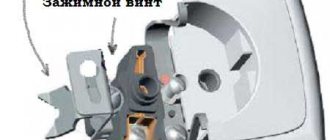
These elements of the electrical network are the “end point” on the line of transmission of electricity (signal) from the producer to the consumer (individual device or group). They differ in size, shape, color design and other parameters. The device is simple: base (ceramic or polymer heat-resistant), front panel (protective cover), spring contacts. The design and number of contacts depend on the specific application and characteristics of the electrical network (1 or 3 ph, without or with grounding). According to the current standard in the Russian Federation, household sockets have 2 holes (round): for L and 0.
Installation of an outdoor unit
This block has its advantages and disadvantages. It is easier to install and replace this design, and you can also quickly detect problems with the device by its appearance - these are positive aspects. The only disadvantage is that in the interior, exposed wiring and outdoor units do not look so beautiful. Therefore, most often such devices are used in garages, bathhouses, sheds and other utility rooms.
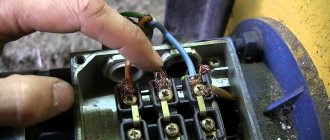
- Always start any work related to electricity by de-energizing the room where you will be working. Turn off the voltage and use an indicator screwdriver to check its absence.
- Disassemble the unit body by removing the top (or front) cover.
- The back cover with the core must be secured to the wall. Place it in the place of future installation and mark the fastening points with a simple pencil. Set the block aside for now, drill the designated areas, and drive in the dowels. Now you can fix the core of the block with self-tapping screws.
- Then the electrical part is completed (how to connect the unit to the power supply will be discussed below), all that remains is to put on the top cover and secure it with screws.
Important! If the outdoor unit is installed on a wooden wall, install a paronite gasket between them. In the event of heating of the contacts and further ignition of the insulation, paronite will prevent spontaneous combustion of the wooden wall.
Installation of the indoor unit
The housing of the switching device, recessed into the wall, is not so striking and does not spoil the overall appearance of the interior, therefore the method of closed wiring and the internal unit is used much more often, especially in residential premises.
- Work similarly begins with relieving tension in the room and checking its absence.
- Using an electric drill with a special attachment, drill a hole in the wall for the socket box.
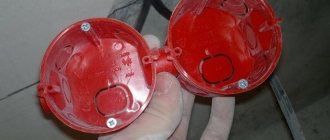
- Choose a special plastic socket box, one-piece for two installation locations. Fix it in the wall hole using alabaster.
- Insert the core of the block into the socket box, make all the necessary electrical connections, after which the housing must be securely fixed in the socket box. This is done using spacer legs.
- All that remains is to install the top plastic cover.
How to install and connect the indoor switch-socket unit can be seen in this video:
Connection diagram
The simplest scheme is to connect a single-key switch with a socket in one block.
connection diagram of the switch-socket unit for the bathroom and toilet
A three-core wire is laid from the junction box to the installed unit.
The following switching is carried out in the distribution box:
- The neutral wire of the supply network is connected to the neutral wires going to the socket and to the lamp.
- The phase from the network is connected to the phase wire of the socket.
Now the switching actions that need to be performed in the block itself:
- A phase and a neutral came from the distribution box to the socket; connect them to the required contacts respectively.
- Next, the phase from the socket is connected with a jumper to the incoming contact of the switch.
- Another wire is attached to the outgoing contact of the switch; it will connect in the distribution box to the lamp phase.
Note! In the case where the outlet is grounded, you will need a wire consisting of not three, but four wires.
If the connected unit has a switch with two keys, then:
- the phase from the socket is connected with a jumper to the incoming contact of the switch;
- two phase wires are connected to the outgoing contacts of the switch, they go to the distribution box, where they are connected to the phase wires coming from the sockets of two lighting fixtures.
Otherwise, the connection diagram for a two-key switch with a socket is similar to the one-key option discussed above, the only difference is that the neutral of the supply network must be connected to the neutral conductors coming from the distribution box to the socket and to two lamps.
This video explains in detail the various connection diagram options:
How to install the switch
The installation of an electric light main switch is not fundamentally different from the installation of a conventional switching element. In exactly the same way you will need:
- select the type of wiring (open or hidden);
- outline cable routes;
- prepare channels (for open wiring) or install support insulators (trays) for open wiring;
- arrange installation sites for distribution boxes and switching devices, install lamps;
- lay and secure the cables, lead the ends into socket boxes and distribution boxes (when installing them);
- cut the ends of the conductors;
- make connections in the distribution boxes and connect the corresponding cable cores to the switch terminals.
Important! Electrical installation rules require that the distance from the installation site of switches to gas pipes be at least 50 cm. Otherwise, the PUE contains only advisory information.
After this, you can check the installation, apply voltage and test the operation of the lighting system.
Selecting a lighting cable
The cable cross-section for the arrangement of electrical networks is selected according to the economic current density and is checked for thermal and dynamic resistance to short-circuit currents. 1.5 sq. mm are suitable in all respects for the implementation of lighting networks . This has become a kind of standard for laying lighting wiring. A smaller cross-section, even if it meets local selection criteria, does not provide mechanical strength. Anything more leads to irrational financial spending.
Although wiring with aluminum conductors is allowed in Russia, it is strictly recommended to use only products with copper conductors. Also, conductor products with stranded cores cannot be used.
To arrange the wiring, depending on the selected circuit and topology, cables with a number of cores from 2 to 4 may be required. Common types of cable products suitable for the work are shown in the table.
| Cable type | Section, sq.mm | Material | Number of cores | Additional properties |
| VVG-Png(A) 2×1.5 | 1,5 | copper | 2 | Flat, non-flammable |
| VVG-NG(A) 2×1.5 | 2 | Incombustible | ||
| NYY-J 2*1.5 | 2 | Non-flammable, low smoke | ||
| VVGP- 3×1.5 | 3 | Flat | ||
| VVG-NG- 3×1.5 | 3 | Incombustible | ||
| CYKY 3x1.5 | 3 | Incombustible | ||
| VVG-NG- 4×1.5 | 4 | Incombustible | ||
| NYY-O 4x1.5 | 4 | Incombustible |
Read more in a separate article: Which wire to choose for lighting wiring
Installation using a junction box
To install a lighting system using cruising apparatus, you can use a distribution box. This choice has advantages:
- disconnection occurs in one place;
- you can easily check the correct installation using the dialing method;
- in some cases, cable is saved;
- the installation turns out to be orderly, it is easy to understand even for those who did not directly carry out the connection.
Connection diagrams vary, but the installation principles remain the same:
- from the switchboard comes a power cable with a phase, neutral and protective conductor ( L, N, PE, respectively);
- conductors N and PE go in transit to consumers (if there is more than one load, they diverge into the corresponding number of branches);
- the phase conductor breaks, a cable is connected into the gap, going down to the switches, then it branches and goes to consumers.
Installation of two switches using a distribution box.
As an example, the installation of a control circuit from three places is shown (for a two-wire network, without a PE conductor). The disadvantages of this method are obvious:
- from the latter, according to the switch diagram, you need to pull the cable back to the distribution box, this is irrational, since its length can be significant;
- A separate cable must be laid for the lamp; this is not always optimal.
Another disadvantage of using junction boxes appears in parallel with the complexity of the circuit.
Installation of two double switches to control two loads using a distribution box.
As an illustration, a circuit with two main and one reversing switches is shown. The more complex the scheme, the:
- with a large number of cores, cables are required;
- more connections occur in the box, which increases the likelihood of installation errors and requires the use of larger junction boxes.
Therefore, whenever possible, it is necessary to use cable routing . Although the decision on the topology of cable routes must be made individually each time, taking into account local conditions.
Some useful tips
- When choosing a model of a combined socket with a switch, give preference to a product that has two teeth on its legs. Such blocks are fixed more securely and firmly in the wall.
- If there is a need to connect several household appliances at the same time, use an outlet block. Most often it is used in kitchens where a refrigerator, hood, dishwasher, electric kettle, and TV are constantly running.
- When you buy socket boxes, choose models whose internal walls are ribbed. When installing the switching device, the spreading legs will cling more securely.
You are now familiar with all the disadvantages and advantages of such a combined block. Do you know how to install and connect such a switching device? Decide for yourself whether you need this type of socket with a switch or not. Let us repeat once again, for utility rooms this is a very convenient option; for a living room it is better to use a separate option.
