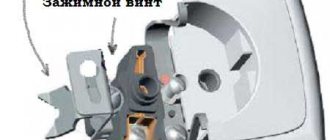
An integral part of any major renovation is the installation of sockets. According to all the rules, at this stage a box for an outlet is required, which is one of the main elements of installation and is a guarantee of safety.
It is mounted directly into the wall, followed by wiring and connecting the socket to the mains. If necessary, this simple electrical element allows you to repair or replace the outlet.
Socket boxes and their purpose
Not many people know what a socket box is and what it is needed for. This question may arise only if repairs with a change in wiring are necessary. But the solution to the problem usually depends on experienced builders. A small repair involving changing the installation boxes for sockets can be done independently.
The socket box is usually represented by an original glass made of metal or plastic, fixed in a hole made in the wall. Necessary for the internal location of the socket mechanism. Switches are also installed in it. From above, the entire structure is covered with a decorative frame, which makes the socket boxes invisible to the eye, which is why not everyone knows about them.
And not everyone understands why you can’t just place the outlet directly into the wall without a box. First of all, it is necessary that the socket complex is assembled with high quality and works perfectly.
Other purposes of socket boxes include:
- Guarantee of strong fixation of the mechanisms of sockets, switches and similar devices. The fastening function is usually performed by screws of the socket box or spacer legs of the installed devices.
- Acts as an additional dielectric insulator between the socket (switch) and the wall of the room.
- Performing the distribution function. boxes when installing electrical wiring without it.
- Provides additional protection against accidental fire.
In order for the mounting box for sockets and switches to correspond to the listed functions, you should make a responsible choice. In the future, this will serve as a guarantee for the uninterrupted operation of devices and the electrical network.
Pros and cons of triple sockets
The number of household appliances in modern apartments is constantly increasing. This happens at such a speed that the number of installed sockets does not meet the growing needs, especially if it alone is forced to supply a large area. In this regard, apartment owners install blocks of three or more outlets.
Most often this happens in the kitchen, where it is not always possible to use an extension cord, and the need to use several devices at the same time arises quite often.
Triple sockets have gained popularity due to several advantages:
- Reliable and safe fastenings.
- No additional wiring required.
- The ability to quickly switch from single sockets to triple sockets while simultaneously improving the overall functionality of the home electrical network.
- Easy and quick repairs if any malfunctions occur.
- Simple installation, convenient operation, relatively low cost.
However, despite the obvious advantages, most people prefer to install several separate outlets in one place rather than use a single block. This is primarily due to the specific disadvantages characteristic of such products.
Among the disadvantages are the following:
- The mechanical load on the socket increases significantly. Gradually it will begin to collapse and fall into disrepair. This will cause certain negative processes, including short circuits.
- Increased electrical load since the triple socket itself is designed to power multiple devices. If the permissible load is not taken into account, then not only the installation product will fail, but also the electrical wiring.
- Significant overall dimensions increase the risk of mechanical damage. This especially affects the quadruple socket, as well as blocks with even more sections.
However, with normal load calculations made with a certain margin, the triple block of sockets will perfectly cope with its functions, creating more convenient and comfortable conditions when using household electrical appliances.
Choosing the right boxes for sockets
Boxes designed to accommodate sockets and similar devices are divided into several types. Such a classification is necessary for their proper installation and subsequent implementation of the purposes listed above.
There are a number of classification parameters, among which several main ones should be highlighted.
By type of installed surface
Socket boxes are necessary for installation in various rooms made of different materials. It can be brick, concrete, foam blocks or aerated concrete.
According to this parameter, their design may differ in some way. For example, a box for mounting in plasterboard has additional tabs for secure fastening.
According to the material of manufacture
Socket boxes can be plastic or metal. To install the box, the first option is usually used, which has a wide range of models and shapes:
- Round - have become widespread. It is easy to make a hole in the wall for them and select the necessary groups of devices for installation.
- Oval - characterized by the presence of a large amount of space, which allows you to make a supply of wires necessary for mounting devices and the disconnection process. If necessary, you can purchase boxes that can accommodate up to 5 mechanisms.
- Square ones have a large amount of space for wires and allow the installation of dimmer elements, smart home devices and a number of other devices. Capable of holding up to 4 mechanisms.
Metal socket boxes are not widely used because they are conductors of electric current. But this is the option of choice in houses made of wood.
By number of sockets
Single boxes designed for mounting single sockets are in demand. But boxes for placing 2, 3 and 4 sockets are also gaining popularity. The distance (center-to-center) in such socket boxes is 71 mm in accordance with the standards.
It is customary to subdivide boxes by size - internal diameter and depth (40 - 60 mm). Additionally there is an installation diameter (60, 64 and 68 mm). The best choice is a socket box with a diameter of 68 mm and a depth of 42 mm. If it is necessary to carry out wiring without distribution boxes, a depth of 60 mm is suitable.
Connecting sockets with a cable
The main nuance that causes heated debate among electricians is whether it is possible to connect an outlet with a cable? And on this issue, many are divided into 3 camps:
- absolutely not possible
- possible in some cases
- you can always if the design of the socket allows it
Most modern sockets always have two terminals for each wire: phase-neutral-ground. Total 6 contacts.
It is assumed that in a walk-through socket all six ends of the wires (3 incoming + 3 outgoing) can be safely inserted into the terminals, clamped and be sure that everything is done correctly.
However, there is a paragraph of the PUE rules, clause 1.7.144, which states:
That is, phase and neutral working conductors are connected via a loop without problems, but for the grounding conductor, according to adherents of a categorical ban, this is unacceptable.
It is necessary to make a branch for it. Moreover, it is advisable to do it in a screwless manner so that there is no need for further maintenance (tightening). And this means sleeving by crimping, or soldering or welding.
The easiest and most convenient way to do this is by crimping. Add up the final cross-section of the three cores that will be connected by crimping and select the appropriate sleeve.
For example, you have a 3*2.5mm2 power cable. Incoming cable core 2.5mm2 + branch to socket 2.5mm2 + outgoing cable core to adjacent socket 2.5mm2. Total theoretically – 7.5mm2.
Due to the fact that the actual cross-section of the cores does not always correspond to the declared one, and loosening of the contacts is not acceptable here, select a sleeve with a slightly smaller cross-section than the calculated one - GML-6.
Place the vein into the sleeve and press the press with pliers.
Always cut off the excess length of the sleeve so that it does not take up free space in the socket box.
The resulting connection is best protected with heat-shrinkable tubing.
Although, of course, no one forbids applying several layers of high-quality electrical tape.
Especially if you have a powerful heat gun without smooth temperature control. With such a device, you can inadvertently melt certain parts of the socket box.
If you do it differently, using the factory terminals of the socket, what are the dangers? For example, you have two double sockets connected in series. One is at a height of 90cm, the other is slightly below it, at a level above the baseboard.
Power to the bottom comes from the top. If there is a break or violation of the grounding contact in the very first of them, then the “ground” will automatically disappear on the others. Which is categorically unacceptable.
However, many electricians are confident that the ban on such daisy chaining applies only to sockets located in different blocks, at a distance from each other. And this rule in no way applies to double sockets located in one block, united by a single frame.
That is, in fact, such a block is a kind of connector that has a single housing. This means that it can be considered as a single electrical installation product.
Most doubles, tees and even extensions are made in this way.
You will not be able to disassemble a single product without disconnecting the plugs from adjacent connectors. And since you have disconnected these plugs, then breaking the grounding conductor at the very first point will not affect anything.
But if the socket blocks are located far from each other and do not have a common body, then it is absolutely impossible to connect them with a cable.
Well, third interpreters of paragraph of the rules of the PUE 1.7.144 reasonably notice that in the PUE itself, nothing is said about the prohibition of “loops”. There is not even such a concept for sockets.
It says that the “Pe” conductor must be electrically continuous (the essence is in this word - electrically). And that the current-carrying elements of the device cannot be connected in series to the grounding conductor circuit.
There is neither one nor the other in the train. In most of these sockets, under one terminal, both conductors are immediately clamped. Moreover, in an acceptable way (screw or spring).
Now, if the socket had a ground input on one side and an output on the other (from under another independent contact), then yes - it’s impossible! Moreover, the PUE does not consider the socket contacts as open conductive parts, so clause 1.7.144 has nothing to do with it.
Even if you are forced to dismantle one of the looped sockets in this way, then in addition to the protective wire, you will also break the phase and neutral conductors.
Which of these opinions is true and how should you mount it?
If you are doing what is called for yourself and “for centuries”, so as not to look into the socket box for decades, then install a sleeve and make a branch, not a cable.
The same applies to objects for delivery to regulatory authorities. In order not to redo all the wiring and not have to prove your own reading of the PUE to some energy inspector, forget about loopback. Don't give unnecessary reasons for comments.
Well, if you are firmly convinced that the cable is not a violation at all, and it is not for nothing that manufacturers of sockets initially included the possibility of such a connection in their products, then at home you are free to act as supporters of the second and third methods.
In the end, this is your own home, and no one has the right to forbid you to do this and not otherwise.
List of necessary tools
When carrying out large-scale repair work, the necessary list of tools is usually at hand. But even minor repairs require preliminary selection of tools.
To install a socket box, the list of necessary tools should be presented as follows:
- Level with pencil and compass. Necessary for marking the walls and subsequent alignment of the block of boxes for sockets (if installation is necessary).
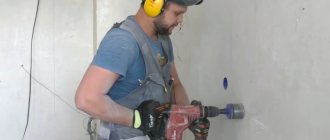
- Drill. Required for making holes for boxes. The drill will need drill bits - if they are missing, a concrete drill bit will do. If you don’t have a drill, a hammer drill or grinder will do.
- Hammer with chisel. They will be needed at the stage of forming holes to knock out excess pieces of the wall.
- Spray. It will be needed during drilling to water the crown, prevent cracking of the tiles and prevent dust from flying away.
- Spatula (trowel). Necessary at the stage of attaching boxes.
Additionally, you will need a solution of alabaster, cement or gypsum to securely fix the boxes in the wall. Dowels are often needed for this purpose. Do not forget about socket outlets, the presence of which must be ensured before performing the listed actions.
Materials of manufacture and dimensions
The socket consists of a body and a working part - contacts, grounding, terminals with springs for the plug. The modules are placed on a common frame or on 3 independent ones, but connected by a common panel. 2 modifications are used.
- C5 – option without grounding in the housing . Connects to a 220 V power supply for old Soviet appliances.
- C6 is a Euro socket that can operate with voltages of both 220 V and 380 V. Compatible with Euro plugs and connectors.
The block body is made of heat-resistant plastic. The lid, if there is one, is made of the same material. The core is ceramic. For contacts, brass is most often used.
The module has a width from 212 to 220 mm , which depends on the manufacturer. Height ranges from 72 to 80 mm . Together with the overhead frame, the height reaches 160 mm. The diameter of the round holes is higher here compared to the standard one, taking into account the complex fork rods of European devices.
Valera
The voice of the construction guru
Ask a Question
Standard sockets can withstand current up to 6 A, modern European versions - up to 16 A. They produce products for 10 and 25 A. The “power” of the device is selected according to the power of the largest source of consumption. In a house or apartment, these are most often heating devices. For it, you should buy a 10 A option, while 16 A will be redundant.
Installation of socket boxes in rooms made of various materials
The process of installing the box should be treated responsibly, since the reliability of fixing the sockets and subsequent work directly depends on this.
Depending on the wall material, the installation procedure has some characteristic differences.
Concrete
Concrete is one of the most common materials for indoor walls, so the installation of socket boxes in this case is worked out to the smallest detail:
- Carrying out markings. A serious stage, especially when installing several socket boxes, where the same level of location is especially important.
- Making holes. The diameter of the holes for sockets must exceed the diameter of the installed socket by 5 mm. The easiest way to do this is with a crown or a pobedite tip. You need to drill holes around the perimeter of the marked circle and knock out the inner part (if you don’t have a hammer drill or drill, you can use a grinder), making rectangular holes in the wall, covering the corners with mortar.
- Trying on the box. A proper installation must be flush, so do not forget to check how freely the cables pass through the pre-prepared holes.
- Installation process. You need to place a layer of putty in the hole so that the glass fits. After installation, you need to leave everything for a few minutes for the solution to set, after which you need to remove the unnecessary part from the wall.
If the fixation is insufficient, the socket box should be additionally secured with dowels.
Brick
Installing boxes for sockets in brickwork is similar to installing them in concrete, but there are a number of nuances.
The boxes should be installed flush on the outside of the wall. It is necessary to take into account that an additional layer of plaster and sometimes tiles (kitchen, bathroom) will be laid on the wall. It will be difficult to calculate in advance how many mm the socket box should be pulled out from the wall or tile.
You can use the following scheme:
- make a recess (diamond, pobedite);
- hide the wire in the hole and cover it with a lid (for example, made of cardboard);
- putty the wall, remembering the location of the future outlet (if necessary, lay tiles);
- proceed to the first stage of installation of the socket box (after the tile adhesive and plaster have dried), carefully drilling holes at the required coordinates.
Subsequent stages of installation should be carried out by analogy with the installation of socket boxes in concrete.
Gas silicate
When installing socket boxes in gas silicate blocks, you should prepare for a large amount of dust. You need to use a vacuum cleaner.
Since plaster, putty for painting or wallpaper are used in finishing walls made of gas silicate, the step-by-step installation of socket boxes is similar to that when installing them in brick walls. The only caveat is that the holes should be made with a drill with an inventory drill. An impact drill should not be used.
Depending on the material, the installation process will differ. The most important thing is to comply with all safety requirements.
Main varieties and designs
Design solutions of modern sockets are limited by certain technological frameworks. However, these products are produced in a wide range, represented by various models and modifications.
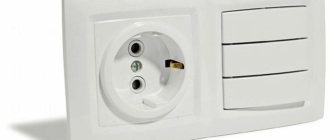
Any triple socket in one socket box is structurally available in two main versions. In the first case, a common frame is used, closed with a single lid, and in the second, a common body-lid covers three sockets, spaced separately. Among such designs, products with switches are in high demand, significantly increasing the functionality of the network at a given location.
Mounting boxes in PVC and MDF panels and more
The number of different materials used in modern construction is amazing.
It is worth knowing about some of the nuances of each material in order to competently carry out the process of installing socket boxes.
Drywall
When installing boxes in plasterboard walls, a hammer drill and mortar are not required. The work will be completed several times faster compared to installing socket boxes in walls made of concrete or brick.
You need to purchase special boxes that have additional legs to ensure better attachment to the drywall sheet. After marking, you can make holes using a drill with a crown or a regular drill. Then you need to bring the wire out and thread it into the socket box, and then insert it into the hole. The bolts from the adjustment tabs should be tightened on it.
If there is a risk of the box falling out of the hole, you can first glue a sheet of plywood or other dense and non-crumbling material to the inside of the drywall. All other steps (attaching the socket mechanism) are standard.
Tree
Carrying out hidden wiring in a house made mainly of wooden components is not a cheap task. According to the requirements of the PUE, the installation wire should never come into contact with wood.
Standard plastic socket boxes are not suitable as there is a risk of fire. The only option is iron, which can withstand the arc of electricity during a short circuit.
During the installation process, the wires should be laid in iron pipes, and the joints with the socket box should be carefully sealed. We should not forget about grounding, for which you will need to additionally weld a fastening bolt to the ends of the pipes converging in the box. To provide additional protection, the bottom of the holes can be lined with asbestos.
PVC and MDF panels
Modern window sills or loggias are often made of polyvinyl chloride and act as places for installing sockets.
To carry out this process quickly, you need to purchase boxes for sockets with spacer legs. For additional fastening, you should buy self-tapping screws. At the assembly stage, the power cable should be laid in advance.
The holes for the socket boxes in the panels are made in advance using a crown (diameter 68 mm). They must be strictly sized so that the socket fits quite tightly. Then you need to pull the cable through the prepared holes and connect the socket terminals. After this, you can attach the panels to the main location. It is necessary to try to ensure that the socket is close to the wall.
When installing a whole complex of devices, you should always maintain a distance between sockets of 71 mm. To maintain this distance to the millimeter, you can make an original template yourself. To do this, you need to take any rigid material (pipe profile, aluminum frame) and mark it in the center of the rib where the socket boxes will be attached.
To do this, you need to find the center using a tape measure and mark the line with a pencil. You need to drill holes along the finished line with a metal drill. Then you need to use a tape measure to measure the distance between the holes of the box and drill a second point according to it. Make holes for the remaining boxes in the same way. In order not to perform so many manipulations, you can simply purchase a stencil for socket boxes.
Features of installing a socket with two sockets
Before connecting the device, you need to determine where the phase and zero are located. The easiest way is to study the markings of the wires: phase - brown, black, white or red, zero - blue, white-blue, ground wire - yellow-green.
If you don’t trust the markings, you can independently check the location of the phase and zero. You can do it like this:
- Wear rubber gloves.
- Apply a special tester screwdriver to each wire.
- Evaluate the signal from the screwdriver - the light will light up in phase.
Before installing a double socket, you need to de-energize the wiring - turn the switch on the machines or one (necessary) machine to the “off” position. Next, in the place where the product will need to be placed, the voltage is re-checked using a special screwdriver.
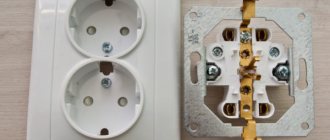
There are some features of installing a double socket as opposed to a single socket. The double socket has one socket box (cup) with two separated terminals, 1 mounting compartment for wires.
The installation diagram is as follows: a grounding cable should be connected to the central or upper terminal, with the phase on the right and zero (neutral) on the left.
You only need to choose a cable from the same material and with the same cross-section as the main wiring. If you plan to install 2 socket boxes, you will have to drill holes in the wall for them with a drill, maintaining the required distance for the holes. Before installation, markings should be applied to the walls if the old outlet was not there.
Recommendations for work
There are other tips that you should follow when connecting sockets.
- Before starting installation, it is necessary to check the compliance of the sockets and panel, cables with current strength and voltage.
- Installation of a triple module in a brick house is allowed in a plastic box. To avoid fire, only metal can be used in a wooden one.
- When working, tools with plastic or rubber insulation are used. Rubber protective gloves are required.
- The module is installed near the door so that the switch is closer to the doorway than the sockets.
