Today it is popular to decorate houses, shops, and industrial facilities using garlands. This decorative element has long been known in the domestic market as an integral attribute of the New Year holidays. And with the development of technical means, the New Year’s garland has become accessible to other areas of human activity. But due to the low quality of Chinese garlands that have flooded the market, and simply out of curiosity, many ordinary people are wondering how to make a garland from light bulbs and LEDs with their own hands.
How garlands are arranged
The arrangement of the garlands is quite simple. Ordinary, old garlands have one or two wires in their design that connect incandescent light bulbs to each other. Modern garlands have 5 wires, one of which is empty, and four of which are connected to a special controller box.
It is this box that is the most complex element of the garland and is responsible for:
- Different flashing modes for lights
- Duration of garland operation
- Time to turn off the garland
- Reliability of the entire structure
Although the box with the relay or controller is usually reliably protected from moisture and dust, breakdowns often occur here.
Making your own lighting
How to make curtain lighting yourself? To complete the work you need:
- choose LED strip;
- select additional equipment necessary for the operation of the tape;
- install LED strip and other electrical equipment.
How to choose a tape for organizing curtain lighting
When choosing an LED strip you need to consider:
- LED color. Manufacturers produce:
- plain white LED strips (photo below). The main advantage is the possibility of achieving not only a decorative effect, but also organizing additional lighting of the window opening;
- plain colored ribbons. Available in red, yellow, blue, green, purple and so on. When choosing a specific color, you need to build on the existing decoration of the room. The ribbon should complement the design of the room, and not stand out as a separate bright spot;
LED strips with diodes of the same color
multicolor ribbons. The main advantage is the ability to independently select a color mode in accordance with your mood, work performed, and so on.
Multi-colored ribbons can be used to additionally decorate a suspended ceiling with a niche for curtains, which will allow you to achieve maximum effectiveness;
LED strip with multi-colored LEDs
- lighting brightness. Parameter depends:
on the size of the installed LEDs. Illumination of cornices for curtains and suspended ceilings is usually done with diodes of size 3.5X2.8 mm, which allows you to achieve a brightness of 5 lumens;
The most popular sizes of LED strips
on the number of diodes per 1 m of tape;
Variety of strips depending on the number of LEDs
- level of protection of electrical equipment from moisture. To illuminate curtains in a room or kitchen, a strip with a minimum level of protection (IP20 marking) is sufficient.
All parameters that are significant when choosing an LED strip are indicated in the labeling.
Standard LED strip marking
Selecting additional equipment
For the LED strip to work correctly you will need:
power supply, which is selected depending on the power of the electrical equipment and operating voltage. To independently determine the power of the equipment, you can use the following formula:
Power supply power = Power of 1 m LED strip * Strip length * 1.25 (minimum stock level)
Tape connection equipment
controller. If you set up the curtain lighting yourself using a multi-color tape, then to control the operating modes, additional equipment is required - a controller, which can have manual or remote control.
When choosing a device, factors such as the control method and the number of available operating modes are taken into account.
Remote Controller
Installation diagram
LED strip installation diagram:
- preparation (assembly) of the lamp. The LED strip is cut in accordance with the specified parameters, connected to each other by soldering (the safest method) or connecting clips, the power supply and controller are connected (if necessary);
Equipment connection sequence
- LED strip mount. If installation is carried out in an aluminum profile or plasterboard box, then the tape can be attached to an adhesive base. If the tape is fixed directly to the cornice, wall or ceiling, then it is more advisable to use special fasteners;
Installation of LED strip on mounting clips
- fixing the power supply and controller.
You can watch the video for more information about the process of organizing the lighting.
» alt=»»>
After complete installation of all lighting elements, a test run and performance check is carried out. If necessary, appropriate adjustments are made.
Reasons for the breakdown of garlands
There may be several reasons why the garland does not light up or does not blink as desired. Main reasons:
- Burnt out light bulb
- Damage in the wire
- Damage to the power supply
- Damage to the control unit chip
Identifying a burnt out light bulb or damaged wire is easy. Moreover, modern garlands have a parallel connection and therefore it is much easier to find a problem in these cases. Since when there is a problem, not all the lights go out, but only some. And by the nature of the problem it is easy to determine its cause.
If a single-color LED strip stops working
The greatest consumer demand is for tapes of the same glow color powered by a 12 V DC source. Malfunctions encountered during their operation can be divided into 4 groups:
- Doesn't turn on.
- There is light, but dimly.
- Flickers.
- One of the above symptoms appears on a separate section of the tape.
1) If the LED strip does not light up immediately after assembling the entire system, then you need to ensure the integrity of the electrical circuit. To do this, first check whether the connection polarity is correct: the red wire from the output of the power supply unit (PSU) should go to “+”, and the black wire to “–” of the tape. If everything is correct, then with the power supply turned on, you need to lightly pull all the connecting wires and once again make sure that the contact is reliable at the soldering points
If there are connectors, they should be given special attention. Lack of reliable contact under the connector latch is a common reason why LEDs do not light up immediately after being turned on.
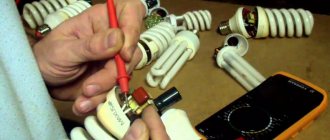
The second step towards troubleshooting should be to check the functionality of the power supply. Using a multimeter (voltmeter), check the presence of a constant voltage of +12 V at its output terminals. If the readings of the measuring device differ by more than 10% from 12 V, then the power supply is most likely faulty. If you don’t have a voltmeter at hand, you can check the voltage at the output of the power supply using a car light bulb.
It’s rare, but it still happens that when the power supply breaks down, the LED strip also burns out. Therefore, you cannot be sure that it will light up with the new power supply. But you can make a diagnosis: take a 9 or 12 volt battery and briefly connect it to the tape, observing the polarity. The LEDs should light up, although not at full brightness.
2) Dim LED lighting can occur for one of two reasons:
- The voltage at the power supply output is less than 10 V, as a result of which the LED strip does not burn at full power.
- Loss of LED brightness caused by overheating of the emitting crystal. In turn, overheating of the crystal can be caused by violation of operating conditions (lack of a radiator or too high supply voltage), or poor quality of installed LEDs.
3) The reason that the LED strip either lights up or doesn’t light up along its entire length is poor contact in the power circuit.
4) Any strip can be conditionally divided into sections of three LEDs and a resistor, connected in series and operating from +12 V. All sections are connected in parallel to each other, that is, they are electrically independent of each other. It follows that a malfunction in one area (failure of an LED, resistor, broken contact, microcrack on a printed conductor) will not affect the operation of the rest of the LED strip. Only 3 LEDs will stop lighting.
Recently, LED strips and LED lines have appeared on sale, connected directly to a 220 V network. They have a primitive power source sealed at one end. The reliability of such an assembly is low. Therefore, if a 220-volt LED strip does not light up after the next turn on, then its repair is hardly possible.
Preparation for repair: materials and tools
For high-quality, quick and competent repair of New Year's garlands with your own hands, you will need the following materials and tools:
- Screwdriver with different sections
- Insulation tape
- Additional copper wires
- Voltage meter
- Multimeter
- Soldering iron
- Additional light bulbs as needed
Advice! When disassembling the garland, it is better to lay out all the small details on a large white sheet of paper. This way they won’t get lost and you can immediately find the part you need.
Conclusion
When buying such a product, it is not always possible to please yourself and your loved ones with high-quality jewelry. Sometimes, behind bright lights and an attractive price, a rather simple and cheap Chinese garland is hidden. Its circuit will be easy to study and convenient for applying electrical skills. Repairing a product can also bring moral satisfaction. Everyone determines for themselves whether it is worth the time and effort. Or maybe it’s better to immediately take the more expensive option? After all, even Chinese garlands for a high price are much better quality than their cheap “compatriots”. The choice is yours!
How to fix a garland of ordinary light bulbs
A garland of ordinary light bulbs has the simplest device - a wire and incandescent light bulbs connected to each other in parallel or in series. This is the simplest garland device.
Usually the cause of the breakdown is either a damaged wire or a burned out light bulb. In a series connection, you will have to check each light bulb individually. But such garlands are practically no longer found.
With a parallel connection, a burnt-out light bulb is immediately visible and can be easily replaced. Damage in the wire is also easy to detect visually. In this case, it is enough to replace part of the wire using a soldering iron or simply connecting the wires by twisting.
Important! All replaced components must be securely insulated with special tape, as can be seen in the video of DIY garland repair. Otherwise, children, animals, or other household members may receive electric shock.
We strengthen the damaged contact by soldering
Sometimes you can't do without soldering. And soldering the wires will additionally strengthen the contact of the wires compared to conventional twisting.
Twist the contacts in the same way as shown earlier.
Next, apply flux to the wires to be soldered (you can use regular alcohol rosin).
Take solder to the soldering iron and go over the soldering area in one go. Soldering should be neat, without unnecessary “snot” (large lumps of solder). Good soldering can strengthen the contact of the wire so much that when you try to test it for strength, you can damage other sections of the wire. In the same way, we isolate the place of the soldered contacts with electrical tape, as in the case of twisting.
What is different about a garland of LED light bulbs?
A garland of LED light bulbs differs primarily in that it consists of a large number of wires and has its own control unit. A simple microcircuit is built into the control unit, but it is this that usually fails.
The microcircuit consists of the following parts:
- Dioid bridge
- Resistors
- Thyristors
- Capacitor
Thyristors are special controllers that control the operation of each branch of wires. If the device has four branches, then there are also four thyristors, if there are three, then there are three. Therefore, calculating thyristors and their breakdowns is quite simple.
What will we get in the end?
The garland that we will make consists of addressable LEDs. These diodes differ from conventional ones by the presence of a logical contact, through which the color and brightness of the light are controlled.
Accordingly, to control such a garland you need “brains”. The control board will send different signals to each diode several times per second, which will allow you to get beautiful dynamic effects and animation.
If an ordinary garland simply turns on the diodes according to a schedule or can produce a snowfall effect at most, then we can make a running line with text and more than 20 effects. Each glow mode will be customizable with the ability to change most parameters.
How to fix a garland of LED light bulbs
If it was not possible to visually calculate the damage on the microcircuit, then to repair the Christmas tree garland with your own hands you will need a voltage indicator. With its help, by alternately switching on different modes with an open microcircuit, you can calculate the place where the current does not flow.
Important! All work must be carried out with rubber gloves, otherwise electric shock may occur. Once the problem has been identified, all that remains is to fix it.
Chaotic blinking
There is a situation when you turn on a garland and it starts blinking chaotically, sometimes brighter, sometimes dimmer. It sorts through the channels on its own.
In general, one gets the impression that this is not some kind of factory effect, but as if the garland has “gone crazy.”
Most often the problem here is the electrolytic capacitor. It may swell and swell a little, and this will be clearly visible even to the naked eye.
Everything can be solved by replacing it. The denomination is indicated on the case, so you can easily purchase and select a similar one in radio parts stores.
If you replaced the capacitor, but it did not give any effect, where to look next? Most likely one of the resistors has burned out (broken). It is quite problematic to visually determine the breakdown. You will need a tester.
You take resistance measurements, having previously learned its nominal (normal) value from the markings. If it doesn't match, change it.
One of the branches is broken or the thyristor is burned out
In this case, it is necessary to either replace the branch wire or replace the thyristor itself. The thyristor can be soldered with any metal material - copper, brass or other solder.
Replacing the branch wire is even easier - even a child can do it. However, it is important to reliably insulate the replacement area.
LED burned out
In an LED garland, usually all diodes on one branch are connected in series. In expensive garland versions they are connected in parallel. The most difficult thing is to calculate a burnt-out LED in a series connection.
In any case, you will need to replace the faulty light bulb, as well as the incandescent lamp in the old garland. It is also necessary to do the same with LEDs when repairing street garlands with your own hands.
Misunderstandings
The most unpleasant surprise during repairs is thin wire strands. You begin to wonder how it all works and has not yet fallen apart. Both the price of the product and the reliability of operation become clear. This is the Chinese garland. Scheme, repair and search for gaps - this is your future fate. The wiring connection is naturally the weakest point. Therefore, you should start searching for a gap with the switching box.
In addition to surprisingly thin wiring, the Chinese product can please you with the quick failure of the thyristors that control the color lines, as well as the main controller. To replace faulty elements, you most often have to look for domestic analogues or redo the entire circuit.
If one of the colors glows dimly
This symptom indicates a break in the branch wire. That is, the wire is not completely broken, but at times it does not work properly and the signal does not pass through it well. It is necessary to carefully examine the entire branch, preferably in a lit state.
In this case, you need to carefully move the wire. If, when examining a specific place, a branch begins to go out or blink, it means the tear is right here. Next, you just need to replace the wire in this location.
Options for cornices for ceiling lighting
A cornice is any device that allows you to covertly install ceiling lighting. There are 2 main ways to solve this problem. The cornice itself is a structure fixed to the ceiling or wall. At the same time, it forms a technical niche in which lamps or LED strip are placed. There is a gap of a certain width between the cornice and the ceiling, which is necessary for the passage of light. Cornices can be very different: wooden, plastic, string, metal. The material is chosen taking into account the style of the room, convenience and technical parameters of the lighting system.
Light sources are located on the closing back side of the device. The minimum distance from the ceiling is 5 cm, from the wall – 10 cm.
A niche in the ceiling appears with a certain method of installing a plasterboard structure. A prerequisite is the presence of at least two levels near the ceiling. There are many ways to organize a niche. Most often, everyone resorts to installing a box, which is mounted so that there is a gap between it and the base ceiling for the passage of light. This option is more effective, as it allows you to really hide the lamps and achieve more uniform illumination.
The niche takes up more space: at least 10 cm wide and 15 cm high. If fairly powerful lamps are installed, the width has to be increased to ensure sufficient cooling. But at the same time, you can arrange the lamps in a variety of ways in order to obtain different lighting effects.
Capacitor failure
It is quite simple to identify a broken capacitor by its swelling - it will be immediately noticeable on the microcircuit. A broken capacitor also makes itself felt by the random blinking of all diodes.
The capacitor simply needs to be replaced with a new one by resoldering it on the board. You can get a new one either from the store or from another garland. These simple tips will help keep the garland in good condition, and it, in turn, will delight everyone in the New Year's mood.
Checking the control board
If everything is in order with the wires and plug, then we move on to checking the control board. It is usually packed in a box. The power supplies come to this box, and the control wires go out to the garland. Disassemble the box. This usually requires a small Phillips screwdriver.
Next, pull out the board. The board contains electronic components. They also need to be visually checked for integrity. There should be no traces of soot on the radio components. And electrolytic capacitors should not burst into flames.
If it is possible to check the parts with a multimeter, turn it into dialing mode and check the radio components for a short circuit. For example, the diode should not ring briefly.
Also pay attention to the back of the board. The soldered wires on the board must be intact and not move away from the contact pads. Solder if necessary if they come off or seem too flimsy.
If you soldered the board, do not forget to clean it with a brush and alcohol or gasoline.
