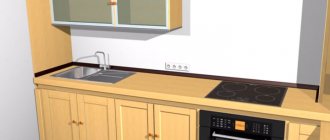
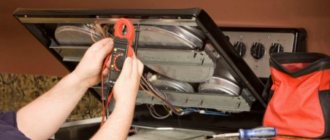
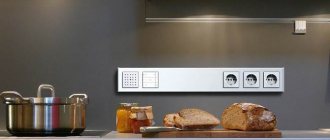
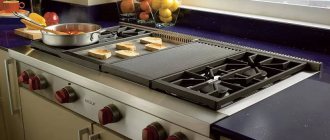
When connecting a hob, you may encounter problems that make not only the average user, but also an experienced electrician think:
- which cable to choose for installing electrical wiring from the panel to the hob
- how to connect the panel in the electrical panel
- how to connect 4 wires coming out of the stove and 3 wires of the electrical wiring power cable
- how to connect correctly and not mix up the cable cores on the terminal block
We will consider all these points in detail below. But first, let's decide on possible additional purchases. To connect the hob you will need the following materials:
- cable VVGng-Ls or NYM
- special socket + plug for stoves with current 32A-40A (you can order a similar connector here)
- PVS wire, if no wires are included with the panel
- differential machine
- NShV tips
- terminal block or GML sleeves
Electrical cable for connection
First of all, understand that the hob must be connected with a separate electrical wiring line directly from the switchboard. It is not allowed to power it from an existing common distribution box in the kitchen or from already installed sockets.
The cable must be three-core and copper, and it’s up to you to decide which brand VVGnG-Ls or NYM. Which cable is better and how they differ can be read in detail in the article “4 differences between NYM and VVGnG-Ls”.
The most important thing is to choose the right section. The set of rules SP31-110-2003, compiled on the basis of GOST and PUE, states that for slabs it is necessary to select a cross-section of at least 6mm2.
But apparently, here we are talking about preliminary installation of wiring in the apartment, when it is not yet known what power the hob will be installed. Therefore, initially a cross-section of 6 mm2 should be provided, sufficient to connect most existing models.
If your power is less than 7 kW, and you are sure that in the future you will not buy a new, more energy-intensive stove, then you can use the following table as a guide:
What should you do if the cable has already been laid (VVGng-Ls 3*2.5mm2), but it turns out to have a smaller cross-section than needed for the maximum possible power of the hob (7.2 kW). At the same time, there is neither the opportunity nor the desire to re-drill the walls.
In this case, you can protect yourself in two ways, although you will have to come to terms with the fact that you will not be able to use the full power of the panel:
- install a switch in the panel based on the nominal cross-section of the cable, and not the power of the stove (see the table above, according to the cross-section)
- programmatically set the panel operating mode in which it will not be possible to turn on all burners at the same time
That is, if you don’t yet know what kind of hob you will have, feel free to use 6mm2. Just keep in mind that low-power panels have small terminal blocks that are not designed for 6mm2. And it is not always convenient to connect such a wire directly; you can break the clamp.
What kind of wiring is needed for an electric stove?
The most common option is VVG 3x6 3-core wire, copper with a cross-section of 6 mm², it will last up to 30 years! Cables VVGng (non-flammable), NYM will be more expensive, but the stove
Connect once, you can spend a little money. If the device is of low power up to 6 kW, you can use a similar wire with a cross-section of at least 4 mm².
Interesting materials:
Which soldering iron is better to choose for soldering microcircuits? Which parquet is better to choose? Which tablet to choose for Yandex Taxi? Which tablet to choose for car navigation? What density should I choose foam block for building a house? Which used car should you choose? Which used crossover should you choose? Which power bank to choose for a smartphone? Which Powerbank to choose 2022? Which Powerbank to choose 2022?
Connecting an induction hob in the panel
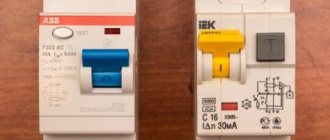
A prerequisite for installing a hob and oven is to connect these devices via an RCD + automatic circuit breaker, or a differential circuit breaker with a leakage current of 30 mA.
Simple circuit breakers will not provide protection in the event of insulation damage and leakage to the housing.
- In the shield, the phase wire of the cable (usually brown, gray or other colors other than blue and yellow-green are chosen for the phase) is connected to the lower terminal of the diffavtomat without the inscription N or with the number 2
- Neutral conductor (choose a blue wire) - to the terminal at the bottom, marked with the Latin letter N
- Yellow-green wire (protective grounding) to the grounding bar
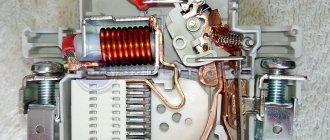
The purpose of the machine
The protective circuit breaker (circuit breaker) is used to prevent overheating of the electrical wiring.
Important! The cable is designed to carry a certain current. If it exceeds the permissible value, the cable overheats and the wiring begins to melt, resulting in a short circuit.
If a short circuit occurs, the automation stops the current supply and the power in the network is turned off. As a result, both wiring and equipment remain undamaged.
Socket and plug for hob
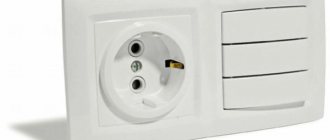
If you do not intend to run the cable directly into the panel, then you will have to install a separate outlet under it.
Using a fork is a more convenient option when it comes to maintaining and operating the hob.
For example, when wet cleaning, the panel must be de-energized.
If you don’t have an outlet, you’ll have to run to the panel twice and turn off the machine. And so I pulled out the plug, wiped the surface and plugged it back in. The socket should be installed at a convenient height. The recommended distance from the floor is up to 90cm.
In this case, it is not allowed for the socket box to be on the same level as the hob. It would be best to place it to the right or left of the device.
If you want to install an oven nearby, the socket should be located below the oven level. Usually this distance is at the level of the kitchen legs.
It is also impossible to do it too close to the floor, keep in mind the possibility of flooding and water supply leaks!
Which socket should I take? With a low-power panel up to 3.5 kW (usually two-burner), everything can be connected via a Euro socket and a corresponding plug.
However, it will constantly operate at its rated power of 16A and most likely get very hot.
In addition, if you initially took a 3*6mm2 cable, then connecting it to the plug contacts will be a big problem. Therefore, it is preferable to use a special plug and socket for stoves, designed for currents up to 40A.
If you have an induction panel with a power of more than 3.5 kW, then connecting through a regular plug and socket is even more prohibited!
The location of the phase and neutral wires in the socket does not play a significant role. The main thing is to connect the grounding conductor correctly (on top of the grounding contact).
But when connecting the plug, it is advisable to observe the “polarity”. It’s not for nothing that manufacturers mark the terminals where phase and neutral should go. But even if you mix it up, the panel should still work properly.
To connect the plug you will need a wire. It is not always included. If you don’t have a standard one, you need to purchase a three-core PVS wire. The wire cross-section must correspond to the power of the device (see table above).
Disassemble the plug body and pass the wire through it. Remove the insulation from the outer shell to such a length that its edge, after assembling the plug, is pressed down with a special clamp.
You strip the cores and, to ensure better contact, crimp them with an NShV tip.
Tighten the screw connectors of the plug:
- phase and zero under the outer terminals
- grounding - under the top screw
The big inconvenience of such models is that they “stick out” very much from the wall - by 5-7 cm.
Take this point into account when assembling the kitchen in advance.
About grounding
Before you connect an electric stove, you must realize that this appliance has a lot of power. Therefore, it must be grounded without fail.
The simplest option is to conduct grounding through the grounding system of a private house. Of course, if it exists. Typically, the ground loop is formed outdoors and inserted into the distribution panel, where a bolt is installed. It is to this that the earth is attached with a nut.
Grounding system in the distribution board Source legkovmeste.ru
If there is no grounding in the house, then it can be done. This is a minor problem that can be resolved quickly. To do this, three pins made, for example, from steel reinforcement, are driven in on the street near the house. Instead, you can use any metal profile. The pins are driven to a depth of up to 2 m at the corners of an equilateral triangle and connected to each other with the same reinforcement or a steel strip 3 mm thick and 30 mm wide.
After which the triangular circuit is connected to the distribution board with the same strip or wire rod with a diameter of 6 mm. A bolt is installed in the shield, to which all grounding wires from household appliances will be connected. Or maybe from all sockets.
Attention! The grounding circuit must be checked for resistance, which should not be less than 8 ohms. To do this, you will have to invite a specialist with a special device. He must draw up an act for this occasion.
How to properly make a grounding loop on the street Source build-experts.ru
Connecting a panel without a plug
If a socket protruding a few centimeters does not suit you and you want to carefully hide everything in a socket box or junction box, then you can do this in two ways:
- through GML sleeves
- through the mounting box KlK-5S
First, let's decide on the wires. On many models, a connected cable already comes out of the panel, but it has 4 cores. And you only have three in your socket. What should I do?
The fact is that such hobs are simultaneously designed for both a single-phase 220V connection and a two-phase 380V connection. In this case, one half of the burners will operate from one phase 220V, and the other from the second.
Some people believe that the second phase is only used for control power. This is wrong. Power is distributed evenly across both phases. To connect the whole thing to the usual 220 Volts, simply remove one core to the side and insulate it.
What remains is zero (usually a blue wire), ground (yellow-green) and phase (brown, black or another color).
You can combine two phase wires into one through a lug. For example, in many Bosch panels, where the cable is not removable, this is how it was originally done.
There is also an option with a 5-core cable. Such panels are usually of high power from 7 kW and above. They are initially designed for 380V. To connect them to a 220V network, you need to connect two wires in pairs.
For example, connect the black and brown wires to phase, and the blue and gray wires to zero. The earth yellow-green remains single.
But if you strictly follow the rules, then such a connection is not entirely correct. Since the protective conductor PE must be of the same cross-section as the phase conductors. And yours will be twice as thin.
What current is fatal to humans?
Currents greater than 80–100 mA alternating and 300 mA direct voltage cause cardiac fibrillation and/or cessation of lung function. In this case, clinical death occurs, lasting 5–7 minutes. An electric current of more than 100 milliamps is considered fatal.
Interesting materials:
How to change open with? How to change auto payment settings? How to change the order of photos in the Android gallery? How to change the backup path in iTunes? How to change region on PlayStation 4? How to change video playback speed on iPhone? How to change emoticons on Instagram? How do I change my AdSense link? How to change your skin in Roblox? How to change the theme of the mailbox?
Connection with sleeves
Now you need to connect the wiring in the socket box with the cable going to the panel. Select GML sleeves that correspond to the cross-section of the cores.
If the sections of the cores are different, for example, 6mm2 comes out of the wall, and 4mm2 goes to the panel, then on one side (smaller) the sleeve is sealed with an additional wire.
After which the ends are pressed in with press pliers and insulated with electrical tape or thermal tube.
Now all this can be neatly hidden in the socket box.
Prices for electrical installation work
First of all, I work with clients who are interested in RELIABLE and SAFE electrical wiring that lasts a long time. If our goals coincide, we will always agree on a price .
Working with a professional tool allows you to reduce the time for performing electrical work and make prices affordable for most of my clients:
The cost of work is indicated in Belarusian rubles. The price is valid for 2019.
More detailed prices can be found on the prices page or download the current price list (from 04/01/2019)
Connection via junction box
Sleeving is inconvenient because, firstly, the connection is not dismountable, and secondly, crimping requires a special tool. Not everyone has a press, and you cannot crimp such connections with pliers.
In this case, the KlK-5S mounting box will come to the rescue. Apart from a screwdriver, you don’t need anything here, and the outgoing cable can be disconnected at any time.
True, its contacts can be quite delicate, so do not overdo it with the tightening force.
In addition, its overall dimensions, unlike powerful sockets, are small and the whole thing can be conveniently mounted behind kitchen cabinets.
The connection is made traditionally:
- zero via screw terminal N (blue wires)
- the ground is indicated by the “grounding” icon - yellow-green conductor
- There are three phase connectors on top. If you have 220V, remove the extra phases and isolate them.
Connecting an oven and other kitchen appliances to the mains: how to choose the right unit
- A hidden outlet would be a good option, since an open outlet does not look very aesthetically pleasing. For example, you can place the socket below at the level of the plinth - this way it will not be conspicuous.
- Another option for a hidden location would be to install an outlet in an adjacent closet. However, please note that the socket should not be located near the side walls, as this is a fire hazard.
- Some people place the outlet behind the cabinets - this approach is incorrect. Such a plug will be difficult to pull out of the socket, which will create a lot of unnecessary problems for the owner.
Induction hob connection diagrams
After all the work has been completed, you can begin directly connecting the cable to the terminals of the hob. On the back of the panel there should be a sticker, drawing or graphic designation of the factory connection diagram.
For a single-phase network, choose a circuit that is most often designated as 1N.
According to this diagram, terminals numbered 1,2,3 and terminals 4,5 must be connected to each other by jumpers.
Such jumpers made of copper or brass should be included with the hob. Usually they are located in a separate “pocket”, in the same place as the terminals.
If you do not install these shunts, then only part of the hob will heat up.
Often, the same problem can arise during operation when, due to poor contact and heating, one of the jumpers burns out.
Before connection, the insulation is removed from the PVA wire and the conductors are crimped. Here you can use tips NShV, NKI, NSHP. Before installation, check whether there is enough free space in the terminal box to install certain lugs.
Sometimes you have to shorten them, or abandon some type altogether.
First, jumpers are installed. According to the diagram for a single-phase hob, mount them on terminals 1-2-3.
After this, connect the phase conductor to terminal No. 3 and tighten the contacts.
To connect zero, install a jumper between the fourth and fifth terminals.
Insert the blue neutral wire into terminal No. 5 and tighten the contact.
The last free core, the protective ground, is connected to the connector with the “ground” symbol.
Here are several connection diagrams for different models of hobs Bosch, Electrolux, Zanussi, Hansa, Gorenje:
GorenjeElectroluxZanussiHansaBosch
Assembly of custom panels
As a private craftsman, I offer services for the assembly of power and low-current panels for apartments, houses, cottages, etc. Assembly is carried out in Minsk .
The assembled electrical panel will not only provide reliable protection for your home and family, but will also be aesthetically beautiful and convenient to use throughout the entire period of its operation. Because each shield is individual and is assembled taking into account all the wishes of the customer.
A good electrical panel is:
1. Protection of electrical wiring from short circuits and overheating of wires; 2. Protecting people from electric shock; 3. Protection of electrical equipment from dangerous voltages (low and high); 4. Protection of property from fire due to poor wiring; 5. Protecting your home from the consequences of lightning strikes and impulse power surges.
Also, I collect low-current shields. A low-current shield will save you from a web of low-current wires (Internet, telephone, television, satellite, alarm, video surveillance, etc.) throughout the apartment and will allow you to create a convenient place for optical input from Beltelecom.
The panels are assembled according to the customer’s own designs and diagrams. Delivery of shields is possible throughout the Republic of Belarus and beyond its borders.
Common mistakes
Common problem: the panel is connected, but turns on and off spontaneously. The cause of this behavior is not necessarily due to incorrect installation.
The problem is caused by a variety of factors: child lock is turned on, water gets on the touch parts of the equipment, or accidentally pressing the wrong buttons. Some models are equipped with a cookware recognition function, and until there is a pot or pan on the panel, the stove will not heat up.
Another common problem: only two of the four available burners are functioning. Burners that are not working show residual heat (indicated by the letter H). The situation is caused by blocking that occurs when three-phase models are connected single-phase. The blocking is done programmatically.
Therefore, before tampering with the connection terminal block, it is recommended to study the documentation for the equipment in advance.
Selection of circuit breaker rating for current and load power
To select a suitable machine, it is convenient to calculate the current per kilowatt of load power and draw up the corresponding table. Applying formula (2) and a power factor of 0.95 for a voltage of 220 V, we obtain:
Considering that the voltage in our electrical networks often does not reach the required 220 V, it is quite correct to take the value of 5 A per 1 kW of power. Then the table of current versus load will look like this in Table 1:
For example, if you need to find out how many amperes a machine needs for a power of 15 kW with a three-phase current, then we look in the table for the nearest larger value - it is 16.5 kW, which corresponds to a machine with a capacity of 25 amperes.
The question of how many sockets can be connected to one machine can be answered in one phrase: as many as you like. The sockets themselves do not consume electricity, that is, they do not create a load on the network. You just need to make sure that the total power of simultaneously switched on electrical appliances corresponds to the cross-section of the wire and the power of the machine, which will be discussed below.
For a private house or cottage, the input machine is selected depending on the allocated power. Not all owners are able to obtain the desired number of kilowatts, especially in regions with limited power grid capabilities. But in any case, as for city apartments, the principle of dividing consumers into separate groups remains.
Expert opinion
Viktor Pavlovich Strebizh, lighting and electrical expert
Any questions ask me, I will help!
In addition, connecting the cable of an electric stove must be carried out in accordance with the instructions of the PUE and other regulatory and technical documentation relating to the installation and operation of energy-intensive products. If there is something you don’t understand, write to me!
How many amps does an oven need?
The oven socket must be equipped with a ceramic insulator. The outlet current is at least 16 amperes.
Interesting materials:
How to use protein correctly? How to take bcaa capsules correctly? How to take protein correctly? How to take maximum glucosamine? How to take glucosamine correctly? How to take glutamine powder correctly? How to take apple fiber correctly? How to take coenzyme q10 correctly? How to take letrozole correctly? How to take Lipo 6 Black Hers correctly?
Cabinet location
Before connecting the oven, you need to prepare a place for it. Place the cabinet in a special niche in the furniture.
When preparing the site, the following parameters are observed:
- Avoid distortions of the surface on which the equipment will be installed. If the cabinet is installed unevenly, improper heat distribution inside the cabinet cannot be avoided. As a result, the equipment will break down.
- Provide gaps between the surface of the furniture and the oven. This is necessary to avoid excessive heating of the kitchen unit. The recommended distance from the furniture walls to the oven is 5 centimeters. The distance between the bottom of the niche and the base of the cabinet is from 8 to 10 centimeters, and between the wall and the back cover is at least 4 centimeters.
Selection of circuit breaker rating for current and load power
To select a suitable machine, it is convenient to calculate the current per kilowatt of load power and draw up the corresponding table. Applying formula (2) and a power factor of 0.95 for a voltage of 220 V, we obtain:
Considering that the voltage in our electrical networks often does not reach the required 220 V, it is quite correct to take the value of 5 A per 1 kW of power. Then the table of current versus load will look like this in Table 1:
For example, if you need to find out how many amperes a machine needs for a power of 15 kW with a three-phase current, then we look in the table for the nearest larger value - it is 16.5 kW, which corresponds to a machine with a capacity of 25 amperes.
The question of how many sockets can be connected to one machine can be answered in one phrase: as many as you like. The sockets themselves do not consume electricity, that is, they do not create a load on the network. You just need to make sure that the total power of simultaneously switched on electrical appliances corresponds to the cross-section of the wire and the power of the machine, which will be discussed below.
For a private house or cottage, the input machine is selected depending on the allocated power. Not all owners are able to obtain the desired number of kilowatts, especially in regions with limited power grid capabilities. But in any case, as for city apartments, the principle of dividing consumers into separate groups remains.
