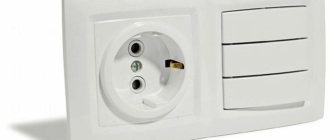
Combining a power point and a device that controls lighting devices allows you to rationally organize the power supply of a residential or office space. Agree, it is much more convenient if the electrical fittings are grouped and not randomly “scattered” around the room.
In addition to significant ergonomic advantages, such a technical solution has a lot of design advantages. However, it also makes you think about how a socket with a switch in one housing is connected to the electrical network. In our article you will find answers to all complex and simple questions that arise during the installation of such a block.
We provide comprehensive information on installation methods and methods of connecting block electrical devices. Subtleties and nuances are highlighted in photo collections and videos that clearly demonstrate the specifics of the work. Such powerful information support will help you cope with the task “perfectly”.
Areas of application
Triple switches are used to switch three groups of lighting fixtures.
It is possible to create combined lighting when both central and local light, multi-arm chandeliers, multi-level lamps in plasterboard ceilings, etc. are used. The advantages of tees include the following characteristics:
- economical energy consumption;
- small dimensions;
- attractive design;
- the ability to control lighting fixtures in different rooms from one place;
- the ability to use where the use of dimmers is not practical due to technical conditions;
- If desired, you can change the light intensity of the room.
Electricity savings are achieved as follows. For example, there is a six-lamp chandelier in the room, for which there is a single switch. When the lights are turned on, all six lamps are used, because there is simply no other option for supplying electricity. If the lighting fixtures are divided into zones, then after pressing one of the keys, two or three lamps will turn on, which may be quite enough for good illumination, and energy consumption will be lower.
So, the use of tees is justified when achieving the following goals:
- changes in the light intensity of one of the lighting fixtures;
- control from one place several light sources at once;
- control of individual lighting zones within one room.
Device: advantages and disadvantages
Until recently, the connection of various elements - sockets and switches - was carried out in a separate junction box, and then they were carried to those places that were determined by the project. Now savings come first: both time and effort. Paired designs make it possible to perform the operation much faster.
pros
Among the advantages of combined blocks:
- A simpler circuit, thanks to which there is no need to lay wires to each element.
- Fairly easy marking due to the larger block size.
- The fastest possible installation on walls.
- Minimum number of holes.
This is not to say that this solution does not have its drawbacks.
Minuses
These include:
- High price. Combined blocks, naturally, are more expensive than individual elements.
- Impracticality. If one component of the device fails, then more often the entire unit will have to be replaced.
- Increased load on wires. In this case, it is necessary to calculate their cross-section, otherwise the risk of overheating will be high. To connect a block device, it is recommended to take into account the maximum load.
- Location restrictions. The combined element can no longer be placed at the top of the wall, since in this case the appearance of the room will be spoiled by the plug and cable of an electrical appliance that is constantly needed. “Turning on the light” will not be very convenient, especially in the dark.
The biggest disadvantage is the need to replace the entire unit if one of the elements suddenly refuses to work. All other shortcomings can be accepted. But is the purchase of such an invention justified?
Alternative
In some situations, you need not one outlet, but several. Few people know how to connect them correctly so as not to cause trouble. Therefore, it is better to choose an alternative option - a block of sockets. Such blocks come in regular and power types. They are very convenient to install and easy to connect.
There is a switch on the side, which allows you to disconnect the load without pulling out the plug. You can purchase units of 10 and even 20 A. Please note that some models come without a power cord; it must be purchased separately.
When making repairs or modernization in a house or apartment, remember: apparent simplicity does not mean that you can cheat somewhere. And this is especially important in electrical engineering.
Principle of operation
Unlike a standard two-gang switch, the pass-through switch does not have an “on” and “off” position. Due to the different principle of operation of the mechanism, each key in it controls a changeover contact, that is, voltage is supplied to one outgoing contact and the power is simultaneously turned off from the other outgoing terminal. Two two-key devices control two different lamps/groups of luminaires from two different locations in the room.
The main feature of installing a pass-through switch with two keys is that one four-wire cable or two two-wire cables are laid between such switches. At the same time, it is enough to lay a two-core cable between single-key pass-through switches.
Basic connection options
In old houses, all connections were made in a junction box under the ceiling. After it, the wires diverged each to its consumer. With the advent of blocks - various devices assembled in a single housing - it became possible to save on cables and cut less wires. In addition, there is no need to carefully measure the height of the socket with the switch in order to place them exactly next to each other.
The disadvantage of such combined devices is that if one thing fails, everything will need to be replaced together. It cannot be replaced separately.
Single-key option
This is the simplest version of the block design. All you need is the unit itself and a connected 3-wire cable. In the distribution box itself, it is necessary to make the wiring: phase, zero - to the socket, zero - to the lamp, another wire from the lamp - to the switch. Now you need to make the necessary connections inside the block itself.
As can be seen from the figure, connecting elements in one block is no different from separate ones. A phase and a neutral go to the socket. The same phase goes to the contact of the switch, then to the lamp. Now everything is inserted into the box, screwed on, and the key is put on. If you did it right, everything will work.
If the outlet is grounded, then the cable will not have 3, but 4 wires. The fourth is yellow-green. It goes to the ground contact. You can't connect it anywhere else!
Two-key block
There are situations when you need to turn on the light in the bathroom or toilet, and then you need to connect the washing machine somewhere. An outlet can only be installed in the bathroom itself if it has the necessary waterproofing. If not, then it is best to mount everything in the hallway. To save space and wires, we will again use the “all in one case” block, but only now with two keys. Connecting it is also not difficult.
Some useful tips
- When choosing a model of a combined socket with a switch, give preference to a product that has two teeth on its legs. Such blocks are fixed more securely and firmly in the wall.
- If there is a need to connect several household appliances at the same time, use an outlet block. Most often it is used in kitchens where a refrigerator, hood, dishwasher, electric kettle, and TV are constantly running.
- When you buy socket boxes, choose models whose internal walls are ribbed. When installing the switching device, the spreading legs will cling more securely.
You are now familiar with all the disadvantages and advantages of such a combined block. Do you know how to install and connect such a switching device? Decide for yourself whether you need this type of socket with a switch or not. Let us repeat once again, for utility rooms this is a very convenient option; for a living room it is better to use a separate option.
Non-standard application
Some experts advise using a one-key switch with a socket instead of a standard socket - supplying the phase through a switch. This method is convenient for equipment without a shutdown button or quick de-energization of the equipment.
The disadvantage of the scheme is that it is compatible only with low-power consumers, which almost never happens in practice. None of the contacts are designed for high current, so the wiring heats up, melts and causes a fire.
The idea of combining a switch and socket appeared recently, but the devices quickly became popular for reasons of convenience and functionality. If the schemes are followed correctly, combined appliances will become an excellent interior solution, zone the space, and increase the number of power supply points.
Kinds
Two-key switches are available in several versions:
- with backlit keys;
- combined with a socket;
- designed as a pass-through switch.
By design, switches are available for outdoor or indoor installation. Connecting a two-button light switch depends on the specific situation. It is necessary to decide where the switch for two chandeliers will be used and decide which option is needed.
There are options for two-gang switches that have four contacts instead of the standard three. They are two isolated single-key switches combined in one housing. They are called modular.
For indoor installation
This device is the most common. It is used in office and residential buildings. Installed in a mounting box, which is mounted in a plasterboard or concrete/brick wall. Due to the fact that the switch is hidden in the wall, it is also called “recessed”. The wires are supplied to it in special grooves called grooves. If the switch is fixed in a framed plasterboard wall, then the cable to the switch is laid in a corrugated pipe.
For outdoor installation
When installing open-type wiring, outdoor switches are used. They are mounted on a non-flammable base, and the wires are connected to them in cable ducts, metal hoses, corrugated plastic pipes or on top of the wall on porcelain insulators. Most often, the connection diagram for a two-button switch for two open-type light bulbs is used in wooden houses of gardening partnerships. Outdoor installation is also used in sheds, garages, basements and other utility rooms.
Connection methods
The three-button switch can be connected using a junction box or without it.
With junction box
First of all, you will need to disassemble and remove the old switch from the wall, clean the niche and check the condition of the wiring. There should be five wires coming out of the wall. Now you need to turn off the power to the apartment, straighten the wires, and then direct power to them.
Using an indicator screwdriver or other device, paying attention to the color of the insulating material, find the single-core and neutral phase conductors and connect them to the socket. The phase is placed on the contact going to the jumper of the device. The remaining three wires are placed on their corresponding contacts. When you press the switch buttons, the lights should light up.
Installation of an outdoor unit
This block has its advantages and disadvantages. It is easier to install and replace this design, and you can also quickly detect problems with the device by its appearance - these are positive aspects. The only disadvantage is that in the interior, exposed wiring and outdoor units do not look so beautiful. Therefore, most often such devices are used in garages, bathhouses, sheds and other utility rooms.
- Always start any work related to electricity by de-energizing the room where you will be working. Turn off the voltage and use an indicator screwdriver to check its absence.
- Disassemble the unit body by removing the top (or front) cover.
- The back cover with the core must be secured to the wall. Place it in the place of future installation and mark the fastening points with a simple pencil. Set the block aside for now, drill the designated areas, and drive in the dowels. Now you can fix the core of the block with self-tapping screws.
- Then the electrical part is completed (how to connect the unit to the power supply will be discussed below), all that remains is to put on the top cover and secure it with screws.
Important! If the outdoor unit is installed on a wooden wall, install a paronite gasket between them. In the event of heating of the contacts and further ignition of the insulation, paronite will prevent spontaneous combustion of the wooden wall.
How to connect a socket and switch: diagrams and installation recommendations
You can replace switches and sockets yourself or hire specialists to do this work. If you lack knowledge and skills in handling the electrical network, it is better to give preference to the second option. In this case, the risk of short circuit is eliminated, and compliance with all safety rules and high-quality installation is guaranteed.
Note! If powerful electrical appliances such as a water heater are connected, grounding will be required. In this case, it is better to invite an electrician. The technician will select a cable with the optimal cross-section and correctly connect the wires to the outlet.
Connection diagram for socket with switch
List of necessary tools for installing the product yourself:
- drill core;
- drill;
- pliers;
- screwdrivers with insulated handles (2 pcs.);
- wire cutters
Preparation for installation involves choosing a location for installation, marking and drilling holes in the wall using a crown. If the wiring in the room is hidden, you will need to create a niche. The body part has perforated holes for cables. They should be broken out.
How to connect a socket and a switch from one two-wire wire
For a socket with a switch in one design, a certain sequence of installation actions is provided. The easiest way to solve the problem involves using a clear diagram for connecting the wires to the device in the distribution block.
Before carrying out work, it is imperative to turn off the power to the apartment or house.
How to connect a socket from a switch:
- Forming a hole for mounting an indoor unit or selecting the optimal location for installing an outdoor one.
- Determining the phase from the distribution panel and de-energizing the room.
- Phase supply to the switch. To do this, the ends of the phase conductors are stripped, twisted and covered with insulation.
- The neutral core of the network is connected to the socket and covered with insulation.
- Wires that are left unused are twisted together and covered with insulating material.
Using this diagram for connecting a socket and a switch by connecting the phase cable through a switch will be advisable if the power socket is used extremely rarely, and constant switching on and off of electrical appliances is required.
The operating principle of this design is extremely simple. If the switch is in the on position, a phase is supplied to the socket through the switch. This system is convenient in cases where there is a water heater installed in the room that does not have an off button. Due to the installation of the combined structure, you will not have to constantly pull the plug from the network.
Following safety rules, it is necessary to work with rubberized gloves.
How to connect a socket with a switch in one block
The switch and socket, combined in one design, can be operated separately from each other. For example, in a diagram for connecting a light bulb through a switch with a socket, cables with phase and neutral are laid from the main panel to the distributor box.
The box will contain several wires:
- Cables coming from the lamp (2 pcs.).
- Wires leading from the block (3 pcs.).
The phase conductor that comes from the shield is connected to the socket. The neutral conductor from the electrical network is connected to the neutral cable coming from the lamp and socket. In turn, the phase wires connecting the switch and the cartridge are twisted together and must be insulated. After this, the ground connection is connected using a suitable cable.
The process of connecting a socket with a switch in one housing
Helpful advice! To create a connection between the socket and the terminal located on the switch, it is advisable to use a jumper.
In this connection diagram for a single-key switch, the socket will operate independently of it. In this case, the process of turning off and on the light bulb of a lighting fixture in a room will not affect other elements of this design and affect their functioning.
How to connect a double switch and socket to the network
Most often, a two-key switch and socket are installed in a partition, in the area between the doors to the toilet and bathroom. Thanks to this, it becomes possible to control the lighting in two rooms and simultaneously connect any electrical appliances through an AC outlet.
Diagram of the distribution box and connection of a two-gang switch.
Five conductors are used for connection. They connect the twin structure and the junction box. During operation, you need to make sure that the neutral wire and the grounding conductor are connected to the outlet and only to it. Using a special jumper, you should apply a phase to a switch with two keys. This element is present in the switching block.
According to the double switch circuit, a pair of free wires is connected to its switching contacts. Through this element the phase will be supplied to the lighting fixtures located in the bathroom and toilet. In the distribution box, you should twist the wires of the free cores with those that supply the phase through the switch. Due to this, the system is connected to the light bulb sockets in the premises.
The ground and neutral wires are formed in the distributor box by connecting the bare ends with twists that were intended to connect the socket. If the need arises to replace the sequence of switch keys that supply voltage to the lighting fixtures in the bathroom and toilet, the cores on the switching contacts should be swapped.
Installation of the indoor unit
The housing of the switching device, recessed into the wall, is not so striking and does not spoil the overall appearance of the interior, therefore the method of closed wiring and the internal unit is used much more often, especially in residential premises.
- Work similarly begins with relieving tension in the room and checking its absence.
- Using an electric drill with a special attachment, drill a hole in the wall for the socket box.
- Choose a special plastic socket box, one-piece for two installation locations. Fix it in the wall hole using alabaster.
- Insert the core of the block into the socket box, make all the necessary electrical connections, after which the housing must be securely fixed in the socket box. This is done using spacer legs.
- All that remains is to install the top plastic cover.
How to install and connect the indoor switch-socket unit can be seen in this video:
Installation errors
When connecting a three-key switch with a socket in the same housing, erroneous actions are possible, as a result of which the lighting devices may not turn on. Common cases include:
- A non-working switch with a working socket indicates that the technician has mixed up the phase and neutral wires. You need to check the design with an indicator and make the required changes.
- Two buttons do not function until the third is pressed - a sign that the phase was launched to the output of the third button, and not to the main input.
You should not connect a tee to the socket - its contacts are not designed for high voltage, and the device may stop functioning.
Selecting wire cross-section
Experts recommend choosing the right cross-section of conductors to which the switch will be connected; this can significantly reduce the likelihood of a fire in the electrical wiring; for this, several conditions must be met:
- You need to know how powerful the lamp connected via the switch will be. Using the formula: power = current × voltage, you can find the value of the rated current; in a single-phase network, the voltage is usually considered to be 220 volts.
- Knowing the value of the rated current, using the table you can select the wire of the desired cross-section.
Table:
Table for selecting the wire of the required cross-section
Manufacturing companies
Often the choice of a particular switch with a socket is determined by the attractiveness of the design. For example, the Spanish company produces antique-style models. German products are distinguished by modern, sophisticated design. French electrics are successfully integrated into the surrounding interior: both vertical and horizontal modifications are made. Perhaps the widest selection of products is presented. The product line of this Swiss company also includes products with LED backlighting.
Among Russian manufacturers, Kuntsevo-Electro can be distinguished. The company produces several models of three-key switches:
- BELLA BKVR-039 (there is a socket without a grounding contact);
- BELLA BKVR-212 (with indicator light);
- BELLA BKVR-036 (the model is equipped with a European socket and protective curtains).
Combined unit Bella BKVR-033 and BKVR-054
The specified switches operate in 220 V networks with a rated current of 10 A. Models are also produced in Russia for a rated current of 16 A with grounding. For example, NPO Elektrotekhnika produces models BZVRzk-S and BZVRzksh-S.
How to properly connect machines after the meter
The installation of machines after the meter must be carried out according to the circuit diagram. The circuit should provide for the division of electrical wiring into several independent lines, each of which is protected by a separate circuit breaker and, if necessary, an RCD.
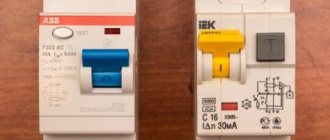
Note! If the dimensions of the distribution panel are limited, then it is possible to install differential circuit breakers that combine the functions of current protection and residual current devices. The cost of difavtomats is higher than the listed devices, but at the same time the wiring in the panel is simplified
The machines that will be installed after the meter must have a lower rating than the input one. If you install stronger ones, a fault in the network will cause the input circuit breaker to trip.
It is enough to protect lighting lines by installing a single-phase circuit breaker, and for sockets, two-pole protective devices are advisable, since a single-pole breaks only one wire.
