Intercom, Miscellaneous
Seasoned residents know very well how to use such a device, but beginners ask many questions about the operation of the intercom. This article will help owners understand their new device. In it you can find answers to several of the most frequently asked questions by users about the operation of this device.
Intercom device
First you should find out what the device consists of. The intercom system is built from the following parts:
- Power unit.
- Call panel.
- Exit button.
- Switch.
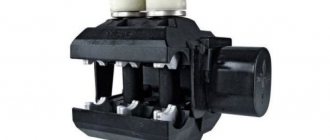
- Electromagnetic lock
- Panel tubes.
It is important to determine the types of intercoms, as well as the places where the devices will be used:
- Individual model. Well suited for a cottage or private home. The call panel is almost always mounted on the outside of the gate. But there are cases when the panel is mounted directly on the house, at the front door.
- Multi-subscriber. An excellent choice for a multi-storey building. Most often they are mounted on the entrance door. The intercom is a source of communication between the guest and the owner of the apartment. The signal is transmitted to the apartment. Please note that the resident of the house is required to purchase a card or intercom key to bypass the intercom blocking.
Also, communication devices can be divided into the following types:
- Analog. To work, you need a cable with several cores and a switch. The purpose of the first is to connect the apartments and the switch.
- Digital. Only 2 wires are used. Their goal is the same - connecting apartments and the switch.
Actions are performed in the following sequence:
- A man approaches the house. He presses buttons that correspond to the number of the apartment whose owner he wants to contact.
- The owner of the apartment receives a sound signal that someone wants to contact him.
- If the owner of the apartment wants to let the guest into the entrance, he presses the appropriate button.
- After the signal is transmitted, the lock on the door is removed.
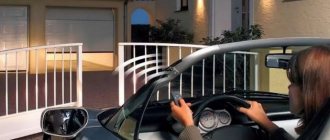
There are also video intercoms. Their difference is that a person will also be able to see the guest approaching the door. Such a structure can be moved to another place if necessary.
It is worth paying attention that it is advisable to entrust this work only to a specialist.
The device can operate correctly when it is connected to a network in which the current flows at the required frequency. Since the intercom is considered an electrical device, the presence of voltage in the network is the main condition for its operation. Each component of the device operates when there is power. If the power is lost, the operation of the device is immediately blocked. The monitor and speaking handset are also turned off. The door lock also does not work in this situation, since its magnetic element is turned off and it cannot hold the bolt. This is the main disadvantage of this security system, especially if it is installed in a private house or apartment. If the intercom in an apartment building is turned off, then in the worst case, only the entrance door opens, and access appears only to the landings.
Source
How to use an intercom from the street
Let's look at how the owner of the house can get into his apartment. When installing an intercom, he must receive a special key. You will have to purchase it yourself, and you can buy several keys at once. There is a special code on the tablet that allows you to get inside. The owner of the apartment must place the key with a tablet on the reader. The latter is located directly on the intercom. The code is read from the card. If it is correct and there is nothing blocking the reading of the code (scratches, dirt), the door will open. Now let's find out what a person who does not have a special card should do:
- The guest approaches the entrance. There he sees a panel with numbers from 1 to 9, similar to the one on a calculator. He dials the apartment number.
- The handset of the owner of the dialed apartment will begin to beep.
- The owner of the apartment asks the guest who he is. He can ignore the call if he does not want to see this person or does not know him.
- If the owner agrees and opens the door lock, the visitor will be able to easily enter the premises.
Note! If you are the owner of an apartment, you need to take care of the key. If there are scratches or dirt on it, the intercom may not open. The problem is that the defects interfere with signal processing and the device cannot read the correct code.
It is important that the visitor enters the code correctly, otherwise he may enter the apartment without being connected to the structure.
Connection procedure
Each intercom is supplied with a connection diagram. Before starting installation, you need to stock up on some items:
The difficulty comes from parsing the connection diagram to a special switch. It is located in the floor electrical panel. First of all, you will need to understand the tens and ones buses - each has a cable. At the same time, hundreds of tires are missing.
The procedure of “inserting” into the intercom line itself is carried out in six stages:
At this point, the insertion into the line can be considered complete. You just need to make the twist as high as possible and avoid poor contact. Don't forget to insulate the connection well. If for some reason it is not possible to do this by analogy, you can go down to the first floor or to the basement and inspect the switch. The connection diagram should be indicated on its surface. It will be enough to simply write down or remember the colors. Then connect the cable to certain contacts.
If everything is done according to the instructions and the indicated diagram, but problems arise in operation or the tube does not function at all, then there may be several reasons:
In the first case, it is easy to detect a malfunction and fix it. It is enough to inspect the cable and ring it using a special tester. Everything is much worse if the polarity is reversed. This will cause the remote control of several subscribers to operate simultaneously. In this case, serious problems may arise with the company servicing the intercom, as well as with the subscribers themselves.
It is easy to avoid such a situation. The polarity is marked on the tube. In accordance with the designations, it is worth marking the ends of the wire. If the noodles are laid, but there are no marks, then the situation can be resolved in two ways:
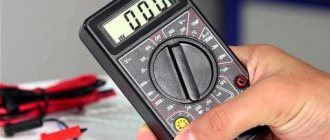
Using a tester, determining the polarity is very simple. To do this you need to do the following:
If in both cases the tester shows a break, regardless of the connection method, then there are two options:
In the latter case, you can resolve the situation yourself only if you know the master code. Otherwise, you need to contact the intercom service company. They are obliged to perform the unlocking - if the subscriber regularly pays for the service.
If desired, you can simultaneously connect several numbers to one apartment. For example, in different rooms - parents and child. Typically the switch is manufactured for 100 apartments. There are often several fewer of them in one entrance. Service company employees do not block others for various reasons. You can determine unused subscriber numbers very simply - by the total number of apartments or by examining the switch itself. The connection procedure is performed in a standard way. But it is necessary to extend another two-wire communication cable into the apartment.
On video: How to connect to the Vizit audio intercom yourself, connection diagram.
How to use an intercom from inside an apartment
Let's find out what the owner does when receiving an alert:
- Hears an alert. Fits the tube.
- He picks up the phone and asks the visitor who he is.
- Decides whether to let a person in.
- If he lets you in, he presses the button to remove the lock from the intercom. This will open the door.
Please note that the owner of the apartment must promptly pay the subscription fee for using the intercom system, otherwise his handset will be disconnected from the switchboard. Also, make sure that the button on the handset is in good working order; it often breaks.
Find out how to connect to the intercom for free if you are disconnected here.
Checking the handset connection
To check the functionality of the tube, do the following:
- The handset has a switch key. There are letters I and O.
- I means on, O means off.
- Let's see which one has the key on it.
- If it is on O, the door will not open.
Possible causes of tube malfunctions and repair methods
The intercom is one of the main elements of an integral intercom system. The situation when the intercom does not function is quite unpleasant and brings certain inconvenience to users. In this case, the apartment owner is not able to control access to the housing using his subscriber device. If the intercom device does not function in only one of the apartments, then the likelihood that the speaking tube has failed is very high.
If the speaking tube breaks, you can always replace it with new devices and continue to use the intercom system without any restrictions. But there are a number of breakdowns in which it is not necessary to change the entire intercom handset; you can simply eliminate these faults and continue to use the intercom system without resorting to the financial costs of purchasing a new intercom. There are several main types of breakdowns of this part of the intercom system:
- the tongue is broken or stuck;
- no sound;
- To open the door you need to press the button again.
Let's take a closer look at each of them.
The tongue is broken or sticks out
In the case when the tongue gets stuck, until it is pulled out, the call will go on constantly, and it will not be possible to open the door. In order to solve this problem, you should first disassemble the tube body by unscrewing the screws that hold it in place.
The tongue is located on the front panel where the door opening button and the handset on/off toggle switch are located. There is a special bracket on the inside of the front panel that holds the tongue, allowing it to move back and forth. During operation, this bracket unbends a little, causing the tongue to begin to move not only forward and backward, but also to the left/right. As a result, it disengages from the bracket and does not always return to its original position when the handset is hung up. As a result, a breakdown such as the tongue sinking is observed.
To eliminate it, you should return the bracket to its original position. To do this, you can use a regular soldering iron, which heats up the plastic bracket. When it is well heated, the bracket is aligned so that the tongue is held by it and is prevented from moving to the sides. After the plastic cools back down, the tongue will be fixed and can only move back and forth, ensuring the normal functioning of the intercom.
The most common reason is that the open button does not work.
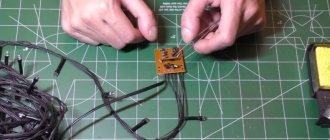
- Open the tube body.
- We pull out the board.
- We dismantle the old non-working button and solder a new one.
No sound
If there is no sound when using the intercom handset, then most likely the microphone or speaker has failed. In order to fix this problem, you need to disassemble the device and check the functionality of its microphone and speaker. It is also possible that the switching wires between these nodes have become unsoldered or come loose. If the speaker or microphone still does not work, then you need to purchase a similar part and install it in place of the failed one. After this, the speaking handset will function with the same functionality as before the breakdown.
Press again to open the door
The reason for pressing the button again to open the door is a faulty microswitch (microphone). This device is located on the electronic board under the door open button. During operation, the microphone may fail, which will eliminate the possibility of opening the door using the subscriber device. The first sign that the microswitch is not functioning correctly is the appearance of a crackling sound in the speaker when the door open button is pressed. After this, the microswitch will remain operational for some time, although the door is unlikely to open the first time - for this you will need to press the button several more times.
To correct the situation, you need to replace this microswitch, because it cannot be restored. The cost of the microphone is low, so repairs will not require a lot of financial resources. After purchasing a new microphone, you need to unsolder the old one from the electronic board. Since the microswitch fits tightly to the electronic board, you need to be careful when desoldering it and removing it from the contact sockets of the electronic board. After the microphone has been removed, a new switch is installed in its place and soldered to the contacts of the electronic board. Thanks to such a simple repair, the door opener call button will function as before.
Conclusion
Since the intercom handset is one of the main elements of the intercom system, it is important that it is always in working order. If a minor breakdown occurs, for example, one of those discussed above, you can fix it yourself, and then continue to use the device for its intended purpose. In case of more complex breakdowns, you need to seek help from specialists who service intercom systems. They will be able to quickly eliminate the breakdown, as well as the cause of its occurrence, and if the tube cannot be repaired, they will replace it with a new device. After this, the functionality of the intercom system will be restored and the user will be able to fully use all its capabilities.
Opening the door if a person is at the entrance
If a person leaves the house (he has already met the owner and is about to leave), he may have difficulty opening the door. But it's very simple:
- There is a special button on the door. If you press it, the door will open. The button is usually illuminated, making it very easy to identify even in the dark.
- It is located at a height of no higher than one and a half meters. But sometimes it is located low so that children can use the door opening.
- When you press the key, the door will emit a beep indicating that you can now go outside.
- If a guest finds himself on one of the upper floors and does not know where the exit is, pictures can help him. They are usually installed to indicate the location of the door. Pictures can be backlit so as not to get lost in the dark.
In modern times, an intercom has become a very useful thing. It protects the entrance from bad weather and ensures that no strangers will enter your entrance.
On video: Vizit intercom. The whole truth about the scam for keys in the Vizit intercom system.
Most common models
In our country, equipment for intercom systems is supplied by several large companies. Among them we can highlight such manufacturers as Metakom LLC, the VIZIN group of companies (Visit). Both companies offer comprehensive solutions for organizing remote access control systems (ACS). Both companies present a wide range of intercom equipment.
Based on the proposed elements, you can create low-user and multi-user intercom systems of any configuration. The company's products are distinguished by a high level of quality and engineering. The equipment can operate in difficult weather conditions of our country. Anti-vandal design ensures high durability of products.
Electrical circuit diagram
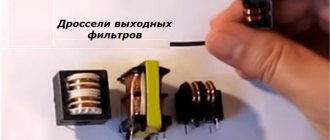
If you disassemble the intercom receiver, you can see that its “filling” is quite simple: a small electronic board, a button, some wires, a reed switch, a microphone, a speaker... and a lot of free space.
The circuit diagram of the intercom handset “Digital KL-2” is shown in the picture.
It already highlights places of frequently occurring damage - contacts:
- switch;
- reed switch;
- buttons.
Let's consider possible breakdowns inside the tube.
Exit button
There are contactless and mechanical exit buttons, the first are equipped with an infrared sensor, they work as soon as you bring your hand close to them.
Septic tank Topas - detailed review and description of technical characteristicsPetrol mower repair: overview of faults and effective methods for solving them. Photo instructions from the pros!
- Garden composter - which one to choose? Review of the best views for a summer residence (100 photos)