You drive up to your garage or garden, press a button on the remote control (or the built-in transmitter in the car), and the entrance opens automatically. This is convenient: there is no need to get out of the car (especially in the rain).
Of course, there are also disadvantages that can negate all possible advantages:
- Automatic gates with remote opening reduce the level of security of your home. The signal from the remote control can be intercepted. Attackers, using simple devices, read the radio code and can gain access to the territory after your departure.
- The electric drive in a sense limits freedom: in the event of a malfunction, or a banal lack of electricity, opening the doors manually can be problematic.
- The installed actuator takes up a certain place and spoils the aesthetics of the fence of your home.
- Mechanical doors with incorrectly configured automation are an object of increased danger: animals or even people can fall under their influence.
- A guaranteed free area along the trajectory of the valves is required.
- The main disadvantage is that automation for swing or garage doors costs a lot of money.
While installing automatic gates with your own hands is still possible, making actuators and a gate control system is quite difficult. You will need a factory engine, mechanical rods, possibly gears, etc. Of course, the sliding gate mechanism can be purchased at a specialized store.
However, the cost of such a set most often exceeds the cost of manufacturing the doors themselves. In addition, installing automation on ready-made swing gates with your own hands can be complicated by incompatibility in geometry.
However, automatic garage doors are created with your own hands and can be easily installed both in the fence (fence) and in the garage door. The savings in this case are significant, plus moral satisfaction after successfully completed work.
Preparation for construction: drawings and diagrams
Installation of automatic gates should begin with drawing up a drawing. Using a pencil, you should draw a diagram of the gate taking into account the dimensions on a sheet of paper. It is advisable to indicate the main dimensions of the parts on the diagram.
The dimensions of the automatic design must be specified as accurately as possible. During the calculation process, the following requirements must be observed:
- when a vehicle enters the garage, a minimum of 30 cm must remain on each side;
- the higher this indicator, the easier it will be to enter the site;
- The width must be determined taking into account the type of vehicle.
For an ordinary passenger car, a width of 2.5 m and a height of 2 m are enough. For a minibus, the height should be about 2.5 m.
The automatic one differs from the standard swing design only in the presence of a drive. At this stage, you should decide on the type of device - whether it will be installed lever or linear. If you plan to install sliding gates, then most often a drive with levers is used. Linear is installed if there is a minimum distance from the extreme part of the support to the loop. If there is a gap of more than 15 cm, then it is advisable to use a lever device.
Automation installation diagram indicating the number of cable cores and their cross-sections
Sliding gates will be affected by wind loads, so it is important to take care of protecting the devices in advance.
If you plan to install automatic garage doors, then the ceiling level must be lowered by 25 cm. This should be taken into account, since installation will require space under the ceiling structure.
The design of the automatic recoil design is practically no different.
Layout of elements of automatic sliding gates
In this case, only one electric motor will be needed.
Sectional
In many European countries, sectional doors are the most common type of security devices for garages and the entrance area of a suburban area. In terms of technical equipment, their design consists of separate sections connected to each other by hinges, moving along guide rails fixed along the opening and shifted under the ceiling of the room. The movement of the garage door leaf of this type is carried out along a vertical plane. This is very convenient in everyday use, since no additional space is required to open the gate, even if the car is located directly in front of the entrance.
For ease of use, sectional doors can be equipped with a side door or a built-in wicket door.
A separate door significantly improves the convenience of everyday use of the garage, reduces heat loss in the room and increases the level of security of the facility. After all, if there is a door or gate, you do not need to lift the gate entirely to enter the box.
An important advantage of automatic sectional gates is the presence of a reliable and convenient access restriction system. You can first select a rotating latch or a special latch to open the system only from inside the room. To close the structure from the outside, an automatic deadbolt lock with a stable pin and a reliable snap washer is installed.
Varieties
A well-chosen control system will provide the facility with high reliability at an affordable price. When the gate leaves are closed, the installed drive additionally serves as a high-quality locking device.
Tips for choosing automation
Having decided to install automation, the owner of a private house assumes that it will serve for decades. A high-quality set can function for many decades, but low-quality components can become an extra headache. To make the right choice, you should consider the following recommendations:
Manufacturer's choice
Today in construction supermarkets you can find automation from Chinese and European factories. Chinese devices aim to significantly reduce cost at the expense of quality, but there are exceptions. Well-known Chinese companies offer high-quality products for the automation of various types of gates.
Among European manufacturers, it is worth giving preference to Italian and German fittings, but the latter is more expensive. Regardless of which manufacturer you choose, you should not buy a cheap part that no one has heard of. Automatic movements are purchased for a long time, so you should not save on it.
Selecting a gate drive
An automation installation specialist can recommend the best option, but you need to understand this issue yourself. As mentioned earlier, the drive can be worm or lever. The choice must first be made based on preferences for the appearance of the product. You should also consider which direction the structure will open - into the yard or the roadway.
The worm drive is easy to install, easy to maintain and has a long service life. This type of mechanism can be installed on gates that open both inside and outside the building. If the structure opens outward, then there are restrictions: the gate opening will decrease by approximately 30 cm. This is due to the installation features. If there is no free space, then such a drive is not suitable.
Using a drive with levers, gates that open into the territory are automated.
The lever drive can only open the gate inwards
The lever mechanism is more advanced in terms of manufacturability. The disadvantage is the high cost.
Accordingly, if the gate will open into the territory, then you can choose any type of drive. If outward, then only a worm mechanism can be used.
Drive power selection
When choosing automatic mechanisms, the weight of the sashes must be taken into account. The technical documentation indicates how much weight the device is designed for. It is recommended to install an electric drive that is designed for greater weight. Recommended power reserve is 30%. If the device operates at its power limit, the drive will overheat. This will entail failure of the mechanism before the time stated by the manufacturer.
Wind loads should also be taken into account. If the gate consists of a single piece, then the drive will have to overcome the influence of wind. Accordingly, a more powerful design will be needed.
Another problem is climate change during cold times. In summer, the design can easily open gates weighing 250 kg, but in winter, difficulties may arise, since the drive will operate in labor-intensive conditions. It is imperative to take into account that in some regions the power supply voltage drops during this period. In this case, drives without power reserve may not turn on.
Availability of additional functions
Manufacturers produce a wide selection of accessories. You should definitely purchase photocells that help stop the gate closing process if obstacles appear in the coverage area:
It is recommended to install photocells for sliding gates
It is also recommended to purchase an antenna that can increase the range of the remote control. Signal lamps can alert others when the gate is open. This function will be needed if the exit goes onto the sidewalk where people walk.
The choice of additional options depends on the operating conditions of the gate.
It is also important to take into account the technical parameters that are used to classify automatic mechanisms:
- Torque (Nm) is the basic automation parameter for a lever swing structure. This characteristic is not used for worm gear automatics. Torque can show how much weight the structure can open the actuator. The higher the indicator, the greater the weight of the valves that the automatic mechanism can open. For gates weighing up to 800 kg, the optimal torque is 3000 Nm.
- Intensity (%) – a parameter that shows the maximum intensity of use of the electric motor. Intensity is the ratio of the period of operation of the device to the total time. For example, if the parameter is 30%, then the structure can work 30% of the time, while the interruption in work will be 70% of the time. Typically this value is sufficient for standard parameter gates.
- Traction force (N) – the parameter will show with what force the mechanism presses on the doors. The higher the characteristic, the more powerful the drive. The optimal value for a 6 m gate is 400 N.
The maximum sash weight parameter should not be taken into account. The choice must be made based on traction and torque.
Advantages of technology.
To fully consider the issue, it is necessary to determine the most significant advantages of this option for manufacturing gates.
- Strength. Sectional doors are mounted on a rigid frame and have sufficient mechanical strength to cope with loads.
- Safety. The reliability of the design and the ability to integrate electronic security systems make automatic gates one of the safest solutions.
- Durability. In the manufacture of such systems, modern materials are used, which ensure a long service life while maintaining the original characteristics.
- Convenience. Thanks to the automation system and the possibility of remote control, using such gates is convenient and simple.
- Compactness. Automatic gates are mounted in a special frame and open upward, which allows you to save useful yard space and more efficiently use the internal volume of the room in which they are installed.
- Aesthetics. Advanced materials and a wide range of possible options for manufacturing lamella panels create the opportunity to choose the appearance of the product that suits the overall exterior.
In addition, automatic gates have a high degree of versatility in use. They can be installed in an opening with any parameters, and there are no restrictions either in terms of physical dimensions or scope of application.
Step-by-step guide to making gate automation
There are many options for making a drive with your own hands from various materials.
How to build a drive for sliding gates?
You can make a drive from two carriages. You will need to do the following:
- The frame needs to be cut so that the vertical pipe that comes from the axis protrudes a few cm above the star.
- On one side, you need to dismantle the pedal, and on the other, remove the pedal and connecting rod.
- There should be 2 sprockets. Their dimensions and tooth pitch should be the same, since the drive will use a single chain.
- The carriages must be attached by welding to the top of the frame. Stars that are placed in the corners should be placed parallel to each other.
- The connecting rods should be placed at a short distance from the frame.
- It is recommended to select the rods that connect the connecting rods to the gate in accordance with the dimensions of the stars.
- When the sprockets move, the rod that connects the flaps to the connecting rods will move the blade.
- It is difficult to choose the exact length of the bar, since there are different models of bicycles. A design with a diameter of M-8 is suitable. The bar can be made from a metal strip.
- The chain must be put crosswise on the stars. As a result, they should scroll in different directions. The design is made from several chains from a bicycle. They will need to be fastened to each other.
- It is important to tension the chain well. However, this will not solve the problem that it may sag or come off. This can only be eliminated by welding several steel strips to the frame that can support the chain. The parts will also be used as guides. Another option is to fix large-width rollers along which the chain will move.
Homemade gate drive from a bicycle frame assembly
The chain is mounted exclusively on closed gates. After this, a design check should be performed. To do this, you need to push out one sash. The second will have to move symmetrically to the first. If there is overlap, the chain should be moved one tooth.
How to make a drive for sliding gates?
The lightweight sash can be driven by a drive from a modernized window lift mechanism. The advantages of the method include ease of manufacture and operation with virtually no noise. The following window lifters can be used as a drive:
- a drive that operates using a gear;
- a design in which a rack with teeth is used as a moving element.
In each case, the drive part must be installed on an iron platform, which is securely attached to the pole. The metal bar should move parallel to the base of the gate and extend towards it.
The window lift mechanism needs to be modified:
- If a rail is used, then the first step is to install an extended metal rod.
- When using a gear wheel, a knee lever must be installed.
- Next you need to connect the rod to the drive and the gate.
- The two parts of the knee lever are fixed in the form of a fork joint. The design is similar to that of a door closer.
The connection of the rod with the drive and the gate must be made in the form of a fork joint
It is recommended to make one side of the connection in the form of bonded plates. The parts are fixed with a bolt and nut.
Question about automation for sliding and sliding gates
The next step is to install the motor for the sliding gate.
After manufacturing the drive, you will need to install the gate automation
To open the gate, you will need to push one leaf or pull the chain towards you. To automate the design, you can install an electric motor and connect it to gearboxes from car wipers.
The electric motor will need to be connected to the car wiper gearboxes
An old battery can be used as an energy source. Due to this device, the automation will not depend on electricity. The disadvantage of an old battery is that it will open the doors slowly.
Another option is to use an electric motor from a washing machine. The average power of the device is 105–115 W, the scrolling speed is 1500 rpm. A screw jack for passenger vehicles can be used as a gearbox. The jack will need to be improved. To do this, you need to install a pulley from a washing machine behind the bevel gear. In this way you can turn the jack into a linear gearbox.
The jack must be welded parallel to the chain so that the slider pulls the chain while moving. Iron wire is used to fasten the parts together.
It is important to know: if the electricity is turned off, you will have to unwind the wire each time to open the gate.
To connect the electric motor to the pulley, you will need a belt from a washing machine. The engine speed will be reduced by approximately 1:4, so the pulley diameter should be minimal.
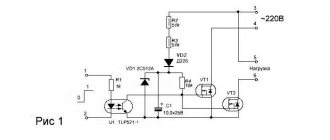
To remotely control the gate, you will need to buy a single-channel 12 V car alarm and connect it.
You can connect the radio control using a car alarm using this diagram
If you have no experience, it is recommended to entrust the task to an electrician.
Automation for sliding gates consists of the same elements. The only difference is that you will need 2 electric motors. They are located in the side parts of the gate. You will also need to install levers. They can be made from a profile pipe.
Stages of work
To get a good result, you must strictly follow the step-by-step instructions.
First, the support posts are installed. To avoid bending of the racks, the depth to which they must be lowered into the ground must be at least 1 meter.
The racks must be installed in the following sequence :
- Mark the installation location.
- Dig 2 holes at least 1.3 m deep and 0.6 m wide.
- Pour fine crushed stone 15-25 cm thick into the bottom of the holes.
- Install and level the support.
- Fill with concrete.
If the weight of the canvases is large, then additional strengthening of the racks will be required. This can be done using a bottom bandage, having first dug a trench from post to post. Then strengthen everything with reinforcement and fill it with concrete.
It is important not to continue further work until the concrete has dried well. In warm weather, a week is enough.
Welding of the sashes is carried out in several stages:
- The profile is cut according to the dimensions in the drawing.
- Cut the ends of the profile at an angle of 45° in the elements that create the main rectangle.
- The structure is welded.
- The remaining elements of the middle are welded.
- The hinges are welded.
- All welded elements are cleaned with a grinder.
- Profile sheets are attached using bolts, and the structure is sewn up.
After welding the opposite hinges on the posts and installing the gate, you can proceed to installing the automatic mechanism.
This is interesting: do-it-yourself sliding gates without automation.
After installation of the entire structure, the quality of gate opening, operation of the automated mechanism, etc. is checked. The engine and all electrical parts can be protected from rain with a casing made from scrap materials.
For the owner of a summer cottage who knows how to work with tools such as welding and a grinder, making a gate is not difficult. But a more complex procedure is process automation. Not all homeowners risk making automatic gates themselves, fearing complex electrical mechanisms. However, making automated gates is not difficult. The main thing is desire and compliance with the weight of the gate, the reliability of the mechanism and support pillars.
How to set up automation?
Each mechanism has its own characteristics. In order for the structure to serve for a long time, you will need to correctly program the control device. Different manufacturers have different parameters, but the most commonly adjusted parameters are:
- Current sensitivity. The parameter is responsible for starting the protective device. If an obstacle appears, the gate stops.
- Change speed. The speed of movement of the shutters can be changed by reducing or increasing the power of the electric motor. It is not recommended to set a fast pace, as this can lead to equipment failure. To increase speed, you can increase the voltage to 38 V.
- Automatic closing. To implement this function, the design must include a timer. It is best to purchase the part ready-made.
Other functions can be implemented by adding appropriate parts to the design diagram.
Drive types.
Another criterion that distinguishes automatic sectional doors from each other is the drive used. In addition to being divided into industrial and “civil” manufacturing options, these design elements will differ in operating principles.
So we can distinguish:
- Manual drives are the simplest and cheapest manufacturing options. To work, it is necessary to apply human muscular strength, which makes it possible to significantly simplify and, therefore, reduce the cost of the unit. Such drives can be installed both at industrial facilities and in private garages, however, due to the specifics of the work, they will have certain limitations and have less functionality.
- Automatic drives - this type of device is much more complex in design, since it requires the presence of an electric motor and a gearbox, which means that such a drive will be significantly more expensive than the analogue mentioned above. However, using such gates will be more convenient and easier, especially if you install a fully automatic control system equipped with motion sensors.
In the context of the material, it is the second drive option that will be considered, since it can be considered more advanced in a number of parameters.
In addition, the drives will differ in their operating principle:
- Ceiling drives. They ensure the movement of the door leaf inside the guide elements through its linear movement. This can be achieved, for example, through the movement of certain elements along a thread or a chain/belt drive.
- Axial drives. Used to move the canvas using an electric motor.
In private use, each of the options can be used, however, due to its greater prevalence, gates with the first type of drive will be considered below.
Tips for use
To ensure that these gates serve for a long time, you need to adhere to the following tips for use:
- From time to time the mechanisms need to be serviced. The process involves lubricating moving elements. Only anti-freeze lubricants may be used.
- The guides should be inspected periodically and cleaned of debris. If ice forms, the blade may jam.
- Automation mechanisms are also subject to inspection. Parts need to be checked at least once a year. If any of the elements fails, it is recommended to entrust the repair to specialists.
- You need to keep an eye on the canvas. It has an anti-corrosion coating, but it is often damaged. It is recommended to promptly clean the gate from dirt using water and soap solution. If any of the sections is bent or scratched, it should be treated with special anti-corrosion agents or replaced.
It often happens that some of the do-it-yourself parts are easier and cheaper to replace with others.
General description.
Automatic sectional doors are a system consisting of a rigid frame, a drive and the door leaf . Depending on the specific model, control can be carried out either using a special switchboard, which is installed indoors, or a remote control . If installation rules are followed and a quality manufacturer is selected, this type of device combines excellent performance characteristics, strength and durability.
What to look for when choosing a gate
Each design has its own characteristics. In order not to make a mistake with your choice, you need to study all the features of the gate, evaluate the area and compare all the criteria. Having made the right decision, the design will last a long time while maintaining all its performance qualities.
Before purchasing, you should take a number of measurements:
- For a car to enter, the opening must be made taking into account the width of the car door and a half meters on each side and this is the standard width of the gate on the site.
- If large equipment is planned to enter the site, it is recommended to increase the opening width to 4 meters.
- Gates with a wicket can be made on one leaf. It is more convenient to move the gate and make it separate.
- Wickets can also be equipped with special automatic devices for remote control.
Automatic swing doors
Automation kits are sold for swing gates, including power drives (linear, lever, hydraulic, electromechanical). There are separate articles on the question of which mechanisms are better, as well as on their installation. It is necessary to pay attention to the withstand wind load of the canvases, the possibility of swinging in both directions or only in one direction (by how many degrees).
Automatic swing gates are easy to install, and if the entrance to the facility is already decorated with such doors, they can be easily automated by attaching the servo drive to the posts, and the levers that transfer the articulation forces to the doors. All elements are attached relatively simply, according to the instructions, if you briefly show the installation, then the above parts are bolted to the corresponding elements of the gate (to the column and leaf), there are types of motors (underground) that can be concreted.
General points.
First of all, it is necessary to take into account that one of the main conditions for the proper operation of automatic gate mechanisms is the maximum geometric accuracy of the installation of elements. This is especially true for the supporting frame, on which the blade and drive will be installed.
This means that the main frame elements must be in the same plane and level. This is necessary to ensure that there are no distortions during installation of the structure.
Another point that is important to consider when installing automatic sectional doors is the need for electricity for the system to operate. To ensure uninterrupted operation, some purchase a diesel generator, while others install a mechanical opening system, which will duplicate the main one in the event of a power outage. The question seems obvious, but requires immediate attention.
Among other things, when choosing the optimal drive for your gate, it is worth purchasing models with some power reserve. The more powerful the device, the more weight of the canvas it can move, but it is also more expensive. It is important to maintain a balance here - it is unlikely to be advisable to overpay for excess power, but you should not save on this element either. In most cases, a 30% margin will be sufficient. This will be enough to cope with additional load (icing of the lower edge of the canvas, fallen snow), and will also ensure a longer service life of the entire system.
Classification of gates with remote control
Gates are an essential element of any fence. They are installed in private, industrial areas. Automation of the design allows a person to open and close the doors while sitting in a car or at home, without requiring any effort. It is automatic entry structures that are most popular among consumers today.
Types of use can be divided into three groups:
- Garage;
- Entry;
- Production.
Each group has its own distinctive characteristics. Installation is possible if all necessary conditions are met.
The design features of the product divide them into separate groups:
- Swing;
- Lifting;
- Recoil;
- Rotary;
- Rolled;
- Sectional.
Problems
More than half of the breakdowns involve mechanical parts. If the shutters are jammed due to an obstacle or for other reasons, the mechanism is switched to manual mode, the shutters are placed in their original position, and it is turned on again.
If the gate does not work, check the power supply, cable connections, and try to open it from the local control unit, and not using the key fob.
If the remote control is lost, the structure is opened using a panel with a code keyboard (expensive kits). You can also turn off the control unit, unlock the gear, and open the doors manually. If the reed switches and diodes are burned out (lightning discharge, power surge), the solution is replacement.
Actuator assembly
Actuator sizing
The actuator is based on a telescopic mechanism. To create it, you will need a pair of metal manifolds. One of them should fit into the other without play. Pipes with square and round cross-sections are suitable - this will not play a special role. There should be no rust, cracks or chips in the cavity. Therefore, it is recommended to purchase pipes that have not been used in work before.
The dimensions of pipes and studs should be calculated independently based on preliminary measurements.
For example, there is a folded drive 110 cm long with a working stroke of 50 cm. Then the length of the external collector should be no more than 100 cm, and another channel will be embedded inside it - even less, 80 cm.
But the length of the pin can be from 110 cm. This is influenced by the method of fixing the engine. When the gate is open, the drive pipes have an overlap of 30 cm.
Assembling the retractable part
Algorithm for assembling the retractable part:
- We pass a pin with twisted hardware through the smallest manifold and install it in the central part of the pipe. The latter should not have too large a diameter;
- Using even force, grind the hardware until it completely fits into the channel;
- We fix everything with a welding machine. There is no need to weld inside. But, if you wish, you can do this through the cut hole;
- After securing the hardware, unscrew the pin;
- At the end of the pin we fix a support part with a cleaning apparatus, which is closed on both sides;
- The bearing must slide freely along the pipe cavity. The space between it and the canal wall should be no more than 1 mm;
- We clamp the supporting element on the stud with two hardware;
- We place a couple of washers between the nuts to prevent rotation difficulties;
- Lubricate the pin with lithol;
- We insert the pin inside the smallest manifold and tighten the hardware;
To check the correct assembly, you can run a bearing along the entire length of the pipe. It should move easily and not jam.
Plugs and swivels
Now is the time to do the stub. It is a steel blank. Its size is slightly smaller than the diameter of the collector.
So that the drive can be repaired at any time, several holes should be made in the channel.
Metal strips with a hole must be attached to the end of the plug by welding. The space between them should not be greater than the thickness of the lock on the gate leaf.
Before installing the plug, 50-70 g of lithol can be placed inside the pipe. Next, install the bearing into the channel 5 cm, after which do not forget to add lubricant and plug the collector.
Actuator outer tube
The pin is completely pulled out of the manifold until the bearing rests against the nut hardware. The internal collector is installed in the external one, and the pin is tightened 5-6 turns.
After this, installers choose a method for fixing the engine. Ideally, the cylindrical motor housing is fixed inside the manifold using clamping fasteners.
If you have difficulty finding an engine of a suitable size, then you can weld a piece of channel, metal strip or corner to the rear. Thus, it will be possible to fix a small motor using any available option.
Motor installation and final assembly
The motor shaft and stud are connected together using a coupling. You can buy it in the store. It is usually sold among engine components. Sometimes you can create it yourself using a couple of small tubes. They must be nested within each other.
Re-lubricate the stud with lithol and mount the motor on the platform. Using rotational movements, it shortens the length of the trigger mechanism to its original position. Next, we lubricate the entire surface of the internal manifold with lithol and completely fold the drive mechanism.
If the engine is fixed in the inner part of the manifold, then it needs to be placed to a depth of 5-6 cm. In this case, it is advisable to use a plug identical to the first one.
The wiring can be passed through the hole made at the bottom of the collector. The main thing is that moisture does not get there. Another area to create a hole is the plug itself. Regardless of the method chosen, it is recommended to install gland entries.
When we mount the motor on the platform, we must weld the bearing to it. After this, you should definitely make sure that the structure is reliable and rigid. It is better to equip the engine with a protective casing.
When everything is done, all that remains is to install the trigger mechanisms in the required place. Finally, you need to connect the ends of the plugs with the fasteners on the doors and poles. For this you may need hardware.
