Local power grids are not always able to fully provide electricity to homes, especially when it comes to country houses and mansions. Interruptions in the constant power supply or its complete absence forces us to look for alternative ways to obtain electricity. One of these is the use of an electric generator - a device capable of converting and storing electricity , using the most unusual resources (energy from the sun, wind, tides). Its operating principle is quite simple, which makes it possible to make an electric generator with your own hands. A homemade model may not be able to compete with a factory-assembled analogue, but this is a great way to save more than 10,000 rubles. If we consider a homemade electric generator as a temporary alternative source of power supply, then it is quite possible to get by with a homemade one.
How to make an electric generator, what is required for this, as well as what nuances will have to be taken into account, we will find out further.
220 V water generator: how to make it at home?
Various methods are used to heat private houses. They differ from each other in heat transfer and type of energy carrier. In the process of using water heating, different types of boilers are used depending on the type of fuel:
- Solid fuel - in this case, solid fuel is used for operation.
- Electric - in such boilers, heat is converted by converting electricity.
- Gas - in such boilers, heat transfer occurs at the moment of gas combustion.
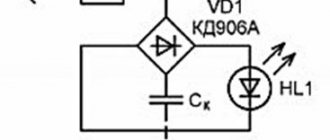
A water generator is a container of water containing electrodes for converting water into oxygen and hydrogen. To make your own water generator, you will need:
- stainless steel sheet;
- plexiglass plate;
- rubber tubes for water supply and gas outlet;
- rubber sheets;
- a voltage source that should provide a current of 5–8 A.
To assemble a water generator, you need:
- First cut the stainless steel plates into rectangular sheets.
- Cut off the corners on them in order to further tighten the device with bolts.
- In each plate, drill a 5 mm hole at a distance of 3 cm from the bottom of the plate for water inlet and outlet.
- In addition, a wire should be soldered to the plates to connect it to the power source.
Before assembling the generator from rubber, rings with a diameter of 200 × 190 mm are first cut. Prepare two plexiglass plates with dimensions of 200 × 200 mm, and you need to pre-drill holes in them on all sides for M8 bolts.
They start assembling the water generator like this: first they put the first plate, then a rubber ring coated with sealant, and so on according to the same pattern. After this, the entire structure is tightened with bolts and plexiglass plates.
In the latter you need to drill holes: in one plate at the bottom for liquid to pass through, in the other at the top for gas removal. A fitting should be inserted there. PVC tubes must be placed on these fittings.
Reference! To prevent gas from getting back into the gas generator, a water seal must be installed on the way from it to the burner.
The advantages of this type of heating include the following:
- ecological type of heating, because when hydrogen is burned in oxygen, water appears in the form of steam, and there are no emissions of harmful substances into the atmosphere;
- you can connect the generator to an existing water heating system without modification;
- the installation operates silently, so it does not require any special room.
The disadvantages of a water generator include:
- Hydrogen has a high combustion temperature, so a simple boiler can quickly break down.
- You must be careful when working with Brown's gas as it is explosive.
- When operating a water generator, it is necessary to use distilled water.
Launch
The portable generator must be placed on a flat, dry surface, and if working in an open space, it must be protected from precipitation. Since single-cylinder engines used in gasoline-powered generators are characterized by a high level of vibration, foreign objects, and especially fuel containers, should not be placed on the generator to avoid them falling.
Before starting, you must make sure that the engine oil level is sufficient and, if necessary, add it, after which the generator engine can be started.
The load can be connected to the generator only after the engine has been started. Do not run the generator while electrical appliances are connected to it.
To start a gasoline engine, a special air damper is used, which enriches the fuel mixture in the closed position. When starting the engine for the first time, especially in cold weather, it must be closed the more, the lower the air temperature, and as the engine warms up, open it smoothly
A warm engine should start without closing the throttle, otherwise you should pay attention to the carburetor adjustments. Starting, depending on the design of the engine, is carried out either by a cable starter (pull it out smoothly until you feel resistance, then sharply increase the force) or electric (to start, press and hold the start button)
Starting a diesel engine differs only in that there is no need to use the air damper, but instead you need to slightly open the decompressor - a device that reduces the pressure in the combustion chamber to facilitate cranking during startup. In addition, starting a diesel engine can be made very difficult by an airy fuel system (the first start of a new generator or if the tank was previously run dry). In this case, you will have to bleed the fuel system (the bleeding procedure differs for different engines and is described in the operating manual).
After letting the generator run for some time (in the warm season, the gasoline engine will warm up quite quickly, no more than a minute), you can connect the load, making sure that the performance indicators or voltage indicator of the generator set indicate its full functionality.
Wood-burning home appliance
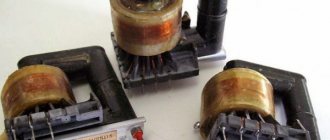
Self-assembly of such a model is not difficult. When creating it, you need to buy or remove a Peltier element from an old refrigerator. It is a thin-walled plate square. One of its panels is made of copper, and the other of nickel.
Contact clamps are attached to them and connected to the network. The operation of such a generator is that when current passes through metal surfaces, one side of it heats up and the other cools down.
When a solid fuel generator operates, the reverse method of action is used: one plate is heated by burning wood, and the other is cooled by a cooler and radiator connected to the unit. At this moment, an electric current is formed between the parts, which was what needed to be obtained.
In addition to the Pelte element, during the generator assembly process you will need:
- metal sheet for the body;
- a part that stabilizes voltage;
- cooler and radiator;
- heat-conducting paste;
- device for setting rivets;
- metal scissors;
- rivets, drill and soldering iron.
Help: after preparing all the necessary tools and materials, you can begin assembling the mechanism. There are ready-made sets of power tools on sale.
First you need to make a metal case in the shape of a cylinder. Holes for air intake should be installed at the bottom, and a stand with a container for water should be installed on top.
The radiator is secured with thermal paste on the cold side. The main heating element is attached to the other edge. During assembly, you will also need an electricity stabilizer with a USB connector. This device will create voltage and allow you to cook food and charge various electrical appliances. The stabilizing part must be insulated and soldered to the main element, taking into account the poles.
Upon closer examination of this device, there is one big flaw - the high price for many tourists and summer residents. But with frequent use, the cost is justified by the savings on fuel. Firewood is cheaper than diesel fuel and gasoline.
In addition, when operating such an electric generator indoors, you need to install a chimney. It releases combustion products into the atmosphere. But, despite these disadvantages, a wood-burning device also has advantages:
- capable of heating a house up to 50 cubic meters;
- can be used as a stove for cooking;
- the device is small in size, so it can be installed in small rooms;
- long service life;
- light weight;
- no noise during operation;
- economical use of fuel.
Make or buy?
The desire to have an electric generator in your use is overshadowed by one nuisance - the high cost of the unit . Whatever one may say, the lowest-power models have a fairly exorbitant cost - from 15,000 rubles and above. It is this fact that suggests the idea of creating a generator with your own hands. However, the process itself can be difficult if:
- no skill in working with tools and diagrams;
- there is no experience in creating such devices;
- the necessary parts and spare parts are not available.
If all this and a great desire are present, then you can try to assemble a generator , guided by the assembly instructions and the attached diagram.
It is no secret that a purchased electric generator will have a more expanded list of capabilities and functions, while a homemade one can fail and fail at the most inopportune moments. Therefore, whether to buy or do it yourself is a purely individual question that requires a responsible approach.
From an electric motor
To convert an electric motor into a functioning generator, it is necessary to use non-polar capacitor banks, so it is better not to use electrolytic capacitors.
You can connect a capacitor in the motor using two schemes:
- “Star” - with its help you can generate at the lowest number of revolutions, but with a low output voltage.
- “Triangle” - operates at high speeds, so it generates more voltage.
Expert opinion
Ivan Zaitsev
Lighting specialist, consultant in the building materials department of a large chain of stores
You can create your own device from a single-phase motor, provided that it is equipped with a rotor. To start development, you need to use a phase-shifting capacitor. Single-phase is not suitable for conversion.
It’s easy to create a generator; the main thing is to have all the necessary components on hand in the form of:
- asynchronous motor;
- tachometer;
- capacitor containers;
- the capacitor itself;
- set of tools.
During the assembly process you will need to perform the following steps:
- First you need to connect the electric motor to the network and start it. Next, use a tachometer to determine its rotation speed.
- Having found out the speed, you need to add another 10% to the obtained value.
- Next you need to select a capacitance for the capacitors.
Important! If the capacity is large, the generator will heat up quickly. You need to choose ones that will provide the required rotation speed.
A generator with a squirrel-cage rotor creates a high voltage, so if you need 220 V, you will need to install a step-down transformer.
The main advantage of this device is that the existing capacitors do not require maintenance, because all the energy of the rotor is transferred from the magnetic field of the rotor and the current generated during the operation of the generator.
But there are also some disadvantages:
- During operation, there is no way to ensure industrial parameters of the electric current generated by the generator.
- High sensitivity even to small differences in workloads.
- When there is a high load on the generator, there is a shortage of electricity, after which recharging becomes impossible and the generator stops working.
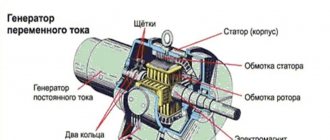
How does an electric generator work?
The operating principle of an electric generator is based on the physical phenomenon of electromagnetic induction. A conductor passing through an artificially created electromagnetic field creates a pulse, which is converted into direct current.
The generator has an engine that is capable of generating electricity by burning a certain type of fuel in its compartments: gasoline, gas or diesel fuel. In turn, the fuel, entering the combustion chamber, produces gas during the combustion process, which rotates the crankshaft. The latter transmits an impulse to the driven shaft, which is already capable of providing a certain amount of output energy.
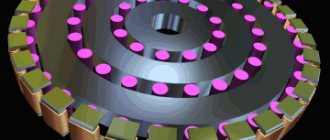
Homemade from magnets
The magnetic generator is slightly different from the previous one. For example, it does not require the installation of compensating batteries. The magnetic field that creates electricity in the stator winding is formed thanks to neodymium magnets.
How to create this type of generator:
- You need to unscrew the existing engine covers.
- Pull out the rotor.
- The rotor needs to be sharpened, and the top layer of the required thickness must be removed. It is difficult to do such a procedure on your own without turning equipment.
- Make a template for round magnets on a piece of paper. You need to select the required size depending on the size of the rotor. Next, attach the created template to the rotor and install the magnets with their poles and at an angle of 20 degrees to the rotor axis.
- You should get four groups of strips with a distance of two magnet diameters, and between them in the group there is one diameter. Due to this arrangement, the rotor will not stick to the stator.
- After installing all the magnets, you need to fill the rotor with epoxy resin. When it dries, you should cover the cylindrical part with fiberglass and again with resin. Thanks to this fastening, the magnets will be firmly fixed.
- When drying the rotor, you can put it in place and screw on the two engine covers.
Many experts believe that a pendulum with an axis 6 m long will be sufficient to provide electricity to a country house.
In this case, the electromagnets will push the neodymium magnets with a force of more than 100 kg. The advantages of this device are that it does not depend on the sun and wind. In addition, the generator does not require expensive batteries like other power generators.
But while using it, some problems cannot be ruled out:
- as the pendulum moves in the opposite direction, the polarity of the magnets may change;
- when the pendulum hangs at the top point, a ripple effect may form in the network.
Attention! This project cannot be implemented with ferrite magnets due to their technical characteristics.
Classification
Short-circuit type generators are most widespread due to the simplicity of their design. However, there are other types of asynchronous machines: alternators with a wound rotor and devices using permanent magnets that form an excitation circuit.
Figure 5 shows two types of generators for comparison: on the left, based on an asynchronous motor with a squirrel-cage rotor, and on the right, an asynchronous machine based on an IM with a wound rotor. Even a quick glance at the schematic images reveals the complex design of the wound rotor. The presence of slip rings (4) and a brush holder mechanism (5) attracts attention. The number 3 indicates the grooves for the wire winding, to which current must be supplied to excite it.
Rice. 5. Types of asynchronous generators
The presence of field windings in the rotor of an asynchronous generator improves the quality of the generated electric current, however, such advantages as simplicity and reliability are lost. Therefore, such devices are used as a source of autonomous power only in those areas where it is difficult to do without them. Permanent magnets in rotors are used mainly for the production of low-power generators.
Gasoline modification
There are two designs of a self-made gasoline generator based on an engine from a trimmer and a generator from a car.
To assemble the first generator you will need:
- gasoline engine from a trimmer, preferably 4-stroke;
- working car generator;
- 12 V battery, not necessarily powerful, it will only be used for starting; Without it, the generator will not be able to generate electricity, since the collector will need to be supplied with an initial voltage for the first excitation.
The direct feed device is simple and straightforward. The only difficult stage is preparing the shaft for the drill chuck.
- First, the shaft is cut and sharpened on a machine, and then threaded to fit the chuck.
- Then the cartridge is screwed into which the shaft of the electric generator is clamped.
- Then everything is attached to a wooden stand.
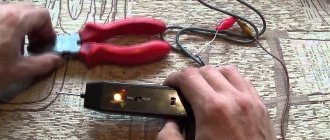
- Now you need to start the gasoline engine and connect the generator to the battery. A voltmeter with a light bulb will check its operation.
The second method of assembling the generator is somewhat similar to the first, only a belt is used for the rotation process. A pulley is attached to the trimmer shaft, and everything is connected with a belt. Next, everything is attached to a wooden base. The trimmer is started and the operation of the device is checked.
As for the advantages of gasoline devices, there are many of them:
- The scope of use of the device is practically unlimited. It is used to supply power to a country house, summer cottage, or during emergency power outages in hospitals, pharmacies and retail outlets.
- The gasoline device is small in size and weight. Its small size ensures mobility: it is convenient to take with you and transport in the trunk.
- Low noise levels distinguish gasoline devices from diesel or gas ones.
- Gasoline generators are economical in terms of fuel consumption; it can be purchased at any gas station.
The disadvantages of this type of generators include:
- The main disadvantage is the high price. Gas and diesel are cheaper. Therefore, frequent use of such a device is not financially profitable.
- It has a low duration of continuous operation, which does not exceed 8 hours. But this time is enough to supply power or carry out work on the site.
Advantages and disadvantages of self-assembly
The positive aspects of making a homemade electric generator with your own hands include:
- Increasing your own self-esteem, which is extremely important for men. A successfully assembled unit can become a source of pride as well as an alternative power source.
- Significant financial savings.
- The ability to create a device that would meet all the stated requirements.
In addition, the process can become more complicated and have a lot of negative consequences:
- It is possible that the unit will often break down, which is due to the impossibility of a hermetically sealed connection of all parts of the generator.
- Incorrect connection or power calculation will lead to generator malfunction and will also reduce its productivity by an order of magnitude.
- A certain skill in the work is required, as well as caution, since all work is carried out with electricity, which, as we know, is not to be trifled with.
Interesting option. Electric generator from a bicycle
Vertical wind power generator
It is not difficult to make a wind device with a vertical axis of rotation with your own hands. It is enough to buy the required components, assemble them correctly and install the unit in the chosen location.
To make a wind device you will need the following materials:
- The axial mast is a supporting structure in the form of a pyramid, having a height of 5 meters. The generator and blades are attached to it.
- The blades catch the wind currents.
- The stator includes phases from coils.
- The rotor is the moving part of the windmill.
- The controller slows down the device when it develops more power.
- The inverter produces alternating current and the battery stores the energy.
To make the blades you will need high-quality plastic. Even plastic pipes will do. In this case, tin fragments are attached to each side of the pipe.
The rotor will require two ferrite disks with a diameter of 32 cm. For the stator, nine coils with 60 turns of copper should be made.
The mold for the coils should be made of plywood and lined with fiberglass.
You need to assemble a wind generator as follows:
- Make a hole in the top of the rotor for the pins.
- Make holes in the stator for fastening to the stand.
- Place the lower rotor disk on the stand with the magnets facing up.
- Here, install the stator and secure it to the plate with studs.
- Cover the structure with another disk.
- By rotating the pins, you should ensure that the upper and lower disks are evenly brought together, after which the pins and the plate are carefully removed.
- Secure the generator with nuts.
- Screw the finished device to the axial mast.
Electricity is started last: the energy from the device goes to the controller, is then collected on the battery and converted into alternating current by the inverter.
A vertical generator turns wind into an energy resource. To work well, it does not need additional devices that determine the direction of the wind.
Its maintenance does not require devices to ensure safe repair work.
Useful! The minimum number of moving parts makes this installation reliable and stable.
The device operates quietly, does not disturb neighbors and owners, does not produce harmful emissions into the atmosphere and reliably serves for many years.
Tips for use
An asynchronous generator does not require special care. Its maintenance consists of monitoring the condition of the bearings. At nominal modes, the device can operate for years without operator intervention.
The weak link is the capacitors. They can fail, especially when their denominations are incorrectly selected.
The generator heats up during operation. If you often connect increased loads, monitor the temperature of the device or take care of additional cooling.
Which companies to trust?
Not only well-known companies, but also those that have appeared quite recently are engaged in the production of electric generators. It’s easy to get confused in the available assortment without some preparation.
Stationary installation
The following several names are well known to the domestic buyer:
- "Boar". It is in greatest demand among Russian companies engaged in this area. Power ranges from 2 to 230 kW. The generators are suitable for both domestic and industrial use. WAY - models suitable for use at home.
- SDMO. Another manufacturer whose models are found in large quantities. Units in this case also have motors operating on 1 or 3 phases. Power and external design are the main differences between different models. The noise-absorbing housing is perfect for those who use household types of generators. Air cooling, power up to 10 kVA - characteristics of a separate class of devices. They are often equipped with additional outputs for AC or DC current. An electric starter complements the stationary varieties of models. They are installed on a frame or inside containers with sound insulation function.
- Geko. Manufacturer with a wide range of products for any conditions. He creates not only household models, but also options with a narrower specialization. A single- or three-phase motor is installed inside the models, depending on what goals the consumer is pursuing. Starting is manual or it is replaced by an electric starter. Some models have noise-absorbing covers. The built-in automatic start panel is also a good addition to standard power plants.
We collect the necessary components and tools
This unit consists of the following parts:
- Motor from a brush cutter;
- DC motor – 12-24V;
- Inverter 12-220V;
- Pipes (pieces of flexible PVC pipe of different diameters)
- A piece of board for the frame (thickness 35-40mm);
- Hardware – self-tapping screws, screws, bolts, nuts, clamps, terminals;
- Insulating tape.
The tools we will need are:
- Drill or screwdriver + drill bits and Phillips bit for self-tapping screws;
- Circular saw or jigsaw (for lovers of manual labor, a hacksaw is suitable);
- Voltmeter;
- Screwdrivers, pliers, paint knife or scissors;
- Square, tape measure.
The simplest gas generator
As an example, let’s look at a simple homemade design based on a chainsaw and an electric motor from an old washing machine:
- We attach the electric motor from the washing machine to the chainsaw bar using a specially made stable bracket.
- We put pulleys on the drive shafts of both engines and connect them using a belt drive.
- The button for adjusting the speed of the chainsaw engine, located on the handle, is equipped with an additional device for adjusting the pressing force. A simple bolt secured with a clamp will do the job just fine. To increase the speed, it will be enough to tighten it, and to decrease it, loosen it.
- We connect two capacitors in parallel to the external starting winding of the electric motor, designed for a power of 400-450 Volts.
The video shows a generator with a washing machine engine
This installation, the simplest in design, is capable of delivering a current of 220 V 180 A, which is enough to power a drill, screwdriver, and lighting fixtures.
Almost any craftsman can make such a basic device. Of course, except for cases when a person does not see the difference between an engine and a carburetor, or the words bracket and container sound the same to him. It is completely unacceptable to manufacture electrical appliances for a person who does not know the differences between the concepts of power (watt), current (ampere) and circuit voltage (volt). More complex designs require fundamental knowledge and skills that will help to correctly calculate engine power, ensure safe use of the finished design, and correctly configure all parameters.
On the Internet on forums, craftsmen discuss various homemade designs. For those wishing to join the ranks of the “Samodelkins”, participation in the discussions will bring a lot of benefits - you can get a lot of useful advice on building a new one or repairing an old one. Special videos will help you visually see the manufacturing process. Which muffler to choose, electric starter, is it possible to have an autostart function - all your questions can be answered. Would you like to go further and install a wind generator on your site to save energy? What current is needed at the output - 12 or 16 A? There are enough instructions on any topic, study and apply the best of them in practice.
Those who decide to make a gas generator with their own hands need to correctly assess their capabilities. Unsuccessful attempts can cause damage to household appliances or even become a threat to life.
The video shows another DIY generator, let's take a look
Working with electrical devices places increased safety requirements and does not forgive negligence. Be very careful and careful!
Where to begin?
Based on the magnitude of the required loads to simultaneously turn on the devices, all the main elements are selected.
Optimal performance indicators are achieved by correctly selecting the power of gasoline and electric engines.
To obtain a single-phase current of 220 V, a two-stroke gasoline engine is suitable, and if you plan to obtain higher powers, then the choice should be made on a four-stroke. Fuel consumption will depend on the selected engine. In addition to the main task - generating energy, a system for noise reduction, lubrication, ventilation, and installation of an exhaust pipe for removing gases should be provided. You will have to buy wheels to ensure the mobility of the device. The casing can be made of metal or plywood.
A gas generator based on a two-stroke gasoline engine will help out if you need a short-term connection. When work is required for a long time and with a heavy load, it is better to make a generator with a four-stroke gasoline engine.
The control panel must have a voltmeter, a circuit breaker button, grounding terminals, and sockets for using the generated energy.
Making your own gas generator makes sense when you have unused engines from old appliances. You can, of course, buy all the components specifically for these purposes, but you won’t be able to get much savings - the cost of the components may even exceed the price of the finished factory model.
In practice, motorcycle or car engines, engines from mowers, chainsaws and other devices are often used.