Having a kitchen hood is not just a fashion statement, as it represents an important functional element. It is necessary to ensure that there are no extraneous, sometimes unpleasant odors in a person’s home that appear as a result of cooking in the kitchen. Its installation and connection has some nuances that everyone should know about.
Electrical connection
When the installation of the hood in the kitchen is completed, the last step remains - connect the power supply. The connection can be made in several ways: using a cable, replacing the socket or drawing a new line.
When the installation of the hood in the kitchen is completed, the last step remains - connect the power supply.
The easiest way is to use a cable. It comes in handy if the hood is installed in a finished kitchen unit and there is no socket nearby. A separate socket can be installed next to the hood, and a piece of wire should be run to the nearest outlet. The train can be hidden, for example, under a baseboard.
The easiest way is to use a cable
Note! The wire must be copper and have a cross-section of no less than 2.5 mm2. If there is a socket next to the hood, but it is already used for some equipment, then you can make it double
But first you should make sure that the line has enough power for double load
If there is an outlet next to the hood, but it is already used for some equipment, then you can make it double. But first you should make sure that the line has enough power to handle double the load.
If there is an outlet next to the hood, but it is already used for some equipment, then you can make it double.
If it is not possible to use the above methods, you can draw a separate line from the electrical panel to the ventilation device. This is a costly process that causes a lot of inconvenience, for example, a large distance appears between the panel and the kitchen, or you need to figure out where to hide the wire.
If it is not possible to use the above methods, you can draw a separate line from the electrical panel to the ventilation device.
Now, after installing the hood, the kitchen will turn into a safe place with fresh air.
Requirements for installation of household devices
A few words about the requirements for installing equipment in rooms with gas stoves. According to the law, a gas stove can be installed in rooms with a height of at least 2.2 meters. This is worth knowing for those who are going to build large-volume suspended structures to hide ventilation ducts or pipes.
When installing a hood over a gas stove, rules apply. According to the rules, the minimum distance between the kitchen work surface and the appliance panel is 75 cm. This is 10 cm more than the standard for electric stoves
Installation or selection documentation can be found in the public domain. General documents on the importance of forced ventilation can be found in SNiP 2.04.05-91, details on the volume of exhaust air in SNiP 2.08.01-89, and on efficiency and other technical details in GOST 26813-99.
There are no strict rules for installing ventilation ducts, so they can be placed outside or inside kitchen cabinets, behind partitions and above hanging structures.
You can find out where to install the hood and what conditions are necessary for its installation in our recommended article.
Installing a hood in the kitchen
Installing a kitchen hood with your own hands depends on the type and location of the ventilation duct. You can install ventilation inside a kitchen cabinet or make a separate model in the form of a fireplace hood or an inclined panel.
Installation diagram
often disrupts the ventilation installed in the apartment. If you make another hole for air exhaust to install the hood, the quality of air exchange will not improve, since the cross-section of the ventilation shaft will not change after such manipulations.
This hood installation scheme prevents the occurrence of reverse draft and natural ventilation when the exhaust equipment is turned off.
To properly connect the hood in the kitchen, it is necessary to correctly install the check valve: in the horizontal channel, the axis of the damper attachment must take a horizontal position, and the heavier section should be inclined downward. Without air pressure, the valve will be closed.
Fan installation
A homemade kitchen hood can be made from a fan mounted into the wall. To do this you need:
- Mark on the wall the location for installing the fan, then make a hole of the required diameter.
- A fan is inserted into the hole, and the free space between the wall and the equipment is filled with foam.
- A grille is installed on the outside.
- After these manipulations, the fan can be connected to the power supply.
DIY kitchen hood
You can make a hood in the kitchen with your own hands, by building it into a cabinet or without it. Built-in ventilation looks organically with the kitchen set. The stages of its installation are as follows:
- An aluminum or metal box with a check valve is made. For convenience, it can be purchased ready-made.
- A hole is marked on the top board of the cabinet in accordance with the lower clapper window. For final installation, you need to outline the sides of the firecracker.
- A hole is cut in the bottom of the cabinet along the edge of the bottom of the hood.
- Next, remove the cabinet shelves and cut out holes for the air duct with a jigsaw to mount the hood.
- A square hole is cut out on top of the cabinet board for the clapper window with an allowance of 3-5 mm at the edges.
- The corrugation is installed: a corrugation is threaded into the round holes, the upper end of which is formed by hand in the shape of a square and pushed into the upper hole.
- The cabinet with corrugation is installed in place.
- The kitchen hood is inserted into the cut-out hole in the cabinet with your own hands. All joints of the corrugation, “cracker” and holes must be treated with silicone sealant and then with polyurethane foam. A do-it-yourself kitchen hood is attached to the cabinet using self-tapping screws.
- A corrugation is put on the exhaust pipe and secured with a clamp. There is no need to seal this connection, as this will complicate disassembly for cleaning the ventilation, and will also create pressure drops in the area where the pipe passes into the corrugation.
When using not corrugated, but plastic pipes for air ducts, installation is carried out by connecting them with component corners and further wiring to the ventilation duct.
If installing a hood in the kitchen with your own hands is carried out in the form of installing a separate structure, a metal frame is made from a 20–25 mm angle according to the dimensions of the hob. It is attached to the wall under the hood socket. The air duct itself is installed under a plasterboard box. The firecracker is placed on the top edge of the box, just like on a cabinet.
To know how to make a hood in the kitchen yourself, you need to take into account practical recommendations and advice from specialists in this field. To summarize these recommendations, the following can be noted:
- Do-it-yourself ventilation in the kitchen should be not only exhaust, but also supply.
- When installing the air duct, it is necessary to avoid a large number of bends in order to ensure good draft.
- To ensure good traction, it is necessary to clear the building shaft of blockages.
- Installing a check valve will help prevent the supply of exhaust air.
A correctly selected one does not have a drive or spring, but it does have a damper with an offset axis relative to the center.
Installation of air duct for exhaust hood
Types of air ducts for kitchen hoods
Unfortunately, the hood will not be of any use if you do not install an air duct that is designed to remove air contaminated with combustion products to the street. Since the air is at room temperature, there are no special requirements for the structural elements. Basically, 3 types of air ducts are used:
- Corrugated air duct made of round aluminum . Its advantage is that it stretches to the desired length, while easily bending at any angle. Its disadvantage is that, under certain conditions, the operation of the hood can be noisy due to the fact that the surface is ribbed. In addition, such a surface creates additional resistance to air flow, and it is quite difficult to care for such a surface.
- PVC duct, also round in shape . To assemble an air duct of the required configuration, you will have to buy additional elements in the form of adapters, bends, angles and couplings. Since the inner surface of such an air duct is smooth, they operate silently, since they do not present any resistance to the air flow, and they are also easy to maintain. The disadvantage is that such an air duct, in the case of a complex configuration, takes up a lot of space.
- Rectangular plastic air duct . The material of manufacture is the same as in the case of plastic round air ducts. The rectangular section allows you to save space, since such an air duct can be hidden behind drywall, as well as behind other structures if saving space is a priority.
You should also pay attention to the fact that a corrugated air duct will cost less. The only problem is that if such an air duct is left open, it negatively affects the design of the room, which cannot be said about neat plastic structures.
Regardless of the model, the outlet of the hood is round, but this is not a problem, since adapters are sold and connecting such a hood to a rectangular duct will not be difficult.
Duct sizes
Round air ducts are available in three types - with a diameter of 100, 125 and 150 mm. As for rectangular air ducts, their choice is somewhat larger, which is presented in the table below.
Dimensions of flat PVC air ducts for hoods
When the question of choosing the type of air duct is raised, you should focus on the dimensions of the hood outlet. The cross-section of the air duct should not be smaller than this hole, otherwise the hood will not cope with its task and will work ineffectively. This is true for air ducts of any shape and configuration.
Methods for attaching corrugations to the hood and ventilation system
When using aluminum corrugation as an air duct, you need to think about how to secure it to the exhaust outlet pipe, as well as to other elements of the ventilation system. Firstly, you need to make sure that the correct size corrugation is matched to the hood pipe. If this is not done, then it will be difficult to implement it in any case. When the air duct is smaller, there is no question of connection at all, but when the dimensions are larger, this will most likely lead to deformation of the air duct, the appearance of air leaks and, as a result, ineffective operation of the device.
Attaching the corrugation to the grid on the wall
Basically, fastening is carried out using metal or plastic clamps. The best option is metal clamps, which can be easily removed if it is necessary to disconnect the air duct from the hood.
To connect the hood to the ventilation system, you will need a special ventilation grille with holes for natural air circulation when the hood is not working. If the air flow goes directly to the street, then a completely different ventilation grille is installed on the street. The ventilation grilles also have short pipes that allow corrugation to be attached to them. The main thing is to choose the right grille according to the size of the pipe. Fastening is also carried out using clamps.
Attaching the duct to the wall
In addition to air ducts, manufacturers have developed and produced special fastening elements in the form of clamps and latches. Clamps are used for fastening rectangular air ducts, and latches are used for fastening round air ducts. The distance between the fastening elements depends on the configuration of the air ducts, with a distance of about 60 cm considered optimal.
Methods for attaching corrugations
In the case of attaching a ventilation system to the ceiling, the fastening technology is the same, since the latches allow you to hold air ducts laid on any surface and in any plane. The corrugated aluminum air duct is attached exclusively using clamps, and it is necessary to monitor the fastening force, since the air ducts are thin-walled and easily deformed.
Wall type installation
- Using a tape measure, the distance between the mounting holes of the hood is measured, and their position is transferred to the wall. Typically, fixation occurs on four self-tapping screws, one pair is used to hang the device, and the second firmly presses the structure to the wall.
- An adapter included in the kit is installed in the middle of the hood, designed to connect the air duct. It is secured with four screws.
- Using a hammer drill, holes are drilled in the wall into which dowels are installed.
- Hooks are screwed into the top row, usually these are self-tapping screws with a wide head.
- The dome body of the hood is hung on these hooks through special holes.
- Self-tapping screws are inserted into the remaining two holes, and the entire structure is pulled to the wall.
- Electrical is connected. It should be noted that at this stage you should not forget to turn off the power to the electrical line to which the exhaust equipment is connected.
- The correct connection is checked, for example, by turning on the hood light.
- A corrugated tube is connected to the hood adapter and pressed with a clamp.
- The return end is connected to the ventilation duct and is also compressed with a clamp.
- If necessary, the joints are sealed with sealant.
- At the last stage, a U-shaped decorative overlay is put on to cover the ventilation duct.
You can hang a suspended structure in the same way. The only difference from the wall structure is that the provided fastenings are located not behind the dome, but in its upper part. A base platform is installed on the ceiling, to which the cables are attached. In the future, you need to hang the hood on them. To do this, the cables are threaded through the lugs located on the device and pulled tightly together.
Types of exhaust devices
To improve the microclimate and rid the room of odors, soot and burning, a kitchen hood is used. Depending on the internal structure, it can remove exhaust air, purify it, or alternately work in each of these two modes.
In the first case, the equipment evacuates air masses from the room into the atmosphere. To do this, a special pipe is used - an air duct.
Models that draw in exhaust air and release it into the atmosphere are easy to use and maintain. They do not require regular purchase of expensive filters
Models of the second type are recirculating. For their full functioning, they do not need to be included in the ventilation system.
They need power to draw in waste air that accumulates, for example, over a frying pan frying potatoes. Particles of fat, soot and the smell of cooking food get inside the device.
The grease filter takes the hit first, then comes the turn of the carbon filter. It is he who absorbs all impurities and releases purified air back into the room, releasing it through small holes in the housing.
The version of kitchen appliances that does not require inclusion in the ventilation system is characterized by great demands - for the operation of the equipment, you will need to periodically buy filter devices, usually carbon
The third type is combined models. They can operate in both drainage and cleaning modes. In the first case, to ensure the functionality of the kitchen hood, it will need to be connected to ventilation. And in the second - installing a cleaning filter.
You have to choose the right option during use. Moreover, depending on the model of the device, its settings may differ.
For example, for hoods with cleaning mode from LEX, the manufacturer recommends first installing carbon filters. Then take the plugs that come with the exhaust equipment and close the side and top holes, which are intended for connection to the ventilation system.
Plugs allow you to prevent the uncontrolled escape of air from inside the device - first it is fully filtered, and only then it comes out through the holes intended for these purposes
In addition to the principle of operation, hoods differ in installation options - they can be built-in or open.
And they all differ in shape, which determines the possible location of the exhaust equipment.
Image gallery
Photo from
Island hood type
Wall-mounted exhaust structure
Wall recessed view
Corner dome hood
Kitchen appliances differ in price, which depends on the popularity of the brand, the sophistication of the design idea, the materials used in production and the functionality of the exhaust equipment.
The consumer can easily choose a hood in the desired price category - even in the inexpensive segment there are many worthy models. True, the more complex the processes a device can perform, the more expensive the final cost will be.
Where to install a kitchen hood
The kitchen hood is installed according to the instructions. Expensive models and products from well-known companies have 3-5 options, others have one. The main factors include the height of the suspension above the kitchen stove, the portal covering the entire surface of the desktop, and the number of bends in the air duct. The central aspects that determine the performance of the hood. If you hang the portal too low, the grease filter and other structural elements will begin to burn and melt. The kitchen hood inlet is located too high - some of the combustion products will pass by. Low-hanging equipment will get in the way of the cook. There are many criteria for choosing a place for a kitchen hood.
Television programs, YouTube videos, and reviews give conflicting recommendations regarding the installation height of a kitchen hood; we advise you to follow the instruction manual. You will hear different numbers; the manufacturer has studied how much power the burners provide, regardless of whether the hob is powered by gas or electricity. The hard work is done by the service teams of large concerns, why swim against the tide. For example, the instructions state:
- The minimum hanging height above the gas stove is 65 cm.
- The minimum hanging height above the stove is 55 cm.
We recommend maintaining the distances measured from the burner lids, not from the stove table. Distances are determined by the number of burners and the size of the portal; smart transmission cannot replace the operating manual. There are no instructions - download, surf the Internet, today you will find the papers.
Finally, for severe cases, the kitchen hood is so simple that it lacks instructions, it is recommended to choose the maximum distance recommended by the sources found. If possible, the portal covers the burners with a margin of 5–10 cm. It is appropriate to cover the burners that work more often with a dome (the housewife can use one of four located diagonally; it will not be possible to cover it).
Everyone will assemble the hood with their own hands, having gained relevant experience working with metal. You cannot use the device according to the rules; many forges are built themselves; here there is only a hood. Provide the dome opening with a bathroom fan. The device must withstand elevated temperatures. It is better to choose a steel fan for a kitchen hood; there are known cases where a plastic one worked normally. We discussed the question of how to make a structure with your own hands, let us mention: the dimensions can be borrowed from a similar design
Please note: modern hoods use tangential fans; you can take them from an old vacuum cleaner, fortunately there is an impeller. The kitchen hood operates for a long time (without interruption)
Take the trouble to equip the device with safety mechanisms. Other vacuum cleaners lack protection against overheating for a trivial reason: the motor is blown with filtered air taken through a hose. The number will cause harm to the kitchen hood. The stove air is hot, it can additionally heat the kitchen hood motor, but does not cool. The problem can be easily solved. Look for a 135 or 145ºC thermal fuse in your old appliance. Visit the markets. Wind the acquisition tightly to the turns of the stator winding and supply power through the protection element.
Most vacuum cleaners do not have varistors. The elements eliminate commutator breakdown (spark). Readers will find out in more detail on specialized websites; varistors are soldered parallel to the brushes with one end, and the other is placed on the motor housing. If there is no grounding, the breakdown will occur through the motor shell without entering the circuit, causing interference, or burning out delicate electronic devices.
The installation height of the hood is a resolved issue. The vacuum cleaner engine is noisy, there is a chance that the neighbors will call for reinforcements, the squad will find out who is howling in the ventilation duct. It is logical to replace the commutator motor with an asynchronous one. Take the body and impeller of the vacuum cleaner. A complex process if you have a burning desire to make a kitchen hood with your own hands...
Surface preparation
The hood helps eliminate unpleasant problems that usually arise during the cooking process: fat settling, evaporation, unpleasant persistent odors. She draws all the dirt into herself and removes it. But the full functioning of the device depends on its correct installation.
Before installing the hood, it is worth considering its location in advance. Of course, it should be installed above a gas stove, but you should also not forget to pay attention to the quality of the wall surface. For this reason, in order to choose the right area for installing this product, it is worth studying the important features:
- First of all, it is recommended to check the quality of the walls. To install this system, you should choose a strong and durable wall that is made of a high-quality base;
- the most suitable option for installing a hood is a wall surface made of concrete or brick;
- It is imperative to prepare fasteners; they must fully fit the selected base;
- When installing a hood, it is worth considering that it must be located above the stove at the correct height.
A wall made of concrete or brick is suitable for installation.
Particular importance is given to height; the correct functioning of this device depends on it. So, in order to correctly determine the required height level, you should follow the following recommendations:
- the permissible height above the surface of the electric stove is 65 cm;
- the maximum height above the surface of the gas height should be 75 cm;
- It is imperative that the lower limits be strictly observed, otherwise the device may fail during heating and melt;
- the upper boundaries of the product must be adjusted to the growth of the owner;
- You definitely need to know the correct width parameters, they should be the same as for a gas stove - 50-60 centimeters.
Once the surface for installation has been selected and a suitable hood model has been purchased, you can begin installation. The structure, which will be installed and connected in accordance with all rules and recommendations, will be able to last for a long time.
Operation, care
The instructions say: change the aluminum grease filter every two months. We would venture to guess that the instructions in the original language contain something like renew, which is translated as updating. Rather, the grease filter should be washed once every two months, avoiding buying a new one. Otherwise, the device will become an expensive purchase; in a year, maintenance will consume three times more money than the cost of the unit. Check with the manufacturer. You can do it yourself after purchasing. Just try to wash the grease filter, if the accessory returns to its previous condition and becomes as good as new, quickly continue using it.
The carbon filter will have to be changed. The large size is not so alarming as the renewal period - 2 months. The manufacturer is not so cruel, he specifies a period of six months, since the carbon filter costs money. The instructions say: regenerating or washing components is unacceptable. More like the truth. The carbon filter is located above the grease filter and is used in the recirculation mode, when the air simply circulates around. Not the best option for a gas stove; for an electric one, nothing more is needed.
Annoying: the name and type of carbon filter are not indicated. A direct search engine query regarding the type of kitchen hood in question is powerless to give a positive result. Cunning dealers are annoying when they write: the Hansa FWU 60 carbon filter is not available, but can be ordered. The price is kept silent. We find it difficult to calculate the cost of operating the product and have no desire to call to make inquiries. The reader will have to take the steering wheel. In this review we consider the installation of a kitchen hood, not the problems of stubbornness.
The components cost 250-800 rubles. Manufacturers identified. Avoid buying something for free and take a kitchen hood. Expensive carbon filters can last six months, cheap ones - two months. A simple calculation shows: we exchange the awl for soap. After a year, the cost of the product will be covered. An expensive kitchen hood, of high quality, requires similar operating costs.
Installation of a kitchen hood is carried out according to the instructions. Manufacturers' settings are specific, so don't think that kitchen hoods are alike, like twin brothers. All that remains is to say goodbye.
At what height from the gas stove should the hood be installed?
Knowing which fasteners to install a kitchen hood on is not enough. It is important to correctly measure the distance for hanging equipment above the gas stove. There are special standards that must be followed if the kitchen is standard.
Also, the installation height of the hood can be changed if provided by the manufacturer.
Traditionally, the system is installed at a height of 65-90 cm above the hob. If you try to place the device a little lower, this may affect performance, because high temperatures may cause some parts to become deformed.
It is advisable to install a hood higher only when a tall person in the family prepares food, and the device has sufficient power and is capable of extracting smoked air even from the bottom of the room.
Electrical connection for a kitchen hood
The instructions for electric drills say: grounding is strictly prohibited. Why, one wonders? We believe that this concerns the work process. For example, if you drill into a battery, a breakdown will occur to the ground. Obviously: steel gearbox, axle. Significant leakage current will occur. The instructions will write: the device must not be grounded. The plug simply does not have a side terminal.
Violation of instructions, we believe. In the book by Polonsky P.A. “Installation of line-cable structures of city telephone networks 1978” states (page 80): an electric drill must certainly be grounded. Some equipment manufacturers violate generally accepted norms. It is reliably known: some people were killed while working with an electric drill when they touched a central heating radiator. To avoid repetition with a kitchen hood, a housewife, the device should definitely be grounded. If the event is impossible, cancel it!
Even if there are no special means, make a notch on the body, screw the eyelet, lay a good copper wire with a cross-section no less than that recommended by the instructions for electrical connection of the device. You will find information in the instructions. The current will be shared between the circuit and the housewife, as a result, life will be saved. It won’t come to contact; if there is a breakdown, it will instantly knock out the plugs and protective circuit breakers.
We believe that what has been said is clearly stated. Let us add that it is not customary to plug in built-in kitchen appliances into an outlet. For switching with the electrical network, pads are used; before inserting the conductor, it is better to tin it so that they do not fray or become covered with a coating of oxide. The story about how to install a hood is coming to an end. Surely readers will have other wishes, you can voice them in the comments.
Organization of air circulation in the apartment
Let's consider how air circulates in a single apartment without installing additional air exchange devices.
As mentioned above, fresh air enters through all sorts of window cracks and gaps, as well as through doorways - ajar doors and cracks under them.
The diagram clearly shows the direction of air movement. It enters through windows or doors of living spaces and moves towards ventilation openings
Comfortable living in apartments is characterized by a number of factors, including the frequency of air exchange and the volume of regularly changing air.
There are standards regulating the flow of air flows.
Air exchange rate table suitable for an apartment building. Air change should occur more actively where there is high humidity, that is, in the kitchen and bathrooms
In older buildings, ventilation shafts do not always function 100%, and this can be checked in a simple way. You need to take a sheet of paper and attach it to the technical ventilation hole. If the piece of paper is not held by the force of traction and falls, natural ventilation is disrupted.
Instead of a sheet, you can use a burning candle or match. By the movement of the flame, it becomes clear whether there is a draft from the room to the outside.
We discussed in more detail the rules for checking ventilation in an apartment and ways to find the problem in another article.
Ventilation problems negatively affect the well-being of people living in apartments. The lack of fresh air causes unhealthy drowsiness, fatigue, and headaches.
People with diseases of the heart and respiratory system react especially sensitively to this. They constantly want to keep the vents and windows open, and this leads to a sharp cooling of the premises and, as a result, an increase in the number of colds.
We also recommend that you read the information on how to restore ventilation and air duct functionality.
You can increase the efficiency of a natural exhaust system using a simple device - a fan installed in the ventilation outlet in the bathroom
If a regularly switched-on hood with air exhaust into the ventilation shaft is installed above the kitchen stove, this will also contribute to a rapid change of air masses in the kitchen and in adjacent rooms.
If desired, residents can independently organize the air flow. For this purpose, both ordinary ventilation and special mechanical and technical devices are used, for example, a supply valve for a window.
Valves are installed not only on double-glazed windows, but also in walls, most often under windows, near heating devices. Air from the street enters the room through a small hole with a diameter of 5 to 10 cm and is heated by the heat of a radiator or convector.
There are automatic models that are sensitive to changes in temperature and humidity: as soon as the parameters exceed the norm, ventilation occurs.
But a centralized channel-type supply system is recognized as more advanced. You can install it yourself only in a private house, because in high-rise buildings special services deal with systems of this scale.
Air ducts and air supply/heating devices are located above the rooms, in the ceilings, and pass through the walls, so they are installed during the construction process.
Supply duct ventilation is installed in new buildings of the so-called elite class. One of the installation conditions is high ceilings, allowing installation without damaging the interior
As you can see, the lack of a well-established natural ventilation system can be partially compensated for by installing additional devices. There is only one minus - additional one-time expenses for the purchase of devices and regular expenses for paying for electricity.
Illegality of installing a hood
However, if your house was originally designed only for natural ventilation, and you have harmful neighbors, then any installation of powerful devices with mechanical forced circulation may be illegal.
Neighbors can refer to the “Resolution of the Moscow Government”. There is such a two-fold paragraph 3.4 “On approval of standards for the operation of the housing stock.”
You can turn it in any direction. Surely there are similar resolutions in other regions. There is also article 3.14.13.
So be careful when installing exhaust hoods over stoves.
Although the same rules recommend installing check valves on all ventilation grilles in all apartments. That is, as if they were saying that it is not you who are forbidden to install a hood, but everyone else needs to take care of themselves just in case.
But now the question is how lucky someone will be with their neighbors.
A few words about air ducts
The hood kit does not include an air duct. It will have to be purchased separately. It is believed that a metal box with a rectangular cross-section looks more aesthetically pleasing than aluminum corrugation, but it also has its advantages.
Anyone who thinks that corrugation does not look very attractive may be mistaken: under certain conditions, it can even decorate the interior of a room
The corrugation should be selected with a diameter that corresponds to the inlet hole in the upper part of the hood. If the length of this pipe is less than 1.5 meters, then the aerodynamic resistance of this material is practically negligible in comparison with the random losses resulting from turbulence in ventilation. The corrugation is easy to cut with ordinary scissors.
The corrugation can be given a square shape to connect it with the clapperboard. It completely lacks the resonant properties that sometimes occur with rigid boxes. If you still choose to purchase a corrugated stove, then cooking in your home will never be accompanied by a monotonous hum.
Rules for installing exhaust ventilation
Before installing a hood in the kitchen with your own hands, you should choose it correctly:
- It is necessary to determine the diameter of the fan. To do this, the outlet of the ventilation shaft is measured, the value is rounded down - this will be the required diameter.
- To install a kitchen hood, you need to calculate the fan performance. To do this, you need to calculate the volume of the room and subtract from it the volume occupied by the furniture. The resulting value must be multiplied by 6 and 12. You get two indicators of the lower and upper limits of the fan performance. These indicators will help you choose the right fan model.
- To prevent exhaust air from being drawn through the fan, it is necessary to choose equipment with a check valve.
- No less important characteristics of the exhaust hood equipment are: the presence of a mesh to prevent the entry of insects; removable front panel for easy cleaning; presence of a timer.
Having selected the necessary equipment, you can begin. It is recommended to follow some rules for installing a hood in the kitchen:
It is necessary to ensure reliable grounding of the equipment. Therefore, installation of a hood in the kitchen is carried out by connecting to the electrical network with three wires: “phase”, “zero”, “ground” with wires in yellow insulation. To know how to properly make a hood, you need to have an idea about connecting to the power supply. This is especially true for those device wires that are not equipped with a plug. In this case, the connection is made through the terminal block. For convenience, the socket for the terminal block can be made hidden inside the hood body. The hood must be mounted at a height of at least 70 cm above the electric stove, and a distance of 80 cm must be maintained above the gas hob. Before installing the kitchen hood, the air ducts of the building must be checked for clogging
If the draft is bad, you need to contact housing office specialists to clean the shaft. Before you ventilate your kitchen, it is important to choose the right duct. You can choose aluminum round corrugated pipe or rigid plastic pipe
In the first case, the advantage is lower cost and a simpler installation method, in the second - space saving during installation, a more aesthetic appearance and resistance to vibration.
Installation nuances
The hood cannot operate without an electrical connection. Therefore, regardless of how the product is installed, power must be supplied to it. Hoods are most often supplied with a small piece of cable that connects to the necessary terminals inside the product and does not have plugs on the other side.
On the one hand, this is very convenient, since there is no fixed distance to the nearest electrical outlet. However, on the other hand, when installing the product yourself, you often have to lengthen the cable and screw in the plug. During the construction phase, it is important to provide hidden electrical wiring, for example, under ceramic tiles, leading to the installation site of the hood. Then all the wiring will be hidden behind the decorative trim of the product.
However, there are two options that allow you to correctly install a kitchen hood:
- Direct connection using a cable directly connected to the electrical box;
- Using the plug directly into an outlet.
Make sure that the cross-section of the cable to be connected is not less than that already connected to the device, or is indicated in the technical data sheet of the device. If the supplied cable already has a plug, replace it with your own or install an outlet in close proximity to the appliance. The use of extension cords, tees and cables of any type is prohibited.
In addition to the requirements for electrical equipment, there are other specific rules. The basic rules for installing a hood are as follows:
- All air duct connections must be tight, so rubber seals are used;
- The entire structure must be rigidly fixed;
- The power of the hood should not exceed the power of the ventilation duct;
- If a gas boiler is installed in the room, forced ventilation should be installed only in its exhaust duct, natural ventilation should also be present;
- To avoid backdraft, use valves that allow air to flow in only one direction.
In order to correctly install the hood with your own hands, you need to perform a number of preparatory steps. First of all, this concerns the location of the air ducts. According to the requirements of SNiP, the ventilation duct should not have sharp bends, so most often the connection of the hood to the outlet is carried out using a corrugated hose.
A necessary element of flow ventilation will be a corrugated hose and a check valve. The latter is necessary to prevent the penetration of foreign odors into the room. The cross-section of the air duct must be selected in accordance with the type of unit. An integral attribute of air ducts is the clamp. It serves to securely fasten the air duct to the casing itself and to the air duct inlet.
In addition to the duct components, it is also necessary to prepare seals and all kinds of sealing compounds. Caulk is used to seal any joints in the ductwork, and mastic is used to fill gaps around the joint between the ductwork and the outlet. Instead of sealant, you can use polyurethane foam.
The following tools may be needed:
A vent plug is a good idea.
- Hammer Drill – Use this to enlarge the duct window and drill holes for the vent to attach;
- Phillips screwdriver or screwdriver;
- Measuring tape;
- spirit level;
- hammer;
- screws, self-tapping screws, dowels.
The surface on which the cap is attached must be smooth, without visible bulges. The kitchen set must already be installed, and all utilities must be connected to it. The correct solution for replenishing the air supply when using a flow-type device is to install a supply valve. To install it, drill into the wall from the outside and then insert a pipe with a valve into the hole. An O-ring is placed on it, on top of which the front cover and filter are then installed. The outside of the pipe is covered with mesh.
If a private house does not have an original ventilation system, a retractable shaft is attached to one of the walls. It is insulated for improved traction.
There are two ways to connect the cornice to the ventilation duct. The first is a direct connection to an existing duct, provided there is an additional duct that is used for natural ventilation. If there is only one air duct, a special adapter with two inlets is used. One of them is used for air exhaust, and the other for natural ventilation. The disadvantage of this option is that some of the air may leak back into the room. Therefore, it is better to make an additional hole in the air duct and close it with a ventilation grille with a check valve.
The second way is to connect it to an existing ventilation unit, for example coming from a bathroom. This means that there is an air duct running under the ceiling to which the exhaust vents of all rooms are connected. They usually have an active fan that draws air into the duct. The end of the duct leads outside where a check valve and grille are attached to it.
If the exhaust fan is an island type, there is no point in running separate duct work with the existing unit, so a tee is used to connect the exhaust fan to the unit. To prevent exhaust air from entering the kitchen through the hood, a check valve is installed. This system is especially easy to implement for a kitchen hood in a detached house.
When designing a recirculation type hood, an air duct is not required.
How to install a dome hood in the kitchen
A little about the dome hood options on the market. They are:
- Fireplace (wall) - mounted on the wall. Similar in design to ventilation systems for fireplaces.
- Corner - rarely found in kitchens, when the stove is located in the corner.
- Island - installed in large kitchens, mainly in dining rooms, when the stove is in the center of the kitchen. Attached directly to the ceiling.
These devices are made of enameled or stainless steel; much less often they are made of wood or plastic.
The dome hood can operate in different modes. If an air duct is laid outside, or to a ventilation system, then it simply removes air from the room.
It happens that it is impossible to install an air duct, then you can install a circulation unit, it will pass the air through the filter and return it back to the room.
There are also dome hoods that work in both versions.
In order to install a dome hood, you need to connect the corrugation to the building’s ventilation system and connect the device to the electrical network.
It is possible that you will have to increase the corrugation or wiring, so it is better to enlist the help of professionals.
If you decide to do all the work yourself, then first equip the kitchen with furniture. And only after this will it be possible to work on marking the location of the hood, taking into account the height of its location.
Let's start preparing the fasteners. You need to drill or gouge holes for the dowels. Supports will be bolted to them, onto which, in turn, the base of the exhaust device will be placed.
Observing maximum tightness, you need to connect a special outlet of the hood with the corrugation of the air duct. Next, we check the functionality of the device and put on the upper hood cover.
Considering the fairly large size and high power of this hood, it should be positioned as a device for a spacious kitchen with high food output.
How can you organize an inspection?
During the inspection of supply and exhaust systems, the compliance of air exchange in rooms of different purposes with the requirements of the project and sanitary standards is revealed. When in good condition, properly designed ventilation shafts are visually hidden and their operation is inaudible. There are several ways to check the ventilation in an apartment.
Match
Bring a match, lighter or candle to the ventilation duct
The effect of a lit candle (match). Bringing a burning flame to a ventilation grille in a bathroom or kitchen to a duct closed by the grille will show the operation of the ventilation. If the vertical column of flame, when the vent (window) is open, deviates into the room or remains in the same position, then the system is not working properly. But this method is dangerous and is not recommended by employees of the gas supply organization. If there is a gas leak in the house, an open candle flame can cause an explosion.
Paper
A safe, but no less effective “paper” option. When the window is open, a sheet of newspaper or other thin paper placed against the grille should adhere tightly to it and be held in place by the rod.
Working ventilation will attract a sheet of paper
These methods are justified only in the cold season. In the heat, at almost the same temperatures outside and inside the room, the laws of physics regarding the displacement of warm light masses by colder air do not apply. Therefore, regular ventilation is organized. If malfunctions in the ventilation operation are detected, measures are taken to eliminate them.
Devices
A professional ventilation inspection provides an assessment of the degree of blockage in floor and building ventilation ducts. The power of air draft and the degree of “suction” that occurs due to the formation of low pressure are checked.
What tools and materials will be needed
Bits and corresponding screw heads
We will describe a complete set of materials and tools that will allow you to correctly install a hood in the kitchen with your own hands. So, you will need:
- impact drill or hammer drill (high power, if we are talking about installing a kitchen hood on a reinforced concrete wall);
- drills and drills;
- fastener Both “novosel” mounting kits (plastic plug and screw) and “Euro nail” type fasteners can be used. But optimal results are achieved when using so-called spacer reinforcement.
- screwdrivers and keys (depending on the type of fasteners used);
- small hammer;
- roulette;
- building level;
- marking tool - marker or pencil.
Small tricks for working with the tool. Experienced craftsmen use screwdrivers and bits in accordance with the type of screw heads. Beginners who want the screwdriver to not slip and the fasteners to turn smoothly and accurately will need a little advice. Wood screws (black, with a cross-shaped recess on the head without additional notches) are tightened with bits marked PH. Self-tapping screws for dense materials (chipboard, plastic, metal) are usually white or yellow, have notches on the head located at an offset of 45 degrees relative to the main recess for a Phillips screwdriver. This type of fastener is ideally tightened using bits marked PZ or similar shaped screwdrivers. Using the right tool, you can significantly speed up the job and tighten the fasteners more tightly without damaging the heads.
Glass drill
By varying the types of fasteners, you can correctly install them yourself on any walls. So, for a brick wall in the kitchen, the “new house” or “Euro nail” sets are ideal (it needs to be driven in, so some models of hoods will not be able to provide enough space in the body for the hammer to move, this must be taken into account); work on reinforced concrete is best done using spacer tubes , on a wooden wall, black self-tapping screws will be sufficient.
A little trick. When working in the kitchen on a wall covered with ceramic tiles, you cannot use a hammer drill right away - it will split the decorative element. First, you should go through the tiles with a drill along the glass, and then use a hammer drill to make a hole through the adhesive and the wall material itself.
Variety of choices
Before visiting a specialized store and purchasing a hood, you need to decide on its type. Cleaning household appliances may differ not only in the installation method, but also in functionality.
Reference! Before purchasing an exhaust system, you should carry out a detailed calculation of the required equipment performance in accordance with the area of the room.
- Wall-mounted kitchen hood. Installation of such a unit is carried out on the wall adjacent to the hob. A wide range of design solutions will allow you to choose the right system for your headset without much difficulty.
- Corner hood. The optimal choice for a small kitchen. The equipment is installed in a corner of the room, which significantly saves work space.
- Hanging hood for the kitchen. This type of cleaning device is suspended above the surface of the stove under the wall cabinet without disturbing the composition of the existing interior.
- Built-in hood. An umbrella built into the unit will provide effective ventilation of the kitchen, while remaining invisible.
- Island hood. A suitable option for a large room in which the stove and work area are located in the middle of the room.
In addition to choosing the type of equipment to be installed, it is necessary to correctly prioritize between comfort and savings. Performance, design and method of adjustment determine the final cost of the hood.
These criteria will help you choose the optimal device:
- Power. To determine it, you need to perform a simple calculation taking into account the area of the room. According to state standards, air circulation in the room must be carried out at least 12 times within one hour. Thus, obtaining a suitable performance indicator for a kitchen hood is carried out using the formula: S*H*12=M, where S is the total area of the room, H is the height of the walls. If, according to the preliminary installation diagram, bends in the outlet channel are identified, then you will need to multiply the resulting number by ten times the number of turns as a percentage. For example, if we connect a hood for a room with an area of 8 square meters and a wall height of 3 meters with two bends of the outlet pipe (20%), the calculations will be as follows: 8*3*12=288 m3; 288*1.2=345.6 m3 – recommended power of cleaning equipment.
- Noise. To determine the noise level, you need to connect the hood to the network and measure it using special equipment or use a mobile application with similar functionality. The set value should not exceed 50 dB. This rule applies to residents of apartment buildings. Among the many models of hoods, there are also silent ones, which are equipped with three fans and a sound-absorbing casing.
- Additional options and devices. These could be lighting fixtures, sensors that connect to an automated system, a timer, and the ability to remotely control. In some modifications you can also find a choice of operating modes and an indicator of filter element clogging. The proposed functions will significantly facilitate the culinary process and timely clean the exhaust air from the room without human intervention.
After purchasing a cleaning system that meets your requirements, the question remains of how to connect the kitchen hood to the electrical network so that it functions properly and efficiently while observing proper safety measures.
The process of connecting the hood to the ventilation system
The corrugated pipeline from the location of the ventilation hole to the connection to the exhaust pipe is laid as hidden as possible. Use the ledges of kitchen furniture, suspended and suspended ceilings to disguise the corrugation. Plastic air ducts can be laid openly because they look more aesthetically pleasing.
When choosing corrugated or plastic ducts, it is important to meet the main condition: the size of the pipes for connection to the ventilation duct must be greater than or equal to the diameter of the hood pipe. How to properly connect a household appliance to a ventilation hole in the kitchen:
- Mark the route for laying the air duct and determine the length of each straight section. Consider installing a horizontal section on top of kitchen cabinets. In the case of corrugation, the total length of the pipe is determined.
- Place the ventilation duct onto the hood pipe (the corrugation is secured with a clamp), threading it through the previously made holes.
- Having adjusted the length of the sections of PVC pipes, connect them together using fittings - nipples, couplings and bends.
- Install a plastic grille equipped with a connecting pipe into the opening of the exhaust shaft. Connect the air duct to it and make sure that your system is assembled securely and beautifully.
- Perform final assembly - separate the joints of the PVC ducts with exhaust and ventilation, coat with sealant and reassemble.
Secure horizontal sections of air ducts running openly along the wall with plastic clamps at intervals of 0.7–1 m, otherwise the structure will sag. When connecting a hood to a through hole in the wall of a private house, the check valve is mounted from the outside.
If air communications spoil the design of the kitchen, sew up the pipelines with a decorative box. As a rule, plastic panels that match the colors of kitchen furniture or wallpaper are used for this purpose.
Which one is best to choose?
There are many brands of hoods on the market - Hansa, Krona, Gefest, Elikor and many others. Existing models differ in design, size, operating principle and installation method. When deciding which hood is best for a particular kitchen, the following criteria are usually taken into account:
- Type of exhaust system - recirculation, flow (direct-flow) or combined (can work as a recirculation or direct-flow system);
- Its appearance - how well it fits into the overall design of the kitchen;
- the material used - this affects both the appearance of the device and its durability;
- technical characteristics, such as the power of the device and the noise level it produces during operation;
- Dimensions – It is recommended that the system neck be no larger than the surface of the cooktop and that the ducts fit into existing vents
- the installation method, on which the installation of the hood largely depends - there are suspended, built-in, corner, telescopic and island models that can be mounted in various ways.
Fume hoods come with push-button, mechanical and touch controls. The different types of control do not provide any benefit; the choice is a matter of personal preference.
Why should a kitchen hood overlap the stove table?
The requirement is not obvious; some new hoods work differently. We saw in advertising inclined portals that reach a maximum of the middle. Kitchen hoods are available, high power, the flow of rising air is drawn inside by a powerful fan. As soon as you lower the speed, open the burners to their fullest, the new ceiling wallpaper will begin to become overgrown with a layer of grease. It will not be easy to wash, try to avoid dangerous situations.
It is useful to remind you: take more portal. Please note that some manufacturers prohibit keeping products turned off while the fire is burning. The kitchen hood will catch fire. The fan should spin, creating movement.
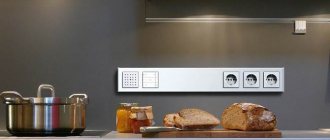
The process of installing a surface-mounted socket
To install a socket with an overlay, you do not need to hollow out a recess in the wall, since the wiring goes directly through overhead cable channels. Initially, the kitchen is completely de-energized. The wires are brought out to the connection point, fixing them with a cable duct or using clamps screwed to the wall. The body is disassembled, the base is screwed to the wall using self-tapping screws and dowels. The wires are screwed to the contacts.
Connecting cables to contacts
The housing is assembled by screwing the half with the wires to the installed part on the wall. Then the electricity is supplied and the functionality is checked.
How to connect the hood to electricity
There are a fairly large number of options for connecting the hood to the electrical wiring in the kitchen or installing a separate outlet within reach of the fan’s power cord.
The most common method involves installing a separate power cable from the nearest junction box in the kitchen to the contact group on the hood body.
The option is good, but quite labor-intensive and not always justified, for example, if the installation of furniture and hoods is carried out according to a temporary scheme. If the furniture and furnishings in the kitchen change in the future, then the installed wiring will only become a burden for the owners. Therefore, today the best option is to install a dedicated electrical outlet in the kitchen to connect the electric hood fan.
Where is the best place to place the outlet for the hood?
The most traditional method of installing a socket involves installing the connector directly next to the hood body. The specificity of hanging furniture cabinets on the wall in the kitchen does not allow surface mounting of the wiring, so the wire is pulled in a plastic corrugation along a pre-cut groove in the wall plaster.
Part of the back wall of the cabinet is cut out to gain access to the outlet.
A lesser known wiring method involves installing the wire inside the duct. The wire is inserted into the plastic pipes through the joint between the sections and brought out directly in front of the hood body. The method is unsafe for people and kitchen equipment, even if the air duct pipes are made of plastic.
Grounding and grounding, installation of sockets
A prerequisite for safe use of a hood in the kitchen is to connect the exhaust system housing to the ground loop. If the house does not have a special grounding bus, then the metal frame of the hood is connected through an RCD to the grounding of the distribution board.
In addition, for plastic air ducts it will be necessary to install a protective loop made of stranded copper wire. As air moves, a large amount of static electricity is generated, which must be discharged to grounding for safety reasons. Otherwise, when trying to open the cabinet, kitchen visitors will experience a slight electric shock.
How to measure distance correctly
When measuring the height of a kitchen hood, several requirements must be met. First of all, before installation, it is recommended to imitate the intended work: bend over the last burners, try to place a heavy frying pan on the stove. This is best done with an assistant.
Mark on the wall the minimum distance at which you can easily operate the device. Then measure the recommended height on the wall according to the distance from the hob to the hood. The lowest point will be the hob itself, and the top will be the hood filter. For inclined instruments, the lower part of the instrument is taken into account. The final score is based on average scores for standards and usability.
Where and how to remove the air duct
The best solution is to route the kitchen hood duct into a separate ventilation pipe that rises to the roof of the house. In multi-storey buildings above five floors, all ventilation pipes are combined in one well. The air flow in such a well is in constant motion, and because of this, the vacuum at the inlet is constantly changing.
The best way to get rid of surges and pressure drops in the hood is to install a compensating valve on the natural ventilation outlet window. In a private house or in a building below five floors, the problem is solved by leading the pipe into the wall of the house.
How to take it outside
Organizing the outlet of the air duct from the kitchen to the street does not pose a particular problem for private houses and apartment buildings built of brick, cast concrete or wooden panels.
In wood concrete and foam concrete panel buildings, installation of the outlet part of the hood is possible only through a window opening or an embedded pipe laid into the wall during the construction of the kitchen walls.
In addition, the outlet must be located at a horizontal distance of at least 80 cm from the window opening and must be equipped with a check valve and anti-icing fungus.
What ventilation would be the best option?
For those who are building a large country house or renovating an elite apartment, we can recommend an expensive, high-quality and efficient ventilation system with heat recovery. Owners of expensive real estate should install an efficient hood and make the exhaust air outlet in the wall. An electric appliance may be a better alternative to a gas stove because it produces fewer carcinogens.
Builders with limited funds should use natural ventilation that connects to the kitchen, bathroom and toilet and ancillary areas. If an exhaust fan installed above a kitchen stove is used in a private house, then the channel for removing air masses is made in the wall, and not vertically on the roof. The fan is equipped with a check valve to prevent cold air from outside from entering the room.
Preparing the ventilation shaft hole
Before all installation work, it is advisable to plaster the entry into the ventilation shaft itself and remove all sharp corners. This will give the entrance maximum aerodynamic qualities.
You should end up with approximately the same surface as a standard 90 degree round elbow.
It is recommended to add ceresit liquid (ceresit CT99) to the plaster solution.
This hole will be exposed to fat and moisture. And ceresite contains components that prevent the formation of mold.
However, do not use gypsum plaster under any circumstances. Its use in ventilation shafts is a direct path to the appearance of mold and fungi.
Attach sections of a standard air duct to the tee on both sides. From the side of the wall, 5-7 cm, wall it up in the ventilation duct. The exit itself is decorated with a square frame.
How to install it yourself
At the first stage, you should decide whether to dismantle the old cabinet in order to replace it with a box created specifically for exhaust equipment, or to get by with the least losses and simply slightly modify the existing wall furniture. Measuring the body of the purchased device will help here. If its dimensions exceed the width of the wall cabinet, then you will have to equip a box. In the case where a 50 cm built-in hood is installed in a cabinet, then most often these dimensions are suitable for most kitchen “walls”.
For example, a built-in 50 cm kitchen hood requires that a hole corresponding to this width be cut in the furniture. The top of the cabinet must also be modified, and a cutout must be made for the air duct, which will connect the outlet of the exhaust device and the ventilation window in the wall. But often not a round corrugated air duct is used, but a rectangular plastic ventilation duct. In this case, installing a built-in hood in a cabinet involves a rectangular cutout in the upper part of the furniture body.
The first step at the stage of fastening all the elements together is to directly install the exhaust device inside the cabinet. Typically, a built-in hood is installed by attaching the back of the housing to the wall. To do this, it is necessary to provide an additional cutout on the corresponding side of the cabinet.
The main nuance that must be taken into account is the ability to move the panel, that is, after securing the housing, the moving part of the exhaust device must move freely.
Installation of a built-in hood in a cabinet from the side where the air duct is attached should not be done “tightly”. This means that it is enough to secure this connection with a clamp
This is done with sufficient force to ensure maximum tightness, but it is important to maintain the possibility of dismantling the structure, since periodically these elements will have to be disconnected from each other in order to clean the system from layers of contaminant particles
Features of choosing an air duct
When deciding how to install a hood in a cabinet with your own hands, you need to choose the type and material of the ventilation duct. The most suitable varieties for the kitchen are the following:
- corrugated air duct;
- plastic air duct of rectangular or round cross-section.
Installing a built-in hood in the kitchen is most often a consequence of the need to save space. Therefore, it is not advisable to purchase a round ventilation duct, since a rectangular box will take up much less space. Further, the advantage of the plastic channel is better throughput, which is ensured by smooth walls. However, installing a built-in hood with your own hands using corrugation, despite the increased noise effect during operation due to the corrugated structure of the walls, does not require elbows, which in turn will eliminate the possibility of turbulence in air flows in the exhaust system.
When installing a corrugated duct, you should remember that it must be placed in a stretched form, since contaminants will be retained in the cracks and depressions along the entire length of such an air duct. A clear advantage of this type of material is that there is no need to purchase additional adapters, since the corrugation lends itself well to deformation and a rectangular shape can be obtained from a round cross-section with a little finger force. Thus, each type of ventilation ducts has advantages and disadvantages; accordingly, it is impossible to provide specific recommendations on which one to choose, since the decision must be made by the homeowner, based on taking into account all the parameters of the room and equipment.
Features of the design of exhaust ventilation ducts
The diameter of the hood must correspond to the diameter of the air duct. If the exhaust pipe is smaller, the hood will work in a stronger mode, and this will lead to damage to the fan motor. A pipe with a smaller diameter also affects noise insulation - when the equipment is operating, the noise level will increase significantly.
The length of the air duct should be no more than 3 meters
It is necessary that all bending angles when installing ventilation ducts are greater than 90 degrees. The operation of ventilation depends on this. And the number of these same bends should be kept to a minimum. The efficiency of the exhaust air purification device depends on this. It is better to give preference to plastic systems with a round cross-section. Not only will dirt and dust not settle in them, but they also have less resistance to the passage of air masses.
Important! The scheme also includes the installation of valves - plastic or film.
Attaching a wall or dome model to a wall
Although these two models differ in appearance, they are attached to the wall. They have four holes on the back wall of the case - two on the left, two on the right. Many manufacturers provide their products with a mounting template on which the locations of the fasteners are marked. All you need to do is lean the template against the wall and move the marks. If there is no template, measure the distance between the holes and transfer it to the wall. If you have an assistant, you can ask them to hold it at the selected height and make the marks yourself.
The hood must be attached to the wall through the standard holes in the housing.
Then everything is simple: use a drill to make holes of the appropriate size, insert plastic plugs for the dowels, then hang the hood on the dowel-nails. Naturally, we check that the installed equipment is horizontal.
This method is good if the wall is smooth and nothing interferes. Often there is a gas pipe running next to the stove, which makes it impossible to hang the hood close to the wall. In this case, you can nail wooden blocks to the wall, and attach the hood to the bars. This is a simple option, but not a very good one - the bars become covered with soot and are difficult to wash.
The second option to install the hood behind the pipes is to use a hairpin screw (the second name is a plumbing pin). They have a thread for screwing into the wall, a smooth part, which makes it possible to carry the hood some distance from the wall, and a smaller thread with two nuts, which will be used to secure the body. There are these studs in different sizes, choose which one you need, but all the nuts are made for a bit or an octagonal wrench.
How to install a hood on a wall if a gas pipe is in the way or the wall is uneven
This option for mounting the hood is universal, simple to implement, and reliable. It is also more convenient to clean - the metal is usually stainless, and it is easy to clean it from deposits.
Performance, filters, management
According to sanitary standards for kitchen premises, tenfold air changes are recommended every hour. Therefore, when calculating the performance of the hood, you should focus on the volume of the kitchen, expressed in cubic meters. To do this, you need to multiply the length, width and height of the room, and increase the resulting result ten times.
For example, for a kitchen with an area of three by four meters and a ceiling height of three meters, you will need a hood with a capacity of (3 m X 4 m X 3 m X 10) 360 cubic meters per hour. And this is the minimum value.
Sellers recommend purchasing a kitchen hood with some power reserve. If the performance of the device is lower, it simply will not cope with cleaning the kitchen air from contaminants. How to calculate the power of a kitchen hood is written in detail here.
Grease filters vary in composition as follows:
- organic (based on synthetic winterizer);
- paper (based on non-woven fabric);
- synthetic (acrylic based);
- metal (aluminum or steel).
Paper filters are a disposable option and need to be replaced with new ones every time they become dirty. Synthetic analogues can be washed, but this must be done very carefully, as they are easily damaged. They will also have to be replaced from time to time, although not as often as paper ones.
Metal filters are considered the most reliable; they are wear-resistant cassettes. Coal varieties, which are used only in recirculating installations, also cannot be purified. They must be replaced promptly, otherwise the performance of the hood may be significantly reduced.
When choosing a hood, you should pay attention to its type of control. Electronic control usually allows:
- automatically adjust performance levels;
- change operating modes;
- configure the device to turn on and off automatically;
- turning on the built-in lighting when there is movement near the stove;
- light indication of filter status, etc.
Among the useful functions of a hood built into a cabinet, one can note the residual mode: the fans run for some time after the hood is turned off to ensure the most complete removal of contaminants.
The additional ventilation mode allows you to automatically start the hood at low power at certain intervals to maintain optimal air exchange in the kitchen.
Drilling work
Using a hammer drill, make holes in pre-marked areas. You should also make holes for attaching the grille. To perform work on fixing the hood, you will need a drill with a diameter of 8 mm. The finished hole is “hammered in” with a 50-gauge dowel, into which 50 mm self-tapping screws are screwed. To fasten the grille, a drill with a smaller diameter is used, and, accordingly, smaller fasteners: 6 mm will be just right. After installing the fasteners, the grille itself is fixed. As a rule, the ventilation grille is fixed with four self-tapping screws.
Hood operating modes
Forced ventilation devices for the kitchen vary in operating mode. The units are:
- Recirculation filters pump contaminated air through a block of filters, consisting of a preliminary filter (for rough cleaning) and a carbon filter (for cleaning the air from odors). Such a unit does not require a connection to the ventilation duct, so in this case installation will be the simplest. But, in terms of the quality of air purification in the room, this type of device is inferior to flow-through devices.
- Flow-through systems effectively pump contaminated air from the room into a ventilation shaft or channel, which is discharged outside (if you install a hood in a private house).