Advantages of fastening with a dowel clamp
- Installation is simple and does not take much time
- Ability to quickly replace failed fasteners
- The dowel-clamp is resistant to ultraviolet radiation
- Can hold quite a lot of weight
- Can be used both indoors and outdoors. Since it is possible to work with it at different temperatures
Disadvantages of using dowels
- Appearance, it is not very aesthetic, so they try not to fix it in a visible place
- When working with such a mount at high temperatures, it can be subjected to deformation
How to use it technologically
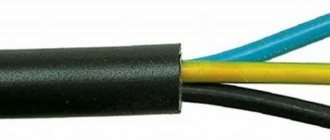
Dowel clamps are intended for cable laying only. But it should be no thicker than 2.5 centimeters.
When choosing, consider the following factors:
- select the diameter of the clamp for each cable. A 10-15 mm clamp will not support a 20 mm cable;
- pay attention to the shape of the clamp - whether the cable will be flat or round, choose dowels for them;
- Date of issue. The dowel-loop is designed for one and a half to two years of operation. But not from the moment of installation, but from production.
Design
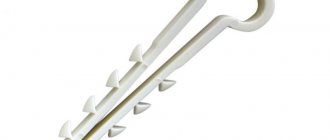
A dowel-clamp is a fastener that can be used to attach wires or pipes, both hard and soft, to brick, aerated concrete, foam concrete. The dowel is made in the form of a loop with an oval or round end.
- At the ends of this loop there are teeth, which cling to the material when fixed.
- Dowel - clamp has such functions as holding a wire or other attached material (clamp) and fastening directly to the surface (dowel).
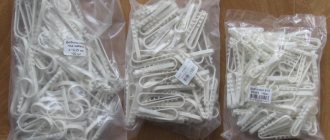
- These clamps are often produced in two colors, black and white, but if desired and necessary, you can find other colors. There are several types of dowels. Basic.
"Helicopter"
Fastening in the form of a loop with a spacer. This type can withstand loads of up to 8 kilograms. With this fastening, you can fix not only cables, but also pipes with different coatings and shapes, the diameter of which should not exceed 32 mm.
Please note that when installing with these dowels, you must first put it on a pipe or cable, and only then fix it in the wall.
Bracket
A plastic strip with teeth, designed for fixing cables and pipes with a diameter of 6 to 25 mm. When calculating the number of fasteners, it is necessary to take into account the weight of the cable.
Arc Clamp
The shape of such a dowel is not in the form of a loop, but in the shape of an arc. And the diameter of the attached cable or pipe must match the size of the clamp. They are produced with one or two arcs, which allows the cables to be fastened in parallel.
Why is the wiring fixed?
There are many different ways to install electrical wiring, but no matter what you choose, it must be secured. Even in the case of hidden installation in grooves made in the vertical or horizontal plane of the wall, the cable should be securely fastened, and then the holes should be plastered. Not a single wire should extend beyond the edges of the grooves and interfere with plastering and finishing.
The situation is similar for an open gasket. The cable must be securely fastened along the entire length of the electrical line, and only then hidden inside corrugations, special boxes and other decorative items. The same should be done when laying behind suspended and suspended ceilings.
You can attach the wire to almost any wall - brick, plasterboard and wood. To perform work using dowel clamps, it is advisable to prepare a drill or hammer drill with a set of suitable drills.
Installation platform with clamp
Thanks to this fastening, you can easily fix cables and pipes in a bundle and of different sizes. In appearance, this is an ordinary plastic dowel - a clamp with a tie and teeth, at the end of which there is a rectangular loop. By threading the clamp through the loop, the cable or pipe is secured.
The following materials are used in clamp dowels:
- Nylon is the most common material for making dowels. When comparing polyamide and polyester materials, the balance favors the former. They show the best mechanical performance. It is worth considering that the temperature of use of Nylon dowels is limited to +85 degrees.
- Polyethylene is considered the cheapest fastener. Its main and main disadvantage is intolerance to ultraviolet rays. Over time, the dowel becomes brittle and may fall apart, unable to withstand the load on it. An exception is the dowel made of stabilized polyethylene. This material is resistant to sunlight.
- Polypropylene - differs from the previous ones in hardness and strength, but also remains sensitive to ultraviolet radiation. Since dowels are often used inside buildings, you can turn a blind eye to intolerance to direct sunlight.
Cable mounting options
Let's look at the basic methods for securing wires using a hammer drill.
Dowel tie for fixing flat and round wires
First you need to drill a hole with a diameter of 6 mm. Then place the cable inside the clamp and push or hammer it into the hole. This is an economical, operational approach that eliminates the protrusion of parts when installed in grooves on the walls. This option is suitable for fastening corrugated pipes.
Cable tie with a hole for a dowel
Another economical way, since the cost of purchasing consumables is minimal. Take a plastic dowel (you won't need anything else). Occupies minimal space.
Square mounting area
The beginning is similar to the first option: drill a 6 mm hole, hammer a wooden chopper or plastic dowel-clamp into it, then screw the pressure plate to the wall with a screw. Next, the cable is pressed against the plate using a conventional tie.
Clips for corrugated pipes
The clip is attached using a dowel and a self-tapping screw screwed into it. The size of the clip depends on the dimensions of the corrugated pipe. The main advantage is the ability to assemble clip blocks connected with locks. Complex electrical systems can be created from blocks.
Metal bracket
If the wire is placed inside a metal sleeve, it should be secured using staples. As in the case of clips, their size depends on the dimensions of the protective element (metal sleeve).
Platform with self-adhesive backing
If the wires are laid on a metal surface that cannot be drilled, then the only solution is to use self-adhesive pads. Their design involves the use of an adhesive backing hidden under a protective film. Remove it and attach the product to a clean surface. To secure the cable, use conventional cable ties. This installation method is relevant for large electrical panels.
Metal fasteners
A metal dowel - clamp is a stronger fastener. Outwardly, it looks like an ordinary dowel.
But, nevertheless, there are a couple of options for this fastener:
- Bug. The metal fastener is a self-tapping screw with a press washer. This dowel-clamp can withstand a load of no more than 10 kilograms. This type of fastener is used to secure cables and metal pipes, the diameter of which should not be more than 38 mm. Attention! When installing the cable, it is necessary to ensure its insulation. And in the place where the fastening itself is located, it is necessary to wrap it with thermal tape.
- Fastener with tape for clamp. The dowel itself is a long clamp and has a plastic tape. It can be made of either soft or hard material. The maximum length of this tape is 14 cm.
- Fastening with wire tape. This fastener is capable of securing a load of no more than 1.5 kg. It is made of heat-resistant steel with a special polymer coating. These clamps are available with a buckle, for more precise fastening, or without. In this case, the edges of the wire just need to be twisted.
It must be taken into account that the dowel is only a part of the fastener that provides support for the self-tapping screw or screw. More often, buyers accept a complete set under the dowel - this is a self-tapping screw, a clamp and a dowel.
Installation of fasteners
Dowel ties and other similar products are very easy to install. Before installing fasteners, be sure to drill holes for them . Installation features partly depend on the type of part.
A simple bracket is installed like this:
- Fixation points are marked on the wall in increments of 0.25 m (with a larger value, the cable may sag). In areas with a change in direction, it is reduced to 0.1 m.
- Drill holes with the same diameter as the dowel and 1-1.5 cm deeper than the length.
- The wire is laid along the resulting line.
- The dowel is put on the cable and inserted into the hole. The teeth rest against the recess from the inside and prevent the fastener from falling out.
Steel parts with a clamp and buckle are mounted a little differently. After drilling the holes, the tape is folded and goes around the dowel. The part is driven into the wall with tape using a hammer. The ends of the clamp are bent. A self-tapping bolt is screwed into the dowel until it stops. The cable is laid between the ends of the tape and the buckle is mounted on the clamp. The end of the latter is tightened to firmly (but not excessively) press the wire. The ends of the buckle are bent for fixation.
Fastener selection
Before choosing a fastener, it is necessary to take into account the material of the base on which the fastener itself will be made.
Types of fastenings:
- Steel fastenings. They must be driven or screwed into the wall or ceiling.
- Expansion anchors and dowels. They must be inserted into a pre-drilled hole.
- Mounting mixture and adhesive composition.
Calculation of fasteners
Before purchasing dowel clamps, you must correctly calculate their number.
When calculating, it is necessary to take into account some factors:
- The weight that the dowel can support. This information can be found in the relevant certificates.
- Diameter. This depends on the thickness of the bundle or the size of the pipe being attached.
- Length. It is necessary to know the thickness of the coating to which the fixation is made.
- Material. It is necessary to take into account what the wall or ceiling is made of, depending on what the fasteners are attached to.
- It is necessary to take into account the length of the wiring or pipe being laid.
Important! When attaching wires, it is necessary to maintain a distance between fasteners of 25 cm. When turning, at least 10 cm.
The choice of fasteners is great. But dowel - clamps, both plastic and metal, are very convenient to use and are in good demand. This is the most suitable fastening for electrical wiring. More often used for industrial purposes. In apartments, hidden wiring is more common.
Wire fastening
When installing cables, various fastening methods are used. It all depends on the specific conditions, financial capabilities and tastes of the owners of the premises. When performing this work, everything must be securely fixed, the insulation must not be damaged, and the appearance must be consistent with the surrounding environment and be favorable.
The materials from which walls and ceilings are made can have different densities and structures. The cable, depending on the task at hand, can be completely or partially “hidden” in grooves (groove recesses), plastic pipes, corrugations or special trays. And if this is not really necessary, you should secure it more carefully.
All this can be done using a wide variety of devices. Let's try to take a closer look at the most common types of fastening.
General rules
In principle, the recommendations are universal and simple. The distance can be reduced if necessary. For example, at turns of the route, the fasteners are installed at a short distance from the bend point - 5-10 cm. The task is to ensure reliable fixation and prevent sagging.
- So, when laying cables on walls or ceilings, it is recommended to follow the following rules:
- When using screws, dowels and self-tapping screws, try to tighten them all the way. Otherwise, the protruding cap may damage the insulation.
- The maximum distance between fastening points should not exceed 50 cm, and at bending points (turns) it can be reduced to 5 - 10 cm.
- Laying is carried out without humps, evenly and preferably in a straight line (horizontally or vertically). If a margin is provided, it should be made less noticeable.
- When laying cables hidden in a groove, they are laid so that they do not interfere with further finishing of the walls.
- If you have suspended or suspended ceilings, there is no need to make grooves under them.
- The main tools that should be used during installation are a drill, a hammer drill, a screwdriver, screwdrivers and a hammer.
All these recommendations are universal and easy to implement.
Hidden gasket
Fasteners for hidden installation - if cables are laid at the renovation stage, they are increasingly resorting to installation inside walls, floors or ceilings. Since the result of the work is invisible, minimal attention is paid to aesthetics. But a lot of attention is paid to reliability and safety - access for alterations is very, very complicated.
- Therefore, when laying cables inside the wall, ceiling, or under the floor, reliable fasteners are chosen. It can be:
- Screeds of any type - with dowels, mounting platforms, etc.
- You can choose the appropriate size clip type.
- Make homemade fasteners.
If you are making a suspended ceiling from plasterboard, the wiring can be attached to hangers or laid inside profiles. When installing, do not lay the cables close to the profile wall to avoid damage during operation.
To lay large bundles of wires on the ceiling, it is more convenient and faster to use trays, but you can still use the same fasteners. The only bad thing is that you have to drill a lot of holes to install fasteners in concrete or brick. This is especially inconvenient when working on the ceiling. Below is how to best optimize work in this case.
If the presence of false walls or a finished floor is not expected, recesses are made for the wires - grooves. The wires are laid in them, then they are covered with a solution and then the finishing is done.
From an aesthetic point of view, the option is ideal. From an operational point of view, it is problematic, since it is almost impossible to replace or repair wiring without breaking the walls. Nevertheless, wiring is done exactly this way, simply trying to lay high-quality cables, and even with at least some reserve in terms of power or number of pairs.
According to safety rules, in combustible walls (wooden, panel and frame) the cable is laid in a non-combustible sheath or in an all-metal tray. If we are talking about a non-flammable shell, then it is usually a corrugated pipe made of non-flammable plastic. In this case, the sheath itself is attached, inside which the cable is located.
This does not particularly affect the choice of fastening type, but it does affect the selection of fastener sizes - it is simply necessary that the fasteners be able to cover the shell.
Laying cables inside combustible walls is difficult: the requirements are very stringent. They can be done in frame or panel houses, but in timber or log houses it is very difficult. It is necessary to lay all-metal trays in the walls.
In this case, it is necessary to remove a large amount of wood, which does not improve the thermal characteristics, and it is not possible to make the appearance ideal. Therefore, in wooden houses they often resort to an open installation method - on top of the walls.
Open gasket
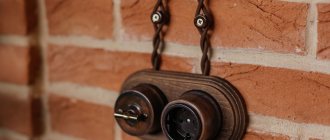
Fasteners for open installation - when laying cables externally, more stringent requirements are imposed on the fasteners regarding the appearance. Since everything is in plain sight, it is necessary to select the most inconspicuous options or, conversely, the most decorative ones, for example, retro wiring.
- Other options:
- Installation in cable channels. These are plastic trays that are attached along the walls. Not the best method from an aesthetic point of view, but if it is necessary to lay a large number of wires in wooden houses, it is perhaps the cheapest and most convenient for installation.
- Laying a certain number of wires in special skirting boards.
- Using staples from a stapler. The most inconspicuous fastener, and also installs quickly.
- Fastening with brackets and clips, painted to match the cable.
- There is a choice, but all methods are imperfect, so everyone decides for themselves how and with what to attach the cable.
To Wall
Fastening the wire to the wall - depending on the type of surface, the method of fastening is selected.
- Soft and thin.
These include walls made of foam concrete, aerated concrete, fiberboard, plastic, plasterboard, etc. Simple fasteners will not hold here. More reliable and stable will be special devices in which the end or middle part is made wider. These can be butterfly dowels, umbrellas or dowels with a drill.
- Dense.
These are wooden, gypsum, plastered surfaces, OSB and chipboard. In this case, use ordinary self-tapping screws or simple nails. If the screws are screwed in with great force, you can pre-drill holes with a smaller diameter.
- Solid.
Brick and concrete walls are the most common materials in this category. Here, even screwing self-tapping screws into pre-drilled holes will be problematic. It is in this case that dowels should be used.
Most often, they consist of a plastic cap and a screw. Holes are drilled in the wall. For walls made of concrete and brick, the diameter of the drill must match the diameter of the dowel (drill 6 mm - dowel 6 mm).
For less dense surfaces, the drill should be 1 mm thinner (5 mm drill - 6 mm dowel). Caps are inserted into the holes, the end of which should not protrude from the surface. Then the fastener itself (clamp, plates, etc.) is attached to them using screws.
To the ceiling
Attaching the cable to the ceiling - attaching cables to the ceiling becomes necessary mainly when installing suspended ceilings or ceilings made of plastic panels and plasterboard. In the case of plasterboard, everything is somewhat simpler: there is a system of suspensions to which you can fasten wiring harnesses with plastic ties.
In other cases, everything is somewhat more complicated: you have to drill a large number of holes for fasteners, because they use the same clips and brackets, and under each you need to install a dowel (if the ceiling is made of a concrete slab).
- There are several ways to speed up installation:
- Using cable trays (described above).
- After attaching a number of lines to the ceiling, hang small wire harnesses from them using plastic ties.
- Use a long perforated strip of metal for fastening.
In the groove
How to secure a cable in a groove - you need to take care of the grooves and laying of cable bundles long before the final finishing of the room: precisely when the apartment still has no trace of furniture, no things, no wallpaper, no linoleum, nothing at all. In a word – bare walls, like in one famous TV show.
On these bare walls we determine and mark the route along which our cable lines will pass. Marking can be done using a construction pencil and a level.
Here it would not be amiss to recall that cable lines should not be located anyhow, but run either horizontally under the ceiling (at a height of 2.5 m) or strictly vertically along a plumb line. No diagonal transitions or horizontal segments at a low level are strictly allowed.
When marking the walls, we immediately determine the location of sockets, switches and branch boxes, because the holes in the wall for their installation will need to be made at the same stage as the grooves for laying the cable.
The width of each groove is determined in accordance with the number and cross-section of the cable that will be fixed in it.
Grilling. Having completed the marking, we move on to the next question, which is of primary importance. What to ditch with? There is plenty to choose from.
Most often, a hammer drill with one of the special attachments is used to make grooves. The first of these attachments is called a strobe. The strober is a slightly curved blade with a longitudinal groove. The end of this blade is pointed and is designed to go deeper into the groove being punched.
You should work with the strober in purely impact mode, without rotation. The groove from it turns out neat and deep. However, using this device, it is possible to make a groove wider than the groove itself in only a few steps, which, of course, is not very convenient.
Another attachment often used for punching with a rotary hammer is a regular flat blade. The principle of working with it is approximately the same as with a strober, but the productivity is slightly lower.
Ordinary sharp peaks for a hammer drill or even drills, oddly enough, are also sometimes used for scoring - when there is nothing else at hand, and the volume of work is very small.
Still, one cannot expect great productivity when gating with a hammer drill, especially when it comes to gating concrete walls. Therefore, for large volumes of work, many electricians use a disk cutting tool to perform grooves.
An angle grinder (angle grinder), or, more simply, an angle grinder with a diamond segment disc, is often suitable as such. With its help, cuts are made along the edges of the groove to the required depth, and the middle part is subsequently easily knocked out using the same hammer drill.
Despite the seemingly much larger number of working operations, gating using an angle grinder is much more productive than the same work using only a hammer drill. The reason is that the grinder makes each cut very quickly in one single pass.
The most productive tool for gating is a wall chaser - a device very similar to a grinder. The wall chaser has two cutting discs located parallel to each other.
The distance between these disks is adjustable, which means that the width of the groove can be set within the required limits. The position of the disks relative to the supporting surface, that is, the depth of the groove, also changes.
Disc cutting tools have only one drawback compared to a hammer drill. Of course, even when chipping with a rotary hammer, there is a lot of dust and dirt, but from the cutting disc this dust does not even fly in clouds, but in a continuous stream.
If an electrician neglects personal protective equipment when working with a grinder or wall chaser, then after finishing several projects, he risks developing lung and/or eye disease.
Therefore, wearing safety glasses, a respirator, and earplugs when doing hammering is far from a luxury, even if you work as a hammer drill. Your health is always more valuable.
Professional wall chasers, by the way, are equipped not only with a protective casing for the discs, but also with a standard connection pipe for connecting an industrial vacuum cleaner, which can absorb most of the dust generated.
Installation of cable in a groove. And now the groove is completed, the dust and fog have cleared, and you can begin installing the cables. Unfortunately, the requirement for the replacement of hidden electrical wiring when laying cables in a groove most often has to be neglected. Making large and wide grooves that could accommodate a pipe for cable wiring is not always possible.
Therefore, as a rule, cables are laid in bundles in the groove, without any additional protection. The insulation of the most popular cable for home installation - VVGng - is quite reliable and does not fail with this installation method.
You can secure the cable in the groove in one of the following ways:
- Using a perforated strip.
It was exactly these kind of nylon perforated strips that were used for the most part in the construction of our “favorite” panel “Khrushchev” buildings. The strip was fastened across the groove using dowels and securely held the entire mass of cables, regardless of their number.
- How to secure a cable in a groove using an aluminum mounting strip.
This is sold at any electrical store. Actually, it is not necessary to buy it: if you have free time and patience, you can make it by cutting any thin and ductile metal.
For installation, the strip is punched in the middle and screwed to the bottom of the groove using the popular “screw-dowel” pair. The cables are laid on top of the strip, and its ends are bent with pliers, forming a tight and reliable lock. The method, of course, is labor-intensive, but still very popular.
- It is quite possible to secure the cable using alabaster.
We pull the cable line along the groove and immediately fix it with a solution that we keep on hand. The disadvantage of this method is that the alabaster solution cannot be diluted in large quantities due to the fact that it dries very quickly.
- The most “advanced” and productive way of fastening a cable in a groove is using dowel clamps.
A dowel clamp is a dowel with an installation size of 6 mm. At the end there is a special loop that allows you to hold the cable bundle. Thus, installation using dowel clamps is extremely simple: you just need to punch a series of holes with a puncher, and then insert dowel clamps with a fixed harness into them.