Let’s start right away with a lyrical and technical digression so that what will be discussed further in the article is clear. So: electrical wiring in residential premises is of two types - hidden (internal) and open (external, if you like).
Hidden wiring is when you can't see the wires. They are walled up in wall cable channels, hidden under a layer of plaster or behind plasterboard panels. All we see in this case are sockets, switches, sockets for lamps and, perhaps, covers of distribution boxes under the ceiling.
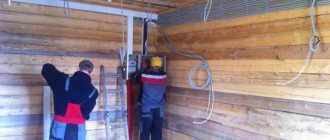
Open wiring is when everything, or almost everything, is visible. In this case, the wires are laid over the walls, ceiling or floor. They can be hidden in special cable channels and pipes, or they can be simply attached to the surface. It is this kind of open wiring that will be discussed.
For what purposes is it necessary to lay a cable channel?
Electrical networks created using a mounting box are different:
- mobility;
- installation flexibility;
- low cost of installation;
- increased electrical and fire safety;
- aesthetic appearance.
Using an electrical box is especially beneficial in rooms where renovations have already been done. To attach the base of the plastic channel, there is no need to disturb the external finish of the walls.
The mounting box is used to protect and insulate external wires in apartment buildings, private homes, and various industrial facilities.
Most often, wall and floor plastic boxes are used to connect electricity, the Internet, cable television, and when installing intercoms. It is suitable for insulating external electrical wiring in rooms with high humidity. It can be installed in the bathroom if the owners want to keep the ceramic tiles on the walls intact.
Installation nuances
Creating convenient and high-quality wiring in an apartment or private house ensures reliable and safe connection of all electrical appliances. Before deciding how to attach the cable channel to the wall, and which screws are best to install the boxes on, it’s worth planning.
Important! You can plan the route for laying wires in any direction and with a different number of turns, but you need to make sure that there are no places where the wires could be damaged.
General recommendations include:
- place the switches on the side of the door handle at a height of 90–160 cm from the floor;
- a minimum distance of 15 cm is required from the ceiling, and 10 cm from the window;
- horizontal wiring lines should be located at a distance of at least 30 cm from the floor.
Beginners installing cable ducts for electrical wiring of any kind should stock up on material 10–15% more than calculated in the drawings.
Advice: do not cut the entire box into pieces at once: during the fastening process, shifts may occur upward or downward and parts of a different length will be required.
Classification of cable channels
Cable channels are classified according to the following main characteristics:
- According to the material of manufacture, they are distinguished:
- metal;
- plastic.
- Based on location, cable boxes are divided into the following types:
- floor products;
- wall, parapet or main (the same wall, only with dimensions over 80 mm in width and 40 mm in height);
- ceiling;
- baseboards.
Types of cable channels
- According to the degree of hardness they are divided into:
- rigid cabinet products, represented by rigid straight plastic or metal boxes;
- flexible cable channels that can bend in different directions.
Everything ingenious is simple
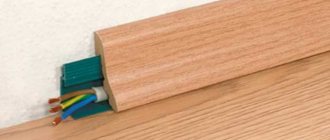
The idea of combining several functions in one item has always been very popular, so it is not surprising that floor plinths with cable ducts are so in demand when decorating premises.
With its help, you can beautifully and neatly seal the gap between the mating surfaces, and hide the wires, of which there are now countless: telephone, Internet, TV, lighting, electrical wiring, etc. According to the design features, the plinth with cable channel can be divided into two types: profile with a groove in the middle, which is closed by a decorative insert, and a profile consisting of a base that is completely covered by a decorative element.
The first model is more common, but can accommodate only 5-6 wires in a cable channel, but the shape of the plinth is made in such a way that you can hide the same amount before installing the cable in place. The second type of skirting boards allows you to lay 10 or more wires for various purposes in a cable channel.
A standard cable cord with a cable channel allows you to lay 5-6 wires
Materials
Plastic plinth with cable duct is the most popular and inexpensive profile, which has gained its leading position among analogues from other materials, thanks to its very affordable price, practicality, resistance to mechanical stress and microorganisms. It can be called universal, since the profile is presented in different sizes in width and height; the color and texture of the decorative coating can be used to match the PVC skirting board with cable duct to any interior.
The huge demand for such profile models with a cable channel has pushed woodworking enterprises to modernize production technologies. In the wake of competition, wooden plinths with cable ducts appeared, as well as veneered and MDF laminated profiles with grooves for wiring. Now installing baseboards for parquet, laminate and other natural wood flooring has become much easier.
Practice has shown that cable plinth is a convenient device for laying wires. But in addition to this practical function of the cable channel, the aesthetic component also plays a huge role: the upper decorative strip hides the fastening of the profile to the surface, the front part remains intact, it does not need to be covered or tinted, and no nail heads or screws stick out.
Electrical wiring in the baseboard, in the photo there is a way to hide a lot of wires
To satisfy the demand of the most demanding customers when it comes to interior design, the market also offers aluminum plinths with cable ducts. As a rule, it consists of a base with a groove, and a decorative metal strip is fixed onto it. This profile with a cable channel is in demand in rooms with a specific microclimate and difficult operating conditions, for example, in public places with huge traffic.
It should be noted that the price of skirting boards with a cable duct made of these materials is slightly higher than their plastic counterparts, but it is now possible to finish the perimeter of the floor from different materials, and at the same time you do not have to worry about choosing a skirting board from what is available, as in the old days.
Some profiles do not have a cable channel, but their back part is modeled in such a way that the wires can be hidden; the photo shows how to lay a cable in a baseboard that does not have a special groove
Main varieties
Depending on the modification, the dimensions of the cable channels, their shape, material of manufacture and technical parameters vary. In everyday life or for registration of wiring in offices, the following are most often found:
| Name | Peculiarities | Areas of application |
| Mini | Box with a small cross-section. They hold up to 3 small cables. Installation of mini cable channels is carried out using self-tapping screws. When turning the wires, the joints are poured at an angle of 45° or plugs are installed. Typical sizes range from 10x10 mm to 60x80 mm | Most often used for Internet, television and telephony. |
| Flattened floor | An oval profile, which is used if it is not possible to route cables around the perimeter of an office or apartment. When installing, one edge of the box is attached to the floor with self-tapping screws, then it is closed with a lid and plugs are placed at the joints. Made from aluminum, galvanized or hard plastic. Size variations: from 16×6.5 cm to 7.5×1.5 cm. Colors include white, black grey, brown and a natural wood option. | They are laid in offices where it is necessary to run the wire to office equipment or a workplace in the center of the wall. Suitable for one or more medium sized cables. |
| Parapet guides | Main (parapet) boxes are made of plastic. There are several variations depending on the type of profile: similar to the “P” burka without a partition, “W” - with three sections, “G” for corners, curly and universal. The main advantage is the ability to adjust the rotation angle from 7 to 45° using adapters. Dimensions from 10×6 cm to 1×2 cm. | Can be used in any domestic premises. |
| Perforated with open access | Made of plastic or metal, it is 30-40% lighter than conventional options with easier installation. They provide good air circulation, have constant access to the wire in different parts of the network and can be installed on curved surfaces. | They are used to connect wires to each other when entering electrical panels or in production workshops, where the appearance of the wiring is not important. |
| Skirting floors | This type of cable duct is fastened using self-tapping screws to the walls or floor. Their design resembles hollow sections with a lid on top. The main selection parameter is the width of the diagonal wall (5 and 7 cm). The advantages include versatility for residential and office premises, variability of colors and immunity to ultraviolet rays. After dismantling the plinth cable channel, it can be reused. | Offices, administrative buildings, apartments and private houses. |
| Flexible | Prefabricated structures made of metal or plastic. Available in different colors, there are corrugated models. Such cable channels protect against mechanical damage, vibration or chemical reactions with the external environment. Such a box is flexible, can reduce noise levels and provide free access to wiring. At the same time, it is easy to replace a separate element, and installation does not require much time. By diameter you can find the following subtypes:
| When connecting wires to machines and other equipment in production. |
| Corner under the ceiling | Installation of the corner cable channel is carried out at the joint between the wall and the ceiling. The triangular shape of the structure fits perfectly into a flat corner. The maximum dimensions of the internal cavity are 4 by 4 cm. Simple installation and light weight of the structure are among the positive aspects of the box. Such cable channels are fixed only under the ceiling due to their fragility. | Any office and residential premises. |
| Transparent with backlight | Externally similar to corner ceiling models. They have a completely transparent lid, tilted at an angle of 45°. They have built-in lighting. | They are used to decorate lighting systems under the ceiling, frame kitchen cabinets and other decorative elements. |
| Industrial wire | Made from metal wire. They provide free air circulation, quick access to wires and do not accumulate dust inside the structure. | Installed in warehouses and workshops, as well as behind suspended ceilings. |
The types of cable channels listed can be divided according to the degree of rigidity, the presence of a cover or the type of locks at the joints. However, installation of wiring boxes in an apartment is carried out according to the same principle and with general rules.
Corrugated metal pipes
A distinctive feature of metal hoses from plastic pipes is the manufacturing method. If the latter are completely solid and sealed, then the metal ones are twisted from galvanized steel tape, which determines the advantages and disadvantages of use.
Dimensions of metal sleeves for cable:
| Outer diameter, mm | Inner diameter, mm |
| 11,6 | 7,8 |
| 13,9 | 9,1 |
| 15,9 | 10,9 |
| 18,9 | 14,9 |
| 21,9 | 16,9 |
| 24 | 18,7 |
| 26 | 20,7 |
| 30,8 | 23,7 |
| 38 | 30,4 |
| 44 | 36,4 |
| 58,7 | 46,5 |
All other parameters are similar to PVC pipes.
+ Advantages of corrugated metal pipes
- More reliable protection of wires from mechanical damage.
- If the metal hose is grounded, it will act as an additional electromagnetic shield - in some cases, when laying information cables, this is a significant advantage.
- Easy to install.
— Disadvantages of corrugated metal pipes
- Since the pipe is not solid, it cannot be used in conditions requiring a hermetically sealed connection.
- Weight and cost are higher than those of plastic analogues.
- Insensitive to negative temperatures.
Features of open wiring in a box
Open wiring using electrical boxes is attractive due to the ease of installation, repair and simplicity of carrying out an ongoing inspection of the condition of cable lines inside the box.
Note! Installation of hidden wiring is inherently comparable to the overhaul of the entire room. During the replacement of hidden wiring elements, the room is virtually unsuitable for work or even staying in it due to clouds of dust formed when previously sealed grooves are opened.
The industry produces sets of accessories for cable channels, with the help of which an external type cable route is mounted, duplicating the outlines of the walls, floor and ceiling of the room.
During the operation of cable lines, if it is necessary to repair or replace the electrical wiring laid in the box, it is enough to remove the cover and perform the required work. An important advantage of open wiring in cable channels is the ability to lay additional wires and cables in already laid boxes without finishing work.
Parapet
The products are similar to baseboard models. They contain auxiliary elements, thanks to which various structures are assembled. And the laying is carried out at a level slightly higher than the floor and baseboard.
The main colors are white and milky shades. Used to mask connections between indoor and outdoor units of the air conditioning system.
Calculation of the size of a plastic box for electrical wiring
Before you purchase cable channels for installing electrical wiring, you must first draw a layout diagram of the structure in the room, indicating the type of cable channels and the length of each section. After this, determine the required size of each type of tray. To calculate the size of the box, you need to know the cross-section of the wires and their number.
Attention! It is recommended to take a cable channel with a small margin in length (10%) and width.
The length reserve takes into account the additional costs that arise during installation in places with corners, as well as in the event of material damage. It is also advisable to have free space inside the box, which may be needed when laying additional electrical cables.
There is no need to purchase a wide tray if you initially plan to lay only one cable, since its price also depends on the width of the product. Usually the calculation is carried out taking into account an increase in the number of wires by 2-3 pieces.
Also, taking into account the “Rules for Electrical Installations”, in the case of multi-layer filling of plastic cable channels, the sum of the cross-sections of all conductors located in them should not exceed 40% of the cross-section of the product itself in the case of using a box with a lid or 30% in the case of a blind box.
Table for calculating the minimum dimensions of cable channels
Wire cross-section, mm2 Design and dimensions (height and width, mm) of the box
| single-section | two-section | three-section | |||||||||
| 10x22 | 10x30 | 10x22 | 10x30 | 15x54 | 10x40 | ||||||
| number of wires in one section | |||||||||||
| 1,5 | 10 | 12 | 3 | 3 | 5 | 5 | 19 | 13 | 5 | 4 | 5 |
| 2,5 | 7 | 10 | 2 | 2 | 3 | 3 | 13 | 13 | 3 | 3 | 3 |
| 4 | 4 | 8 | 1 | 1 | 2 | 2 | 10 | 13 | 2 | 2 | 2 |
| 6 | 2 | 3 | 1 | 1 | 1 | 1 | 5 | 5 | 1 | 1 | 1 |
Cable channels are delivered to hardware stores in packages. Depending on the size of the trays, the packaging differs in the number of products and, accordingly, in the total footage. To calculate the total length of cable channels in a package, the number of products is multiplied by the standard length of one tray (2 m).
A table of parameters for one package, depending on the size of one box, is shown in the figure. Parameters of one package of electrical boxes, depending on their size
On a note. When purchasing boxes, it is advisable to purchase fittings for them (plugs, corners, branches, etc.).
Also, for household purposes, it is better to purchase single-lock products, as they will last longer than double-lock ones. This is due to the fact that the wall thickness of single-lock structures is greater, and, consequently, the products themselves are more durable.
Correctly sized cable channels will allow you to quickly install the system, and the additional space inside the box will make it possible to easily add wires to the system without the use of additional trays.
What to consider when choosing wire camouflage?
When choosing a method for laying (masking) electrical wires, take into account their technical features and length.
Please note the following restrictions:
- laying cables along the walls and along the ceiling is unacceptable;
- It is important that there is no heavy load on the plug near the equipment, otherwise the connector may break;
- It is forbidden to work with wires without insulation; during operation, the cable may be damaged and its insulation may be compromised;
- Areas with chips, cuts and cracks must be insulated with electrical tape, or the damaged section of the cable must be replaced with a new one.
When choosing a cable installation option, consider the following points:
- Total length and number of wires. If we are talking about one or two wires, then you can make recesses for them or buy cable channels. If there are a lot of wires, it is easier to hide them behind plasterboard panels.
- Location of wires. If the installation is on the ceiling, you will need a longer wire than when laying on the floor.
- Distance to sockets. If the equipment to which you need to connect the wire is located near sockets, it is recommended to disguise it.
- Safety. If there are children or pets in the home, the wires must be positioned so that any contact with them, accidental or intentional, is excluded. The cable should be placed in an inaccessible place - for example, in a wall or in a special box.
Drawing of cable channel passage
The next step will be to make a drawing of the cable trays, taking into account the location of all junction boxes, switches and sockets. To do this, it is better to use a program with the ability to display three-dimensional images.
Wiring diagram for cable channels
Connecting sockets (general diagram)
The wiring diagram for household electrical outlets is quite simple. Below is a typical diagram for connecting two sockets:
The power cable from the distribution panel (DP) enters the distribution box. From the distribution box there are separate cables for each outlet.
A distribution (junction) box allows you to divide one line into several. If only one socket is installed on one line, then a junction box is not needed. In the diagram we see the designations C1, C2, C3, these are the connections of the corresponding cable cores: phase, neutral and ground.
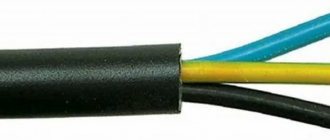
When connecting sockets, the cable cores are connected strictly by color (unlike switches), as shown in the photo below. In this case, sockets with grounding are connected, so a three-core cable is used:
This way you can connect not only two, but also three or more outlets. The main thing is to calculate the cable load to avoid damage to the electrical wiring as a result of heating.
Installation procedure and features
According to the rules, wiring is laid horizontally and vertically; inclined installation is permissible only on stairs. In other cases, the rules are not deviated from when wiring is open. To obtain an even cut when installing plastic cable channels with thin stacks, use metal scissors or others, but the cutting edge must be sharp. Aluminum and metal trays are cut with a hacksaw. Thick plastic can also be cut with the same tool - there will be a smooth edge and the profile will not wrinkle.
If you need a piece of a certain length - for a outlet, for example, you need to cut it in this order: snap the lid, align the edge, apply marks on the lid and body at the same time. Then you can cut it separately. With this order, the length of both products will be the same.
Please note that when passing the corner, the lid is not cut into two parts, but only the side walls are cut so that it can be bent. Do not forget that when going around the outer corner, the cover should be longer than the tray; in this case, it is better to mark the places of cuts on it after the cable channel body is secured.
Rules for installing plastic cable trays
The cable channel is attached to a non-wooden surface using nails with a wide head (screws can be used), or to plaster or plasterboard walls using self-tapping screws. For installation on brick or concrete walls, installation with dowels is required. The fastening step of the fasteners is about 60-70 cm; at the ends of the profile and at the joints, the fasteners are installed at a distance of 3-5 cm from the edge.
If two pieces of cable channels are joined, the cover must be positioned so that the joints of the housing and the cover do not coincide. Otherwise, the joint will be too noticeable and an unevenness may form, which will further emphasize the joint.
Order of laying wires
We lay conductors in the mounted housings. To prevent the walls of the cable channels from sagging, we install supporting jumpers with some steps, and then snap the covers. At this point, the installation of wiring in the cable channels can be considered complete.
Definition, structure, purpose
Cable channels are plastic or metal boxes for hidden or open laying of wires and cables. Can be used both outdoors and indoors. They are also called cable trays and boxes, sometimes the word “electrical” is added.
Consists of a body and a cover. The cross-sections are mainly rectangular and square, but there are others, more specific (they will also be discussed later). The body can be solid, or perforated. Perforated housings are rarely needed for better ventilation and faster cooling.
The cover and body of the cable channel are connected using a lock - they snap into place. This is why cable trays are convenient - you can open, check, lay a new or remove unnecessary wire at any time. When purchasing, pay attention to the structure and quality of the locks - ease of use depends on them. The best, at this stage, is considered a double lock. It provides sufficient hold and allows the lid to be opened/closed multiple times.
Some types of cable channels can be separated internally by partitions
The internal space of the cable channel can be divided by partitions. This is done so that it is possible to separate power (wiring) and low-current (television, Internet, telephone, etc.) cables. It is advisable to lay them separately so that they do not interfere with each other. Some companies have developed a design so that partitions can be installed independently. They are sold separately and fit onto the tabs on the inner wall of the case (an example of such tabs is in the photo on the right).
Material: metal or plastic. If you choose plastic cable channels, please note that it must be non-flammable or flame retardant (read in the description). Ideally, it will also emit little smoke - just in case.
General markup rules
Correctly executed markings clearly indicate how to attach the cable channel to the wall, taking into account all the executive elements of the electrical wiring. To apply marking lines you need to prepare:
- ruler and pencil;
- bubble or other type building level;
- beating cord, also called coated thread, with pigment.
The sequence of marking is as follows:
- In accordance with the architecture of the room and the electrical wiring diagram from the distribution board, the placement points for sockets, switches, and mounting boxes are determined. The optimal dimensions of their distance from the joints of the floor with the walls, corners, etc. are measured with a ruler. Appropriate marks are made on the walls with a pencil.
- In all places where the cable route is supposed to be laid, straight lines are drawn with a tapping cord.
- The construction level controls compliance with the vertical and horizontal lines.
Stages of work
How to create a project
How well this step will be implemented will affect the composition of the required purchases and quantity, as well as labor costs when performing installation work, which will affect the completion time of the work and the final cost. For such reasons, drafting a project is a fairly responsible and important point, although many people neglect it and make many mistakes.
The project for installing a cable channel at home can also be completed in draft form on a simple sheet of paper. The main thing is that the plan is accurate and that measurements are provided that can be done using a regular tape measure. A plan should be drawn up both during the initial construction and during the next reconstruction/revision of the electrical circuit. The sequence in drafting the project is as follows:
- Determine the places in the room where switching elements will be located (sockets, switches, distribution box), as well as consumers of electrical energy, which include lamps, stationary and portable electrical appliances.
- Plan the main lines of power electrical wiring, low-current and computer networks, determine the bypass of possible critical routes around the gas and water supply lines, as well as sewerage and heating systems.
- Draw up sketches of the rooms on paper and mark the planned installation locations, indicating the exact dimensions, which make it possible to calculate the need for materials.
Fixing the cable channel along the marked route
Fastening the electrical tray to the wall can be done with liquid nails, wood or metal screws, or dowel nails. It is recommended to screw in the fasteners in a staggered pattern. When using liquid nails, glue should be applied to the back of the box in a zigzag pattern.
Attaching the cable channel to the wall
Fastening methods
Attaching the cable to the wall is done in various ways. The choice of a specific option depends on the composition of the working surface. The materials used and work with them are discussed in the table.
| Fastening method | Operating procedure, tips | Mounting surface |
| using self-tapping screws | wood screws are screwed in with a screwdriver on average every 50 cm; It is recommended to use them with a length of about 40 mm; used for quick installation of plastic channels; no pre-drilling required | |
| dowel-nails (quick installation) | the lid is removed from the box; holes are drilled in it in increments of about 45 cm; it is adjusted to the surface, marking the location of the drilling points on it; use a hammer drill to make a hole in the wall; the plastic part of the nail is inserted through the box into the hole, the metal part is then hammered in | allows you to securely attach it to a concrete wall, brick, stone |
| "bugs" | screwed with a screwdriver through the distance indicated above | thin metal (less than 2 mm) |
| glue (liquid nails) | apply the adhesive inside out the prepared section; lean it against the marked place for a few seconds, move it away; wait for the glue to thicken; pressed back; additionally it is required to use dowels and screws | wood, drywall, wallpaper, tiles, can also be glued to a concrete surface |
The step width is adjusted based on surface unevenness. For more information on how to select and install a cable channel, watch this video:
It is recommended to install wiring in the cable channel after all finishing work has been carried out (pasting wallpaper, applying decorative plaster).
With this method of laying lines, the rules of the PUE are observed, and you can easily get to the place of the problem.
The presented fastening options reliably join the surfaces. The variety of materials fits the laid routes into the apartment’s decor.
Wall mounting options
There are several ways to attach cable ducts to a ceiling or wall:
- Glue the structure with superglue or a special solution. Not the most reliable option, since under the influence of moisture or other harmful factors, the integrity of the adhesive base may be damaged and the cable channel may come off. And there is also no way to dismantle without harming the repair.
- Screw to the surface using galvanized self-tapping screws. Suitable for wooden or plasterboard surfaces.
- For a concrete or brick wall, dowel-nails are used.
- Combine the method of gluing and screwing in screws.
In specialized stores you can find a separate type of cable channels, which have one adhesive side. For their installation, no additional devices are required, only the material itself.
Important! The boxes must be cut with the lids snapped on them. And when constructing several sections into one route, ensure that the joints match.
Specifics of gluing cable channel
Gluing is as easy as shelling pears, but you need to take into account that you need to completely forget about dismantling the glued box. You can’t just tear it off, only together with a piece of the wall or its decoration. True, installation will require a minimum of effort and time; the only consumables are glue, for example, “liquid nails.”
The algorithm is as follows:
- We apply the adhesive composition in a kind of zigzag with a step between the “tops” equal to approximately 1.5 times the width of the box;
- We apply the base treated with glue to the wall, but do not fix it on it, but remove it to the side;
- wait until the remaining adhesive trace on the wall thickens;
- install the channel in place and press firmly;
- again we wait for the glue to harden.
For your own peace of mind and increased reliability, you can supplement the adhesive fastening with nails driven along the central axis of the box in increments of 50-60 cm.
Only after hardening will it be possible to begin laying the cable, which for convenience needs to be fixed in the channel. For permanent fixation, special plastic holders are useful. Thrifty craftsmen can use available devices: pieces of the cover or the cable channel itself. Temporary fixtures will undoubtedly need to be removed before attaching the cover.
Advice. It is more convenient to lay the cable in the constructed system, alternating with snapping the cover. Installed part of the wiring in the channel, then clicked it, etc.
Safety - how to hide wires from a child?
Wires in the public domain are a constant source of danger for young children. To prevent accidents, manufacturers offer a variety of protective elements - they prevent the child from coming into contact with live parts of the wiring.
There are manufacturers who offer entire series of security elements:
- fasteners that are difficult to break;
- boxes - wooden, plastic, cardboard;
- bags-covers for extension boxes.
All items that pose a danger to children are placed in boxes, which are placed in places inaccessible to them.
Fastening on the surface of plasterboard boards
Attaching boxes to plasterboard boards (hereinafter referred to as GCP) with standard hardware is very problematic, since GCP are a layer of gypsum located between layers of paper. The compressive strength of such drywall is critical. If you are slightly “overzealous” when tightening the self-tapping screw while screwing the base of the box to the GKP, then the threaded part of the fastener in the plaster will begin to turn idle, reducing the strength of the fastening to zero.
To fix the boxes on the fragile surface of the GCP, reliable fastening can only be ensured by using special dowels, commonly called “butterflies”, or by using mounting adhesive, called “liquid nails”.
Instructions on making corner joints
The main requirement of this work is the absence of visible “gaps” between the elements after snapping the covers. To avoid any cracks, you need to carefully measure and cut carefully, using a metal blade and a miter box or trimmer. Therefore, those who want to build a cable channel system on their own are strongly recommended to use accessories that hide all the flaws.
Minor errors can be masked with a color-matched sealant, but there is also a way to form a corner transition. Instead of cutting two pieces at the traditional 45º angle, you can simply cut the walls of the bases to their full width. In such cases, the boxes are installed with an overlap. Cuts and cutouts on the walls of the cable channel are made with metal scissors.
We are convinced that there are no special tricks in fastening electrical boxes. Connecting sockets and switches to the mains laid in them is done in a standard way. If the performer is patient, you can rightfully be proud of the result.
Additional electrical wiring in cable duct
There are situations when, after repairs, you need to add an additional outlet or other elements. It is very simple to solve this problem if there is electrical wiring laid in the cable route. It is enough to purchase a wire, box and accessories from one manufacturer and add the required point.
If necessary, it is easy to lay additional wire in a plastic box
It is not recommended to use material from another company. This will lead to a violation of the aesthetic appearance of the room.
Kinds
A new outlet is selected based on a number of important technical parameters.
type of instalation
There are two options:
- mortise: installed in a hole drilled with a crown;
- overhead: screwed onto the wall with self-tapping screws.
Mortise ones in combination with hidden wiring (cables are hidden in grooves and sealed with mortar) are installed in residential and other premises with high aesthetic requirements.
Invoices with open wiring are used in garages, country houses, etc. - they are easier to install.
Presence of grounding contact
Grounding household electrical appliances is desirable because it protects the user from electrical injury. But it can only be implemented in houses with a grounding system organized according to new standards (type TN-CS).
In older houses with a TN-C system, grounding is not connected to sockets; therefore, you should purchase a product without a third contact.
Even if the house has a modern TN-CS grounding system, you should not rush to buy an outlet with a grounding contact. Since it was decided to power the new point from an existing outlet, you first need to make sure that a 3-wire wire is connected to it.
If it is connected with a 2-wire wire, then even if there is a grounding contact on it, there is no point in buying a socket with grounding.
Socket diameter
There are two types of sockets:
- Soviet model;
- Euro sockets: with sockets of increased diameter.
The choice of outlet depends on the type of plug on the electrical appliance. The error is not critical: there are adapters for connecting Soviet-style plugs to European sockets and vice versa.
Terminal type
This determines the quality and reliability of the contact in the socket. If the contact is poor, the wire becomes very hot, which can lead to burnout or fire.
Sockets are equipped with three types of terminals:
- flat spring. The most reliable variety;
- screw with pressure plate. To fix the wire in the terminal, tighten the screw against the copper plate. The terminals are flat spring, inferior in reliability, but quite acceptable;
- screw without pressure plate. The option where the cores are simply pressed with a screw is the worst; purchasing such a socket is not recommended.
Tips for installing corners and joints of cable channels
When using special accessories, the places where plastic cable channels pass through the external and internal corners of the walls or floor are closed, respectively, with external and internal corners, aesthetically fitting into the interior of the room. The joints of the boxes can be trimmed with slight deviations from right angles and straightness of the cut, if you use connectors that hide the junctions of the sections.
In the absence of factory-made elements, corner transitions can be made as follows:
- To pass the internal corner you need:
- in the place where the route bends, make cuts along the sides of the box with a cutting depth to the level of the plastic base;
- bend the box at the desired internal angle;
- install the box at the transition site and attach it to the wall using one of the previously described methods (depending on the wall material);
- close the box with pieces of lids.
- For installation along the outer corner, the box is cut and fixed in the same way as for the inner corner. However, cuts are made on the lid at an angle of 450 with the center of the angle on the bend line.
The use of cable channels when arranging home and workshop electrical wiring greatly simplifies the design and installation of cable networks, speeds up installation work and allows the full reuse of wires and cables after dismantling the wiring.