Greetings! During the discussion of the article by comrade KSVl, the need for a small manual on printed circuit board design was voiced. Very often on Habré I see articles in the style of “5 rules for coding” or “5 steps to a successful project,” that is, very convenient collections of abstracts on a specific topic. Unfortunately, there are few such articles on electronics development and this is bad... I promised the KSVl user and some other readers an article with the basic principles of printed circuit board (PCB) design, I also invite all fans of soldering over a cup of coffee to read it!
Prologue
All the rules described in the article are the most basic and are aimed exclusively at completely novice developers for whom electronics is just a hobby.
I would like to note right away that this article does not claim to be the absolute truth and all explanations are given in free form. Surely there will be people who will say: “Yes, it works that way, why change anything?” And here, alas, I am not ready to waste energy and convince you. Some want to do everything well, efficiently and reliably, while others are unable to understand this desire.
Sources of information on which the rules described in the article are based:
- Course of general physics and electrical engineering. All within the 1st year of university
- Books by Howard Jones: Designing High-Speed Digital Devices: A Primer in Black Magic and High-Speed Digital Data Transmission: A Primer in Black Magic
- IPC standards, such as IPC-2221A. There is a translation in Russian (old version) and the original version of the latest versions in English
- Own experience
Rule #1 - Conductor Width
Mistake
- very often novice developers use the default width of conductors (tracks) in the CAD software they are using. In the previously mentioned article, the author used EasyEDA and there the basic width value is 6 mils, that is, about 0.15 mm. This width of conductors is used almost everywhere and this is bad, because it leads to a number of problems.
Problem #1
- voltage drop. We all remember Ohm's law, from which it follows that the smaller the cross-sectional area of the conductor, the greater its resistance. The greater the resistance of the conductor, the more the voltage across it will drop.
Problem #2
- heating of the conductor. It’s the same Ohm’s law, the power released on the conductor is proportional to its resistance, that is, the greater the resistance, the more heat released on the conductor. A current of 5-10A will easily evaporate a 0.15 mm road.
Problem #3
- parasitic inductance. This point is hardly a basic one, but you need to know about it. The smaller the cross-section of the conductor, the greater its inductance. That is, any conductor is actually not just a “piece of copper”, it is a composite component of active resistance, inductance and parasitic capacitance. If these parameters are too high, then they begin to negatively affect the operation of the circuit. More often they appear at frequencies above 10 MHz, for example, when working with SPI.
Problem #4
- low mechanical strength. I think there is no need to explain that a 2 mm wide track is more firmly attached to the textolite base than a 0.15 mm track. Just for fun, take a factory waste board and dig into it.
Solution
— use the maximum possible width of conductors. If the conductor can be routed with a width of 0.6 mm, then this is better than conducting it with a width of 0.15 mm.
Example:
1) Bad
2) Ok
Rule No. 2 - Connection to terminals
By pins we mean the component pad (pad), vias and other objects that we connect on the board using conductors (tracks).
Error
- there are two extremes. In one, the developer makes a mistake from rule No. 1 and connects a 0.15 mm track to the output of the smd resistor 1206. In the other case, on the contrary, he uses a conductor whose width is equal to the width of the contact pad. Both options are bad.
Problem #1
- low mechanical strength. With several attempts to resolder a component, the pad or track will simply peel off from the textolite base of the printed circuit board.
Problem #2
— technological problems with board installation. Although this will become a problem if you start ordering not only boards, but also assembly from China. Of course, they will collect it for you, but the percentage of defects increases.
Solution
— the width of the conductor connected to the contact pad should be approximately 80% of the width of this pad.
Example:
1) Bad
2) Ok
The size of the capacitor pad 1206 in this case is 1.6 x 1 mm
. Accordingly, to supply the signal from below, a track equal to 80% of the width of the area is used, that is, 0.8 mm (80% of 1 mm). To supply the signal on the right, a 1.2 mm thick track is used (approximately 80% of 1.6 mm). The pad width of the microcircuit in the SOIC-8 package is 0.6 mm, so the signal needs to be supplied using a track of about 0.5 mm.
It is worth understanding that this option is ideal. You probably won't like the transition from 1.2 mm to 0.5 mm - unnecessary fuss. It can be avoided. To do this, they usually take the width of the track relative to the minimum pad, that is, in this case you can do it like this:
As you can see, I chose the width of the conductor according to the minimum area, that is, according to the output area of the microcircuit in the SOIC-8 package. This simplification is acceptable, but should be used wisely.
What types of microcircuits are there?
Below is a detailed description of some of the main types of integrated circuits.
- Packet based classification
- BGA IC Substrate: These ICs are best suited for heat dissipation applications. Its electrical performance is exceptionally good and can greatly increase the number of pins on the chip. Hence, such ICs are considered best for packaging ICs with more than 300 pins.
- Substrate CSP IC: This IC consists of a single chip in a package, is light in weight, has a miniature size and offers almost the same functions as an IC. Such IC substrates are commonly used in memory products, such as those in the telecommunications and electronics industries, where fewer pins are required on a chip.
- Substrate FC IC: Flip Chip or FC IC is a type of packaging purchased by flipping the chip, which features lower signal interference ratio, lower circuit loss, higher performance and efficient heat dissipation.
- MCM Substrate IC: Multichip A module or substrate MCM IC is a kind of IC that integrates a chip with numerous functions in a single package. This results in optimal product performance due to its various characteristics such as miniaturization, shortness, thinness, lightness, etc. A large number of chips are packaged in one package; therefore, this type of substrate is ineffective for signal interference, routing, and heat dissipation.
- Classification based on materials
- Rigid Substrate IC: This type of IC is made of epoxy resin, ABF resin and/or BT resin. The coefficient of thermal expansion of such an IC ranges from 13 to 17 ppm per degree Celsius.
- Flex IC Substrate: This IC is made of polyethylene or PI polymer and has a thermal expansion coefficient of 13 to 27 ppm per degree Celsius.
- Ceramic Substrate IC: Such ICs are mainly made of ceramic materials such as silicon carbide, aluminum nitride, aluminum oxide, etc. They have a lower coefficient of thermal expansion, which is 6 to 8 ppm per degree Celsius.
- Classification based on bonding technology
Below is the main classification based on bonding technology.
- Wire connection.
- FC bonding.
- Automatic tape gluing.
IC Substrates
Rule #3 - Power Circuits
Now let's consider a case where simplification in relation to rule No. 2 is simply unacceptable, namely, the design of power circuits.
This rule is based on the previous two and is a particular, but perhaps the most critical case. Error
— neglect of rules No. 1 and No. 2 when designing power circuits.
Problem #1
- the output of your voltage stabilizer is strictly +3.3V. You turn on the device and observe that the microcircuit behaves inappropriately, the ADC does not measure accurately and periodically turns off. You measure the voltage at the legs of the consumer (microcircuit) and find instead of +3.3V only +2.6V.
Problem #2
- your DC-DC converter does not start or has large ripples at the output.
Problem #3
- in an attempt to find a fault, you place the oscilloscope probe on the +3.3V line and find there, instead of a constant voltage, some terrible ripples and interference.
Solution
— we observe rules No. 1 and No. 2 especially strictly and fanatically. The paths are as wide as possible. Power must be supplied to the microcircuit through a ceramic capacitor, which, if possible, is placed closer to the terminal of this microcircuit.
Example:
1) Bad
2) Ok
What I did to make it better:
1) Power supply VCC3V3
Now it fits not bypassing the capacitor, but through it. That is, first to the capacitor, and then to the output of the microcircuit
2) I used a transition hole (via) with a size of 1.2/0.6 mm. Yes, according to the requirements for accuracy class 4 (standard), I can use a via hole measuring 0.7/0.3 mm, but I did not do this and used a larger transition. This made it possible to reduce its resistance and allow more current to pass through.
3) The power bus that comes from the stabilizer is now not 0.3 mm, but 2 mm! Don't be afraid to make wide conductors. This approach will minimize the voltage drop in the circuit and reduce the inductance of the conductor
Production of etching substance.
There are various compositions for etching, foil material in the manufacture of printed circuit boards.
Recipe No. 1.
For forced (4-6 min) etching, you can use the following composition (in parts by mass): 38% hydrochloric acid with a density of 1.19 g/cm3, 30% hydrogen peroxide (peroxide) - perhydrol. If hydrogen peroxide has a concentration of 16-18%, then for 20 parts by weight of acid take 40 parts of peroxide and the same amount of water. First, peroxide is mixed with water, and then acid is added. Printed conductors and contact pads should be protected with acid-resistant paint, for example nitro enamel NTs-11.
Recipe No. 2.
Dissolve 4-6 tablets of hydrogen peroxide in a glass of cold water and carefully add 15-25 ml of concentrated sulfuric acid. To apply a printed circuit board design to foil material, you can use BF-2 glue. The etching time in this solution is approximately 1 hour.
Recipe No. 3.
In 500 ml of hot (approximately 80 ° C) water, dissolve four tablespoons of table salt and two tablespoons of copper sulfate crushed into powder. The solution becomes dark green in color. Ready for use immediately after cooling (not necessary for heat-resistant paint, see above). The solution is enough to remove 200 cm3 of foil. Etching time is about 8 hours. If the printed circuit board design is made with sufficiently heat-resistant paint or varnish, the solution temperature can be raised to approximately 50 ° C, and then the etching intensity will increase.
Recipe No. 4.
Dissolve 350 g of chromic anhydride in 1 liter of hot water (60-70 °C), then add 50 g of table salt *. After the solution has cooled, begin etching. Etching time 20-60 minutes. If you add 50 g of concentrated sulfuric acid to the solution, the etching will be more intense.
Recipe No. 5.
Dissolve 150 g of ferric chloride powder in 200 ml of warm water.
Preparation of ferric chloride.
If there is no ready-made ferric chloride (in powder), then you can prepare it yourself. To do this you need to have 9% hydrochloric acid and fine iron filings. For 25 parts by volume of acid, take one part of iron filings. The sawdust is poured into an open vessel with acid and left for several days. At the end of the reaction, the solution becomes light green, and after 5-6 days the color changes to yellow-brown—the ferric chloride solution is ready for use. To prepare ferric chloride, you can use powdered red lead. In this case, for one volume part of concentrated hydrochloric acid, 1.5-2 parts of red lead are required. The components are mixed in a glass container, adding red lead in small portions. After the chemical reaction stops, a precipitate and a solution of ferric chloride fall to the bottom. Ready to use
Rule #4 - Earth
One can talk forever about the influence of the quality of the design of the ground bus (GND), but any conversation comes down to a simple essence: the stability and performance of the device depends to the greatest extent on the design of the ground
. This problem is very voluminous and requires in-depth study, so I will give the most basic recommendations.
Error
— tracing the GND (ground) circuit using a regular conductor, and even a minimum width. It's just a c-c-c-combo!
Problem #1
— instability of the device and strong interference in circuits, especially in power circuits.
Problem #2
- heating and often breakage of a thin conductor, because it carries a large current.
Solution
- use a polygon for routing the GND circuit, and ideally a separate layer that is completely dedicated to this circuit, for example, the bottom layer.
Example:
1) Bad
2) Good
As you can see, instead of a regular wire, I used a solid polygon fill. This solution provided me with a huge cross-sectional area, because a polygon is simply a very large conductor. Only sometimes this solution has a disadvantage, for example, when the installation density is high and other conductors break the solid polygon, as here the LED1..3
break the shortest path between the pin of the microcircuit and the capacitor (GND):
The previously mentioned separate GND layer will help us here. In a two-layer board, ideally, select the bottom layer for it, and in a multilayer board, one of the inner layers:
Thus, we restored the shortest path for the current through the GND circuit, and in this case, the bottom layer (blue color), which is completely an earthen polygon, helped. Via holes near the pads provided them with the shortest possible connection to the bottom layer of the ground.
Of course, this is an ideal case and sometimes it will not be possible to implement it without increasing the cost of the fee, so the decision is yours. Sometimes “super” reliability is not needed; here it is important to find the golden mean between cost and quality for your task.
Rule #5 - Gap Width
The minimum value of the gap between copper conductors on a printed circuit board is dictated by technological requirements.
For class 4 (standard) the value is 0.15/0.15 mm or 6/6 mils. The maximum width is limited only by your imagination, board dimensions and common sense. Error
- the gap is not large enough, usually leave the default value of about 0.15 mm.
Problem #1
- electrical breakdown.
A short circuit occurs when 2 conductors with different potentials are shorted, for example, by a metal object and the current increases sharply. Unfortunately, there are no ideal dielectric materials, and at some point any material begins to conduct current. An example of this is insulators on power lines; sometimes they even break through. This phenomenon occurs when the critical breakdown voltage
. For the same reason, fiberglass, which is the basis of most printed circuit boards, at some point may begin to pass current.
Solution
- increasing the distance between conductors.
The breakdown voltage depends on the type of material and the thickness/width of the insulator. In the case of printed circuit boards, the distance (gap) between the conductors is precisely the parameter that affects the critical value of the breakdown voltage. The greater the distance between the conductors, the greater the voltage required to break through it
.
I would also like to say that breakdown of fiberglass laminate is not always the most pressing problem. The air that surrounds the board is also a dielectric, but under certain conditions it becomes a conductor, remember a thunderstorm. Airborne electrical breakdown is a big problem in electronics, especially considering that the air can be dry or have a humidity of 90-100%, for example, in the tropics or in the North.
Example:
Let's agree that in this example there are 3 conductors: the rectified mains voltage +310V, the low-voltage power line for the microcontroller +3.3V and the ground bus (GND).
1) Bad
2) Good
Why 0.3 mm is bad, but 0.8 mm is good, you ask, and I will give you 2 sources as an answer:
1) Ordinary physics and electrical engineering. The data in them varies due to different measurement techniques and other things, but the most realistic figure is for dry air
is
2 kV/mm
.
Here many people will be afraid of the numbers and think: “I don’t have such tensions” and this will be a mistake. This value is typical only for dry air, which is rarely encountered in real conditions. And here the numbers are much more modest, for example, at 100% humidity, the breakdown voltage of the air is only 250 V/mm
! The value of the breakdown voltage is also affected by the dust content of the air and the board, as well as atmospheric pressure (Paschen curve and law).
2) IPC-2221 standard, to which I gave a link at the beginning. We are interested in table 6-1, which looks like this:
As you can see in the table for a large number of values, even for our specific case 301-500V
.
If we look, we will see a value of 0.25 mm for closed conductors on the inner layers, that is, in “ideal” conditions without access to dust, dirt and moisture. If the device will operate somewhere in the mountains and the conductor is located on the outer layers (all conductors in the case of a 2-layer board) at an altitude of up to 3000 meters, then the minimum gap there is already 2.5 mm, that is, 10 times larger. If we operate the device at a higher altitude, then the gap is already required at 12.5 mm! It is worth making a note - such a large gap is required if our board is not covered with protective compounds, for example, varnish or compound. As soon as the protective coating appears, we see more adequate values: 0.8
and
1.5
mm.
Therefore, in a “good” example, in addition to ensuring a gap of 0.8 mm, it is also necessary to cover the board with a protective compound, for example, varnish, after completing installation of the device, washing and drying it. Otherwise, the gap must be increased!
The historical path of the printed circuit board
Electronic printed circuit boards marked the beginning of the formation and development of electrical interconnection systems developed in the mid-19th century.
Metal strips (rods) were originally used to connect bulky electrical components mounted on a wood base.
Gradually, metal strips replaced conductors with screw terminal blocks. The wooden base was also modernized, giving preference to metal.
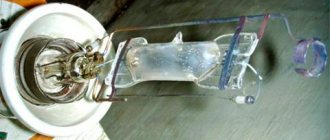
TERMINAL
This is what the prototype of modern PP production looked like. Similar design solutions were used in the mid-19th century
The practice of using compact, small-sized electronic parts required a unique solution on the basic basis. And so, in 1925, a certain Charles Ducasse (USA) found such a solution.
An American engineer proposed a unique way of organizing electrical connections on an insulated plate. He used electrically conductive ink and a stencil to transfer the circuit diagram onto a plate.
A little later, in 1943, the Englishman Paul Eisler also patented the invention of etching conductive circuits on copper foil. The engineer used an insulator plate laminated with foil material.
However, the active use of Eisler technology was noted only in the period 1950-60, when they invented and mastered the production of microelectronic components - transistors.
The technology for manufacturing through holes on multilayer printed circuit boards was patented by Hazeltyne (USA) in 1961.
Thus, thanks to the increase in the density of electronic parts and the close arrangement of interconnecting lines, a new era of printed circuit board design has opened.
Rule No. 6 - Galvanic gap
The mistake
is equating the dielectric gap with the galvanic gap. In essence, they are very similar, but the requirements are increasingly strict when it comes to galvanic isolation. A striking case is the decoupling of the control circuit and the power part using a relay or optocoupler, when the gap between the decoupled sides is also chosen to be 0.8 or 1.5 mm.
Problem #1
— insulation breakdown, failure of the control system and other expensive equipment.
Solution
— increase in the threshold of electrical breakdown. Standard values are usually 1.5 kV, 2.5 kV and 4 kV. If your device operates with mains voltage, but a person does not directly interact with it, then an isolation voltage of 1.5 kV will be sufficient. If human interaction with the device is expected, for example, through buttons and other controls, then I recommend using insulation with a voltage of 2.5 kV or more.
Example:
1) Bad
What's wrong, you ask, because there are gaps on the board, they can be made 1.5 mm. The fact is that even if you make a gap of 2 mm, this will not be enough to ensure insulation. The “weakest” point should be the distance between the relay control terminals (1-2) and the power terminals (3-8). It is also necessary to take into account that a breakdown can occur not only between conductors on the same layer, but also on different ones - right through the board through fiberglass.
2) Good
What has been done to improve the situation:
a) A clear boundary has appeared between the low-voltage and high-voltage parts. Now the +3.3V conductor does not pass into the high-voltage +310V region, the GND polygon does not go beyond the low-voltage part, and accordingly there will be no breakdown. Also, there should be nothing at all in the galvanic isolation zone/border.
b) The insulating zone is freed from the solder mask. The mask is also a weak point and, depending on the quality, will pierce it earlier than fiberglass. This is not necessary in the general case, but if people interact with the device, I highly recommend it.
c) As I wrote above, the weak point is the distance between the control and power terminals of the relay. Everywhere I was able to make an insulating zone of 4 mm, but here only 2.5 mm. We cleaned the mask, the conductors too, and the only thing that could cause a breakdown on the board is fiberglass. Therefore, we remove it too, I made a 2.5 mm wide cutout for the relay and removed the textolite between the terminals. This operation is also not necessary, but it significantly increases the reliability and safety of your device.
Rule #7 - Vias
Error
- very often I see a picture when on a 2-layer printed circuit board, in order to connect 2 contact pads, I use 3..4... or even 5 vias.
Problem #1
— there are too many vias on the board and this limits the space for conductors, which leads to lengthening of the circuits, and consequently to an increase in their resistance. Reduces the resistance of circuits and signals to interference.
Solution
- use a minimum number of vias: if you need to connect 2 contacts on different layers, then do not use more than 1 via. If 2 pins are on the same layer and you cannot connect them directly, then use a maximum of 2 vias. If you need more transitions for the connection, then you are doing something wrong - train the logic and re-route the section of the board that led to the problem.
Example:
1) Bad
2) Ok
The connection uses a minimum number of vias, which provides more free space for other conductors and ensures minimal parasitic parameters of the conductor.
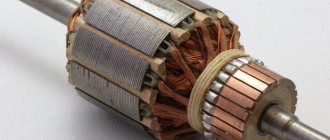
Device
A printed circuit board consists of a base, which does not conduct electricity, and electrically conductive circuits. Various electronic components are attached to these circuits. The mounting method depends on the device. The most common connection method is soldering. There are also other connection options. For example, ports are attached to the surface of the computer motherboard into which so-called expansion cards are inserted. These include RAM. It is also a printed circuit board.
Some general tips
- Don't use autorouters! In their “raw”, untuned form, they produce a terrible result that will turn even the brightest idea into guano. In order for the autorouter to work well, it needs to write down certain rules that will tell it that the road needs to be 1 mm, not 0.15, and so on. For an adequate result, even on simple boards you have to write a hundred, or even two, of these rules. In Altium Designer, a whole section is dedicated to them, for example. If you are an amateur and you don’t have the task of designing your own board for a laptop, then build the board by hand - it will come out faster and the quality will be high
- Don't be lazy to remake the board. It often happens that you have completed the board by 90%, but then everything becomes difficult and you begin to break the “rules” and create guano. Roll back, sometimes you have to roll back to the very beginning, do the job efficiently and at the stage of debugging the device you will save a lot of time and nerves
- Before you start designing a board, look at several open source projects, for example, on Habré or hackaday. The main thing is not to copy other people’s obvious mistakes from there.
- If you know electronics developers, even if they are also amateurs, let them check it out. A fresh look at your project will help you avoid a lot of mistakes
Cache memory
Cache memory is a small block of high-speed, volatile memory that speeds up your computer by pre-caching data from slower RAM. The data is then sent to the processor very quickly when needed.
Typically processors have a built-in cache chip called a Level 1 or L1 cache, but it can also be supplemented with a Level 2 cache, L2. In modern processors, the L1 and L2 caches are built into the processor, and the third level cache is implemented as an external cache.