To connect objects to the centralized power supply line, wires with an integrated load-bearing element are used that can withstand wind loads. Before connecting the SIP with a copper cable at the entrance to the house, it is necessary to study the regulatory documentation and purchase the necessary components. Switching errors lead to problems with the power supply to the facility.
Design features of clamps
The design of the piercing clamp is based on two contact plates connected to each other.
There are teeth attached to them, with the help of which the insulation of the SIP cable is punctured. In this case, teeth with aluminum or copper wires create reliable contact. The entire structure is encased in a fiberglass-reinforced polymer body. It has two recesses, precisely adjusted to the diameter of the SIP cable itself. Each recess contains contact plates. Insulation punctures are made under the influence of pressure on the housing using a bolted connection, the second function of which is to fasten the SIP cable itself in the clamp.
The connection and fastening of two self-supporting insulated wires is ensured by clamping bolts, which are used with the so-called breaking head. It provides a guarantee that the contacts will not be pinched, the housing will not crack, and the threads will not break.
Attention! Clamps for SIP wires can be used to connect a section to an existing main without first disconnecting it. That is, all work can be done under voltage
Since self-supporting insulated wire is often used for laying overhead electrical lines, the clamps for them are a sealed device that provides resistance to all types of precipitation. To create complete tightness, rubber caps are additionally supplied to the device, which cover the free ends of the SIP cable protruding from the clamp
What is important to know
There is a fairly wide variety of punctures for SIP cables. Most of them differ from each other in the diameter of the wires laid in them. Therefore, manufacturers offer both small-sized clamps with a diameter of connected cables from 6 to 95 mm², and standard ones - 35-150 mm².
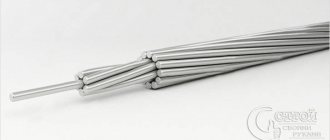
Perhaps someone is not familiar with the abbreviation SIP, which stands for self-supporting insulated wire. It was invented to replace conventional aluminum wires, which are sometimes tampered with by scrap metal collectors. In essence, this is an ordinary twisted aluminum wire, but now it is in insulation, which must be removed, and therefore SIP cables have become of no interest to metal assemblers.
To enter the house with SIP wire, we purchased the following fittings for SIP and other switching elements in the store:
- SIP wire 2x16 long - 12 meters;
- Anchor clamp for SIP cable 4x16 - 2 pieces;
- Branch piercing clamps - 2 pieces;
- Galvanized corner with holes - 1 piece;
- Sealed box with DIN rail - 1 piece;
- PVC corrugation with fastenings - 20 meters;
- Two-core copper cable AVVG 2x10 - 15 meters.
- Automatic switch EKF BA47-73 - 2 pieces.
From our side: a corner was installed on the gable of the house using a bolted connection, to which an anchor wedge clamp for SIP was attached.
Since the SIP cable has polyethylene insulation, according to the PUE, it cannot be brought into the house!
7.4.36. In fire hazardous areas of any class, cables and wires must have a cover and sheath made of flame retardant materials. The use of cables with flammable polyethylene insulation is not allowed.
Based on the above, in order to further connect electricity to the house, an AVG aluminum cable with a cross-section of 10 mm2 was used, which was pre-tightened into a PVC corrugation.
To connect the SIP wire and the AVVG cable, nut-type connectors could be used. But since the cable will pass through the house, to protect it, an automatic switch was installed, which made the connection between these conductors.
How to connect the cable yourself
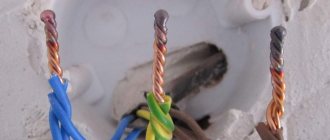
How to connect a vulture to a copper cable. Often during repairs a situation arises when an electrical cable breaks through the wall. This situation arises for the following reasons:
When drilling a hole in the wall (floor) with a grinder, due to the lack of visibility of the outlet to the electrical cable;
Broken wire in the wiring box;
When moving an outlet from one place to another.
You can repair the damage yourself, however, in order to understand how to properly connect the cable, you must follow a number of instructions.
The best option is to replace a complete section of wiring, that is, to replace the cable completely, from the distribution box to the outlet (switch);
You can't just twist one cable and another cable and wrap it with electrical tape, they have to be made of a certain material! For example, copper must be connected exclusively to copper, aluminum must be connected to aluminum accordingly. Copper and aluminum are nonsense.
Of course, replacing a complete section of wiring will require cutting the wall, which means damage to the plaster, wallpaper, tiles... However, if you connect one cable and another cable, simply twisting it and covering it with electrical tape, then after a while the wiring at the junction begins to oxidize and heat up!
Important: you can connect wires of only one metal! If one wire is copper and the other is aluminum, then how to properly connect the cable in this case? They can only be connected using a terminal block, because in it the wire strands do not directly touch each other
When soldering copper and aluminum wires without a terminal block, heating will occur due to oxidation and interruption of electrical contact. Remember this.
When connecting wiring to a residual current device (RCD) in the panel, or to an automatic differential current switch (difatomat), you should be especially careful to isolate the phase, neutral and grounding conductor from each other. Now in this case you know how to connect the cable yourself.
An excellent solution would be to use a heat-shrink tube, which is put on before connecting to the wire, then after soldering (or extension), it is moved to the connection site and heated with a special hair dryer (lighter, gas burner). After heating, the tube will be tightly compressed and provide an excellent seal.
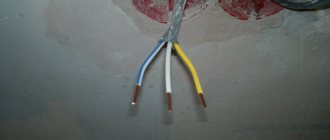
If the wiring runs in a damp place, then it is recommended to only solder the wires (weld) and make improved insulation. Wires with a cross-section of four and six millimeters, for an electric stove - just solder! If the wires are broken and the remaining tip of the wire is one and a half centimeters, the wire is extended using a terminal block. If the exposed piece is small, then you need to strip it a little to the box... If the wires are of different colors, you must always connect the same ones - this will help to avoid problems in the future.
Correct cable connection
Safe connection of wires
The correct procedure for connecting cables using clamping mechanisms guarantees high-quality, safe and stable contact. To correctly connect two wires, you need to follow the given algorithm.
Step-by-step instructions for connecting cables:
- Bringing working conductors to the point of contact.
- Disconnecting the network, unplugging the device from the socket, if the wire is being extended on household appliances.
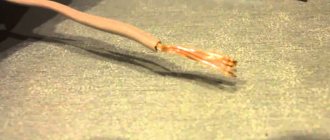
- Removing insulation from the area where the terminal is inserted. You can trim the ends with a knife or using a special tool. The latter option is preferable, since professional equipment will not damage thin wires. Stripping is carried out until the characteristic shine of the wire appears.
- Installation of non-insulated cable parts inside the clamp sleeve.
- Fasten in an appropriate manner. These can be electrical punctures, tightening, squeezing and other types of fixation.
If necessary, you can additionally insulate the contact point.
SIP brands
When considering known designs, the following positions can be distinguished in which the neutral core is used as a supporting wire:
- SIP-1 is a wire with a bare neutral core, connected to main lines and various branches;
- SIP-2 - a cable with an insulated neutral wire, intended for the installation of lighting networks, as well as supply lines;
- SIP-3 – single-core insulated cable used in high-voltage lines;
- SIP-4, SIP-5 and SIP-5NG, containing two or four insulated tightly twisted conductors without a neutral core.
The last three positions are used exclusively for arranging branches to houses (main line). The figure below shows the cross-sectional designs of different SIP wires.
Various types of SIP wires (section)
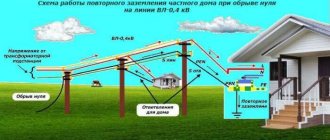
The metering board is located on the line support
- Step 1. Separate the wires on the main line from each other. For this purpose, special dielectric wedges are used. In their absence, wooden ones can be used;
- Step 2. After the wedges are installed, you should unwind the bundle a few turns in the opposite direction and put the clamp on the core. The main line passes through the device, and the SIP cable can only be passed through on one side, since on the other side there is a cap on the terminal;
- Step 3: The drop cable must be straight. After this, it must be inserted into the hole in the connecting device until it stops. As a result, both conductors (main and branch) must be located in parallel;
- Step 4. The final installation step is to tighten the mounting bolts until the head is torn off. In this position, the terminals, which are located inside the connecting device and equipped with special teeth, pierce the insulation of the main line and the SIP cable and ensure stable transmission of electricity.
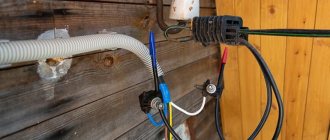
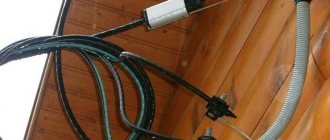
Connection of SIP with VVG cable
For input, SIP-4 or SIP-5 with 16 mm2 conductors is used. A smaller size is prohibited by the PUE, and this permissible cross-section will be more than enough. The number of cores can be 2 or 4, depending on whether the power supply is single-phase or three-phase. For branches, SIP-2 grade wire with a supporting zero core is also used.
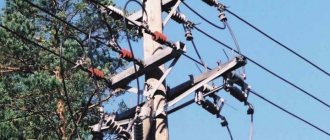
According to the standard, the maximum span for an overhead wire is 25 m. If the distance from the building to the power line is greater, an intermediate support with a supporting clamp is installed.
A branch is made on the support of the main line. The SIP is attached to the wall using a bracket with an anchor clamp. The clamp for the carrier wire SIP-2 is made in the form of a clamping die (Fig. a), and for SIP-4 a clamp is used that simultaneously captures all the cores, the tension between which is distributed evenly (Fig. b).
Anchor clamps for SIP-2 (a) and SIP-4 (b)
The cores of the VVG copper cable entering the house are connected to the wire using piercing clamps (circled in red in Fig. a). They guarantee the electrical connection of conductors without stripping the insulation.
Connecting SIP with VVGng cable using piercing clamps: a – installation of SIP on the wall of the house; b – piercing clamp device for two wires
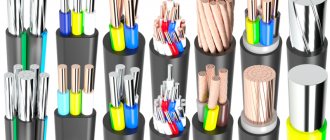
SIP with a copper conductor is connected in the following ways:
Piercing clamps (Fig. b). The insulated wires are inserted into the holes in the clamp, after which the top bolt is tightened. The hermetic body of the device is made of glass fiber reinforced polymer. It reliably protects the connection from moisture and is resistant to ultraviolet radiation. Tightening can be done with one bolt or separately for each core. Branch clamps (photo below). The design includes 3 bimetal plates and screws for fastening them. The cores are stripped, inserted between the plates and fixed. An insulating box is placed on top. The nut connection is preferred for aluminum wires that are sensitive to spike nicks. Shells. The cores are stripped, inserted into the sleeve and crimped with a press. A heat-shrinkable tube with gel inside is placed over the connection to seal it.
Branch clamps (“nuts”) for connecting wires
An alternative solution is to directly insert SIP into the electrical panel of the house, after which the wiring is done inside. The power supply company allows the use of such projects, since any break in the input cable creates a loophole for the theft of electricity.
It is prohibited to lay aluminum PUE cables on combustible structures. Here you will need to switch to a copper cable, for example, VVGng.
For any input option chosen, you should request technical specifications from Energosbyt and perform the work in accordance with them.
The piercing clamps for connecting the cable are sealed and accessible for inspection. To prevent Energosbyt from asking questions about the possibility of electricity theft, you can install clamps with a breakable head that cannot be disassembled.
The connection can be made to the input of a conventional two- or four-pole machine. SIP is a rigid wire and connecting it is not very convenient. A regular cable is connected to the output of the machine, which ensures a reliable transition. It is preferable to place the machine outside the house in a closed, sealed box. Its rating is chosen higher than that of the home system protection.
Another advantage of this method is that SIP insulation is not designed for installation inside the house. Its contact with any surface is undesirable. In addition, polyethylene is a flammable material, although a wire with a cross-section of 16 mm2 is difficult to heat to the ignition temperature in the presence of a machine gun. If you lay it inside the house, you should choose the SIP-5ng brand, where the insulation does not spread fire.
The weak point is the input through the wall. In wooden houses, the installation is done through a metal pipe. In other cases, it is enough to lay a plastic one.
Experts may have different points of view regarding the introduction of electricity. To avoid having to redo it later, the connection project should be agreed upon in advance with Energosbyt.
Safety precautions
The SIP cable is manufactured in accordance with GOST 31946-2012, which prescribes the use of wire for organizing outdoor overhead power supply lines. The insulation is made of polyethylene, which is resistant to ultraviolet light and low temperatures, but supports combustion. There is a version of SIP with additional marking with the letter “n”, designed for installation along the wall of the house. The insulator is made of self-extinguishing polymer and does not support combustion. But regardless of the type, the SIP cable cannot be used inside the house.
Wire switching methods
The connection of conductors can be carried out in various ways. Some of them:
- Using terminal blocks - this method is quite durable and reliable.
- Pressure testing using sleeves. In this case, knowledge of the basics of technology is necessary. The connection is strong, but requires the use of special tools.
- Bolted connection - even a novice master can easily handle it. This method is used in difficult situations, for example, when you need to switch from an aluminum conductor to a copper one.
- Welding is the most reliable method. With its help, the strength of the connection is ensured, but certain skills and the presence of a welding machine are required.
- Soldering - it is important to use a similar method if the conductors will heat up to a temperature of no more than 65 degrees.
- Various spring clamps are easy to install and provide reliable switching when operating conditions are met.
Typical mistakes when connecting wires by crimping
Some important tips for novice electricians, or people who independently use such a connection method as crimping wires with sleeves.
1. Use of sleeves with a cross-section smaller than the wire.
Never use sleeves smaller than the required diameter. To insert wires into them, it is necessary to reduce the diameter of the core, which is done by cutting off part of the conductor and reducing the cross-section of the wire.
Those. if you want to extend a wire with a cross-section of 2.5 mm2, and your sleeve is 1.5 mm2, you do not need to take a file and trim the wires so that they fit into the sleeve.
Thinning the wire leads to an increase in the resistance of the contact area and also reduces its throughput. Therefore, the purpose of maintaining the same conductivity along the entire length of the line is lost. At the junction, the wire begins to heat up and quickly collapses, it’s good if there is no smoke or flame.
Reducing the cross-section of the wire also leads to a decrease in the mechanical strength of the connection. With any external influence it can simply break. Finding a break in an extensive network is not an easy task even for a professional electrician, unless, of course, there are special instruments. But they are not in every home.
Use of large diameter sleeves.
Increasing the diameter of the sleeve also does not bring any benefit. It is not always possible to achieve a reliable and strong connection. The use of the “folk” method of bending the ends of the wire in half can be considered only a partial solution. Practice shows that the mechanical strength of the pressed joint in this case is also reduced by almost half.
Cutting cartridges into several pieces.
Many beginners use this method to save on cartridges. Do not shorten the factory sleeve. This leads not only to the inconvenience of working with pliers, but also to an increase in resistance. The consequences are described in the first tip. Mechanical strength also decreases due to a decrease in the length of the contact section.
How to connect SIP with copper cable?
This is perhaps one of the most pressing issues for people involved in electrical wiring work. It is no secret that private construction is now actively developing in our country. Moreover, many, for a number of reasons, prefer to carry out all the work with their own hands. This also applies to electrical installation procedures.
The laying of electrical networks for private houses or outbuildings is most often carried out using self-supporting insulated power wires (SIP cables), which have many advantages specifically for installation work. The main advantages of SIP wires:
- safety - electrical installation work can be done by hand. It is not necessary to resort to the services of professional electricians, since the design of wires of this type ensures absolute safety of the process. But if you do not have the skills to work with electricity, then it is better not to take risks and call an experienced specialist for help.
- reliability – SIP wires provide stable current transmission in any conditions
- performance characteristics - cables of this type can be used in various weather conditions, at any temperature. They are strong enough to withstand strong gusts of wind, and are made of special materials that maintain flexibility and elasticity in severe frosts
And, of course, an important factor is that SIP wires can be connected to cables of other types that have cores made of dissimilar metals.
Advantages
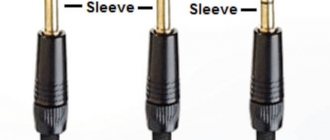
How to connect the antenna cable to each other
In comparison with the cable traditionally used for these purposes, SIP wire has certain advantages, expressed in the following:
- When laying it, it is impossible for phase conductors to overlap, which often happens with ordinary wires;
- Connection with an insulated cable can be done by yourself;
- SIP ensures high reliability of energy delivery under any climatic conditions;
- Products of this class are characterized by high strength, relatively low cost and durability.
In addition, during the operation of these wires, reactive losses are noticeably reduced due to the special properties of insulating protection. The design features of SIP help to simplify its installation during installation work.
Based on the composition of the wires being connected, these products are divided into several classes that differ in their purpose.
How to install correctly
As mentioned above, when this electrical installation is installed, there is no need to uninstall the cable itself. For example, you need to connect a branch to an existing line. How can such a connection of two wires be made (in fact, this will also be the fastening of the beginning of the outlet section)?
- The branch clamp is placed on the live line.
- The end of the wire for the branch section is inserted into the second groove.
- The bolt head is manually tightened until it stops.
- Then, using a spanner wrench, the bolt is tightened to such an extent that its head simply falls off. This indicates that the teeth of the device have reached the metal strands of the SIP wire.
The entire process is carried out only with dielectric gloves. Installation is quite simple, but it is not worth carrying out if you are not an electrician. There are certain restrictions and requirements regarding admission to this type of work. This is especially true for areas under voltage.
Installation of SIP wires - stages and requirements
What is branch compression - design features and installation method
Laying conditions
Cable laying does not require special qualifications. In the process of performing such work, special supports or structural elements of buildings can be used.
It is easier to consider the laying conditions using the example of its placement on reinforced concrete supports:
- the safety of the insulating coating is ensured by special plastic rollers or thimbles that allow unimpeded movement of the cable;
- the wire must not be dragged along the ground or tree branches, so as not to damage the insulation;
- before mounting on the support, the cable is pulled through the movable device and fixed;
- You cannot wind two or more wires together when laying them together.
Fastening the SIP on the support and supplying it to the meter on the support List of materials required for installation of the unit:
- Mounting tape – F 207.
- Clamp - A 20.
- Intermediate suspension kit – ES 1500.
- Sealed piercing clamp FIDOS 4-35/6-150 – RS 35-150.
- 2x Adapter for clamp PC 35-150 – F 2.
- Anchor brackets – CA 1500/2000.
- Anchor clamp for wires of subscriber branches - RA 25.
- Measuring and distribution cabinet made of polyester 320x665x235 - MRO 1-S.
The absence of errors when performing work will eliminate the need for subsequent revisions and repairs.
Cable termination
Connecting SIP cable to copper wire using terminals
If you need to connect a SIP cable to a bare copper wire at home, and you do not want (or do not have the opportunity) to contact specialists, buy spring terminals. They are inexpensive, but allow you to connect wires with cores of dissimilar metals quickly and safely.
The process of connecting wires takes place in several stages:
- the insulation is removed from the wire
- the bare core is inserted into a special hole in the terminal
- the core is fixed by a spring
Connecting wires with cores made of dissimilar metals is problematic not because of the quality characteristics of the materials or the complexity of the process, but because aluminum and copper have different degrees of oxidation: aluminum oxidizes almost instantly upon contact with external factors, while copper does this very slowly. As a result, a film forms at the junction, which prevents the creation of reliable contact.
Spring terminals are made from a special material that is treated with a paste that prevents oxidation of the wires, which ensures a reliable connection and stable contact between them.
Connection to load switch
This method is applicable even at the initial stage of installation work when purchasing materials. Instead of an introductory machine, it is worth purchasing a load switch. Why they are better than automatic switches can be found in the article Modular load switch - differences from a circuit breaker.
The fact is that most modular load switches have special contacts in which the clamping bar is not flat, but semicircular. It is this form of contact surface that perfectly grips the SIP, without crushing it, and providing a sufficient useful contact area
There are also machines with a similar shape of clamping terminals (usually expensive and well-known brands), so pay attention to this in the store
The reliability of the aluminum contact in the machine terminal will be further increased by the use of SuperCont lubricant. By lubricating the SIP core with it once and tightening the contact, the contact resistance, according to manufacturers, will remain unchanged for several years. This means no heating and no need to periodically tighten the contact. This is achieved due to the fact that the lubricant contains up to 70 percent copper.
Types of piercing clamps for SIPs
- P4 – small-sized clamp for connecting a subscriber and street lighting (Fig. a below). Contact plates made of aluminum or tinned copper are used.
- P616R – for entry into the house and street lighting (Fig. b). The contact plates of the clamp are made of tinned copper.
- P645 - for connecting SIP with a copper or aluminum branch (Fig. c).
The listed types of clamps are used to connect copper or aluminum cores to each other. They can be installed on live lines. Secondary installation is not possible due to the breakaway bolt head made of aluminum alloy.
Piercing clamps for SIP: a – P4; b – P616; c – P645
Major device manufacturers
Niled differentiates itself by tailoring its products to suit the local market. For example, special devices for cables with small cross-sections have been developed for Russia.
So, piercing clamps are used to ensure a stable connection between main power lines and their branches. Due to their design features, they practically do not damage the wire and meet all safety requirements; you just need to follow the technology for installing connecting devices.
Connecting dissimilar wires
Entry into the house is usually carried out through a VVG cable. It is not recommended to connect copper and aluminum conductors directly. Due to the high resistance, the contact point heats up and quickly fails. However, there are simple ways to create connections between dissimilar conductors.
The basis is the exclusion of their direct contact. The simplest method is to use a bolted connection. Here you will need a bolt, a nut, several washers and a groover so that the contacts do not weaken over time. When tightening the bolt, a washer is installed between the conductors to protect them from direct contact. It will be even better if you tin it.
Connecting copper and aluminum wires to each other with a bolt and nut
The connection should then be wrapped with insulating tape.
A common way to connect dissimilar conductors is to use terminal blocks. You can use a regular terminal block, but there are special ones, for example, Wago terminals, as well as series 222, 773, 2273, where the connection is made without screws. The method is suitable for small cross-section wires.
The cable conductors at the input have a large diameter and here it is better to use aluminum-copper sleeves pressed onto them.
How the connection can be made
The connection may be different, in particular it depends on the location of the metering panel.
The metering board is installed on the line support
To make such a connection, you must use a solid conductor. In this case, experts advise using a piercing clamp.
It is specifically designed for this purpose, but it is important to consider the parameters used. You also need to take into account that you can use the same SIP or copper cable as a tap
You need to take a closer look at the main components of the compression; they are steel and equipped with sharp teeth. By the way, the teeth can be used for tightening bolts, if the need arises. Using such a tool, you can ensure complete tightness of the connection and reliable contact.
When connecting to a SIP, you should use standard fittings. At the same time, experts are of the opinion that the optimal solution would be to run the wire into the distribution box. In this case, there will be no need to make a connection. But if you need to make such a connection, then it is better to do it outdoors, at the entrance to the house. In this case, use a piercing clamp; you can also use special die clamps. By the way, these squeezes are somewhat reminiscent of nuts in shape.
These clamps are intended to connect the cores together. Moreover, they can be created from various materials. This ensures that the conductors do not come into contact with each other. When using such products, the conductors will only come into contact with steel plates.
Shield on the wall of the house
In this case, a solder clamp is used, and the solder is inserted directly into the shield. When using a SIP, you will need to install special clamps on the wall; they are needed to secure the wire. And when using a copper cable, you will need to tension a steel cable. A connection between a SIP and a copper product may also be required if there are several buildings on the territory, and a SIP is used for wiring. A piercing or tablet clamp must also be used for this purpose.
Some use a special sleeve and then perform crimp testing.
But this method is considered unjustified for several reasons:
- a special device will be required;
- such a procedure is used to restore the veins, otherwise it is not necessary;
- another technology will provide greater strength than a sleeve.
Installation sequence
When tightening the shear nut, such force must be applied that the clamp teeth:
Ensto products, thanks to the pyramidal shape of the teeth and their staggered arrangement, do this better than many others.
You can see tensile testing of SIP after its cores have been pierced with clamps of different brands.
At the end, the connected soldered SIP is bent to the main one and pulled to it with a tie. This is done so that in the wind the contact is not subjected to mechanical stress and does not break off in the future.
Bolted wire connection
If you need to create a really strong and reliable connection of wires from different metals, but you don’t have special tools for this on hand, use an ordinary bolt, washer and nut. The connection process is not too complicated:
- strip the metal cores of both wires. Determine the length of the stripping section yourself. Usually two to three centimeters are enough, but if the bolt has a large diameter, then the length of the stripping section can be increased
- make loops from the stripped wires and put one of them on the bolt
- place the intermediate washer on top and put on the second loop
- then the washer is put on again, and the nut is put on it
After the nut is placed on the last intermediate washer, you need to take a wrench of the appropriate diameter and tighten it carefully. When you have completed all the work, do not forget to check the strength of the connection - the tighter the nut is tightened, the more stable the contact will be.