However, home owners very often do not want to spoil the appearance of the building facade for aesthetic reasons. And they naturally ask themselves whether it is possible to lay SIP wire underground.
Underground cable installation technology
Laying an electrical cable in the ground at a summer cottage, the territory of a private household or other facility begins with excavation work. Before this, you need to decide on the depth and width of the trench. The depth must be at least 80 cm, and the width 30 cm for each cable, if there are several of them. In accordance with the developed plan and route markings, soil sampling is carried out. The trench is cleared of foreign hard and sharp objects, and its walls should have a slight slope. After excavation work is completed, the cable is laid according to the following algorithm:
- the bottom of the trench is leveled, covered with sand in a layer of 15 cm and compacted;
- Protective cases are placed on the prepared pillow, if necessary;
- the cable is pulled through the cases, maintaining the required slack;
- the protection pipes are connected into one whole in one of several ways;
- a layer of sand 25 cm thick is poured on top of the laid cable in protection;
- the top filling is slightly compacted, preferably with your own feet;
- plastic warning tape must be laid with the lettering facing up;
- the trench is filled with soil, layer by layer, with mandatory compaction.
It is advisable to lay the cable in one single piece, without any connections. If this option cannot be implemented, then the individual pieces must be connected in mounting boxes specially designed for outdoor use. The device is installed on a post above the soil surface, at the junction of the cable, where its ends are brought to the surface. Do not bury the box, as this will quickly damage the line.
At this point, the laying of cable lines in the ground ends and the stage of connecting underground electrical communications to the general power supply networks and input into buildings located on the site begins. Each stage of work, both when laying the cable and connecting it, has its own nuances, which will be highlighted below. We will begin this description with the choice of cable for underground routes.
SIP installation rules
Special requirements are imposed on the deployment of drums: the wire should not touch the ground or buildings during installation in order to avoid damage to the insulation. In areas over 100 m, only mechanized rolling is used directly from a drum installed on the machine. Another feature of laying SIP lines is the use of a block system for hanging the cable and its subsequent tension. These and other operations require special devices and tools for the installation of self-supporting insulated wires, including shears for steel strips and hydraulic ones for wires, crimping for sleeves, dynamometers, winches and others. The remaining requirements for laying SIP overhead lines are regulated by the PUE (code of rules for the construction of electrical installations), as well as GOST R 52373-2005.
Cable management protection
Signal tape
The standard trench depth is 90 cm, the thickness of the sand cushion is up to 20 cm. The cable is laid without tension, in a wave-like manner, always below the freezing point of the soil. Next, it is covered with a 30 cm layer of sand and earth, after laying warning tape.
If the soil is subject to shifts, is not dense enough, or is saturated with groundwater, additional protection is installed. Make a tray from concrete blocks or moisture-resistant bricks. The cable is laid in a tray and covered with a concrete slab on top. A reinforced concrete monolithic channel is made on creeping soil and covered with reinforced slabs.
Brick, concrete or stone wall
You can lay a cable without a corrugation or tray only if its insulation is resistant to ultraviolet radiation. But in practice, in most cases, SIP is used, which is intended for installation outdoors and is resistant to ultraviolet radiation, or VVGng-LS, the insulation of which is not resistant to ultraviolet radiation.
In the first case, you can lay the cable along the facade of the building, provided that the distance from the cable to the wall is no more than 6 cm (PUE chapter 2.4, clause 2.4.60).
In the second case, the cable is laid in a metal electrical box. If there is no danger of mechanical damage, you can lay the cable in HDPE corrugation (black), but UV-resistant PVC corrugation is also available on sale (check this point, since regular PVC cracks in the sun). You can also use a metal hose. Cable cleats and corrugated fastening clips are attached to the wall with dowel nails or nail dowels using a construction gun.
The cable fastening pitch in horizontal sections should not exceed 350 mm, in vertical sections - 500, in bending areas - 100. The cable entry into the building must be placed in a pipe or a piece of metal electrical box (chapter 2.1. PUE clause 2.1.58). We talked about how to lay a cable through a wall in a separate article.
The ideal way to install cable lines along the facade would be to lay them in pre-punched grooves and then cover them with plaster, but due to the high labor intensity, this is rarely used in practice.
Rules and GOST
However, remember the main thing - not a single normal power engineer or energy inspector will ever accept such work from you. Moreover, it will not allow voltage to be applied to this potentially dangerous section of the network if it is constructed incorrectly.
Of course, if you need to lay a SIP underground from a house already connected to the power supply to a neighboring garage or extension, no one can forbid you from doing this.
For yourself, you are free to be as sophisticated as you like. No one will punish you for this or even issue you a fine. It will be only your business until one fateful moment, until someone from outside is killed or maimed
What will be the reason for this - leakage current or step voltage is not important
As soon as the relevant authorities begin to look for the reason, all the standards and documents that you did not care about or considered not mandatory, or tried to circumvent them with your innovations and improvements, will be raised.
And the rules say this:
Therefore, if you are an electrician who performs work for hire, never follow the customer’s lead. Ultimately, you will have to answer.
No one will pay attention to tectonic shifts in the layers of the earth, or a large invasion of rodents, or abnormal flooding of the area due to rains or floods. When the investigator understands that the cause of the accident is a non-compliance with the technology for using SIP, he will immediately jump into it
If you do everything according to the rules, in compliance with current standards, then there will be no complaints against you. Here the question will arise not about installation, but about the correct operation of the cable during the entire period of its operation from the moment of connection.
An accident with strangers or with you personally is, of course, an extreme variant of the consequences of laying SIP in the ground. Most often the following happens:
- wire insulation ages and deteriorates over time
- water somehow gets into the pipe in which the SIP is laid
- there is a small but constant current leakage
- For some reason the meter starts to generate a little more kilowatts than usual, and you pay for it all
- add here the voltage drop of a few extra volts
- The longer the wire, the more likely this outcome is. And the more money you will pay for unconsumed electricity.
Sometimes the voltage simply disappears due to a break or broken contact. In this case, a simple loss of light is only half the problem from damage. Most often, many of these accidents are accompanied by current leaks through the shell and subsequent fires.
And if in an armored cable the outer shell is grounded, and thus its protection is ensured, then in a SIP wire there is simply nothing to ground.
In addition, it is not always possible to carry out perfect installation and laying of networks underground.
During the work, you will definitely have to pull the wires through narrow holes, go through bends and turns, and the risk of somehow damaging and scratching the wire without an outer sheath is very high.
In the future, this very place will be the weakest link in the electrical circuit. The cable, unlike SIP, is initially manufactured with the necessary resistance to mechanical stress due to its installation in soil, pipes and blocks.
In general, summing up all of the above, we can draw an unambiguous conclusion - laying SIP wires underground is strictly prohibited. There is no need to come up with additional types of protection to circumvent this prohibition. Just initially plan your purchase of materials wisely and use them for their intended purpose.
Cable output
Finished trench from house to site
At the exit from the ground, before connecting to the pole, a 2-meter section of the cable must be covered with a curved metal pipe. The bending radius is at least 20 times the diameter of the cable sheath.
When laying a cable in the ground at the dacha to the house, it should be introduced through the foundation; for this you need to provide a mortgage. This is a piece of pipe extending 10–15 centimeters from the foundation on both sides. Its cross-section should be 4 times larger than the wire being laid. It is easy to insert the cable into the room through it. For subsequent sealing, use foam or rags soaked in cement laitance.
In another method, the cable in a metal pipe is raised along the house. This is usually where the introductory cabinet hangs. The embed is made in the wall, adhering to the same parameters, and the wire is brought into the house. This method is used if the foundation is made of a monolithic slab and you do not want to disturb it.
Connecting wires in the ground
On both sides of the obstacle, two pits are made, one starting, the other receiving. On the pipe, using a grinder, cut teeth in the form of a crown. The diameter must correspond to the size of the wire, but not less than 20 mm.
It is better to do the work together. The end of the pipe with the crown is installed in the starting hole. The other end is hit with a sledgehammer with great force. After passing 50 cm of the path, the inside of the pipe is washed from soil with water under pressure.
If there is not enough length to the receiving pit, an additional section is welded. When the crown teeth appear on the other side, the process is complete. The protruding ends are cut off on both sides, and the cable is inserted into the middle part. In this case, the pipe remaining in the ground is protection.
Cautions
The underground cable for electricity in a private house should only be armored.
The metal pipe for wiring should not be solid, since when it is filled with groundwater, the ice formed in severe frost will damage the cable.
The wiring must be grounded. To do this, a separate insulated wire is soldered to the armor. The second end is connected to ground on the shield or neutral terminal. In the event of an emergency, the machine will turn off the power.
Choosing the right cable and complying with all requirements during its installation is the basis for long-term and safe operation of the electrical main.
SIP to distribution panel
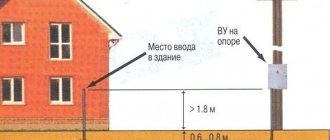
Laying branches from the main power line to a private house or other building will require additional costs from the owner in the form of planning, preparation of documents and concluding an agreement for the electrification of the site. In cases where the nearest power supply line support is located further than 25 m from the planned electricity distribution and metering panel, additional supports will be required to be installed at the owner’s expense. It would be most profitable to equip the shield on the support itself, and conduct the electricity supply to the site underground in a trench.
According to the needs of the homeowner, either a single-phase line or a three-phase line can be installed. Taking into account the planned load, you need to select a suitable wire cross-section. In these areas, SIP-2A or softer wires of the SIP-4 and SIP-5 brands without a supporting conductor with a steel core are usually used. The fittings allow you not only to attach the wire to the building, but also to run small sections of the line directly along the facade.
It is best to entrust the installation of this section to specialists from the company that supplies consumers with electricity in your region. They will be required to sign the electrification act and seal the counting equipment. In any case, such a connection will have to be coordinated with the energy supply company.
Underground cable route design
The owner receives a plan of the route from the pole to the building along with the project for connecting to the electrical networks, but he carries out the wiring along the site to the bathhouse, garage and other objects independently. The most economical option is to lay the cable in a straight line, but in reality this is rarely feasible, since you will have to work around various obstacles. When developing a plan for laying underground cables across a site, the following rules must be followed.
- If possible, avoid intersection with other communications. If this can be done, then the cable without a protective sheath must be placed at a distance of no closer than 0.5 m from gas, water and sewer pipes. When laying the conductor in a casing, this distance is reduced to 0.25 m. When crossing with another electrical cable, this parameter is 15 cm.
- It is necessary to bypass parking areas and vehicle entry areas. If this condition cannot be met, then it is necessary to increase the depth of the trench or pass the cable through a protective case. Large trees and bushes should be avoided. When passing the route along the foundation, the distance from it must be at least 60 cm.
As a result, the cable laying plan will correspond to a broken line, not a straight line. Marking the trench is best done with a stream of sand or pegs. After the preparatory work, it is necessary to once again check the plan for compliance with the standards and transfer it to paper, linking it to all objects on the site and underground utilities.
This drawing will subsequently be useful during the construction of new facilities, redevelopment of the site, as well as in the event of a need to repair an underground power line, which can happen if the technology for laying an electric cable in the ground is not followed or in other force majeure circumstances. The plan has been developed, transferred to paper - it’s time to start the main work!
Advantages?
It would seem that there are only advantages:
- Firstly, you can save on cable
- secondly, directly from the support, lead the wire directly to the switchboard in the basement, thereby eliminating unnecessary connections
At the same time, you can save a significant amount on cable. Since you don’t have to buy an expensive copper armored one, it’s enough to replace it with an aluminum SIP of the same cross-section, plus protect it from the outside, for example, with corrugation or HDPE pipe (prices are indicated at the time of writing):
The standard trench depth for laying cables underground is 0.7 m or more.
Craftsmen, in order to protect SIP from possible groundwater and temperature changes during the winter-summer seasons, bury it to a greater depth - 1.2-1.5 meters. But in the end, none of this helps.
Obtaining permission for underground input
An example of a cable entry project into a house
First you need to complete the project. It should be developed by a specialist. Technical documentation, plans and drawings must comply with all rules and regulations. The designer determines the brand of cable and calculates the cross-section of the conductors.
To receive a project, a number of technical conditions must be met. To connect a house to a common power line, you will need appropriate permission. For example, an agreement for excavation work is drawn up by the service responsible for facilities and communications.
Then the land plot is traced. If there are any communications in the immediate vicinity of the cable being laid, it is necessary to invite their representative to coordinate the position of the trench and control the work being carried out.
Wire tension
The wire is tensioned on the first anchor support of the span. To do this, you will need a hand winch with a special compressive grip on the harness or load-bearing core. Since the tension force must be strictly dosed, a dynamometer is necessary. The magnitude of the tension force can be indicated in the project, otherwise, it can be taken from the installation tables in accordance with the brand of wire and the length of the anchor span.
The work is performed from the AGP platform (“autotower”). The winch is fixed to the supporting core or to the harness, its hook is attached to the support through a dynamometer. By moving the handle, the SIP wire is pulled to the required force, controlled on the dynamometer scale. At the end of the tension, the wire is secured and tightened in the anchor clamp, after which the winch and dynamometer are removed.
Possible installation errors
SIP wire insulation is resistant to weathering, heat and tension, but is extremely sensitive to mechanical stress. Therefore, it is prohibited to lay the wire on the ground and use rollers without a special polymer coating. The connection of wires is made only between the supports, while branches must be made at the points where the wire is attached. Due to the special design of piercing clamps, their reuse is prohibited, and other types of clamps are also prohibited, even if the wire is not tensioned. The brackets are designed for only one fastening; for the same reason, several SIPs cannot be twisted into one bundle. Each line must be installed separately. Checking the wire tension by eye, without a dynamometer, is unacceptable.
Source
Wire rolling
The installation of SIP begins after installing the VLI supports with clamps attached to them.
Anchor clamps are installed on the anchor supports that carry the tension force of the conductors, and supporting clamps are installed on the intermediate supports located between them.
Installation of SIP cable begins with its unrolling. To do this, perform the following steps sequentially:
- Special unrolling rollers are installed on all supports of the anchor span on which the wire is mounted. On the extreme, anchor supports, the rollers are fastened with a belt; on the intermediate supports, the rollers are suspended on a hook in the eyes for supporting clamps;
- A drum with wire is installed behind one of the outer supports of the span. It is located in a vertical position on special stands that allow it to rotate during the rolling process. In order for the wire to enter the roller at a flatter angle, it is recommended to install the drum from the support at a distance not less than its length;
- On the other side of the mounted span there is a drum on which a leader cable is wound, usually a synthetic rope with a diameter of 10–12 mm, depending on the rolling method (manual, mechanized);
- Next, the leader cable is rolled out manually. This operation is performed by sequentially lifting onto each support, threading the cable into the roller and further pulling it;
- After lifting to the last support, the leader cable is connected to the SIP using a special stocking and swivel that prevents the wire from twisting during the rolling process.
This is where the preparatory procedures end, and the actual rolling out of the wire begins. The leader cable slowly, without jerking, is pulled in the opposite direction. During mechanized rolling, the drum winding device is driven by an internal combustion engine with a gearbox; the leader cable can also be pulled out manually.
During the rolling process, the wire, following the leader cable, rises to the support and takes its place on the rollers. Rollers and drums must be located so that when rolling there is no friction of the wire on the ground, support and other structures. It is unacceptable to use a technology in which the wire is rolled out on the ground and then lifted onto a support.
Safety precautions
When installing SIP lines, workers must comply with all safety requirements:
- Standard requirements for outdoor work.
- Preparing the area where work is being carried out, clearing bushes, trees and debris.
- Electrical safety requirements when working with installations up to 1000 V and higher, depending on the voltage of the line being laid.
- Mandatory induction at the beginning of work and daily briefing for each employee involved in the installation of SIP.
- Use of PPE in accordance with existing standards and GOSTs, use only serviceable equipment and tools.
- Protective and marking fencing of the work site.
- Safety precautions when working at height, working lifting mechanisms and other means.
- Additional safety requirements when using special mechanized equipment and devices.
Carrying out the approach to the house
To make a connection to the house, it is necessary to install a bracket for attaching an anchor clamp on the support of the overhead line from which the input is planned. If the supply line is made of bare wire, the bracket is installed below the traverse with insulators. When connecting to VLI, the bracket is mounted below the linear terminals.
The tapping wire is secured in an anchor clamp on the support, leaving the ends of sufficient length to connect to the line. The connection itself is carried out by the personnel servicing the line after complete completion of the installation work. For connection, special clamps for bare wire are used if the overhead line is made with bare wire, or piercing clamps if the connection is made to an overhead line.
At the place where the SIP is attached to the facade of the house, it is also necessary to install a bracket for attaching the anchor clamp. The wire, fixed in an anchor clamp on the support, is inserted into the clamp on the facade of the house, manually tensioned and fixed. Most often, the Technical Conditions require that the metering cabinet be located on the outer wall of the building, and it is stipulated that the power input is carried out by a solid, visible wire. Before entering into the meter or circuit breaker located in the metering cabinet, self-supporting insulated wires are laid along the facade of the building. To secure the wire to the wall, special facade fastenings are used.
Application
Brands of self-supporting wires are divided not so much by their type as by their scope of application. In general, SIPs are designed for transmission and distribution of electricity in alternating current networks with voltages up to 35 kV. Wires of the SIP-1 brand are used in main overhead lines up to 1 kV. Due to a special supporting conductor made of aluminum alloy with a steel core, such wires are able to withstand heavy loads for a long time.
Installation of SIP on supports of the SIP-1 brand is most popular when laying open overhead lines outside populated areas of the temperate climate zone. For regions with high humidity, as well as in densely built areas, it is more advisable to use SIP-2, which, unlike SIP-1 with an exposed zero core, are completely insulated.
Insulation of the carrier neutral wire makes it possible to increase the electrical safety of the line as a whole; moreover, the use of polyethylene cross-linking technology expands the climatic scope of use of these wires.
SIP-3 is made with one core specifically for laying high-voltage power lines. SIP-4 and SIP-5 are manufactured without a load-bearing conductor, so their use is limited to short sections of connecting specific consumers to the main overhead line, as well as small sections of electrical wiring along the facade and inside buildings.
Laying cables along a wooden fence
The height requirements are the same as for concrete. The main restrictions according to the PUE are fire protection. If the cable has a sheath made of fireproof or hardly flammable materials, it can be attached directly to the fence. For a shell made of combustible materials, there are a number of requirements. It is enough to do at least one of them:
- The power wire is laid at a distance from the wooden surface using rollers made of fireproof dielectric (most often ceramic).
- The wiring is placed in a non-flammable sleeve (corrugation). It can be metal or plastic that does not support combustion.
- Installation is carried out inside a fireproof box.
- A backing made of non-flammable material is used, with a width of at least 10 mm to the sides of the cable. You can use a supporting structure made of a profile pipe. Only the wire should not touch the tree. A common option is a steel strip nailed to the fence boards. At the same time, it serves as a supporting structure.
Negative factors for street wiring
Cable lines laid outdoors are subject to several negative factors:
- Ultra-violet rays. Sunlight has a detrimental effect on some types of conductor insulation. This process is long and difficult to control. Therefore, you should choose products with insulation made from materials that do not deteriorate when exposed to UV rays.
- Ambient temperature. Low temperatures can lead to cracking of the insulation. Therefore, when choosing cables and wires, you should find out their operating temperature range. The installation temperature should also be taken into account. Usually it is not lower than 20 degrees below zero.
- Wind. Strong winds can damage both the cable line sheath and the conductors inside. If the cable is laid outdoors, the climatic area of installation should be taken into account.
- Ice. If the external network is installed in areas where there is increased ice formation in winter, it is worth taking this factor into account. A conductor covered with an ice crust can become several times heavier and break under its own weight over long spans.
There are three ways to lay cables outdoors, and each of them has its own advantages and disadvantages:
- By air. The fastest installation method. Disadvantages of this method: it requires reliable fastening of the cables, the lines are exposed to the negative influences of weather conditions.
- Along the walls of buildings. For this method it is much easier to select the conductor material. Disadvantages: labor-intensive installation, disruption of the appearance of buildings, negative impact on the conductor of ambient temperature and sunlight.
- In the ground. This method allows you to solve many problems. Weather conditions and sunlight have no effect. The appearance of buildings and surrounding areas is not disturbed. The disadvantage is that electrical installation is labor-intensive, in some cases requiring the use of construction equipment to excavate a trench.
Exposure to moisture
There is an option to use an asbestos cement pipe. According to many, with such protection the wire will last at least 100 years. However, firstly, it is not so easy to get such material, unlike HDPE, and its price is completely different.
Secondly, you will be faced with the problem of hermetically joining individual pipe sections to each other. It will be impossible to achieve one hundred percent tightness.
As a result, the SIP in this pipe will be in constant damp conditions. At the inlet and outlet of the pipe, it will invariably collect condensation and moisture due to temperature differences. And how will such operating conditions affect the service life?
Of course, all this will not fail the next day and can even work for several years. It all depends on the installation and operating conditions. But at one “wonderful” moment a short circuit or break will occur.
Wet conductors will inevitably fail sooner or later. Moreover, at subzero temperatures the core will already be stretched and break even with a little effort.
And on top of you, everything will already be arranged - a lawn, paths, maybe some bushes or a decorative fence. How to repair all this, where to look for the place of damage and what costs will it all cost in the end?
You can involve specialists and use a reflectometer to establish the location of the accident. However, doing this for a section 40-50m long is simply not practical.
And how to install a coupling on a SIP underground?
As a result, the difference will be several times incomparable with the savings on a normally laid cable, which you abandoned at the construction stage. Here the arguments of those who like to violate technology and still push self-supporting insulated wires underground will no longer seem so convincing.
What they say most often:
- laying the wire underground by placing it in a HDPE pipe provides reliable mechanical protection
- It is enough to seal the ends with couplings and thus you can get rid of moisture forever
- underground there is absolutely no ultraviolet effect on the insulation, which means its service life only increases
Laying cables along a stone or concrete fence
From the point of view of the PUE, the work is carried out by analogy with the stone wall of a building. With a line height of 2.75 m, an unprotected insulated rein with an outer sheath is sufficient.
According to the Rules, a regular VVG of the appropriate section will do. However, given the layout of the wiring, it is better to use a double-jacketed power cable.
If the fence is monolithic (stone or brickwork, or cast from concrete), the cable is laid directly on the surface using standard clips (clamps) for street installation. They can be plastic or metal.
There are separate rules for self-supporting insulated wire (SIP). Since it has a single layer of insulation, a 60mm clearance is provided during installation. Special mounting clamps are available for this purpose.
If the fence is assembled from concrete panels, you cannot attach the cable directly to the plane. Under wind loads, the panels may move and the wiring will sooner or later break. In this case, the cable is attached to a supporting cable, and the suspension points are placed on support posts.
If the installation is at a height of less than 2.75 m from the ground, external cable protection is required. Firstly, it may be accidentally damaged. Secondly, at such a height there is a risk of electric shock. The wiring is placed in a box, cable sleeve (corrugation), or pipe. The material does not matter - the main thing is to provide mechanical protection.
Installation of overhead lines using SIP wire
Gradually, overhead power lines with exposed wires are becoming a thing of the past. This is understandable, no matter how high they are mounted, there is always a danger of electric shock. Considering that the current strength in such lines is quite large, because they power not just one house, but sometimes entire streets and even populated areas, accidents in these areas lead to serious consequences, including deaths. Developments in the field of cable insulation make it possible to use a single, self-supporting insulated wire with separate insulation for each current-carrying and auxiliary wire, which can withstand atmospheric exposure for a long time.
SIP supply to the house
If, according to technical conditions, the electricity meter must be installed indoors, then two options can be used to enter the cable into the house. The first method involves the use of self-supporting insulated wires for laying along the facade of the building and entering inside. The second method involves switching from a self-supporting insulated wire to a VVGng cable before entering the house. The disadvantage of the first option is the relatively low fire resistance of the SIP insulating shell, therefore it is not recommended to insert such a cable into wooden buildings. The disadvantage of the second option is the presence of a transition from a cable of one type to a wire of another type. Representatives of the energy supply organization may prohibit the use of connections to the electricity meter.
The problem is solved in the following ways:
- To increase fire safety, SIPs are introduced into a house using special corrugated hoses, metal or plastic pipes, after pre-treating their surface with a material in the form of paint or paste that is resistant to high temperatures and open fire.
- To avoid direct connection of two cables of different types, protection devices are installed on the facade of the building. An insulated wire is connected to them, and from them another cable is pulled along the facade, brought inside the house and connected to an electricity meter. To protect circuit breakers, a special box is used.
Which option to use is decided on the spot. The advantage of the first method is the absence of a protection device that requires additional protection and maintenance. The advantage of the second method is the provision of a high fire resistance without the need to use additional protective materials, as well as the protection of the cable passage through the wall of the house with an automatic switch. In this case, there is no need to install additional protective equipment upstream of the electricity meter.
What type of branch clamp to choose for SIP
- they are usually called sealed (SLIW clamp series, for example SLIW50). Sealing of the puncture site of the SIP insulation is achieved due to the silicone seal around the contact.
Their contact form is as follows:
branch sealed clamp SLIW
The piercing elements in clamps of this type are oriented opposite each other, which, as a consequence, leads to high demands on the accuracy of the breaking force of the shear head on the central bolt.
For low-quality manufacturers, this force has a wide spread, which in turn leads to the fact that some clamps break too early, without reaching the nominal contact (and installers are forced to tighten the bolt after the break), or too late, which leads to excessive damage to the core.
(this is especially important when branching from the SIP neutral wire). In practice, there have been cases where the conductor was simply cut
This problem especially often arises when installers tighten (and they do this all the time) the bolt after the head has broken off, in order to guarantee contact.
The value of the transition resistance in clamps of this type is ~60 milliOhms. The durability of the contact is ensured by the plastic body of the clamp.
