To change the light bulb in a spotlight on the ceiling, you need to perform a few simple steps: remove the retaining ring, pull the lamp out of the base, insert a new product into it, and then secure it with the same retainer. You should first turn off the electricity, or better yet, turn off the power to the entire apartment with the switch on the panel. This will prevent the risk of electric shock and allow you to complete the job calmly and quickly.
Spotlights in the interior Source design-homes.ru
Spot ceiling lights have become widespread due to their beauty and convenience - such lighting devices perform a decorative and practical function, helping to divide space into zones and emphasize the design of the room. The use of devices with suspended and suspended ceilings has become a common solution among consumers. You can find a large number of different types of light bulbs on sale; LED and halogen light sources are most often used for apartments and houses. Their advantages are low power consumption and bright lighting, as well as ease of installation and replacement. And although the procedure for working with LEDs is significantly different from installing incandescent lamps, in fact, there is nothing complicated in this process. It is not at all necessary to call an electrician for this task; everything can be easily done with your own hands. Next, we’ll figure out how to change a light bulb in a lamp yourself.
Safety rules and preparation for work
Before you begin replacing lighting fixtures, you must ensure that all safety precautions are followed. To do this you need:
- Turn off the lights, and also de-energize the apartment with the switch on the panel. This will prevent electric shock. Please note that you will have to work without lighting, so it is better to change the light bulb during the day. Otherwise, you can use a flashlight.
- Wait a few minutes after turning off the light to allow the appliance to cool down. This is especially true for halogen lamps, but LED lamps can also heat up in some cases.
- Use a convenient device that will allow you to reach the ceiling. You can use a stable stepladder, table or stool. Be careful when working to avoid falling. Do not hold on to the ceiling covering or the lamp itself, otherwise there is a risk of injury and damage to the canvas.
- If you need to remove a halogen lamp, use thin gloves to avoid leaving marks on its surface. Otherwise, the device may overheat.
Mistake #7 Spare light bulbs
Always buy spare LED bulbs from the model you originally chose.
The fact is that in our rapidly changing world, in just a year or two you simply will not be able to purchase exactly the same copies. Manufacturers, in pursuit of trends and in order not to lose growing markets, very quickly modernize their entire line.
As a result, a year later you come to the store to replace burnt out light bulbs, and they tell you: “Sorry, the supplier no longer produces this model. But we can offer you our latest smart developments!”
Why do you need this if they do not match the parameters or design of existing lamps?
Therefore, the best way to avoid problems for several years to come is to buy spare copies in advance.
Types of lighting fixtures
The modern market for lighting devices offers a large number of types of light bulbs, among which the most famous and widespread are:
- Incandescent lamps are an outdated type and cannot be used for suspended ceilings due to the surface temperature being too high. In addition, this type consumes a large amount of electricity and has a short service life;
Light bulb with filament Source stroy-podskazka.ru
- Luminescent - popular “housekeepers”, so named because of their modest electricity consumption, give a good luminous flux, practically do not heat up during operation, but at the same time they flicker and pose a health hazard due to the mercury content in the bulb;
Housekeeper type light bulbs Source elektrik-a.su
- Halogen lamps are an improved analogue of classic light bulbs, in which gas is added to increase the brightness of the lighting. The products are sold at reasonable prices and have an increased shelf life, while their disadvantages are largely the same as sources with filament;
Halogen light bulb Source strojdvor.ru
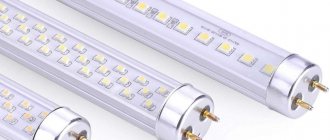
- Based on LEDs - the most economical and safe type, characterized by a long service life and good light characteristics. Such devices do not flicker and do not pose a threat to the environment. The only drawback of the devices is their high cost, although recently there has been a gradual decrease in cost.
Light bulb based on LEDs Source ledosvet.com
Types of socles
Lamps for ceiling lamps differ from each other not only in the light source, but also in the type of base. The following variants of the latter are common:
- Screw - most often used in incandescent lamps, it is a thread for screwing in the device;
Lamp with screw base Source asutpp.ru
- Bayonet is a variation of the previous type, here protrusions are used on the base, which are placed in the corresponding grooves of the cartridge;
Bayonet type base and cartridge Source elektrik-a.su
- Pin is the most modern type, which is installed on halogen and LED devices. There are a large number of its forms and variations.
Light bulbs with a pin base Source oboiman.ru
Technical aspects of installing LEDs instead of halogens
The process of installing LED lamps in a chandelier instead of halogen lamps comes down to changing the power circuit. Here are a few solutions.
Option 1
Complete replacement of power supplies. This is the most expensive upgrade option, but also the most reliable.
Transformers are removed from the lamp body and a DC converter for LED is inserted. Its power should exceed the total power of all lamps by 1.5 times. Large chandeliers may have several circuits, each of which has a separate operating mode (chandeliers with remote control). In this case, you will need a separate driver for each circuit.
Installing LED drivers instead of transformers
Also, if you can’t get by with just one device, you can divide 1 circuit into groups and power each with a separate driver. In this case, the input of all blocks is connected in parallel: the phase wires are collected in one node, the neutral wires in another.
If this is your option, at the end of the article there will be a video that shows in detail how to change halogens to LEDs in chandeliers with multiple circuits.
Option 2
Simplest. Replacing halogen lamps in a chandelier with LED lamps with built-in rectifiers operating on the same voltage as in the original version.
Here, in general, there will be no need to carry out any work - it will be enough to install diodes with the same base in place of the halogens. You can find out what type of LED lamps you need by looking at the markings. Letter designation AC/DC.
The disadvantage of the method is insufficient illumination due to the voltage drop on the internal bridge. We can increase brightness by increasing power.
Designation of LED bulbs with built-in rectifier
Option 3
Models of LED lamps operating on 220 volts are selected. They are connected in parallel, from the household network. It is necessary to remove the step-down transformers and directly power the lamps. No other auxiliary devices are needed.
Important! If the chandelier worked on 12-volt halogens, and we install ice with a rated voltage of 220V (with a built-in driver), then you should be prepared to replace the connecting cables in the chandelier. If they are not designed for such a current, at best we will simply burn them, at worst we will triple the fire
Converting a chandelier with halogen lamps to LED lamps with a built-in driver
How to replace a lamp in a ceiling light
The work of changing a lighting fixture in a suspended or suspended ceiling is practically the same. You need to follow a few simple steps:
- Find the latch, made in the form of a metal ring, and, pulling the ears, carefully remove it from the lamp. After this, the lamp will fall out of the base and hang on the socket.
- Disconnect the device from the base and carefully lift it out of the ceiling, being careful not to squeeze the bulb too hard. For halogen types, be sure to use gloves; you can also use adhesive tape.
- If the lamp does not provide for the possibility of replacing lamps, it must be completely dismantled and then a new one installed. To do this, gently pry the body of the device from the side, after which the springs that hold the device in the ring will appear. To avoid damaging the ceiling, they are slightly bent inward, which allows you to safely remove the lamp.
- Install the lamps in the reverse order - insert them into the base, lift them to the level of the base of the device, and then secure them in the ring with a metal spring.
- When replacing a lamp, it is mounted in the ceiling, tucking in the ears.
Dismantling options
Depending on the purpose, the chandelier can be removed for:
In this case, the dismantling option will be completely different for each case. So, to replace a light bulb, it is not at all necessary to remove the entire structure; it is enough to remove the lampshade, which can be dismantled by unscrewing the bolts, unscrewing the threads, removing the spacers or pressing the clamps.
If you need to wash a chandelier or perform finishing work, and the device is removed temporarily, and a socket with a light bulb is installed for the period of cosmetic repairs. In this option, dismantling is also partial, since it is advisable to leave some elements in place. You only need to release the power wires to which you connect a temporary lighting fixture.
What kind of lighting do you prefer?
Built-in Chandelier
In the case of a complete replacement, all elements are dismantled. And if the fastening structures interfere with the newly installed equipment, they are also removed.
How to remove a damaged lamp
The process of dismantling a lighting fixture becomes much more complicated if its integrity is compromised. This is especially true for broken light bulbs, which can cause injury when removed. To avoid injury and to avoid breaking the flask into many small fragments, it is recommended to cover it with adhesive tape, and only then can it be removed from the cartridge.
The thick glass of halogen devices is less likely to break. But in this case, the danger lies in the sharp edges, as well as the gas that is inside the device. Therefore, when dismantling this type, tape is useful to seal the damage site.
Replacing broken luminescent products is even more difficult. To safely remove a burst flask, it is advisable to put a bag of thick material on it, otherwise the fragments may scatter throughout the room. If this does happen, but the base remains in its place, you will have to disassemble the entire socket, having first removed the ceiling panel of the lamp.
