If earlier installing an intercom in a private home seemed like something expensive and special, now it is done by default. As a result, natural changes have occurred, because the question of the need to connect an intercom in a private house has changed to installing an intercom with your own hands, which, although slightly, reduces costs. For more information on how to connect an electromechanical lock and properly connect an intercom, read the article.
Features of installing an electric lock
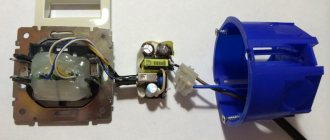
Breakdown of wiring connections by color
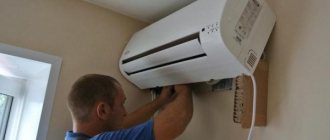
To connect an electric lock, you will have to spend from 45 minutes to 2-3 hours - it all depends on the type of lock, as well as the necessary experience. Overhead mechanisms are easier to install, but mortise ones are much more difficult. But if you had to work with a grinder and a drill, then there should not be any special problems.
To connect an electromechanical lock you need:
- Buy the locking mechanism itself;
- Prepare a hammer drill or drill;
- Apply markings.
Most often, the device is mounted using a T-shaped corner that connects the frame and profile. To do this, you must first mark the locations of the holes for the fastenings.
This stage is considered the most responsible. The accuracy and precision of this work affects the further connection of the electromechanical lock. Immediately after marking, you can make holes for the screws.
Then you need to drill holes in the door frame through which the electrical cable will be laid. The same work must be done on the opposite part of the door: where the profile connects to the frame.
Connection diagram between electric lock and controller
The cable must be routed to the mounting box on which the call unit and reader will be installed. If there are places where the cable bends, then you need to place it in a specialized channel. This is especially true for those locks that are installed on gates.
Then, continuing to connect the electric lock, you need to position the counter part according to the specific design of the door frame. This can be done in several ways:
- Using a grinder, cut an opening of the required size in the door frame;
- Place metal plates under the mating part;
- Connect the video intercom to the call panel.
How to connect an electric lock and a video intercom?
Connecting the lock to an intercom device
The easiest way is to connect the calling panel to the monitor. Such a system does not require additional elements, only a connecting cable. It is best to use twisted pair for wiring. This product consists of several pairs of insulated cores that are twisted together.
The calling panel is connected at a distance of one and a half meters from the floor. And the video intercom monitor should be connected at the most convenient height.
To connect a device over a long distance, you need a special combination cable that can simultaneously transmit audio and video signals, as well as electricity. This cable contains several flexible cores of different colors, one of which is braided with copper wire.
To carry out installation, you need the correct connection diagram. Mostly on the calling panel and video intercom, all terminal contacts are designated by color or numbers. Monitor and call panel colors may vary.
There are models of video intercoms in which the lock is connected not to the intercom, but to its monitor. In this case, the connection diagram will not change too much.
Connecting the lock to the monitor
The main advantages of electromechanical locks
Although the instructions for installing such a lock may seem very complicated, such devices have many different advantages, among them it is worth highlighting:
- High reliability;
- Durability;
- Possibility of use in different conditions;
- Price;
- Ease of combining electromechanical circuits with other security systems.
You can find out how this lock works by watching this video:
By installing a video intercom on the gate and fulfilling all the conditions for connecting an electric lock, you can get rid of the need to leave the house to let a visitor in.
When contacting our company, you can be sure that:
- We offer the best intercoms for a private home with a camera, which is confirmed both by their full compliance with existing quality standards and by numerous positive reviews from our customers.
- Professional advice on the purchase and installation of products, installation and configuration of intercoms, their warranty and post-warranty service.
- Reasonable prices for intercoms for a private house with a lock, flexible system of discounts.
Having ordered a basic set of intercoms, the client can count on the fact that in a short time a team of our company’s employees will go to the site, calculate the optimal location of cameras and call panels, install the intercom and communication paths, and also, at the customer’s request, install additional equipment (electrical locks, audio tubes, video surveillance, etc.).
It’s now easy to secure your home – and we know how to do it at the highest level!
Everything that was once analog can become digital
In our previous articles we have already compared analog and digital technologies. In particular, we looked at IP telephony, IP television and IP video surveillance, and it must be said that these are not the last “IP representatives” of modern devices. Thus, opening the intercom from your phone no longer seems impossible.
IP intercoms are a convenient access system for both private and apartment buildings. They differ from conventional intercoms primarily in their integration with the home network. The connection to the router occurs via a standard twisted pair cable or via Wi-Fi if the device supports wireless communication, and communication between the components of the IP intercom occurs via the SIP protocol. This scheme is very similar to connecting digital video surveillance and telephony, and with some additional options, the intercom can work as an alarm and security system, which is more like an access control system than just a device that opens the front door.
- Remote access. Connecting an intercom to a phone, tablet, computer and other devices.
- Forwarding audio and video communications to home network devices.
- Equipped with a motion sensor.
- Saving video recordings to an external drive or other device.
- Integration with various network systems: smart home, alarm, home automation, etc.
We will install a wireless video intercom for a private home efficiently and on time!
Installing a video intercom in an apartment, house, or office has a number of advantages:
- does not require laying wires for connection, can be installed when finishing is completed;
- installation is available to any consumer;
- it is possible to connect multiple monitors;
- The range of reception of the video signal by the monitor with which the video intercom is connected is 100 meters or more.
The action of a wireless video intercom is equally productive for residential and non-residential properties.
This equipment can withstand temperature fluctuations from -40 to 50 degrees. It is problematic to disable it, because it is installed without the use of wires.
If necessary, the monitor from a wireless video intercom can be moved from one room to another as needed without reconfiguring. The system is able to work effectively in conjunction with motion sensors and electrical equipment of the door lock.
It is not difficult to purchase a wireless video intercom today; a variety of models of different price categories are presented in specialized departments for the sale of security equipment and online stores of professional electronics in the capital.
This unique equipment allows you to equip any premises with modern means of protection and control without significant costs and technical difficulties.
Our company offers installation of various types of video intercoms; we employ experienced professionals and we will select the appropriate option specifically for your conditions and wishes.
It is now important to install this equipment in any premises, and even more so in detached houses. Wireless video intercoms for a private home will be the most convenient; they will provide comfort in use and will guarantee your safety.
Installation
Now let's talk about how to install this entire system yourself. First you need to install the video intercom screen. It operates on a 220 V power supply, so there must be an outlet nearby. The wires for power supply, control of the locking mechanism and transmission of information from the calling panel are inserted into the socket box, where the device will be placed. The height at which installation should be carried out should be at human eye level (1.5-1.6 meters from the floor).
The next step is to connect the call panel. It is usually installed on stable structures: a gate post or the wall of a building. There is no need to mount such a device on an unstable object, because permanent shocks and vibrations can easily move the lens, which is located inside the housing.
Direct installation is carried out as follows:
- First you need to remove the back cover from the calling device;
- then the places for drilling are marked;
- the necessary holes are drilled and another one is made - for the cable exit;
- Now you should connect the cable to the contact strip of the calling panel and lead it into the building directly to the control device;
- the installed cable should be connected to the locking contacts.
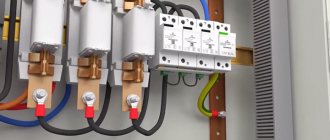
The next stage of installing a video intercom with your own hands in a private house or in a high-rise building will be the installation of an electromagnetic type lock. This is a key element of the entire system. We are talking about a data control unit of a lock type. It protects the lock coil from the permanent supply of electricity. If it is not included in the package of such a gadget, you should definitely purchase it separately because without it, the electromagnetic locking coil can break very quickly.
Considering the location of the control unit, the connection will be made according to different schemes.
- In the first option, a two-wire wire from the device goes to an electromechanical lock and it can be controlled from the call card.
- In the second option, 4 cables will connect from the video panel to the electromagnetic lock. To be able to activate the lock, the necessary wires must be connected in parallel from such a panel to the control unit.
The next stage is installation and inclusion of the power supply into the system. It should be noted that according to fire safety regulations, all electromechanical products must become open when the power supply is turned off and release the locking systems for manual opening. Simply put, thieves only need to turn off the power supply to the building in order to safely enter it.
In many video intercoms, the power supply is intended only for the video panel. And if you purchased an option that involves connecting various additional devices, then you will need to have a powerful centralized power unit, which should ensure its uninterrupted operation.
Choosing the power of such a device is generally easy. You should sum up the total load of all the gadgets used and add about 20 percent to the result. The connection must be made from the contact strip, which is usually located on the left side of the block. A pair of wires should be laid to each part.
The last step before using the video intercom will be recording key passwords into the gadget’s memory. Regardless of the category of keys or magnetic cards and reader model, each set contains a master key. It should be configured at the very beginning and not used under any circumstances.
Setup is relatively easy. After starting activation of the device, it will give a light or sound signal. At this moment, you should touch the contact-type reader with any of the keys available and hold it in this position until the signal disappears. After this, this particular key will give the person administrator rights on the gadget. That is, this is the only way he will be able to record blocking keys and change system settings.
Features and benefits of wireless video intercoms for home
Wireless video intercoms are high-tech modern equipment for protecting the home from unwanted visitors. This set of devices allows the owner to control the door lock while in the room and at the same time see and talk with guests outside the door.
A wireless video intercom for a private home will be an excellent solution, as it has many advantages compared to classic options (wired and radio intercoms):
- has a shock-resistant anti-vandal housing that can withstand a wide range of temperatures;
- has no cables (the display can be carried with you without worrying about wires, and the intercom is difficult to detect and neutralize);
- Reception of a video signal is possible within a radius of up to 300 m, and audio (with an antenna) within a radius of more than 1 km;
- you can connect many handsets and monitors, and use them to communicate with each other from different rooms or premises;
- allows you to control various electrical equipment (locks, lighting fixtures, etc.).
At the same time, you can buy a wireless video intercom for a private home at an affordable price, and its installation is simple and convenient, the design is modern and stylish, and calling panels can be used in both black and white and color.
This equipment has already gained recognition when used in a variety of private and industrial premises!
By the way, now it is possible to install video intercoms for an apartment with a connection to the entrance, which will be very convenient for apartment buildings.
This equipment will reliably protect you and your property.
The desire to protect your home, cottage, apartment or business from unwanted guests, thereby securing it, is especially relevant in our world. Modern security systems help completely control access to the premises. The most common device that can turn any home into an impenetrable fortress is a wireless intercom.
A modern wireless intercom is a combination of innovative and traditionally classic security technologies.
We offer inexpensive intercoms, but only with guaranteed high quality, so by sending your application to us, you will also receive:
- The most modern device at an affordable price (for example, the price of a wireless intercom with a lock starts from 5,000 rubles).
- Competent consultation from highly competent specialists will orient you in the variety of existing models and help you choose the one that is optimal (without unnecessary and additional) for you: be it an intercom for an apartment, a dacha, a business premises or an intercom for a private home. We sell the most modern models, adapted to Russian conditions, which are not afraid of difficult operating conditions.
- Installation and connection of the intercom are carried out by our highly qualified specialists. Fast, high-quality installation of the system, regardless of the complexity of the conditions.
Video intercom installation
To install a video intercom you will need:
- socket;
- monitor;
- cable with a cross section of 0.22x4 mm;
- bracket;
- a pair of technical boxes – 2.5x1.6 cm and 1x1.6 cm;
- electronic lock;
- liquid Nails;
- cambric;
- 12 V power supply;
- call panel (with a camera and, if possible, vandal-proof).
The sequence of actions should be as follows.
Connecting a video intercom
Step 1. First, determine the location for the monitor. Due to the fact that power will be supplied to the monitor, it is advisable to mount it on the wall near the electrical panel.
Step 2. The cable is pulled to the door.
Step 3. At a pre-selected location, attach a bracket for mounting the monitor to the wall. For convenience, the monitor is installed at eye level.
Video intercom installation
Step 4. The panel is removed from the panel, after which the socket is attached with liquid nails and the cables are connected: one to the phase through the machine, the second to the zero bus.
Video intercom installation diagram
Step 5. To lay the wires in the hall, a 1x1.6 cm box is attached, then the wires from the power supply and video surveillance are pulled.
The video monitor (1) is installed indoors and displays the image transmitted by the camera on the calling panel
Step 6. The monitor is hung up and the wires are connected to it (according to the instructions):
- white for video;
- green for monitor (general);
- yellow for sound;
- red for +12 W.
In most cases, such monitors are equipped with spring contacts: they are pressed, the cable is inserted and released - the contact is clamped. All wires are pre-stripped.
If the instructions do not contain a detailed diagram, you can always find it on the Internet.
Calling panel (2) – installed outside, next to the entrance door (gate)
Step 7. Next comes the installation of the lock. It is advisable to choose an electromagnetic one, since it can function even without electricity. The lock will be opened from the inside using a mechanical button, and from the outside using an electromagnetic key.
Electromechanical lock (5) is installed on the door
The lock is installed on the non-opening side of the door leaf, the lock is installed on the opening side, but in such a way that the chamber is one and a half meters from the floor (maximum 1.6 m). To mount the camera, holes are made in the door, then screws marked “MB” are used. The holes are closed with decorative plugs.
The electromagnetic lock (4) is installed on the door frame, and a metal plate is installed on the door. Locks are classified by holding strength from 100 to 450 kg
Step 8. Then a closer is installed to adjust the speed of closing the door. Using the adjusting screws, the closing speed is set, after which the closer is closed with a lid.
The controller (3) is designed to control the electromagnetic lock. Electronic key codes are stored in its memory
Step 9. Controllers are installed. Usually they come in a pair - one controls the lock, the second controls the Touch Memory reader (for opening with an electromagnetic key). The last option allows you to install similar videophones in apartment buildings, but with a preliminary reading of all entrance keys.
Exit button (6) is installed to open the door from the inside
The power source (necessarily stabilized) is connected to an energy-saving lamp and mounted under the ceiling.
The electronic key reader is designed to read the code from the electronic key and gives a command to the controller to open the electromagnetic lock
Step 10. All wires are connected (using the good old “twisting” method) and insulated with heat-shrinkable cambric.
Keys for video intercom
A wireless intercom for a private home with installation and at a discount is an excellent choice!
An electronic intercom mechanism such as a wireless intercom for a private home is installed by owners of private properties in order to ensure a safe stay on their territory.
Thanks to the device sold by our company, unauthorized persons will not enter his home without the owner’s consent.
When deciding on the choice of modern technical means to protect a premises: an office building, a warehouse, an apartment, or a private home, alarm installation specialists advise paying attention to a wireless video intercom. Our company recommends the installation of this particular equipment to solve priority problems in protecting home ownership.
| to the foreman by phone |
| +7 or +7 (available via WhatsApp) |
By purchasing wireless intercoms for a private home, you not only protect the family home, but also create comfortable conditions in it. Now you don’t need to give up important things in order to leave the walls of the house in order to open the door on the street.
If you need to carry out complete visual control over your possessions, it would be most advisable to buy a wireless intercom for your home in Moscow, which has a variety of functionality.
You will be able to see your interlocutor and talk with him. Outdoor cameras are endowed with the ability to view a large space and maintain infrared illumination, so nothing will go unnoticed.
In addition to many functions, the intercom for a private home has an attractive appearance that will decorate the interior of the home. The assortment of the model range is pleasantly surprising, so with us you can get black-and-white displays and color devices with clear images, push-button and touch-sensitive types of equipment, with standard panels and ultra-thin ones. Our prices are quite reasonable.
An IP intercom system for a private home allows you to receive and answer calls via a tablet inside the house, and remotely using 3G/4G. The door can be opened even if you are in any corner of the planet.
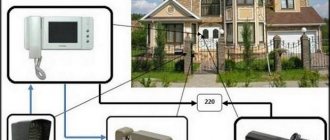
Types of intercoms and general connection diagrams
A modern intercom is a device not only for a conversation between the owner of a home and his guest. Smart communicators provide the opportunity to examine the visitor, ask him questions and get answers to them, and remotely open the lock on the entrance doors. The complete list and level of service depends on the specific modification of the device.
Apartment intercom
In general, the connection diagram for an intercom for an apartment building is as follows:
The figure shows that in the multi-user version of the intercom system there are additional switches that direct the signal to the required apartment. In addition, the wiring is carried out using a multi-core cable, the number of conductors in which corresponds to the number of connected subscribers. Audio and video signals go through separate wires, and this further complicates the connection of all elements. More advanced systems use multiplexing systems or a digital communication format, which requires quite high qualifications from installers.
A multi-user system is quite expensive and is usually purchased for collective use by pooling. Specialists who know well how to connect a video intercom to each apartment are invited to install it.
Individual use intercom
The speaker system in individual cottages and private houses is built completely differently. Since only one family owns such a house, only one set consisting of indoor and outdoor speakerphones is enough to organize communication. Many modern units allow you to connect an additional handset or a second terminal for placement on the second floor, in the garage or other desired location according to the needs of the home owners.
Unlike a multi-user system, installing an intercom in a private house is not very difficult and can be done by any electrician or other person with electrical installation skills. How to connect an intercom of a specific model is always explained in detail in the manufacturer’s instructions, and such work usually does not cause any particular difficulties.
The figure shows all the elements of a simple speaker system for a private home. It clearly shows how to install an intercom in a private house. The system includes:
- home speakerphone (1);
- power supply (2);
- external calling button-speaker (3);
- electromechanical or magnetic lock (4);
- communication cable.
Depending on the specific conditions and brand of device, this scheme may be based on different configurations. Let's look at the main components.
What type of lock do you prefer?
The electromechanical version of the lock is a modification of a simple lock in which the retractable latch can be opened either by a key or by an electromagnet. In the simplest versions, the electromagnet is placed separately from the lock and connected to it by mechanical traction.
- the gate or entrance doors will be locked even during a power outage;
- If it breaks, the lock can be replaced with a regular one of similar design.
Disadvantage - like any mechanism, such a lock requires constant attention, lubrication and adjustment. Considering its external use, the service life of such a lock is much shorter than an electromagnetic one.
An electromagnetic lock is a magnet with a very high pullout force. It is installed on the fixed part, and on the door itself there is a magnetic plate that is attracted to an electromagnet. The tearing force of such a lock is 200-300 kg. When you try to open such a door, the handle will most likely come off, but the lock will still firmly hold the door leaf.
A very strong argument in favor of the electromagnetic system is its mechanical strength and stability. Since there are no moving parts of the mechanism, the lock can work forever, and it practically does not require attention to itself.
The main disadvantage is that if the power goes out, the door becomes unlocked. Therefore, electromagnetic locks are installed on gates and gates, but not on the front door.
Communicators
External and internal communicators can have only audio or simultaneously audio and visual communication channels. The external speaker button usually houses a speaker, microphone and camera. The internal speaker also has a screen on which you can see the guest’s face.
Connecting a video intercom to additional external video cameras significantly increases the visibility and control of the situation behind the front door. There is a special button on the internal speaker to open the doors. A number of products provide the ability to connect additional handsets, alarms and trigger alarms.
Select and buy an intercom for a private home
Can you help me choose?
The link contains a catalog of all our intercoms.
| Find out the exact cost of installation by phone |
| +7 or +7 (available via WhatsApp) |
| Commax video intercoms | Falcon EYE video intercoms |
| HiWatch video intercoms | Video intercoms KENWEI |
| Video intercoms KOCOM | Video intercoms Optimus |
| Polyvision video intercoms | Quantum video intercoms |
| Video intercoms RVi | Video intercoms SLINEX |
| Smartec video intercoms | Tantos video intercoms |
| Video intercoms TORNET | Video intercoms in AHD format, Promo series |
Buying an intercom for a private home in Moscow is no longer a problem - our virtual portal has taken care of not only a wide range of products, but also easy, comfortable conditions for ordering and subsequent installation.
Connecting a video intercom to an entrance intercom
If there is an intercom on the entrance door, and you installed yours on the apartment door, then they can be combined. At least you will have one less pipe in your apartment. To connect a video intercom to a driveway, it is enough to connect the calling panel of the first one to the camera of the second one. Intercoms have an interface unit that you can use to make the necessary connection. This block occupies one of the outputs available in the video intercom.
At the same time, thanks to it, it is possible to connect the camera located in the entrance intercom - and specifically to this block. You can also connect an audio channel if desired. However, remember that the interface block can be either external or internal. And the internal one is more reliable: it is not only hidden by other panels and makes it possible, if desired, to connect several additional panels to the video intercom, but also allows you to adjust the video signals when connected, and this is a definite plus for places with poor lighting.
Intercoms for a private house - basic functions
Currently, modern housing cannot do without a special security entrance device. For a long period of time, an ip intercom for a private home was classified as a security system. And yet this is a fallacy. An intercom is only a means of restricting access and ensuring comfort.
Do you want to purchase an intercom for your office or for your home? Then we recommend that you visit our online resource and get acquainted with the activities of our company.
The team of our company employs people who know very well what an intercom is, are familiar with the principle of its operation, know how to install it correctly, how to correct errors in its operation or repair it in case of breakdown.
By contacting us, you will not only receive a good and high-quality device, but you will also be able to ask your questions, call at any time in the future and consult with our specialists or call them to analyze the condition of the system on site.
Possible faults
During operation of the intercom system, various malfunctions may occur:
- mechanical damage to the tube;
- When you pick up the handset, the signal continues to sound;
- failure of the lock release button;
- the voice of the caller is hard to hear;
- if you press the door open button, the call is dropped.
In the first case, it is easier to replace the damaged part (pipe), because they are not so expensive. The main thing is to choose the right intercom for your intercom system model. In situations where the call signal does not turn off when the handset is picked up, there is no connection with the calling visitor and there is no reaction to pressing the lock control button - look for a breakdown in the handset switch. You can repair or replace it yourself, however, it is still recommended to entrust this to professionals, especially if you have never done anything like this before. This procedure requires some experience and appropriate tools.
If you have to press the electric button several times to open the lock, the microswitch is to blame. It is not difficult to change this part yourself, even if it is located on the intercom handset
It is enough to carefully unsolder the contacts of the faulty part, remove it and solder a new one. If the visitor is hard to hear, the problem is in the speaker or microphone
In some models, such a malfunction may be caused by a clogged “Balance” resistor installed on the intercom handset board.
Unauthorized disconnection of a call when the lock is unlocked may be caused by an interruption in the electrical circuit coming from the speaker. In this case, carefully inspect all cable connections - both on the panel and on the intercom. Of course, turn off the device first. If there is a break somewhere, you need to replace the wire or solder the contacts of the wire and terminals. To summarize, we can say the following: in many cases, you can replace a damaged tube of both a digital and a coordinate matrix intercom yourself; this is a fairly simple action. Only in some cases is it worth calling the adjusters of your intercom system.
To learn how to connect different intercom handsets, see the following video.
Parts of an intercom system
Depending on the principle of power supply, the type and number of system components, it is customary to distinguish the order, as well as the required method of installing the video intercom. There is a certain order in the location of the blocks, which makes it possible to use the equipment as comfortably as possible.
Call panel
The first step when installing an intercom with your own hands is to install the call panel. Without this block, the access system is completely meaningless. There are different types of call panels:
- panel with only a call key; it is impossible to control the lock from the panel;
- call panel and built-in key reader;
- panel with a video camera.
As a rule, the call panel is installed at a height of 1.5 meters from the ground. This arrangement of the device makes it possible for persons to use the panel freely, regardless of height. Among other things, if there is a camera on the panel, it is easier to identify the guest from it.
power unit
Unfortunately, there is no most complete answer to the question: how to connect a video intercom. The fact is that in modern systems there are 3 types of power distribution:
- connection via 1 cable, with a built-in converter in the intercom or on the internal monitor;
- power supply with an external unit, which is installed in the house;
- installation of a separate power supply to which the call panel is connected, as well as an electromagnetic or electromechanical lock.
However, some types of power lines have certain restrictions. For example, if a video intercom is connected via twisted pair, then the length of the route should not exceed 100 meters.
Lock
As for the system lock, it is selected based on the required functionality. As a rule, electromechanical locks are most often used in apartments. Even if the power is turned off, the lock will still remain closed. The best type of lock is one that can be opened manually with a key without power.
If you take an electromagnetic lock, it will open automatically when the power is turned off. For public institutions, such a lock is an ideal solution, which cannot be said about apartments.
Even if the owner prefers an electromagnetic lock in the apartment, care must be taken to additionally install an uninterruptible power supply in case of a power outage in the main network.
Screen (main panel of the video intercom)
All modern intercoms are equipped with flat, convenient monitors. Older models are equipped with lamp-backlit screens, while modern ones have LED monitors. Among other things, there are models that can be connected to a DVR. For this purpose, analogue or digital signal transmission interfaces are provided.
The monitor, like other parts of the video intercom, is installed according to the recommendations provided by the manufacturer. It was previously said that the monitor can serve as a head power distributor
Therefore, special attention should be paid to the installation of this part of the system.
On sale you can find video intercoms not only with a built-in camera. There are models in which the web camera is chosen by the owner himself. This connection diagram for a video intercom allows you to expand the functionality of the device.
Cable production
Expensive models of video intercoms come with a set of wires. This eliminates the problem associated with selecting conductors. In general, video intercoms are equipped with three types of lines:
- multi-core cable - makes it possible to distribute power between different components of the device. Some types of cables can be laid directly in the ground, through the air - without additional protection;
- coaxial cable – allows you to transmit audio and video. With such a conductor, the line length can be significant;
- twisted pair – used when transmitting signals from digital devices. For these purposes, a regular cable that is allowed to be laid in the open air is suitable.
Please note that cable connections, regardless of its type, must be made in strict accordance with the device manufacturer’s recommendations. This work does not require any special skills.
To figure out what kind of conductor is needed to connect a video intercom, the cables are specially marked using colors: the cores are marked in different colors, and the terminals of the system nodes have terminal combs that help make an accurate connection.
Soldering is not used to connect cables. However, to protect the conductor from moisture and other influences, it is best to use a copper cable.
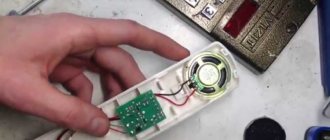
Installing an intercom handset
The last step in the process of installing an intercom device is installing its handset. This is a simple operation that is quick compared to all previous installation steps. Marks are made on the wall for future fastenings. Holes are drilled along these marks. Dowels or wood chips are driven into the holes. Next, self-tapping screws are screwed into them. Wires are connected to the intercom, and it is sent to its place.
If everything has been connected/connected correctly, the device can be used immediately. If it doesn’t work, it means the installer deviated from the instructions somewhere and did something wrong. Will have to check and redo
How to install an intercom
Installation can be wireless or wired.
In the first case, the intercom can be easily installed by connecting the system to an outlet or to a battery. Next, you should proceed according to the instructions.
Read here! How to choose a humidifier - instructions for finding the best devices and their use
One of the disadvantages is that there may be a loss of communication in the presence of various interference that can be created by routers or any radio-controlled devices.
In the second case, you will have to find out for yourself all the features and nuances of the cables coming from the main station. On the positive side, it is noteworthy that such an intercom will not run out of power and the connection will not be lost.
Components of an intercom
This device consists of several main elements that allow you to contact subscribers and control access to the entrance.
External panel. A key reader is installed on this panel. This device works as follows: when a key is applied, the code is read and compared in the microcontroller base. If there are matches, the door opens. The panel is equipped with buttons with numbers from 0 to 9 and two functional ones, usually * and #. This mini-keyboard allows you to access the entrance or use the service menu. In the service menu, you can include a specific key in the microcontroller base, turn on and off service by the system for certain apartments. All actions of the reader and buttons are reflected on the screen of the external panel.
External intercom panel
- Inner panel. Depending on the cost of the system, audio or video intercoms can be installed. The cameras do not have to be built into the external panel; they can be used separately. For example, a camera is added to the general simple system directly next to the apartment itself. Having called the owner from the street and gaining access to the entrance, the guest will have to pass another barrier - a video intercom into the apartment. An intercom configured in this way allows you to control people who have entered the entrance in an incomprehensible way.
- Switch. This part serves as a kind of information distributor from the external panel to the tubes. Depending on which apartment number was entered by the guest, the switchboard sends a ringing signal to the corresponding subscriber. The operation of the switch depends on the type and connection scheme of the handsets.
Switch
- Entrance exit button. Allows you to open the door from the inside of the entrance. Usually this element is more convenient when it is backlit.
- Lock. An intercom connection with an electromagnetic and electromechanical lock is used. An intercom with an electric lock is more reliable.
The intercom comes with its own lock.
Advantages of a wireless intercom with a lock
There are several types of intercoms, for the installation and operation of which modern technologies are used.
To simplify installation, you can buy a wireless intercom with a lock in Moscow. Its installation process does not require the use of special cables. Wireless technology is popular for equipment that works with video cameras (video intercom).
A wireless intercom differs from conventional equipment only in the absence of wires. Users are attracted by the speed of installation (installation and configuration takes a couple of hours). The reliability of the equipment does not decrease; moreover, outdoor wireless intercoms increase the efficiency of the existing security system. The absence of a cable line reduces the risk of intentional or accidental damage to equipment.
Wireless intercoms operate using a Wi-Fi connection. Via a local special network, you can transmit data received on the calling panel. You can receive calls on equipment connected to the network with the software installed. This could be a desktop or laptop computer, TV or telephone.
Manufacturers offer individual and entrance intercoms. The first ones are used for access only to one of the apartments, a small office space or a private house. Access equipment is designed for multi-storey buildings with dozens of active users. A wireless intercom installation scheme for one apartment can be used together with a conventional wired connection for the entire multi-storey building.
Connecting the cable
If the kit does not include a connection cable, you will have to purchase it separately. You need to choose a combined wire. This will allow you to connect to both the power supply system and the video intercom system. The passport supplied with the lock should indicate which brand of cable should be used. You need to determine the required footage yourself by taking measurements.
It is best to lay the wire from the gate to the house in the shortest possible way. Indoor and outdoor devices are connected in several ways: over the air or underground.
If it is necessary to pull the wire through the air, a tensioner should be used. Steel wire is suitable for this. This measure is necessary to prevent wire breakage during icing and strong gusts of wind.
Laying the wire in a metal sleeve with PVC insulation
The height at which the lock needs to be placed, as well as a detailed diagram for connecting the device, is indicated in the product data sheet.
Advantages of wireless equipment
- Compactness
- Mobility
- No long cables
- The exterior decoration of the premises is preserved
- Stealth
- Stable and uninterrupted operation
But to install a wireless security system, you need to have certain knowledge and professional tools. Now there are many companies in Moscow that sell such devices, whose employees also provide installation services.
But we recommend contacting us - we have been on the market for more than 10 years and have gained enough experience!
Selecting compatible devices
If the devices - the calling panel and the intercom monitor - are analog, most likely they will be compatible. Analog devices use the same analog television image transmission systems - PAL or NTSC. For example, a calling panel from Polyvision and a monitor from Commax can easily become friends.
If we are talking about digital systems, then it is better to use devices recommended by the same manufacturer of the main unit. Whether it will be a general house calling panel with a built-in contactless access control system or a monitor for a private home (or cottage) - everything is decided by the cooperation of different companies.
However, in both digital and analog systems there is often a situation where both the external and internal panels of the intercom system are made by the same supplier.
Compatibility of analog and digital components is questionable. It is quite simple to distinguish an analog system from a digital one: digital ones use a simple cable (twisted pair) with 4-8 wires, or a special cable. A technology similar to PoE (power is supplied through the same cable) is becoming extremely popular in digital video intercoms.
We install intercoms in turnkey cottages!
Cottages, dachas and just country houses need round-the-clock protection from intruders. And the intercom has a very cunning device that cannot be hacked. You can buy an intercom for a cottage in Moscow from our company. We offer only high-quality, advanced electronics to choose from, and also install intercoms in cottages.
The contactless intercom has become a very popular model. Its main function is the same, but in practice it has become much more convenient. It is triggered by magnetic influence even without direct contact with the key. It is enough to approach the intercom with a magnetic key fob, and it immediately opens the door. This is very convenient when your hands are busy.
This type of intercom is also convenient for children who want to get home, but cannot reach the electronic indicator.
Start installing a video intercom
Installing a video intercom in an apartment begins with choosing the location of the calling panel. An important point is the installation height. The person making the call must be comfortable doing this in order to avoid strong downward bends or upward pulls; the average installation height of the calling panel is 1.5 meters. This value can be absolutely anything, but this indicator is the most common in modern practice.
In appearance, the panels are radically different from each other; the following elements can be installed in the housing:
- Built-in video camera;
- Illumination (IR), allowing image transmission with a weak light source;
- Element that controls the lock;
- Negotiation elements: Speaker;
- Microphone.
Additional devices
In order to increase the level of security for the apartment, you can install an additional video camera to the one built into the video intercom calling panel. This will allow you to see not only the person standing opposite the call panel, but also, if you additionally install a camera under the ceiling, the entire area of the room directly in front of the door.
Note: if the installation of a video intercom is carried out in a private house, therefore, the installation of the calling panel will be carried out on the street, you need to think about protecting it against moisture, snow and other possible weather conditions. If you cannot integrate the equipment into the fence wall, then the best option would be to create a hinged canopy. The calling panel circuit has a fairly simple structure, which does not require additional special work to protect it from various types of influences.
The next step is to select the wires with which you can connect the calling panel to the monitor. When the distance between the components of the system is less than 35 meters, the ShSM wire is suitable, combining cores for broadcasting video, sound and 12 V power. In cases where it is necessary to lay a longer line, it is better to use a coaxial cable; it will also connect additional cameras when they availability. The wires running from the video intercom calling panel to the lock must be of the ShVVP type.
ShSM, coaxial and ShVVP cables
Wireless video intercom
A wireless video intercom with a connection diagram is shown in the figure below. A distinctive feature of this model is the absence of wires between the monitor and the calling panel.
The next important element of the entire system is the monitor. How well it will be located indoors will depend on the convenience of using it and the speed of answering an incoming call.
The dom ds-10s video intercom offers the following monitor option:
Modern design, great functionality, device configuration is carried out on a convenient and understandable interface.
TV as a monitor
There are situations when you don’t really want to go to the monitor to answer the call signal (if it is located at the front door), but there is a solution. Below we will describe how to connect a video intercom to a TV, which can easily replace a monitor. Modern TV equipment manufacturers include this function in their products. The implementation of this scheme when connecting a video intercom with your own hands or with the help of specialists is possible thanks to the use of a special module.
With its help, when there is an incoming call, you can switch the TV to a specific channel assigned to the video signal from the intercom camera and see who made the call. It is also possible to connect several cameras, with expanded functionality of the module used.
Installing a video intercom with your own hands should not take much time if you understand all the schemes and have the skill to work with the tool. To install an intercom with your own hands in a private house, it will take a little more time, which will be spent on laying the cable from the fence of the house, where the call panel will be installed, to the interior. In this case, it will be necessary to take into account which route the wire will go through: through the air or in the ground, which will affect its integrity and accessibility, and will also help to avoid unexpected damage.
How to install an intercom with your own hands in an apartment will become clear after reading the material above. In this case, the wire footage will be minimal, and therefore, the main work will be carried out with the installation of the calling panel and monitor.
Installing an intercom is quite a serious procedure, as it may not seem at first glance. The safety of the premises and people will literally depend on the successful completion of installation. Those inside. Therefore, a possible option is to install a video intercom in the apartment by professionals.
Tags: , automatic, sconce, view, internal, choice, switch, house, , clamp, bell, cable, like, computer, crown, , magnet, magnetic, monitor, installation, power, setting, lighting, connection, rule, principle , wire, start, , work, size, resistor, repair, socket, row, garden, light, network, system, connection, means, term, circuit, ten, type, current, , smart, installation, shield, electricity, electrical panel
Required Items
When it comes to connecting an intercom with your own hands, you first need to decide on the list of tools and parts that will be useful for this. Of course, you can hope for a standard kit, which is formed by the manufacturer. However, this does not exclude the fact that it is necessary to know why and how each of the elements should be used. It usually includes:
- intercom;
- power supply: external or built-in;
- calling panel: the version differs from the type of intercom;
- video terminal.
Electric locks may or may not be included in the kit. It all depends on the manufacturer and budget category of the purchased device. However, they also differ in type:
- Electromagnetic. They are locked as long as electrical current flows through them - a built-in coil. Their design involves a feature that manifests itself in the automatic opening of the lock if the power supply stops. This imposes on the owner the need to have a backup energy source, which can be a battery or a generator. Failure to do so may result in the opening of gates or doors.
- Electromechanical. They are more carefully designed than electromagnetic locks and click mechanically. They open only when using an electromagnet. It is noteworthy that there are two types: latch and with a key cylinder. It’s hard to talk about the direct superiority of each of them, but the cylindrical type is often used in country houses because it allows you to open or close the door independently even in cases where no one is in the house.
When talking about connecting an electric lock and its two types, you must also take into account the fact that they always consume a lot of energy. In the case of an electromagnet, regular power supply is required, which is not always possible to achieve.
It is also necessary to take into account not only the technical characteristics of each type, but also the external conditions in which they will be used. If we are talking about the Russian Federation, then a cold climate will in some cases entail greater consumption, as well as the need to use electronic keys instead of mechanical ones. In addition, it is recommended to connect a door closer.
We also recommend watching:
- DIY country toilet step by step - tips, recommendations, options
A toilet in a country house is an integral part of comfort and a full-fledged existence. When purchasing a completely clean plot of land, the first thing we install is this structure. It's not only…
- Do-it-yourself wooden porch - construction experience
An integral part of every home is the porch. It would seem that the detail is insignificant compared to the foundation, walls and roof, but without it you simply cannot get into...
- DIY trellis for cucumbers and tomatoes, photo
It’s easy to make a trellis with your own hands in the garden or in a greenhouse. The support method of growing tomatoes or cucumbers in a vertical plane has several advantages. The trellis allows you to walk freely between…
- DIY polycarbonate gazebo - photos of buildings
A cozy gazebo in the country is not only a place for relaxation and picnics with friends. Such a necessary country house building can serve as a dining room, summer kitchen,…
Share with friends:
Useful tips for installing an intercom yourself
Of course, a simpler solution for installing an intercom in a private or apartment building is to contact specialized companies. But if the installation is carried out independently, then you should adhere to simple rules that will help ensure long-term and high-quality operation of the intercom system:
- for external devices (cameras, panels), it is better to provide anti-vandal protection, as well as visors that will protect the devices from aggressive environmental influences (precipitation, ultraviolet radiation, icing);
- install external devices only on fixed elements of door and gate openings to protect connections from constant vibrations and shocks;
- It is better to completely clamp the fasteners and recess the wiring after fully setting up the system and testing its operation for 24 hours;
- use the shortest possible length of electrical cables;
- It is better to purchase a power supply for the intercom separately, with a power reserve;
- All installation work should be carried out with the power turned off.
Popular brands
We have a wide range of video intercoms from several manufacturers.
Tantos
The owner of the brand is STR International Inc. (Canada). The official distributor in Russia is Tantos-Opt.
Tantos models are easy to set up and reliable
The products have the following features:
- spectacular design;
- ease of setup;
- color image;
- displays with bright LED backlighting and diagonals from 4 to 10 inches;
- 3 year warranty;
- free maintenance for 7 years;
- Some models are equipped with HD video communication.
The model range includes several dozen positions. The most popular is Tantos Amelie. Model characteristics:
- color monitor measuring 7 inches diagonally;
- touch control keys;
- video transmission format in PAL format;
- monitor without tube (Hands Free);
- number of connected call panels - 2;
- number of connected cameras - 2;
- the number of connected additional video intercoms is 3.
The inexpensive Tantos Amelie video intercom can work with two calling panels and two additional video cameras, alternately displaying images from each of them by pressing one of the touch keys
Commax
A company from South Korea, one of the world leaders in the production of security systems. Video intercoms of this brand have an affordable price, which is explained by the minimum required equipment and an optimal set of capabilities. Along with color models, black and white are offered.
The connecting wires are color coded according to their purpose:
- blue - grounding;
- yellow - nutrition;
- white - video signal;
- red - audio communication.
Commax patch cables are color-coded, which greatly simplifies the equipment installation process
Some models provide the ability to connect two calling panels. When using only one of them, the wires from the second must be insulated and hidden.
Among the most popular is the Commax CDV-35A model with the following characteristics:
- color touch TFT LCD display with a diagonal of 3.5 inches;
- speaking tube;
- number of connected additional tubes - 2 (convenient for rooms with a large area);
- number of connected additional video cameras - 2;
- number of connected call panels - 3;
- dimensions: 240x122x27 mm.
The CDV-35A model has the smallest screen among all Commax video intercoms, but it is quite enough to see the visitor’s face
The Commax CDV-70A model with the following parameters is also successful:
- color TFT LCD monitor, diagonal 7 inches;
- without a handset (Hands Free);
- number of ports for connecting cameras or call panels - 2;
- dimensions: 243x168x35 mm.
The Commax CVD-70A model allows you to connect two calling panels or video cameras and has a 7-inch diagonal display
The Commax CDV-71AM model has a similar design, but is equipped with a built-in video memory unit and allows you to connect 4 devices: two calling panels and two video cameras.
Falcon Eye
Chinese manufacturer offering color video intercoms with image transmission in PAL/NTSC format. Models with a memory card (micro SD format) store data in the amount of 32 GB. There are 16 ringing tones available.
Models that deserve special attention:
- Falcon Eye FE-Slim.
The thinnest video intercom in the world: thickness is 9 mm. Equipped with a touch screen, aluminum body; The FE-Slim video intercom has a thickness of 9 mm and a screen size of 7 inches diagonally - Falcon Eye FE-71TM.
The Falcon Eye FE-71TM video intercom can operate in answering machine mode: if you are not at home, it will play a pre-recorded message to the visitor
Distinctive features of the latest model:
- widescreen display with a diagonal of 7 inches;
- menu in Russian;
- ability to connect four color cameras;
- additional functions - photo frame, alarm clock, answering machine.
Visit
The Vizit trademark is registered in Russia, Ukraine, the European Union and many Asian countries. Its owner is Russian.
A wide range of models is offered, their features are indicated by the letters in the markings:
- C - color image;
- M - the display is equipped with video memory.
One of the most popular models is Vizit M471M, which has the following characteristics:
- color touch TFT LCD display with a diagonal of 3.5 inches;
- speaking tube;
- the ability to record up to 14,500 videos with a total duration of up to 6 hours;
- 68 polyphonic ringtones;
- possibility of connecting one calling panel and one video camera.
The Vizit M471M video intercom has 68 polyphonic ringing tones and the ability to record videos with a total duration of up to 6 hours
Vizit video intercoms display the operating mode via color indication. This simplifies the operation of the system, especially in situations where, while communicating with one call panel, a signal comes from the second.
CTV
A company with production facilities in China and South Korea. The headquarters is in England. Video intercoms of this brand are distinguished by the ability to transmit video images from the calling panel in HD quality. One of the new products is the CTV-M4104AHD model with a ten-inch screen capable of displaying images with a resolution of 1920x1080 pixels.
The CTV-M4104AHD video intercom is the first model capable of displaying high-definition video in Full HD format on a monitor.
Important points
And now - the promised seven points that you should definitely pay attention to, regardless of whether you carry out the installation work yourself or contact a specialist. This is your checklist that should be in your head.
Well, or before your eyes, written down on a piece of paper. Go!
1. Choose a location for the video intercom that you have easy access to. When we find a panel in a hallway or another room where we often stay or that we have easy access to, we will be much more comfortable using the videophone
It is also worth paying attention to the fact that the videophone monitor is installed at the most convenient level for residents. Visibility of the LCD screen at the correct angle
2. Cables must comply with the requirements specified in the manufacturer's instructions (appropriate number of wires, appropriate cross-section, reinforcement). Using multi-core telephone wires is a fairly common assembly mistake. Remember that they are very resistant to mechanical damage, they are also not suitable for installation outside, in the ground, even in a protective tube. We must also remember that we should not place cables in easily accessible places. Ideally, if they are shielded, they are insulated so that they are not subject to mechanical damage or flooding.
3. There must be a possibility of emergency opening of the door - if we do not foresee such a possibility, it may turn out that after accidentally slamming the entrance or losing the keys, we will not get to our house. It is worth installing an additional hidden opening button, especially at the gate. It can also be an external panel with coded access. Setting the input telephone
4. Adaptation of space for mounting an external intercom panel or videophone. A mistake, or rather a serious problem, is installing interconnects or videophones in older homes without first preparing niches and areas for assembly and protection of the wires. The problem occurs especially in older houses or their fences. The installation of an intercom or videophone should be planned immediately, still at the stage of installing the house or fence. Then we can, for example, in a brick counter or at the entrance, make special niches for the panel, an electromagnetic latch and prepare space for wires. Thanks to this, you can avoid awkward walls. Typically you need to run the wires inside the walls (monitoring the coupler), even if you have a wireless intercom model.
5. Make sure the lighting is correct - this can apply both to the place in front of the gate and to the entrance to the house. Typically videophones are equipped with diodes that allow images to be captured even in the dark, but they usually have a short range. Therefore, it is worth adding an additional lamp that turns on after dark, shedding light on people entering. It can be turned on using the intercom call button. The video phone lens should not be exposed to direct sunlight because the resulting image will be very blurry. It is worth considering the connection to the installation, as well as the function of turning on the lighting of the house, especially when it is quite long. A twilight sensor and a timer are useful, which limits the operating time of the lighting.
6
Pay special attention to cable routing. The cable connecting the internal and external panels of the intercom or videophone must meet the requirements of the device model (number of cores, minimum cross-section, possible need for shielding)
Often multi-core telephone lines are used for this purpose, which - due to their low mechanical strength - should not be placed directly in the ground, but rather driven into a protective tube.
An equally good, although more expensive solution is to use a YkY type power cable, for example 3 x 1.5 mm2.
When planning the route of the pipeline, it must be remembered that it will not be in a place where the surface will harden. Possible connections are made in airtight cans at a height not subject to flooding.
7. Provide a fence for the calling panel. If you plan to install an intercom or video intercom, it is worth adapting to the installation of an external panel at the construction stage
This is especially important for masonry gate posts. When placing pillars, niches must be made in them under the panel, thanks to which we will avoid cutting bricks
How to install and connect a video intercom yourself
To install the equipment, you should prepare the following devices:
- Sharp knife.
- Drills and hammer drill.
- Electric screwdriver.
- A spatula and a pike.
- Grinder and discs for working with metal.
- Screwdrivers.
- Pliers.
- Hammer.
- Container for mixing workers with solution.
In addition, you will need consumables, such as switching, sockets, a circuit breaker, screws and dowel-nails, electrical tape, cable ducts, etc.
What components will be required?
The standard configuration of intercom systems includes all elements of equipment for its correct operation. Audio devices are supplied with an external or integrated power supply, as well as a secure calling panel. The video intercom kit includes a monitor installed indoors.
Types of intercom code keys and the principle of their operation
Intercom code keys can be divided into two types: contact and contactless. The first intercoms used simple analog keys with two contacts. A resistor of a certain value was soldered inside such a key. When such a key was applied to the reader, a fixed current was passed through it, and the microprocessor system measured the voltage drop across the resistor.
If the fall fell within the specified parameters, the door opened. Such a key could be made not only by an intercom service company, but also by any person with basic knowledge of electrical engineering. Therefore, analog keys were quickly replaced by chips that transmit serial binary code. For such keys, the number of possible combinations is determined by the number of transmitted binary digits.
Contact-type digital keys can be made based on chips from different companies. One of the most common are Dallas Touch Memory chips from the same manufacturer. Depending on the microchip model, the keys have different amounts of memory and allow you to obtain a different number of numerical combinations.
Recently, many intercoms have been equipped with contactless reading devices. In this case, the exchange between the access key and the intercom is carried out over a radio channel. The devices communicate with each other at frequencies of several tens or hundreds of kilohertz. The range of such “radio equipment” does not exceed several centimeters. Therefore, the possibility of intercepting radio traffic is unlikely.