REXANT screwdriver with bit set for spot work, iPhone repair, 6 pieces
252 ₽ More details
Combination screwdriver with double-sided rod (PH2xSL6)
149 ₽ More details
REXANT solders
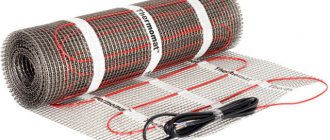
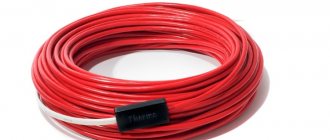
There is an opinion that to provide electric floor heating, it is enough to simply place a heating cable on it. The opinion is correct, but in this case it is necessary to take into account the varieties of this device. In addition, sometimes it is much easier and more profitable to simply place a warming mat. However, underfloor heating cable is the most common solution to this problem.
Often, it is the heating cable that becomes the choice for underfloor heating.
How to choose?
Before you think about which electric heated floor is better to choose, you should solve two questions:
- Firstly, will the heated floor be used for the main heating of the room or only as an additional one.
- Secondly, how it will be mounted: in the screed layer or on top of it.
If the heated floor becomes the main source of heat, then the recommended power per square meter should be from 130 to 150 W. If as an additional one – 110-130 W.
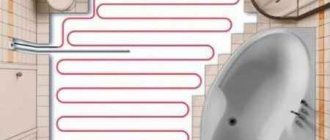
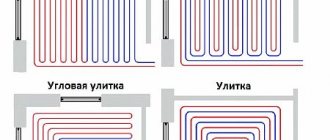
It is also worth considering the possibility of changing the power density of the floor by the distance between the loops of the heating cable. The closer the turns are, the more cable will be needed, but less powerful models can be used. In this case, the area of the heated floor should not be less than 70% of the total area of the room.
It is not the total area of the room that should be taken into account, but only the area free from massive furniture.
Another consideration when choosing cable length to achieve the required power is the type of floor covering on top of the heated floor.
There will be minimal heat loss when laying cables under the tiles. Accordingly, you can get by with less power per square meter.
Laying cables under parquet or carpet will require more power due to the low thermal conductivity of these coatings.
The type of cable also depends on the installation method. When it is located inside a cement screed, cables of any diameter can be used for these purposes.
If it is laid on top of the screed, then in this case it will not be possible to do without an ultra-thin cable
However, the ultra-thin cable has one important limitation: it is only suitable for additional heating
When selecting components for a heated floor, you must also take into account the condition of the electrical wiring. If it cannot withstand the high power of a heated floor, then all calculations and work should begin only after replacing the wiring. The next point when choosing components is the question of which cables to use: single-core or double-core
This will depend on the method of connecting the heated floor to the thermostat and the possibilities of laying the cable itself
The next point when choosing components is the question of which cables to use: single-core or double-core. This will depend on the method of connecting the heated floor to the thermostat and the possibilities of laying the cable itself.
If it is possible to evenly spread the cable over the area of the room and connect both ends to the thermostat, then it is quite possible to get by with a simple single-core cable.
However, if the configuration of the room does not allow laying the cable according to all the rules and bringing their ends to one point, then in this case the choice should be made in favor of two-core models. Cables with two cores are connected to the thermostat with only one end, while the other end can remain in any convenient place.
When ordering a heated floor, you should not forget about choosing a suitable thermostat.
Without this device, it is simply impossible to achieve the desired floor temperature. In addition, the thermostat will help significantly reduce energy costs.
In total, there are three types of thermostats.
Manual models. Their features are simplicity, low cost and minimum functionality. Their entire interface consists of a power key and a manual power control.
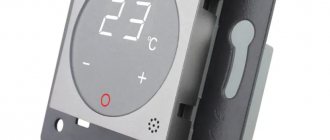
Thermostats with display. Such models are interesting because they allow you to set the temperature to the nearest degree. In this case, the current and desired temperature can be reflected on the existing screen. However, to use these features you will also need to install a temperature sensor.
Thermal sensors should be installed at an equal distance from nearby turns of the heating cable. If this requirement is not met, then setting the desired floor temperature will become impossible.
Programmable thermostats. Their capabilities allow you to set a specific floor temperature for a given period of time. For example, with their help you can automate turning off the heated floor during the daytime during the work week. In addition, some models of such thermostats can control several zones of heated floors at once.
Which wires are not suitable?
There are product options that are strictly prohibited from being used for laying electrical networks, even in the most extreme cases. These include the following types of products.
Product #1 - PVS wire
Copper connection element having a PVC sheath and insulation. It has a stranded design with 2-5 conductors with a cross-section of 0.75-10 sq. mm.
The wire, designed for a voltage rating of 0.38 kW, can be used to connect household electrical appliances to the power grid and for making extension cords.
PVA is not suitable for laying wiring for the following reasons:
- It has a multi-wire core structure, so it requires tinning and soldering to connect the ends, which requires a lot of time and a lot of experience.
- The product creates a fire hazard: the wire strands cause the cable to heat up more, causing the insulation to wear out faster, which can lead to a short circuit.
- PVA cannot be laid in a bundle, whereas almost all cable models are suitable for this. Due to the fact that the wiring lines must be at a certain distance from each other, you will have to make grooves in the wall for each of them.
Thus, even the low price of such wires cannot compensate for the high installation costs, and the quality of the installed electrical network will not be too high.
Product #2 - SHVVP, PVVP wires
Cords or cables having single or multi-wire copper cores can be used to connect household appliances and electrical equipment.
However, they are not suitable for fixed electrical communications because these products do not have non-combustible insulation.
Although a flat cord with polyvinyl chloride sheaths (SHVVP) is not recommended for laying electrical networks, it is quite suitable for organizing low-current lighting up to 24V, namely for laying wiring from a transformer to LEDs
In addition, the service life of SHVVP and VPPV is quite short, and the multi-core design requires processing of the ends and soldering during installation.
It is also worth mentioning PUNP (universal flat wire), which was banned for laying electrical networks in apartments back in 2007.
This outdated product has poor insulation and low power, making it unable to withstand modern loads
Installation of heated cable floors
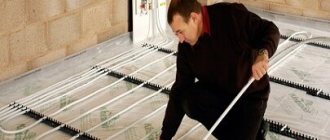
When installing cable floor heating, proceed as follows. First, the base is cleaned and leveled. If necessary, a screed with a thickness of 3–7 centimeters is poured for this purpose. A level base is important.
If this requirement is neglected, then heating will not be uniform. When an air bubble appears under the resistive cable due to unevenness of the base, it will soon burn out.
On a prepared, clean base, in order to reduce heat loss, install thermal insulation, consisting of two parts: a tape laid around the perimeter of the room, and insulation.
When choosing an insulating material, pay attention to its heat resistance - it should easily withstand temperatures up to 100 degrees.
If there is a cold basement below the room, a thicker layer should be created, and if there is another apartment, then 2 centimeters will be enough. If the heat insulator is not used, a third of the system’s power will go down.
You can save money by purchasing regular insulation and laying a film with a reflective effect on top of it. At the same time, experts do not recommend using foil, since it will collapse in a few months. You can buy heat insulation in both rolls and slabs.
It is unacceptable to leave gaps between the sheets and strips of insulation: they are laid closely, since any gap creates a cold bridge through which heat leaks out.
Depending on the base, the following can be used to attach heat-insulating materials: double-sided tape, staples plus a construction stapler, and adhesive. For joining points, tape is used - it can be mounting tape, but the best choice would be metallized tape.
When there is often high humidity in the room, waterproofing is placed on top of the thermal insulation layer. To do this, use polyethylene film or other modern material.
Then you can proceed in one of two ways. In the first case, a small height preliminary screed is laid from a mixture of sand, cement and water. Thanks to its presence, heat is distributed more evenly and overheating of the floor heating cable is prevented.
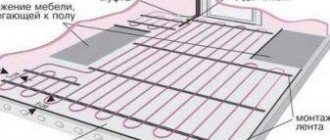
The second method involves installing a mesh with cells of 10–15 millimeters or a special mounting tape on top of a polyethylene film. The tape must be placed with a laying step of 40–50 centimeters. The grids are mounted close to one another.
Characteristics
Regardless of the type, heating cables are characterized by a number of basic indicators:
Core material. According to their composition, the wires are divided into:
- aluminum (more suitable for stationary installations);
- copper (flexible but heavy);
- aluminum-copper (the most convenient and economical option).
- The number and thickness of wires in the core. This indicator is directly proportional to the flexibility of the wire, that is, the more thin wires, the more elastic the cable.
- Insulation material. In order to protect the cable fiber from mechanical damage, as well as prevent leaks, all wires are strengthened and divided according to the type of insulation into:
- armored;
- heat resistant;
- waterproof;
- pressure protected and so on.
- Operating temperature range (heat resistance). The higher this indicator, the higher the heating temperature of the cable without losing its original properties.
- Cross-section or cut area of the current-carrying conductor. For single-core wires, the cross-section is determined by the formula for the area of a circle (the product of the square of the radius and the number Pi - 3.14). For two-core cables, the cross-section is the sum of the cut areas of both cores. According to the “Rules for Electrical Installations”, the cross-sectional size is selected taking into account the planned loads (such as current power, for example) using special tables or average values.
- Life time. On average it ranges from 20-25 years. Having studied the basic characteristics of electrical cables, we can conclude that for heated floors you should choose copper or aluminum-copper heat-resistant wires with a cross-section of at least 1.5-2.5 mm2, which allows you to turn on the thermostat at the maximum heating temperature.
Rexant 15MSR-PB 2M
Photo: https://market.yandex.ru
The model is suitable for installation indoors or outdoors. Installation is carried out using fastening tape or by winding it onto a pipe in a spiral. The heating cable is connected to the supply cable, and at its reverse end there is a Euro plug that plugs into a grounded socket. Power - 30 W, cable thickness is 8.44 mm. The shell is resistant to abrasion and rapid wear. For safe use of the kit, the owner has the opportunity to connect it to a residual current device.
Self-regulating heating cable REXANT 15MSR-PB 2M
Advantages:
- easy installation
- high strength
- versatility
- shielding
Flaws:
- very short length
Perform power calculations for heating cables
When calculating thermal power for a cable system, the purpose of this heat supply method is taken into account. If the heating cable for a heated floor is planned to be used to provide auxiliary heating for a property, then 110-140 W will be required for each “square” of area. When the system is the main one, in this case 150 W or more is needed.
In addition, you should know the size of the area where the cable will be laid out. It should not pass under furniture, plumbing fixtures or objects located low above the floor surface. This is especially true for resistive cables, which are at risk of overheating, but for self-regulating wires there is no danger.
By subtracting the area of these zones, you can find out the actual heat supply area and the power of the entire underfloor heating system, for which the heating area is multiplied by the norm for one square meter.
Next, you should calculate the length of the floor heating cable: in the passport for this product, manufacturers indicate the power of one meter. The required footage is determined by dividing the total power by the cable capacity. For example, the result of calculations was 93 meters.
You need to purchase several bays, the total length of which is close to the calculated value. It should be remembered: if there are extra meters of cable left, they cannot be cut off, since there are couplings at their ends, secured using special equipment.
You can make something similar yourself, but the service life instead of 10 - 20 years will be several years, and sometimes months. Therefore, the cable is laid along its entire length.
Sokol-Electro ENGKEH-1-1.97/220-49.2
Photo: https://market.yandex.ru
The model can withstand temperatures up to 180 °C. The fully sealed sheath and explosion-proof design guarantee stable operation of the cable in any conditions. When purchasing, the future owner has the opportunity to choose the voltage - 220 or 380 volts. The minimum bending radius is 20 mm, the standard length of low temperature copper leads is 1000 mm. The stranded core is made of nichrome and braided with fiberglass. Installation does not require special skills or tools. Still don’t know which brand of heating cable for plumbing is better? Then pay attention to this product.
Heating cable SOKOL-ELECTRO
Advantages:
- quick installation
- tightness
- explosion resistance
- presence of protective braiding
Flaws:
- short length
Some misconceptions about warm field
The most common misconception is that many people think that the effect of a heated floor will be felt 10-15 minutes after it is turned on. This is not true, the floor will become warm only after a few hours, because the concrete slab needs to warm up first. Even if a floating screed with thermal insulation is installed, it should take 3-4 hours to warm up to 30-40 degrees. Therefore, if you are planning an electric heated floor in the bathroom, know: to feel a comfortable temperature under your feet, the heated floor must be turned on in advance, 3-4 hours in advance. In general, heated floors are not relevant for short periods of time; they will be useful when turned on for long hours.
Due to the need to “warm up”, many myths arise about energy consumption. In fact, energy consumption is not difficult to calculate. To do this, the total floor power in kilowatts must be multiplied by the number of working hours.
Example:
Warm floor in the corridor, installed in the place where shoes are taken off and left, area about 2 m2, cable length 24 m, power 440 W. In kilowatts, 440 W is 0.44 kW, multiply by 24 hours: 0.44 * 24 = 10.56 - ten and a half kilowatts/hours will be consumed by this floor during continuous operation for one day.
It is worth adding that there are “smart” thermostats on sale that can turn on the heated floor a few hours before your arrival. Naturally, to do this, you must first program the thermostat.
Operating principle of ETP
In the case of heating wire and mats, the conductor is heated under the influence of the electric current flowing in it. The wire heats the screed, which in turn heats the finish coating. Heating occurs by convection.
In the case of using infrared film, heating occurs by thermal radiation of the carbon layer, which occurs under the influence of electric current. This radiation heats the finish coating and objects located close enough to the floor. They heat the air in the room by convection.
Temperature regulation is carried out using a temperature sensor and a thermostat through which the heated floor is connected.
Preparing the base
Work on installing heated floors is classified as “clean”, therefore, before installation, the walls should be cleaned and plastered, and cracks should be repaired. But after such work, the surface is covered with dirt, and even hardened tubercles of concrete mortar.
According to the technology of laying heated floors and their installation, the base for infrared systems must be smooth and clean, so all this dirt should be removed. Hardened pieces of concrete can be removed with a spatula or a special compound. After this, the surface must be moistened and all debris must be swept away with a broom.
If there are deep cracks, they are sealed with cement mortar. If there are large differences in the floor surface, you can pour a thin layer of screed to get a level base.
Laying thermal insulation
The function of a thermal insulation product is to minimize heat loss.
A heat-reflecting substrate 3-4 mm thick is laid. It is better to take a product with a foil surface that should face the ceiling. The canvases are held together with tape and attached to the base.
As thermal insulation, you can use foam sheets in combination with foil.
Installing a thermostat
Before installing the heating film, you need to install a thermostat. It is mounted on the wall, at a distance of at least 30 cm from the floor.
Before cleaning the base, a recess is made in the wall for the thermostat, and grooves are made for the wires from it to the floor.
Laying heating elements
The IR film is laid according to plan (it does not spread under furniture), at a distance of 5 cm from the walls. Lay the canvas with copper strips down. One cannot allow one canvas to overlap another. Fixation is carried out using construction tape.
If necessary, the film can be cut along the lines there.
Connection
The process of connecting infrared film consists of several stages:
- A temperature sensor is connected - it is placed in a corrugated pipe, which is located in a recess made in the heat-insulating material (its average width is up to 1 cm). The wiring from the sensor, also placed in a corrugation, is pulled along the grooves made in the wall to the thermostat and connected to it. The sensor is placed at a distance of 50 - 70 cm from the wall with the thermostat installed, and is attached with tape. The device must not rise above the thermal insulation material.
The film is connected - for this, the terminals that are included in the floor kit are used. At the edge of the film, the insulation is removed from the wire. It is rolled up and inserted into the terminal, the clamp is fixed with pliers. Then the junction is isolated with bitumen tape. To prevent the terminals from rising up in the structure, recesses are also made for them in the thermal insulation.
The terminal itself is installed with one side on the copper strip, the second should be located on the inside of the film. The contact between the clamp and the product is also insulated.
The thermostat is connected - that is, connected to an electrical power source.
After this, the system must be checked for functionality. If all strips heat normally and there is no short circuit anywhere, then you can proceed to laying the floor covering. But before this, the device is covered with a polyethylene protective film, which will protect it from accidental ingress of water.
Installation of a single-core system
The connection of a single-core heated floor, in contrast to a two-core one, is carried out through the supply of its two “cold” ends, while the two-core ones are closed by connecting the contacts at the cable ends to each other.
The general do-it-yourself installation process can be divided into several mandatory steps:
- calculation of the heating power that is most optimal for this room;
- selection of the best model, taking into account the total surface and area covered by heating elements;
- preparation of a diagram indicating the cable laying plan, location of the sensor and thermostat and their connection.
The main indicator of a heating system is the energy consumption of a heated floor, which is fully determined by the power of the selected option and design of the device, for example, the height of the protective concrete screed.
For residential premises, the thickness of the protective front layer is 5–10 cm, and for “wet” ones, the floor height can be significantly higher, because additional waterproofing must also be installed.
Forged swing metal gates
Forged structures are decorations for barriers made of metal. Despite the huge number of models of modern devices that provide unimpeded entry into the territory of a personal plot, it is the swing design that is in high demand and deserved trust of owners of private houses located within the city or beyond.
Swing gates
It is swing structures that are installed in most cases. Such devices can be:
- Completely transparent, made from individual rods bent into an intricate pattern.
- Partially or completely deaf, not allowing strangers to see what is behind the openwork fence.
Advantages and disadvantages
To achieve this goal, craftsmen create structures in two ways:
- cold forging;
- hot.
Cold forging Hot forging
The main advantages of forged gate leaves are a high level of strength and resistance to mechanical damage. During the work, specialists carry out calculations with particular accuracy of the level of load on the supporting structure
It is also important that such products:
- universal;
- exclusive;
- can have any shape;
- compatible with all building materials that were used in the construction of the fence.
However, there are also certain disadvantages that make you think about the extent of the need for work related to the installation and installation of openwork gates. Among them:
- Heavy weight.
- The need for careful preparation and high-quality installation of supports that will have to withstand significant weight.
Despite all the existing difficulties, installing gates attracts many homeowners due to the opportunity to create various compositions, decorate the entrance to the territory not only with simple drawings, but also with complex ornaments, equip the structure with automation, install video surveillance and an intercom system.
Aura FS Inside 10-6
Photo: https://market.yandex.ru
The Aura FS Inside package includes a Euro plug and a universal coupling for quick connection and ease of insertion of the cable into the pipe. The shell is made of food-grade polymer - it does not emit toxic waste upon contact with liquids, which guarantees the safety of using water for any purpose. The length of the 60-watt cable is 6 meters. Modified polyolefin is used as core insulation. The kit is capable of stable operation in difficult conditions and can be mounted at subzero temperatures. The minimum bending radius of 15 mm allows the cable to be wrapped around very thin pipes.
Self-regulating heating cable AURA FS Inside 10-6
Advantages:
- protection class - IP68
- wear resistance
- quick installation
- durability
- versatility
Flaws:
- fragile shell
Scarecrow
If you need to scare away birds, you should make a device from compact discs. They need to be secured to a hoop and attached to the board.
How to make a water heated floor under tiles?
The water floor under the tiles is installed in the same order as the electric one. However, heating with water and electricity has different physical laws. With an electric floor, the temperature of the cable along the entire length is the same, but with a water floor, everything is different. The highest temperature mark will be noticed at the point where water enters the heating system from the boiler. During circulation, the water loses temperature and arrives at the boiler in a cooled state. Thus, the coolant has different temperature indicators at the outlet and inlet.
Improper installation of a hydronic floor will significantly reduce the operating efficiency of the entire heating system. Therefore, before installing it yourself, read the technological diagram and instructions.
There are two options for laying water floors:
- concrete installation system;
- floor installation system - wooden or polystyrene foam.
The first one has a low price, which makes it very popular among consumers. The operating procedure is the same as for an electric heated floor using heating mats. Water floor pipes, unlike electrical cables, are not afraid of overheating. However, their installation is carried out in strict accordance with the sequence, without any fractures or bends. To do this, use reinforcement with cells of about 15 cm and wire with a diameter of 5 mm. These dimensions are needed to support the weight of a water-heated floor.
Installation steps may be different, since the water pipes do not overheat, but no more than 30-40 cm; if the distance is greater, the efficiency of the entire system will decrease. In addition, areas with low temperatures may appear on the floor. The pipes are secured with dowels and clamps.
The pipeline for a water heating system can be laid in different ways:
- spiral;
- spirally, shifting the center;
- snake (parallel);
- meander (double snake).
When choosing any method, consider the following:
- room dimensions;
- heat loss of the room;
- number of windows, doors, external walls;
- floor.
About installation
In a place where the level of heat loss is high, lay pipes with the hottest coolants. The length of the pipe from inlet to outlet should be up to 100 m. Otherwise, the quality of the heated floors will suffer. To calculate the required number of pipes, take the following construction standard as a basis: per 1 sq. m area will need 6-7 m of pipe.
Lead the return and supply ends of the pipe into a manifold cabinet, which must be mounted in a niche on the wall. It can be done openly. The choice of cabinet placement option depends on your capabilities and desires. Pipes are brought into it, to which the main heating circuit is connected, a valve is installed to shut off the coolants, and a temperature regulator is installed. You can also regulate the temperature with an electronic valve, which responds to a signal from a temperature sensor.
Before pouring the screed, check the functionality of the system to prevent possible coolant leaks. The floor installation system does not require the creation of a sand-cement screed. This helps to quickly bring the floors into service and reduce the load on the supporting structure of the room, since a water-based flooring weighs much less than a concrete one.
SpyHeat SHFD-25-1000
Photo: https://market.yandex.ru
Shielding of the model provides protection from electromagnetic radiation. The fuel cores are covered with fluoroplastic insulation. They are reliable and resistant to local overheating. A fixed temperature thermostat simplifies outdoor use. The cable diameter is 8.5 mm, length - 40 meters. It is designed to operate from a household electrical network with a voltage of 220-240 V. The package includes all the necessary elements for self-installation and quick commissioning of the system.
Resistive heating cable SpyHeat SHFD-25-1000
Advantages:
- shielding
- extended equipment
- quick installation
- durability
- long length
Flaws:
- high power consumption
Cable floors on base
Among the advantages of this technology is the small thickness of the system. This is a fairly thin heating mat for underfloor heating. It is a mesh with a cable. Its cross-section is about 2.8 mm. If you compare this option with ordinary cable floors, then its installation is even more simplified. The thing is that the wire is already correctly laid and securely fixed to the mesh. To install, you just need to spread the mat on the floor and fix it on the surface.
Such floors are very simple and convenient to use under karmic tiles. The thickness of the glue or adhesive solutions is sufficient for the entire heating structure to be in the adhesive mixture. If you install such floors under any other floor coverings, you will still have to make a screed, but its thickness will be small. Often, this is only about 30 mm.
Pros and cons of this installation
You should not lay a cable in the floor without knowing all the intricacies of this process. And you should start with the advantages of hidden electrical wiring:
- High degree of electrical safety. The floor covering (floorboard, laminate, linoleum) will become the dielectric that will prevent the spread of potential in the event of a cable breakdown. This means that a person will not be shocked by electric current even if he stands in the place under which the cable passes.
- Less spending. High-quality wiring will require less cable, which will provide significant savings.
- Ease of operation. The most difficult stage will be pouring the concrete floor. When installing electrical wiring, you need to insert the cable into the corrugation and simply lay it on the floor. Many electricians do not even attach the corrugation to the concrete base.
But in addition to its advantages, any work also has its disadvantages. The disadvantages of installing cable wiring under the floor include:
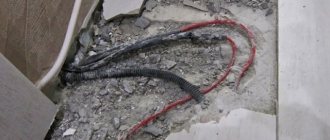
- The complexity of identifying and eliminating the malfunction. If the cable breaks down, you will have to lay a new line or dismantle the floor surface.
- Additional expenses for pouring a new floor if dismantling is required. Also included in the category of additional investments is the consumption of corrugation, without which the cable cannot be laid in the floor.
Types of heating cables for floors
To make the choice easier, you can conditionally classify the wire used in underfloor heating according to the following characteristics:
- Number of cores There is a two-core or single-core cable. The first does not require a return output to the thermostat. The electrical circuit is closed using a special tip. The advantage of a wire with two cores is ease of installation and the possibility of installation in rooms with complex layouts.
Wire type. There are resistive and shielded self-regulating cables for heated floors. Resistive provides the same heating temperature in any section of the wire, which is not always convenient and practical, especially for rooms with a large area. A shielded self-regulating heating two-core cable for heated floors independently changes the degree of heating of the core depending on the temperature in the room. The internal structure of the self-regulating wire allows you to take into account the ambient temperature in individual areas, thus ensuring uniform heating of the room.
The most justified for small rooms is the use of a self-regulating heating cable for laying heated floors. The high cost of the wire is associated with a complex internal structure, including:
- Two conductive wires.
Semiconductor matrix.
Steel braid.
Polyolefin sheath.
The operating principle of a self-regulating heating cable is to uniformly maintain a certain temperature in each section. So, if part of the wire passes under the rug, the heating intensity in this place will automatically decrease.
Self-regulating cable sections increase the temperature if necessary, for example, in the area where windows or doors are located.
Twin-core heating cables
The main advantage of two-core heated floors is an easier installation method. The second end of the wire with one core must be returned to the thermostat. The technology for laying a two-core cable is that a special coupling is placed at the end of the wire, connecting the electrical network.
Another advantage of a two-core wire is that the passing electric current does not change the natural electromagnetic field in the room. For this reason, the use of resistor and self-regulating two-wire underfloor heating is recommended in all types of residential premises.
It is especially worth noting the advantages of using a self-regulating two-core cable. The main difference from the resistor analogue is that there is no need to connect the floors to the thermostat. As a result of application, uniform heating of the surface is ensured. The service life of the self-regulating cable is 20 years.
Only high-quality floors from well-known manufacturers are guaranteed to last their entire service life. Buying a cheap Chinese wire is unjustified, at least from the financial side. The cost of repairing a self-regulating cable section can exceed the price of the material itself several times.
Floor heating using a self-regulating cable has many advantages. Safety of operation and the absence of harmful effects on the human body makes it desirable to install double-core floors in residential premises.
Single-core cables for floor heating
There are several advantages of single core cable. Among them:
- Low cost.
High maximum heating temperature compared to a two-core cable.
Less energy consumption.
The design of a single-core electric heating cable for underfloor heating is as follows:
- One so-called “cold” end of the wire is connected to the thermostat (the one that does not heat up when an electric current is passed through).
The reins are thrown around the room.
The second end is returned and connected to the thermostat, thus completing the network.
The operating principle of a single-core cable implies the presence of two cold, non-heated ends connected to the network. The wire is manufactured in the factory. Before installation, it is necessary to calculate the exact size of the wire, because cutting or adding the missing piece will not work.
A high-quality cable has mandatory markings indicating the number of cores, total length, and type of wire.
Features of application
However, despite the ease of installation of a self-regulating heated floor, some features of its construction should be noted:
- Cutting must be carried out during the installation of the heating floor. In this case, the length of the self-regulating circuit can be either several centimeters or several tens of meters. For different types of cord, the maximum length is different and ranges from 70 to 160 meters.
- When installing heated floors with a self-regulating cable, it should be taken into account that there is a large difference in current between the nominal and starting value, 2 - 4 times. This should be taken into account when choosing ballasts.
By following these expert tips, you will be able to correctly construct a heated floor with your own hands.
