How to connect and configure the program in the weekly timer TM22 Feron
To begin, plug the device into a power outlet and leave it for 14 hours to fully charge the battery. Press the MASTERCLEAR button to reset all settings and information. Now you can make the settings.
- Setting the current time. To do this, press and hold the CLOCK button while simultaneously pressing WEEK (days of the week), HOUR (hours), MINUTE (minutes).
- Next, we set the parameters for the first program; the TIMER button is responsible for this. After pressing, the message 1 on will appear (First program - turn on). We set the desired day of the week, hours and minutes when the timer should turn on.
- By pressing the TIMER button, 1 off will appear (the first program is shutdown). In the same way we set the parameters for shutdown.
- To set 2, 3-10 programs, continue pressing the TIMER button.
- To complete the setting, press the CLOCK button. The timer is ready to use.
An example of installing the program can be seen in the video instructions below.
Timer TM22 Feron - overview, setup instructions, robot demonstration
Review and instructions.
Mechanical timer Review: How to properly set up a mechanical timer.
Electronic socket-timer FERON TM 22
| Expert consultation ready to answer all questions |
| Delivery and payment throughout Ukraine |
| 14 days for exchange, no questions asked |
| are available |
| Manufacturer: | FERON (China) |
| Supply voltage, V: | 220 |
| Rated power, W: | 3500 |
| Rated current of contacts, A: | 16 |
| Degree of protection: | IP 20 |
View all specifications
Add to comparison
Download instructions: Electronic timer socket FERON TM 22
Characteristics: Electronic timer socket FERON TM 22
- Manufacturer: FERON (China)
- Ukrainian name: Electronic timer socket FERON TM 22
- Type: Electronic
- Supply voltage, V: 220
- Rated power, W: 3500
- Network frequency, Hz: 50
- Number of phases: 1
- Rated contact current, A: 16
- Protection degree: IP 20
- Operating temperature, °C: -10. +40
- Warranty, months: 12
A universal timer socket that is needed in every home. The timer socket is designed to turn on the device at a specified time. TM22 model can have different programs for the days of the week. Once you set a program, you can not change it for years. Often used to set the operating time of heating and lighting devices, pumps, compressors, fans.
Operating instructions for a mechanical timer with a daily program
Mechanical timer REV Ritter for 24 hours and 48 starts for controlling household electrical appliances according to a schedule.
Programming
The required switching time is set using segments located under the ring. First, lift all the segments up, then press down the segments corresponding to the time at which you want to set the switching on of devices (for example, lighting lamps).
Example: Lighting should be turned on at 20 o'clock. and turned off again at 24 hours. Press down the segments located between the numbers 20 and 24. In this way, several switching times can be set simultaneously.
Setting the time
- Set the timer to the current time of day.
- Turn the ring to the right so that the arrow points to the exact time of day. As soon as the timer is connected to the outlet, the ring will begin to rotate, and the arrow will constantly indicate the exact time of day.
The ring makes a full rotation within 24 hours. The timer stops working if the plug is removed from the socket, so if you later want to use the timer again, set the time again.
Application: 1. Check if the timer is set to the correct time and plug the timer into the outlet. 2. Insert the plug of the device (for example, a lamp) into the timer socket, which should be turned on at the desired time. The device can only operate if it is turned on.
Out-of-program inclusion
There is a switch on the side of the timer that can be used to directly turn on the device, regardless of the switching program. Using this switch you can also check whether the device is turned on. The switch in the “down” position means the timer works, the switch in the “up” position means the socket works directly.
Technical data
- Voltage 220 – 240 V ~ / 50 Hz
- Switching capacity - no more than 3500 W / 16 A
- Switching interval - 30 min
- Induction capacity - no more than 460 VA / 2 A
Warranty terms
The warranty period is 12 months from the date of sale of the product.
During the warranty period the following will be repaired free of charge:
- damage caused by the manufacturer using low-quality material;
- assembly defects caused by the manufacturer.
The warranty does not apply:
- for mechanical damage and damage caused by exposure to aggressive environments and high temperatures, as well as caused by improper storage;
- for products with malfunctions resulting from improper operation, use of products for purposes other than their intended purpose, as well as instability of power supply parameters;
- for replacement parts (light bulbs);
- natural wear and tear of products (wear of mechanical parts, severe external or internal contamination);
- for products that were opened and subjected to repairs or design changes during the warranty period by an unauthorized company or persons and organizations.
Setup and programming
In the operating instructions, the operating modes are displayed in the following table:
Features of the device and detailed instructions for programming it are also set out in the manual. Therefore, it only makes sense to visually explain some actions.
1. Press the round button below the “RESET” inscription.
2. For about 8 s, the status of the device’s components is polled, all valid characters are displayed on the display and a countdown starts.
- 3. Set the 12-hour or 24-hour operating mode by pressing the “Clock” button and holding it for about 5 seconds. The display will show “AM” or “PM”, meaning half day or full day.
4. While holding the “Clock” button, set the current date and time by pressing the buttons. “D+”, “Ch+” and “M+”. After releasing the “Clock” button, use the “D+” button to select the current day of the week. The display shows “MO”, “TU”, “WE”, “TN”, “FR”, “SA”, “SU”.
5. Set the first cycle of turning on the device by first pressing the “P” button, set the date and time as in the previous paragraph.
- 6. To memorize the set values, press the “P” button again.
- 7. Programming of other on/off cycles is carried out in the same way. There are a total of 16 programming cycles.
- 8. Use the “MODE” key to select one of 4 modes of turning on or off the load.
Button functions
1.1. MASTER CLEAR: Clears all data from memory, including current time and all programs.
1.2. RANDOM: Sets or cancels the random function.
1.3. CLOCK: used
-to set the current time in combination with the “WEEK”, “HOUR”, “MIN” buttons;
-to set the 12 or 24 hour format - with the “TIMER” button;
-to switch to summer time – with the “ON/AUTO/OFF” button.
1.4. TIMER: setting programs in combination with “WEEK”, “HOUR”, “MIN”; to set the 12 or 24 hour format - with the “CLOCK” button;
1.5 ON/AUTO/OFF: select the operating mode of the timer.
1.6 WEEK: Sets the day(s) of the week in combination with “CLOCK” or “TIMER”.
1.7 HOUR: Set the clock in combination with “CLOCK” or “TIMER”.
1.8 MIN: Sets the minutes in combination with “CLOCK” or “TIMER”.
1.9 RST/RCL: Canceling programs or restoring canceled programs.
1.10 Red LED: Indicates output power status. When the indicator is “ON”, there is output power. When the indicator is “OFF”, there is no output power.
Socket with timer (daily) TM32
socket with timer, video instructions for use, time relay for aquarium
Floating function
7.1 Press the “RND” button, “RND” will appear on the display, this means that the “RND” function is activated.
7.2 If this function is enabled, the settings will be made in a floating advance from 2 to 30 minutes, and the total time will remain the same as in the settings.
7.3 To cancel this function, press “RND” again.
8. CD T
- countdown function
8.1. Press LEFT button in time mode, CDT mode will appear, now you can set the countdown time.
8.2. Press the SET button once and release, the “hour” will start flashing. 8.3. Press the left or right button to set the hour. 8.4. Press the SET button once and release, the “minute” will start flashing and the “hour” will stop flashing. 8.5. Press the LEFT or RIGHT button to set the minutes. 8.6. Press the SET button once and release, the “seconds” will start flashing and the “minutes” will stop flashing. 8.7. Press the LEFT or RIGHT button to set the seconds. Press the SET button when the “seconds” stops flashing and the CDT mode is set. 8.8. Now press the CDT button - this exits the setup mode. The time countdown will decrease by one second. The automatic timer will return to clock mode; immediately after the countdown ends, the timer will turn off. 8.9. Press the CDT button in CDT mode, the timer will turn off, the timing will stop and the current settings will be saved. The timer will automatically return to clock mode after 10 seconds. 8.10. The maximum countdown is 23 hours 59 minutes 59 seconds. 8.11. Press MANUAL to reset CDT mode settings, or return to initial settings.
Button functions
1.1. MASTER CLEAR: Clears all data from memory, including current time and all programs.
1.2. RANDOM: Sets or cancels the random function.
1.3. CLOCK: used
-to set the current time in combination with the “WEEK”, “HOUR”, “MIN” buttons;
-to set the 12 or 24 hour format - with the “TIMER” button;
-to switch to summer time – with the “ON/AUTO/OFF” button.
1.4. TIMER: setting programs in combination with “WEEK”, “HOUR”, “MIN”; to set the 12 or 24 hour format - with the “CLOCK” button;
1.5 ON/AUTO/OFF: select the operating mode of the timer.
1.6 WEEK: Sets the day(s) of the week in combination with “CLOCK” or “TIMER”.
1.7 HOUR: Set the clock in combination with “CLOCK” or “TIMER”.
1.8 MIN: Sets the minutes in combination with “CLOCK” or “TIMER”.
1.9 RST/RCL: Canceling programs or restoring canceled programs.
1.10 Red LED: Indicates output power status. When the indicator is “ON”, there is output power. When the indicator is “OFF”, there is no output power.
Settings - On/Auto/Off
Operating modes cannot be changed during software settings.
6.1 Press “ON/AUTO/OFF” button to select one of three modes.
6.2 Programs can only be executed in “AUTO” mode. If “AUTO” mode is selected, the timer operates according to the settings. If “ON” or “OFF” mode is selected, all programs are ignored and the timer does not operate. When “ON” mode is selected, the power output is always on. When “OFF” mode is selected, the power output is permanently disabled.
6.3 If you change the “ON” mode to “AUTO”, the timer will retain the “ON” setting until the next timer setting.
Electronic socket Feron TM25
By the will of fate, another socket from the manufacturer Feron fell into my hands for repair:
In this case, the word repair is said very loudly. Don't be a banal one. But let's take things in order.
Today's patient has a bizarre shape, namely two rosettes. At first glance it might seem, oh cool, two sockets! In fact, one socket is a pass-through socket; it is always energized. The second one is connected to the timer.
And so I connect the outlet to the electrical network, set the timer to check its functionality. At the appointed time, the microcontroller turns on the load, as evidenced by the control LED. But the voltage does not appear under load. There is also no characteristic click of an electromagnetic relay. It immediately becomes clear where to look for the problem. Most likely it is a relay, transistor or control circuit for this relay. All that remains is to disassemble the device and find the fault:
I will not describe in detail the contents of this socket, since it does not differ much from the previously reviewed TM22. But there are some differences. Namely, the presence of an additional pass-through socket. The manufacturer also added a control light that indicates that the timer has connected the load. Another difference concerns the electronic filling. Judging by the electromagnetic relay, it can be determined that the operating voltage of the circuit is now 24 volts, while in Feron TM22 it was 48 volts:
And here is the reason for the problem:
Apparently, there was poor soldering at the factory, and perhaps as a result of mechanical vibration due to the activation of the relay, a cavity formed on the leg, as a result of which the contact was broken. We arm ourselves with a soldering iron. Using some kind of flux, we solder the relay contact.
Timer TM-22 (61925 daily-weekly)
Description Timer TM-22 (61925 daily-weekly)
Timer socket Feron TM22/61925
| Timer socket Feron TM22/61925 |
Timer-socket Feron (Feron) TM22/61925 is designed for connecting high-power household and industrial appliances: irons, air heaters, high-power lamps, street lighting spotlights, electric boilers, etc.
Execution - “euro” with protected contacts.
To protect overly inquisitive young children from electric shock, the socket is equipped with sliding spring-loaded flaps that prevent free access to the sockets.
Specifications:
- timer type - daily-weekly;
- control - electronic;
- time setting accuracy - 1 minute;
- maximum load - 16 A, 3600 W;
WITH
^ Preparing for work
Switching on the electronically controlled timer socket for the first time
Electronically controlled timer sockets use a NiMN battery. It is capable of keeping the clock running and storing settings for at least 100 hours.
Before first use, plug it in to recharge for 14 hours.
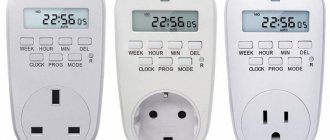
After charging, use a thin pen or pencil to press the MASTER CLEAR button (Fig. 2) to clear the memory of the timer socket and bring it into working condition.
After pressing the button, all elements of the liquid crystal timer indicator will light up for a few seconds (Fig. 3), the internal clock will be reset and the program memory will be cleared.
The MASTER CLEAR button can be used to completely clear all previously entered settings.
^ Setting the time and day of the week
Fig.2 Buttons for controlling the timer operation
Scope of application of the Cn101A timer
The possibilities for using the timer are very wide and are limited only by your imagination and the total number of supported intervals. For example, based on it, you can emulate presence in the house, when lighting or sound sources will turn on and off at specified intervals, simulating the presence of owners in the house. You can use the timer to control lighting or watering in a greenhouse or on a site, flushing water treatment filters, controlling ventilation and many other connected load options. That is, it is possible to automate many cyclic processes that require periodic actions at a given time.
Feron TM22
| Depth | Power | Voltage | Size: height | Width | Built-in diameter | Additional characteristics (description) |
| — | 3500W/16A | 230V | — | — | — | weekly |
terms of Use
terms of Use
Turning on the outlet
1.Connect the socket to a 230/240V network and charge the battery for about 12 hours.
2.Delete all current information after charging by pressing the “MASTER CLEAR” button with a sharp object, e.g. pen or pencil.
3.You can make timer settings.
Setting the current time
1. Press and hold the “CLOCK” button, press the “WEEK” button until the current day appears, then set the current time in the same way by pressing the “HOUR”, “MIN” buttons. To quickly set the “WEEK”, “HOUR”, “MIN” buttons, you can hold them down until the desired day of the week, hour or minute appears.
2. Once the correct time is set, release the “CLOCK” button.
Installing programs
When checking programs, make sure that the settings do not overlap, especially when using a variation block. If program settings overlap, the timer will turn on and off according to the time set in the program, not the program number. The OFF program will take precedence over the ON program.
1. Press and release the “TIMER” button, “ON 1” will appear on the display. Now you can make the first adjustment of the switching time.
2. Press the “WEEK” button to set the desired day or several (group) days. Set the time by pressing “HOUR”, “MIN”.
3. Press “TIMER” to complete the first setting of the on time and proceed to set the off time, “OFF 1” will appear on the display, repeat steps 2.
4. Press “TIMER” again to finish the off setting and begin the second on setting. Repeat steps 2 and 3 to program the remaining settings. Press the “TIMER” button and hold for two seconds to quickly view the specified settings.
5. After completing the settings, press the “CLOCK” button. The timer is ready to use.
Example
You need to program it to turn on at 17:15 and turn off at 22:30 every day.
a) Press and release the “TIMER” button. The display shows “ON 1”.
b) Press “WEEK” until “MO,TU,WE,TH,FR,SA,SU” appears on the display.
c) Press “HOUR” until 17:00 appears on the display.
d) Press “MIN” until 17:15 appears on the display.
e) Press and release the “TIMER” button, “OFF 1” appears on the display.
f) To set the shutdown, repeat paragraphs. c and d until 22:30 appears on the display
Settings - On/Auto/Off
Operating modes cannot be changed during software settings.
1.Press “ON/AUTO/OFF” button to select one of three modes.
2.Programs can only be executed in “AUTO” mode. If “AUTO” mode is selected, the timer operates according to the settings. When “MANUAL ON” or “MANUAL OFF” mode is selected, all programs are ignored and the timer does not operate. When “MANUAL ON” mode is selected, the power output is always on. When “MANUAL OFF” mode is selected, the power output is permanently disabled.
3.If you change the “MANUAL ON” mode to “AUTO”, the timer will retain the “MANUAL ON” setting until the next timer setting.
Floating function
1.Press the “RANDOM” button, “RANDOM” will appear on the display, this means that the “RANDOM” function is activated.
2.If this function is enabled, the settings will be made in a floating advance from 0 to 32 minutes between 18:00 and 6:00.
3.To cancel this function, press “RANDOM” again, this function cannot be set during program setting.
12/24 hour mode
To change the time on the display to 12 or 24 hour format, press the “CLOCK” and “TIMER” buttons simultaneously.
Daylight saving time conversion
1.Press “CLOCK” and “ON/AUTO/OFF” at the same time, “SUMMER” appears on the display. The clock will move forward one hour.
2.To change to winter time, press the two buttons again, the clock will move back one hour. “SUMMER” will disappear.
Source
Extending the life of the timer
The instructions indicate a service life of the device of more than 20 years. However, often the operation of the timer becomes impossible due to a temporary malfunction of the display. If all functions of the digital timer are in normal mode, then the display begins to display all symbols, as shown in the second paragraph of the settings section.
For this reason, when the device is connected to the power supply, it is not possible to access the menu to carry out, for example, adjustments to data stored in the memory.
When the device is disconnected from the network, the display returns to normal mode. Due to the backup power supply, programming of the electronic timer becomes possible.
To prevent such a situation and extend the life of the device, it is proposed to connect it not according to the classical scheme specified in the instructions, but through a switch or, better, through a circuit breaker.
As a result of these actions, with some inconvenience, the life of the digital timer can be extended, despite the fact that the display refuses to display the current state of the device.
Then switching the device to programming mode can be done more quickly than by disconnecting the phase wire from its terminal.
Design features of the TE-15 device
Today our existence is not complete without the use of many electrical appliances. Regular use, for example, of outdoor lighting, aquarium lighting, electric pump, heating boiler and other equipment, prompts the idea of automating the process of turning them on and off. For this purpose, there are a lot of different devices, among which a special place is given to the time relay.
The TE-15 device is a weekly electronic programmable timer. It is manufactured in China and adapted for Russian-speaking users. It is an analogue of the SASSIN 3SHC18A device. The appearance of the TE-15 device is shown below.
Device composition
The mounting device allows you to mount the time relay on a standard 35 mm DIN rail, which should preferably be installed in a distribution board with a degree of protection of at least IP 20.
The structural elements of the timer are placed in a plastic case, on the front panel of which there are controls in the form of buttons with rubber caps. The electrical network is connected to the upper terminals, and the load is connected to the lower ones.
The device includes the following components:
- microprocessor with control circuits;
- liquid crystal (LCD) information display;
- device programming block;
- executive load relay with powerful contacts;
- miniature switching power supply;
- built-in battery.
Using a microprocessor, software controls the load taking into account the current time of day. The liquid crystal display displays the current time, and is also used to select, configure and set operating modes of the device.
The LED indicator notifies you when the equipment is turned on or off.
Liquid crystal display
The perception of data displayed on the liquid crystal display is much more convenient, which is a plus of this device. The LCD display board and its connections are shown below. In updated models of the device, the LCD display shows additional seconds.
Switching relay
The electronic timer uses a relay manufactured by OMRON. It has the AC1 characteristic, that is, the power relay contacts allow you to switch an active or low-inductive type of load, the current consumption of which is not higher than 16 A.
Timer output part
An additional layer of solder is applied to the current-carrying tracks of the output circuits used to connect the load. The contacts of the switching relay are capable of withstanding current up to 16 A. However, despite this, the output part of the device does not have protection from both overloads and short circuits.
In order to prevent an emergency and ensure proper operation, you should additionally use a circuit breaker with a rated current of no higher than 16 A with the device.
Electrical equipment that consumes high current and also represents an inductive load is recommended to be connected using a contactor of the required power.
Built-in battery
In cases of power outages or interruptions, the set values are maintained thanks to a backup power source. A non-Cell-manganese replaceable battery is used as such.
Battery voltage - 1.2 V, capacity - 40 mAh, service life - 3-5 years. The digital timer can operate for about 150 hours on battery power.
Electronic
Using the TM24 model as an example, let's look at how to set up an electronic socket with a timer.
When you turn it on for the first time, you must leave the device in the outlet for 12-14 hours to charge the built-in battery.
Button functions:
This programmer has the ability to configure twenty on and off programs.
As can be seen from the diagram - point 1, it is possible to install the program from Monday to Sunday. That is, it turned on and off at the same time. Setting up individual programs by day of the week from 2nd to 8th point. Combination of the program on weekdays from Monday to Friday, paragraph 9, or only on weekends (Saturday and Sunday), paragraph 10. For six days a week, point 11. Every other day, Monday, Wednesday, Friday, point 12. Tuesday, Thursday, Saturday, point 13. Three days in a row, points 14 and 15.
To start using the outlet, you must first set the current time. You must hold SET for 5 seconds until the day of the week flashes. Use the RIGHT or LEFT buttons to set the desired day. Pressing and holding SET again takes us to setting the clock. Using RIGHT or LEFT we set the desired time. We repeat the same procedure to set the minutes.
Now you can start setting up the program. You can do this as follows:
- Press and hold RIGHT until “1_ON” appears, this is the first timer.
- After this, press and hold SET until the days of the week flash, use the RIGHT or LEFT buttons to select the desired day or combination of days.
- Next, using SET, select the hours and RIGHT or LEFT the desired value, and so on with the minutes.
- Then we repeat the operation while holding RIGHT until the value “OFF_1” appears.
- We repeat the setting similar to the point above, set the day, hour and minutes.
- To exit programming mode, press CLK.
Press the MANUAL button to reset the current program settings to set new parameters. To force the timer to turn on or off, there is a “MANUAL” function, which has three modes: “MANUAL-OFF”, “MANUAL-ON”, “MANUAL-AUTO”. In OFF mode, the timer does not execute programs and is in the off state. In ON mode, the device is in the forced position, and in AUTO mode, programs are executed.
To simulate the presence of a person, there is an interesting RND button on the socket. This function has a floating advance timer that randomly varies from two minutes to half an hour. The time interval is processed taking into account the advance. The switching on of electrical appliances is not strictly tied to a specific minute, which can confuse thieves trying to find out whether people are at home or not.
Instructions for setting the parameters of an electronic socket are provided in the video below:
Electronic timer with weekly programming
Setting up the remaining sockets with a timer is no different from the installation algorithm described in the example and should not cause difficulties. Do not forget to change the clock to winter and summer time for more correct operation of the device.
We hope our instructions were clear and useful for you. Now you know how to set up a socket with a mechanical and electronic timer!
It will be interesting to read:
- Setting up a motion sensor for lighting
- There are two phases in the socket - what to do?
- How to save energy in a private home
Daily mechanical socket with timer Feron TM50
Socket with timer (daily) TM32
Electronic timer with weekly programming
Electronic socket-timer Feron TM 22 with battery.
- +380682468012 Manager
- +380662360222 Administrator (work issues)
| Day | Working hours | Break |
| Monday | 09:00 — 19:00 | |
| Tuesday | 09:00 — 19:00 | |
| Wednesday | 09:00 — 19:00 | |
| Thursday | 09:00 — 19:00 | |
| Friday | 09:00 — 19:00 | |
| Saturday | 09:00 — 18:00 | |
| Sunday | 12:00 — 17:00 |
* Time specified for the region: Ukraine, Kyiv
Return and exchange conditions
The company returns and exchanges this product in accordance with legal requirements.
Return deadlines
Returns are possible within 14 days after receipt (for goods of good quality).
Return delivery of goods is carried out by agreement.
We replace the product with a similar or different one if the product we sent for any reason ceases to meet its technical characteristics within 14 days from the date of dispatch. Depending on the reasons for the return, transportation costs are paid by agreement - (buyer, seller or 50/50).
Electronic timer socket with battery.
Thanks to this small device, plugged into an outlet, you can turn on and off all electrical appliances according to the schedule you previously set, and this will allow you to save energy. Using such a device, you can find many different areas of application both in everyday life for your apartment or house, for example, turning on a humidifier and much more, and in industry. For example, you have a boiler installed, you are not at home all day, it works day and night, heating the water, thereby generating electricity, it makes no sense, isn’t it, you are not at home.
But if you install a timer socket, set a certain time, for example, when you arrive, and while you are going home, the boiler will turn on and start heating the water. The same with a heater, you set the time you need, and by the time you arrive, using the timer socket, the heater will begin to warm your room. And she can also automatically turn on the lights and music, isn’t that great? Nowadays, everyone should have such devices; this is a big saving in electricity, and thereby your money.
Detailed description and instructions for use.
Tired of turning on and off appliances or lights in your aquarium at the same time?
Then the electronic timer Feron TM 22 is what you need. The timer allows you to set up to 8 programs per day. You can set different programs for each day of the week.
If you have previously used a mechanical timer, then you know that if there is no voltage in the network, it goes off for exactly the same time as there was no electricity. The Feron TM22 electronic timer has a battery that prevents programs from going astray in such situations.
Now your devices will turn on and off on time!
Warranty for electronic timer Feron TM22 - 1 year
Timer TM22 instructions:
Ambient temperature - (-10)-(40)°C
Maximum load - 3500W
Timer type - electronic, weekly
Application:
Read the instructions carefully before connecting an electrical appliance to an outlet with a timer.
Attention:
You cannot connect an electrical appliance to the network if the load is more than 16A. Make sure that the plug of the electrical appliance is firmly connected to the outlet. To clean the socket, you need to remove it from the network and wipe it with a dry cloth.
Electronic socket Feron TM25
By the will of fate, another socket from the manufacturer Feron fell into my hands for repair:
In this case, the word repair is said very loudly. Don't be a banal one. But let's take things in order.
Today's patient has a bizarre shape, namely two rosettes. At first glance it might seem, oh cool, two sockets! In fact, one socket is a pass-through socket; it is always energized. The second one is connected to the timer.
And so I connect the outlet to the electrical network, set the timer to check its functionality. At the appointed time, the microcontroller turns on the load, as evidenced by the control LED. But the voltage does not appear under load. There is also no characteristic click of an electromagnetic relay. It immediately becomes clear where to look for the problem. Most likely it is a relay, transistor or control circuit for this relay. All that remains is to disassemble the device and find the fault:
I will not describe in detail the contents of this socket, since it does not differ much from the previously reviewed TM22. But there are some differences. Namely, the presence of an additional pass-through socket. The manufacturer also added a control light that indicates that the timer has connected the load. Another difference concerns the electronic filling. Judging by the electromagnetic relay, it can be determined that the operating voltage of the circuit is now 24 volts, while in Feron TM22 it was 48 volts:
And here is the reason for the problem:
Apparently, there was poor soldering at the factory, and perhaps as a result of mechanical vibration due to the activation of the relay, a cavity formed on the leg, as a result of which the contact was broken. We arm ourselves with a soldering iron. Using some kind of flux, we solder the relay contact.
Pros and cons of the miracle socket
The big disadvantage of sockets with a mechanical timer is that they are directly dependent on the supply of electricity. Power surges can cause all settings to go wrong. Another disadvantage is that such an outlet can be programmed only for one day; for a longer period it is impossible; in outlets with an electronic timer, these possibilities are expanded to a week or even a month.
Surprisingly, the undoubted advantage of this device is also its dependence on external power; unlike its electronic counterpart, it will complete its task after the power supply is restored. The price of such a timer is an indisputable advantage compared to more expensive electronic sockets.
Both types of sockets with a timer can be either stationary or in the form of a separate device (an adapter with a plug, which, in turn, is inserted into the socket). Any type is a convenient, practical and safe purchase.
TIMER SOCKET WITH MECHANICAL CONTROL TGE
Important
Do not connect appliances to the timer if the load current could exceed 16 amperes. Always check that the plug of the device you are connecting is fully inserted into the timer socket. If you need to clean the timer, unplug it from the AC power supply and wipe it with a dry cloth.
DO NOT EXPOSE THE TIMER TO WATER OR OTHER LIQUIDS.
It is prohibited to leave heaters, irons or other similar devices connected to the timer unattended.
The manufacturer does not recommend connecting heating devices to the timer.
Brief introduction
1. Insert one end of the fitness tracker into the slot on the front of the band as shown in the illustration.
1. The timer has a total of 8 on/off programs.
2. Manual ON/OFF settings (MANUAL ON/MANUAL OFF) are easy to make.
3. Switchable 12/24 hour mode.
4. Summer time function for regions where there is a daylight saving time.
5. Random selection function for settings that turn on at a randomly selected time in the range of 0 - 32 minutes.
6. The timer can work with the following 16 combinations of day or block of days:
Mo (Mon) Tu (Tue) We (Wed) Th (Thu) Fr (Fri) Sa (Sat) Su (Sun) Mo, Tu, We, Th, Fr, Sa, Su (Mon, Tue, Wed, Thu, Fri, Sat, Sun) Mo, Tu, We, Th, Fr (Monday, Tue, Wed, Thu, Fri) Sa, Su (Sat, Sun) Mo, Tu, We, Th, Fr, Sa (Monday, Tue, Wed, Thu, Fri, Sat) Mo, We, Fr (Monday, Wed, Fri) Tu, Th, Sa (Thu, Fri, Sat) Mo, Tu, We (Monday, Tue, Wed) Th, Fr, Sa ( Thu, Fri, Sat) Mo, We, Fr, Sa (Mon, Wed, Fri, Sat)
Preparatory operations
1. Connect the timer to a 220 - 240 V power outlet and turn on the power.
2
ATTENTION! The built-in battery will be discharged after 100 hours of storage without connecting to the mains. Therefore, before entering data, the device must be connected to the mains to charge the built-in battery for 12 hours
Then, by pressing the red “MASTER CLEAR” button, set the device to its original position. For pressing, use, for example, the tip of a ballpoint pen. The “MASTER CLEAR” button must also be pressed when the timer does not respond to pressing other buttons when entering data.
3. Now you can enter the necessary settings into the timer and use it.
Setting the current time
1. While holding the CLOCK button, press the WEEK button until the desired day of the week is displayed. Similarly, pressing the HOUR button sets the hour, and pressing the MINUTE button sets the minute of the current time. When you hold down the WEEK or HOUR or MINUTE button for a long time, the values of the corresponding parameter are quickly automatically cycled through.
2. When the desired value is set, release both buttons.
3. If you need to make changes, follow the steps above.
Installing programs
1. Press and release the TIMER button. Now you can make the first switching installation.
2. Press the WEEK button to set a day or group of days of the week. Similarly, set the hour and minutes using the HOUR and MINUTE buttons, respectively.
3. Press the TIMER button again to complete the first ON setting and move on to the OFF setting. Setting the shutdown is carried out using the same steps as described in paragraph 2.
4. Press the TIMER button again to complete the first setting to turn off and move to the 2nd setting to turn on. Repeat steps 2 and 3 to set the 2nd on and 2nd off.
5. After completing all the settings, press the CLOCK button, the timer is now ready for operation.
Example: set daily switching on at 18:15 and switching off at 22:15. a) Press the TIMER button and “1_ON” will appear on the LCD.
b) Press the WEEK button until the display shows “Mo, Tu, We, Th, Fr, Sa, Su.”
c) Press the HOUR button until the LCD displays “6:00 PM or 18:00.
d) Press the MINUTE button until the LCD displays “6:15 PM or 6:15 PM.
e) Press the TIMER button again and “1_OFF” will appear on the LCD.
f) Repeat steps c) and d) to set the shutdown time to 10:15 or 22:15.
g) Press the “RES/RCL” button to stop some programs, press the “RES/RCL” button again to recall the selected programs.
Tip: When checking your programs, make sure that their settings do not overlap, especially when using blocks of days.
Electronic timer Feron TM-22
About the product
Management: electronic Type: weekly
Advantages
- 8 timer on/off programs;
- Selecting MANUAL ON/AUTO/MANUAL OFF modes (on/auto/off);
- Daylight Saving Time Function;
- Random function with floating advance from 0 to 32 minutes from 18:00 to 6:00;
- 16 combinations of days of the week: Mo – Monday Tu – Tuesday We – Wednesday Th – Thursday Fr – Friday Sa – Saturday Su – Sunday;
- Maximum load: 16 A;
- Power supply: 230-240 V;
- Frequency: 50 Hz.
Characteristics
- Power supply: 230/240 V;
- Frequency: 50 Hz;
- Maximum load: 16A, 3600W;
- Minimum time setting: 1 min;
- Temperature: from –10 to +40С Accuracy: +/-1 minute per month;
- Battery reserve: 1.2V > 100 hours.
Warranty - 6 months
Attention!
You cannot connect an electrical appliance to the network if the load is more than 16A. Make sure that the plug of the electrical appliance is firmly connected to the outlet. Do not immerse the socket in water or any other liquid. Heating electrical appliances should not be left plugged into an outlet unattended. The manufacturer advises not to use the outlet with such electrical appliances.
- Instructions (147.68 KB)
To leave a review you need to log in to your account.
If you are not registered yet, you can register, which will only take a couple of minutes.
Management: electronic Type: weekly
Advantages
- 8 timer on/off programs;
- Selecting MANUAL ON/AUTO/MANUAL OFF modes (on/auto/off);
- Daylight Saving Time Function;
- Random function with floating advance from 0 to 32 minutes from 18:00 to 6:00;
- 16 combinations of days of the week: Mo – Monday Tu – Tuesday We – Wednesday Th – Thursday Fr – Friday Sa – Saturday Su – Sunday;
- Maximum load: 16 A;
- Power supply: 230-240 V;
- Frequency: 50 Hz.
About new developments
During the operation of the TE-15 device, a number of shortcomings were revealed, one of which, as noted, was a temporary malfunction of the LCD display.
Therefore, in order to increase operational reliability and improve the existing device, EKF began to supply models of new digital timers such as TE-80 and TE-80-24-230. These models, like the TE-15, belong to the PROxima line, but they have improved characteristics.
In later models, the number of programs available to the user has increased significantly. For example, they already remember up to 40 on/off cycles.
The introduced additional pulse operating mode allows you to double the number of operating cycles. In addition, for example, the cost of the TE-80 device model does not differ from the cost of the TE-15.
Thanks to the increased display size and more convenient buttons, it has become much easier to program and operate the device. Additionally, the electronic timer TE-80-24-230 has the ability to operate from a 24 V DC source.
Also, offline storage of information is provided in TE-80 for up to three years, and in TE-80-24-230 for up to 10 years.
Conclusion
Thus, in recent years, the time relay fleet has undergone significant changes. Electronic digital timers have replaced outdated electromechanical devices.
Devices built on the basis of microprocessor technology have a number of advantages and wide possibilities for connection and operation.
Flexible configuration, simple programming, small size and ease of load switching allow the use of electronic timers to control various types of technological equipment. They have become an integral part in both industry and the domestic sector.
PPS The main tool for making money online and not only is a computer. How to give it reliability, making it fast and immortal, and also speed up its operation up to 30 times is given in the following newsletter: barabyn.ru/wp/computer.
Design features of the TE-15 device
The TE-15 device is a weekly electronic programmable timer. It is manufactured in China and adapted for Russian-speaking users. It is an analogue of the SASSIN 3SHC18A device. The appearance of the TE-15 device is shown below.
Device composition
The mounting device allows you to mount the time relay on a standard 35 mm DIN rail, which should preferably be installed in a distribution board with a degree of protection of at least IP 20.
The structural elements of the timer are placed in a plastic case, on the front panel of which there are controls in the form of buttons with rubber caps. The electrical network is connected to the upper terminals, and the load is connected to the lower ones.
The device includes the following components:
- microprocessor with control circuits;
- liquid crystal (LCD) information display;
- device programming block;
- executive load relay with powerful contacts;
- miniature switching power supply;
- built-in battery.
Using a microprocessor, software controls the load taking into account the current time of day. The liquid crystal display displays the current time, and is also used to select, configure and set operating modes of the device.
The LED indicator notifies you when the equipment is turned on or off.
Liquid crystal display
The perception of data displayed on the liquid crystal display is much more convenient, which is a plus of this device. The LCD display board and its connections are shown below. In updated models of the device, the LCD display shows additional seconds.
Switching relay
The electronic timer uses a relay manufactured by OMRON. It has the AC1 characteristic, that is, the power relay contacts allow you to switch an active or low-inductive type of load, the current consumption of which is not higher than 16 A.
Timer output part
An additional layer of solder is applied to the current-carrying tracks of the output circuits used to connect the load. The contacts of the switching relay are capable of withstanding current up to 16 A. However, despite this, the output part of the device does not have protection from both overloads and short circuits.