The most important element of comfort in a room is properly selected lighting. At the same time, lamps perform not only a practical, but also an aesthetic function. A beautiful table lamp or sconce can transform a room, giving it new features and uniqueness.
There is a huge variety of lighting equipment on sale. However, if you wish and have minimal skills, you can independently make an exclusive lamp that reflects the tastes of the owner. This article will discuss how to make a table lamp with your own hands.
Lighting principles
When organizing lighting, you should adhere to the basic principle - full illumination of the entire room or its separate section (in the case of local light). Lighting should be arranged to perform the following tasks:
- creating a normal working atmosphere;
- obtaining a decorative effect (for example, highlighting interior details);
- emphasizing the advantages of the room and hiding its shortcomings.
A table lamp is an additional light source. Consequently, its function is to illuminate a local area of the room. Most often they are used for work and reading, and also as night lights.
Manufacturing instructions
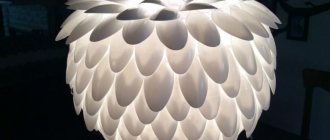
- Initially, you need to cut fabric strips 10 cm wide, cut them into equal squares (approximately 200 such pieces are needed).
- Circles are cut out from prepared fabric squares using a stencil.
- The old lampshade needs to be painted to match the color scheme of the room's interior. The lamp will look more original if the paint is applied in uneven strokes, that is, to give the surface relief.
- While the paint is drying, you can start making parts for the lampshade from prepared fabric circles. Each resulting element should look like a badminton shuttlecock or a folded paper bag for sunflower seeds. To give the blanks a similar shape, the center of the circle is coated with glue, then the sides of the circle are compressed in the center.
- After the painted lampshade has completely dried, you can begin decorating it with fabric blanks. The parts are smeared with glue and pressed against the surface of the lampshade.
If desired, the edges of the fabric flounces can be lightly sprayed with gold or silver paint from a spray can. This will further embellish the finished product.
Important! Depending on the intensity of light flux required from the lamp, the decorative elements are glued either tightly enough to each other, or more loosely.
Design Features
The table lamp consists of the following elements:
- Electromechanical part. Thanks to electromechanics, electricity is supplied from the mains to the lamp socket.
- Support part. This element supports the illuminator or reflector.
- Illuminator. It is a lamp under a lampshade or in a reflector.
In lamps with stands, the main aesthetic is usually the design of the lampshade, with the stand acting as an accessory. In articulated models the opposite is true.
Electromechanical part
The electrical circuit of a table lamp includes a power plug, cable, switch and socket. In some cases there is a voltage controller.
The E27 chuck is installed only on a threaded shank (M10, M12). The cartridge for a narrow base (E14) is also installed on a thread (another option is a lamella in the form of a metal strip). The best option for a table lamp is chandelier sockets equipped with threaded flanges. A metal faceplate with a lampshade structure or a hinge clamp clamp is clamped between the flanges. The figure below shows lamp socket options.
During production, special attention is paid to electrical safety. To do this, adhere to the following rules:
- The cable must be round, covered in a double insulating layer.
- The current-carrying conductors are selected to be flexible and contain many wires. A suitable core cross-section is from 0.35 sq. mm or more.
- Areas where the cable is laid through conductive parts, as well as damp places, are protected with dielectric bushings. Knees or cuffs are also used.
- The cable tension inside the lighting fixture should not be excessive.
The figure below shows a diagram of the mechanical components of a rack table lamp support.
Before insertion, the cable is tied from the inside with a knot or threaded through the opening of a dielectric locking washer. This is done so that after tensioning the cable from the outside, it does not lose the integrity of the internal part.
Hinge Features
The design of a table lamp stand is simple, unlike a hinged bracket. The wire to the lamp socket is supplied through fireproof dielectric elbows. If the hinge link is solid, the cable is routed along its top (right and center). At the same time, they are carefully fixed to the link. In the case of tubular links, the cable is placed inside them. Cable loops are created above the kinks of the links (diameter of at least 60 mm, or from 12 conductor diameters). In the area of cable transition from the bracket to the illuminator, the loop is larger - from 90 mm, or 20 cable diameters.
The position of a table lamp with a hinge varies widely, so it is not easy to ensure its stability with a load. Because of this, a table lamp with hinges will require screw clamps. For a homemade lamp, you can use, for example, a small carpenter's clamp. What is needed is carpentry, not metalworking, since the latter lack a soft coating.
To create a holder from a clamp, use a metal tube socket (inner diameter - at least 10 mm, length - 120-150 mm). A longitudinal groove is sawed in the tube with the same thickness as the clamp holder. The socket is fixed to the clamp using through bolted connections. A metal pin with an eye is installed in the socket, acting as a stationary element of the lower hinge of the bracket.
Note! The clip is made of high-carbon steel so that the clamp does not deform under the pressure of the parts. However, such steel is brittle, so the drill must be made of a durable alloy. Do not hit the clip with hard objects or try to bend it.
Reflectors
For articulated table lamps, only reflectors are suitable. The lampshade is too heavy for this type of lamp. A parabolic type reflector is required because it produces a very even, directional light. You can purchase a reflector or make it yourself. Usually only single reflectors are made independently. However, the lighting from them is not the most uniform. But high-quality reflectors (fourth order of curvature) cannot be made on your own; you will have to buy this part.
The reflector on the hinged bracket needs an upper opening to remove heated air. Although LED and fluorescent lamps heat up moderately, the life of the product is still reduced, so the removal of hot air is highly desirable.
Manufacturing instructions
- Inflate the balloon and tie the hole tightly to prevent air from escaping.
- Pour a large amount of glue into the prepared container.
- You can use a whole thread, gradually unwinding it from a spool, or cut it into separate pieces in advance. The goal is to tightly wrap the threads around the entire surface of the ball (you must leave a small space at the bottom so that you can then remove the deflated ball).
- Before wrapping the frame with threads, they must be thoroughly soaked in glue. Each subsequent turn should fit tightly to the previous one. You can completely cover the ball with threads or leave equal gaps after several turns (the intensity of the light flux will depend on this). To make such a lampshade more durable, it is recommended to coat the threads already placed on the ball frame with glue again.
- The product must be allowed to dry completely (this may take up to 10 hours).
- After the glue has completely dried, the ball can be deflated and removed from the resulting structure.
- The exclusive lampshade is ready, it can be placed on the lamp.
If desired, a hand-made table lamp can be additionally decorated with other decorative components, for example, braid, beads, homemade paper butterflies, etc.
Color scheme and style
Selecting the color of the lampshade or lampshade is important. The table lamp should be in harmony with the overall style of the room. This does not mean that the lamp must be the same color as the interior. For example, a green lamp is suitable for a dark background - it will add liveliness to the interior.
Another interesting solution is to apply multi-colored lines and geometric shapes to the lampshade. This solution goes well with warm colors.
The most popular color schemes are:
- beige;
- sea wave;
- monochrome tones;
- black;
- golden;
- white;
- green (grass color);
- under wood.
Stylistically, a table lamp can be designed in different directions:
- classic;
- Art Nouveau;
- Art Deco;
- minimalism and hi-tech;
- modern;
- Empire;
- Asian styles (Indian, Japanese, Chinese).
Device
Standard table lamps consist of:
- lamps;
- wires;
- switch;
- plugs for plugging into a socket.
Current flows through the wire from the plug through the switch to the lamp. After pressing the button, the switch opens or closes the electrical circuit and supplies (stops supplying) current to the base of the device.
In dimmable lamps, capacitors and resistors are added to the design to regulate the voltage.
Solutions for different types of premises
Cabinet
Lighting in the office must meet the following requirements:
- provide an intense stream of light for reading and writing;
- do not apply psychological pressure;
- consume electricity economically;
- match the interior.
For table lamps in business offices, the following design options are usually chosen:
- opaque spherical lampshades;
- noir style;
- subdued colors;
- classic details;
- simplicity and functionality;
- a switch installed directly on the base of the lamp.
Suitable colors for lamps in the office:
- green (dark bottle shade);
- beige;
- black;
- polished wood;
- Navy blue.
Children's room
The following solutions are relevant for children's premises:
- dim lighting;
- moderately bright colors;
- unusual shapes of lighting fixtures with all kinds of cartoon images or figures.
In a children's room, you should adhere to the following priorities regarding table lamps:
- absence of easily breakable parts;
- strength and maximum possible integrity of structures;
- environmental safety of materials;
- semi-permeability of the lampshade (if possible).
When creating, it is recommended to take into account the child’s taste preferences. Only in this case will he be comfortable in the room.
Bedroom
For the bedroom choose dim lighting. Individual bright elements are possible, but the overall background is predominantly pastel. A table lamp in the bedroom can act as a night light near the bed or illuminate the work area, if there is one in this room.
Which one should I do?
Rack-mounted table lamps (item 1 in the next figure) illuminate a work area that does not require rapid movement of the light spot across the surface of the table: dressing table, desk. The possibilities for decorative design in this case are greatest. Technically, the design of a table lamp on a stand is the simplest. There are practically no possibilities for quickly adjusting the size of the illuminated area. Adjusting the illumination of the working area is possible if there is a thyristor voltage regulator in the lamp, but the spectrum of the emitted light changes significantly.
Types of table lamps
A huge advantage of rack-mounted table lamps is the ability to obtain so-called lamps using relatively simple means. cosecant-square radiation pattern (DP) of the illuminator, see also at the end. A cosecant square pattern provides almost uniform illumination of the working area within a certain angle φ (see figure on the right), which sharply reduces fatigue from intense intellectual work.
Cosecant-square radiation pattern of the illuminator
Lamps on a breakable hinged bracket (item 2) are more suitable for technical creativity. Lamps on a pantograph bracket at home are impractical and technologically complex, and making a lamp on a flexible bracket at home will cost more than buying a ready-made one.
The design of a table lamp on a breakable bracket is limited to laconic and utilitarian forms. The design is more complex than that of a lamp on a stand, primarily due to the requirement for electrical safety, see below. The possibilities for quickly adjusting the light in the work area are wide both in terms of the size of the illuminated area and its illumination with a constant spectrum.
Console table lamps (item 3) are less common in everyday life, because for stability they require a heavy base and, most often, a counterweight, which complicates and increases the cost of the design. There are fewer possibilities for quickly adjusting the light in the work area for console lamps than for lamps on brackets, but it is possible to obtain a cosecant square pattern.
Table lamps without raising the light source above the supporting surface are no longer table lamps, but night lights (item 4). The fundamental difference between both is that the night light does not have a working area with certain light requirements. Accordingly, the light from a night light can be whatever you want, as long as it doesn’t harm your health.
Original ideas
Green lamp
The idea of a green table lamp has historical background. Such a lamp was on the tables of many statesmen. The essence of a green lamp is its lampshade, made of glass of the appropriate color. A translucent (three-quarters) coating is applied inside the glass.
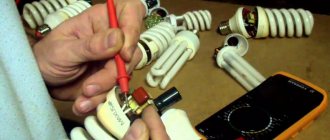
To make a green lamp, you will need housekeeper lamps with a color temperature of 4300 K and U-shaped bulb segments. You also need white acrylic enamel used for bathtubs. The diagram of the green lamp shade is shown in the figure below.
The dimensions of the lampshade depend on the height of the lamp bulb. For this purpose, there is a coordinate grid in the figure. Green light filter made of polyethylene. Reflectors are made from a thin sheet of tin. Use a strip of polyvinyl chloride to hide the outer seam. Two or three more strips are glued along the vertical axis (every 90-120 degrees). You can choose any suitable design as a rack.
Lamp made from plastic bottles
To make a table lamp you will need the following tools and materials:
- concrete dry mix;
- socket, plug, switch and cord;
- two plastic bottles;
- sandpaper;
- self-tapping screws;
- threaded tube (three-eighths of an inch) and nuts.
Sequence of work:
- Using scissors, cut off the bottoms of the bottles. Next we drill the bottle caps. The holes must be such that a threaded tube passes through them.
- We fix the tube on the cover using nuts.
- We fasten both bottles together.
- We use self-tapping screws to secure the bottles.
- Mix the concrete and fill the form with it.
- We remove the bottles. To make it easier to remove the plastic, we use a hairdryer. We get a finished structure based on a concrete mixture
- We clean the roughness with sandpaper.
- We lay the wiring.
Table lamp made from photographic films
An unusual retro-style table lamp can be created using old photographic films. To make it you will need the following materials and tools:
- lamp base;
- wire for frame;
- a piece of thick matte paper;
- glossy glue;
- old film (black and white or color, transparent x-ray film will also work);
- roulette;
- scissors;
- brush for working with glue.
We carry out the work in the following order:
- We apply the film to the shade of the table lamp and measure the required length. You can place the film vertically or horizontally - there is no difference.
- Apply a layer of glue to one of the edges of the lampshade.
- We apply the film along the edge of the edge of the lampshade. We apply the second strip along the other edge. We place the third strip in the middle so that it overlaps the other two.
- Apply glue to the attached films. We make sure that the negatives adhere tightly to the surface.
- We dry the lampshade and assemble the table lamp. When the glue is completely dry, we join the lampshade to the base and turn on the light.
Lamp made of bars
An original table lamp can be made from a wooden beam. To create it you will need the following materials and tools:
- screwdriver;
- wood hacksaw;
- electric drill;
- wing bolt and nut;
- gold paint (in a can);
- three wooden blocks (one long and two short);
- cord, light bulb with socket, plug.
First, three bars are cut using a hacksaw. Next, holes are drilled at the ends of two short bars at equal distances from the edge. Also, two holes are made on a long block: one in the center (for the bolt), the second at the top (for the electrical cord). The distance of the first hole from the edge shows the angle of the table lamp. Once the holes are drilled, press the smaller bars against the longer one (parallel). The structure is fixed with a bolt.
Gold spray paint is applied to the cord and cartridge. Next, the dried cord is passed through the top hole in the long bar and the cartridge is installed. Place a plug on the remaining end of the cord. The lamp is ready for use.
Table lamp made of wood
The following design is very simple and does not require much effort to build. We will not give exact dimensions, since much will depend on the size of the tin can-shade and wooden slats/blocks available at hand.
How the table lamp works is very clearly visible in the picture. The base stand must have sufficient dimensions and its own weight to keep the structure in balance. The stand can be higher than in the photo, but structurally it can consist of a solid block with a cut in the upper part, or it can be assembled from three identical slats glued together, the middle of which is slightly shorter than the side ones. If you decide to glue the stand, use PVA for wood or other good wood glue, always under pressure if you don’t have two or three clamps. Tightening with self-tapping screws is bad manners; we do not recommend doing this, although in some cases this method is acceptable.
We will attach the stand to the base in exactly this way - using 52 mm wood screws into the end of the stand through the wooden base. Pre-mark everything and drill the places where the screws will be screwed in with a thin drill. The best way to position screws is diagonally. Coat the end part of the stand with glue and tighten it tightly with self-tapping screws to the base. And so that the heads of the screws do not stick out from the stand, first drill out the screw-in point with a wider drill to a depth of 2-3 mm - the head of the self-tapping screw will “hide” in the resulting recess.
The crossbar is movably attached to a chrome-plated screw of a suitable size and fixed in the desired position with a wing nut.
To create a lampshade, you can use, for example, a can of stewed meat (as in the photo), decorating it in a suitable way. If you have a better idea - why not?!
Another method, although a little labor-intensive and requiring special electronic parts, but quite interesting, uses PVC from lined sewer pipes (new ones, of course) as the main material