Hello Dear blog readers! In our 21st century, changes are constantly taking place. They are especially noticeable in the technological aspect. Cheaper energy sources are being invented, and various devices are being distributed everywhere to make people’s lives easier. Today we will talk about such a thing as a solar battery - a device that is not breakthrough, but nevertheless, which is becoming more and more part of people’s lives every year. We will talk about what this device is, what advantages and disadvantages it has. We will also pay attention to how to assemble a solar battery with your own hands.
Solar battery: what is it and how does it work?
A solar battery is a device that consists of a certain set of solar cells (photocells) that convert solar energy into electricity. Most solar panels are made of silicon since this material has good efficiency in “processing” incoming sunlight.
Solar panels work as follows:
Photovoltaic silicon cells, which are packaged in a common frame (frame), receive sunlight. They heat up and partially absorb the incoming energy. This energy immediately releases electrons inside the silicon, which through specialized channels enter a special capacitor, in which electricity is accumulated and, being processed from constant to variable, is supplied to devices in the apartment/residential building.
Varieties
Solar batteries are divided into the following types.
Silicon
Silicon is the most popular battery material.
Silicon batteries are also divided into:
- Monocrystalline: These batteries use very pure silicon.
- Polycrystalline (cheaper than monocrystalline): polycrystals are obtained by gradually cooling silicon.
Film
Such batteries are divided into the following types:
- Based on cadmium telluride (10% efficiency): cadmium has a high light absorption coefficient, which allows it to be used in the production of batteries.
- Based on copper selenide - indium: efficiency is higher than the previous ones.
- Polymer.
Solar batteries from polymers began to be manufactured relatively recently; usually furellenes, polyphenylene, etc. are used for this. Polymer films are very thin, about 100 nm. Despite the efficiency of 5%, polymer batteries have their advantages: low cost of material, environmental friendliness, elasticity.
Amorphous
The efficiency of amorphous batteries is 5%. Such panels are made from silane (hydrogen silicon) according to the principle of film batteries, so they can be classified as both silicon and film. Amorphous batteries are elastic, generate electricity even in bad weather, and absorb light better than other panels.
Advantages and disadvantages of this type of energy
The advantages include the following:
- Our Sun is an environmentally friendly source of energy that does not contribute to environmental pollution. Solar panels do not emit various harmful waste into the environment.
- Solar energy is inexhaustible (of course, while the Sun is alive, but this is still billions of years in the future). From this it follows that solar energy would definitely be enough for your entire life.
- Once you have installed solar panels correctly, you will not need to maintain them frequently in the future. All you need is to carry out a preventive examination once or twice a year.
- Impressive service life of solar panels. This period starts from 25 years. It is also worth noting that even after this time they will not lose their performance characteristics.
- Installation of solar panels may be subsidized by the government. For example, this is actively happening in Australia, France, and Israel. In France, 60% of the cost of solar panels is returned.
The disadvantages include the following:
- So far, solar panels are not competitive, for example, if you need to generate large amounts of electricity. This is more successful in the oil and nuclear industries.
- Electricity production directly depends on weather conditions. Naturally, when it’s sunny outside, your solar panels will operate at 100% power. When it’s a cloudy day, this figure will drop significantly.
- To produce a large amount of energy, solar panels require a large area.
As you can see, this energy source still has more advantages than disadvantages, and the disadvantages are not as terrible as it would seem.
Characteristics
The ability to choose from a fairly large number of battery devices, as well as their price, is currently able to satisfy the needs of representatives of a wide segment of the population.
They may differ in quality indicators and methods of application.
- Considering the characteristics of solar panels and the rated power they generate, you can not take a complete set, but use them locally.
- The variation in market value is sixty rubles per electric power of one kilowatt.
For example, using one light bulb (25W, 12V) to illuminate a dark room costs two thousand rubles to purchase and connect. No other energy costs will be needed.
Do-it-yourself solar battery from improvised means and materials at home
Despite the fact that we live in a modern and rapidly developing world, the purchase and installation of solar panels remains the lot of wealthy people. The cost of one panel that will produce only 100 Watts varies from 6 to 8 thousand rubles. This is not counting the fact that you will have to buy capacitors, batteries, a charge controller, a network inverter, a converter and other things separately. But if you don’t have a lot of money, but want to switch to an environmentally friendly source of energy, then we have good news for you - you can assemble a solar battery at home. And if you follow all the recommendations, its efficiency will be no worse than that of the version assembled on an industrial scale. In this part we will look at step-by-step assembly. We will also pay attention to the materials from which solar panels can be assembled.
From diodes
This is one of the most budget materials. If you are planning to make a solar battery for your home from diodes, then remember that these components are used to assemble only small solar panels that can power some minor gadgets. D223B diodes are best suited. These are Soviet-style diodes, which are good because they have a glass case, due to their size they have a high installation density and have a reasonable price.
After purchasing the diodes, clean them of paint - to do this, just place them in acetone for a couple of hours. After this time, it can be easily removed from them.
Then we will prepare the surface for the future placement of diodes. This can be a wooden plank or any other surface. It is necessary to make holes in it throughout its entire area. Between the holes it will be necessary to maintain a distance of 2 to 4 mm.
Then we take our diodes and insert them with aluminum tails into these holes. After this, the tails need to be bent in relation to each other and soldered so that when receiving solar energy they distribute electricity into one “system”.
Our primitive solar battery made of glass diodes is ready. At the output, it can provide energy of a couple of volts, which is a good indicator for a homemade assembly.
From transistors
This option will be more serious than the diode one, but it is still an example of harsh manual assembly.
In order to make a solar battery from transistors, you will first need the transistors themselves. Fortunately, they can be bought in almost any market or electronic stores.
After purchase, you will need to cut off the cover of the transistor. Hidden under the lid is the most important and necessary element - a semiconductor crystal.
Next, we prepare the frame of our solar battery. You can use both wood and plastic. Plastic, of course, will be better. We drill holes in it for the transistor leads.
Then we insert them into the frame and solder them together, observing the “input-output” standards.
At the output, such a battery can provide enough power to operate, for example, a calculator or a small diode light bulb. Again, such a solar battery is assembled purely for fun and does not represent a serious “power supply” element.
From aluminum cans
This option is already more serious, unlike the first two. This is also an incredibly cheap and effective way to get energy. The only thing is that at the output there will be much more of it than in the versions of diodes and transistors, and it will not be electrical, but thermal. All you need is a large number of aluminum cans and a housing. A wooden body works well. The front part of the housing must be covered with plexiglass. Without it, the battery will not work effectively.
Before starting assembly, you need to paint the aluminum cans with black paint. This will allow them to attract sunlight well.
Then, using tools, three holes are punched in the bottom of each jar. At the top, in turn, a star-shaped cutout is made. The free ends are bent outwards, which is necessary for improved turbulence of the heated air to occur.
After these manipulations, the cans are folded into longitudinal lines (pipes) into the body of our battery.
A layer of insulation (mineral wool) is then placed between the pipes and the walls/back wall. The collector is then covered with transparent cellular polycarbonate.
This completes the assembly process. The last step is to install the air fan as a motor for the energy carrier. Although such a battery does not generate electricity, it can effectively warm up a living space. Of course, this will not be a full-fledged radiator, but such a battery can warm up a small room - for example, an excellent option for a summer house. We talked about full-fledged bimetallic heating radiators in the article - which bimetallic heating radiators are better and stronger, in which we examined in detail the structure of such heating batteries, their technical characteristics and compared manufacturers. I advise you to read it.
History of creation and prospects for use
Humanity has been nurturing the idea of converting solar energy into electricity for a long time. Solar thermal installations were the first to appear, in which steam superheated by concentrated solar rays rotated generator turbines. Direct conversion became possible only in the mid-19th century, after the Frenchman Alexandre Edmond Baccarelle discovered the photoelectric effect. Attempts to create an operating solar cell based on this phenomenon were crowned with success only half a century later, in the laboratory of the outstanding Russian scientist Alexander Stoletov. It was possible to fully describe the mechanism of the photoelectric effect even later - humanity owes this to Albert Einstein. By the way, it was for this work that he received the Nobel Prize.
Baccarelle, Stoletov and Einstein are the scientists who laid the foundation of modern solar energy
The creation of the first solar photocell based on crystalline silicon was announced to the world by employees of Bell Laboratories back in April 1954. This date, in fact, is the starting point of technology, which will soon be able to become a full-fledged replacement for hydrocarbon fuel.
Converting solar radiation into electricity has enormous prospects, because for every square meter of the earth's surface there is an average of 4.2 kW/hour of energy per day, which saves almost one barrel of oil per year. Initially used only for the space industry, the technology became so commonplace already in the 80s of the last century that photocells began to be used for domestic purposes - as a power source for calculators, cameras, lamps, etc. At the same time, “serious” solar electric installations were created. Attached to the roofs of houses, they made it possible to completely abandon wired electricity. Today we can observe the birth of power plants, which are multi-kilometer fields of silicon panels. The power they generate can power entire cities, so we can confidently say that solar energy is the future.
Modern solar power plants are multi-kilometer fields of photocells capable of supplying electricity to tens of thousands of homes.
Do-it-yourself solar battery - how to make, assemble and manufacture?
Moving away from homemade options, we will pay attention to more serious things. Now we’ll talk about how to properly assemble and make a real solar battery with your own hands. Yes - this is also possible. And I want to assure you that it will be no worse than purchased analogues.
To begin with, it is worth saying that you probably will not be able to find on the open market the actual silicon panels that are used in full-fledged solar cells. Yes, and they will be expensive. We will assemble our solar battery from monocrystalline panels - a cheaper option, but showing excellent performance in terms of generating electrical energy. Moreover, monocrystalline panels are easy to find and are quite inexpensive. They come in different sizes. The most popular and popular option is 3x6 inches, which produces 0.5V equivalent. We will have enough of these. Depending on your finances, you can buy at least 100-200 of them, but today we will put together an option that is enough to power small batteries, light bulbs and other small electronic elements.
Selection of photocells
As we stated above, we chose a monocrystalline base. You can find it anywhere. The most popular place where it is sold in huge quantities is the Amazon or Ebay trading platforms.
The main thing to remember is that it is very easy to run into unscrupulous sellers there, so buy only from those people who have a fairly high rating. If the seller has a good rating, then you will be sure that your panels will reach you well packaged, not broken, and in the quantity you ordered.
Site selection (attitude system), design and materials
After you have received your package with the main solar cells, you must carefully choose the location for installing your solar panel. After all, you will need it to work at 100% power, right? Professionals in this matter advise installing it in a place where the solar battery will be directed just below the celestial zenith and look towards West-East. This will allow you to “catch” sunlight almost all day.
Making a solar battery frame
- First you need to make a solar panel base. It can be wooden, plastic or aluminum. Wood and plastic perform best. It should be large enough to fit all your solar cells in a row, but they won't have to hang around inside the entire structure.
- After you have assembled the base of the solar battery, you will need to drill many holes on its surface for the future output of conductors into a single system.
- By the way, do not forget that the entire base must be covered with plexiglass on top to protect your elements from weather conditions.
Soldering elements and connecting
Once your base is ready, you can place your elements on its surface. Place the photocells along the entire structure with the conductors down (you push them into our drilled holes).
Then they need to be soldered together. There are many schemes on the Internet for soldering photocells. The main thing is to connect them into a kind of unified system so that they can all collect the received energy and direct it to the capacitor.
The last step will be to solder the “output” wire, which will be connected to the capacitor and output the received energy into it.
Installation
This is the final step. Once you are sure that all the elements are assembled correctly, fit tightly and do not wobble, and are well covered with plexiglass, you can begin installation. In terms of installation, it is better to mount the solar battery on a solid base. A metal frame reinforced with construction screws is perfect. The solar panels will sit firmly on it, not wobble or succumb to any weather conditions.
That's all! What do we end up with? If you made a solar battery consisting of 30-50 photocells, then this will be quite enough to quickly charge your mobile phone or light a small household light bulb, i.e. What you end up with is a full-fledged homemade charger for charging a phone battery, an outdoor country lamp, or a small garden lantern. If you have made a solar panel, for example, with 100-200 photocells, then we can already talk about “powering” some household appliances, for example, a boiler for heating water. In any case, such a panel will be cheaper than purchased analogues and will save you money.
Installation
The battery must be installed in a location with maximum sunlight exposure. The panels can be mounted on the roof of the house, on a rigid or rotating bracket.
The front of the solar panel should face south or southwest at an angle of 40 to 60 degrees. During installation, external factors must be taken into account. The panels should not be blocked by trees or other objects, and dirt should not get on them.
A few recommendations that will help save money and time when making solar panels:
- It is better to buy photocells with minor defects. They are also functional, just not as beautiful in appearance. New elements are very expensive; assembling a solar battery will not be economically justified. If there is no particular rush, it is better to order the plates on eBay, it will cost even less. You need to be careful with shipping from China - there is a high probability of receiving defective parts.
- Photocells need to be purchased with a small margin; there is a high probability of their breaking during installation, especially if there is no experience in assembling such structures.
- If the items are not yet in use, they should be stored in a safe place to avoid breakage of fragile parts. Do not stack the plates in large piles - they may burst.
- During the first assembly, you should make a template on which the locations of the plates will be marked before assembly. This makes it easier to measure the distances between elements before soldering.
- Soldering must be done with a low-power soldering iron, and under no circumstances should you use force when soldering.
- It is more convenient to use aluminum corners to assemble the case; a wooden structure is less reliable. It is better to use plexiglass or other similar material as a sheet on the back side of the elements; it is more reliable than painted plywood and looks aesthetically pleasing.
- Photovoltaic panels should be located in places where sunlight will be maximum throughout the day.
DIY solar battery in the photo
This section presents photographs of some interesting, but at the same time simple options for homemade solar panels that you can easily assemble with your own hands.
Economic feasibility
The payback period for solar panels is easy to calculate. Multiply the daily amount of energy produced per day by the number of days in a year and by the service life of the panels without reducing power - 30 years. The electrical installation discussed above is capable of generating on average from 52 to 100 kWh per day, depending on the length of daylight hours. The average value is about 64 kWh. Thus, in 30 years, the power plant should, in theory, generate 700 thousand kWh. With a single-rate tariff of 3.87 rubles. and the cost of one panel is about 15,000 rubles, the costs will pay off in 4–5 years. But the reality is more prosaic.
What is better - to buy or make a solar battery?
Let's summarize in this part everything we learned in this article. Firstly, we figured out how to assemble a solar battery at home. As you can see, a DIY solar battery can be assembled very quickly if you follow the instructions. If you follow the various manuals step by step, you will be able to collect excellent options for providing you with environmentally friendly electricity (or options designed to power small elements).
But still, what is better - to buy or make a solar battery? Naturally, it is better to buy it. The fact is that those options that are manufactured on an industrial scale are designed to work the way they should work. When manually assembling solar panels, you can often make various mistakes that will lead to them simply not working properly. Naturally, industrial options cost a lot of money, but you get quality and durability.
But if you are confident in your abilities, then with the right approach you will assemble a solar panel that will be no worse than its industrial counterparts. In any case, the future is here and soon solar panels will be able to afford all the layers. And there, perhaps, there will be a complete transition to the use of solar energy. Good luck!
If the article was useful to you, share it with your friends by clicking on the buttons: Below, leave your comments, suggestions, ask questions, express your opinion - this is very important to us!
What components are needed and where to buy them
The main part is a solar photopanel. Typically, silicon wafers are purchased online and delivered from China or the USA. This is due to the high price of domestically produced components.
The cost of domestic plates is so high that it is more profitable to order on eBay. As for defects, out of 100 plates only 2-4 are unusable. If you order Chinese plates, the risks are higher, because... the quality leaves much to be desired. The only advantage is the price.
A ready-made panel is much more convenient to use, but also three times more expensive, so it’s better to look for components and assemble the device yourself
The remaining components can be purchased at any electrical goods store. You will also need tin solder, frame, glass, film, tape and a marking pencil.
When purchasing components, you should pay attention to the manufacturer's warranty. Usually it is 10 years, in some cases – up to 20
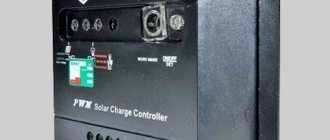
It is also important to choose the right battery. Saving on it often turns into trouble: while charging the device, hydrogen may be released, which can lead to an explosion
Sealing of photocells placed in the housing
After testing the silicon wafers, sealing can be carried out. Use epoxy resin or heat-resistant sealant to seal seams and joints. Apply the oligomer to the space between the photocells and to the outer parts. Next, install acrylic glass on top, pressing it tightly against the silicon wafers.
For additional protection and less wear on the photocells, install a mineral wool gasket between the surface of the box and the silicon elements.
After installing the acrylic glass, lay the structure on a hard surface so that the wall of the chipboard box is at the top. This is necessary to allow air to escape from the battery. After repeated testing, install the collector on the selected area and connect it to the system of the house or apartment.
If you are eager to create a solar station with your own hands, you should not make a huge collector. To understand all the nuances of operation, you need to assemble a small generator. If, after testing, the device copes well with the task, proceed to creating a more powerful model.
Stages of work
The process of soldering elements Once you have purchased all the necessary materials and tools, you can proceed to assembling the panel.
Assembling a solar panel is not a difficult task and requires some soldering skills and a general understanding of the circuit.
Soldering panel conductors:
- Using wire cutters, cut the conductors to the required length.
- Using tweezers, carefully insert the cut conductor into the cell.
- Apply two drops of soldering acid and solder. For precise application of solder, it is better to use a tabletop magnifying glass, which is sold in every supermarket.
- Carefully solder the conductor without pressing the photocell.
That's basically all the soldering is. The process itself is long and will require several hours. It is advisable to rest for at least 30 minutes after every hour of work. This will allow you to ideally solder the photocells.
Next, we assemble the body and fix the cells. We recommend assembling the housing for the solar panel from aluminum corners. So reliable and aesthetically pleasing.
Trim the corners to the required size
It is important to choose corners that will not cast a shadow on the photocells. On the inside of the corners we apply a layer of silicone glue or sealant. This is necessary to isolate the photocells from moisture.
Carefully place the plexiglass cut to the required size on the layer of glue.
Gently press and wait for the sealant to dry. After completely fixing the glass with the aluminum structure, we strengthen it with hardware. Next, we place the assembled photocells with conductors on the inside of the structure. There should be a distance of 5-8 mm between the elements, since the material will expand when heated.
It is advisable to mark in advance with a pencil the places where the elements will be fixed. This will reduce assembly time.
We combine the cells into one power system:
According to the previously drawn up diagram, we fix all the panel elements together with a soldering iron
It is important that the circuit contains connecting Stocke diodes that are fixed in the positive conductor. This is necessary so that the system does not discharge in the dark.
After assembly, the panel is tested for voltage supply. Then we attach the photocells and reliably seal the panel. After this, we install the panel into the aluminum structure and seal the seams. The solar panel is ready for testing.
The advantages of solar panels assembled by yourself are obvious:
- you can order suitable photocells of various types yourself;
- independently select circuits, assemble and test the panel;
- the cost of a finished structure assembled at home is much cheaper than those offered by Internet portals.
The downside is the time and patience spent on assembly. There is still a chance to make a mistake if you do not have certain skills in working with a soldering iron.
But in any case, assembling a solar panel is a great way to become independent from general electricity.
Watch the video in which an experienced user shows in detail the process of assembling a solar panel with his own hands:
Recommendations for use
A solar battery can last a very long time and is stable, supplying current to your home wiring. But much depends not only on the quality of its assembly and subsequent connection
It is very important to operate such a gentle generator as intended. It is advisable to point the batteries, if they are not equipped with a sun-adjusting system, clearly to the south, which will help capture maximum energy and reduce wasteful losses
To eliminate error, it is enough to place the generator at an angle to the horizon that is equal to the number of degrees of latitude in a particular location. But since the solar disk changes its location in the sky throughout the year, it is recommended to lower the angle in the spring months, and increase it when autumn comes.
Supplementing with a tracking system in domestic conditions is impractical. It justifies the investment solely at the industrial level. It is much more profitable to install several batteries at once, oriented towards the most likely lighting angles. When placing solar generators on top of a flat roof, for example, made of roofing felt or sheet iron, it is worth raising them above the plane. Then blowing air from below will increase work efficiency. On wavy roofs it is not necessary to do this, although there will be no harm from the rise.
The best roofs are those that are oriented to the south and designed in the form of flat slopes. In such a situation, the ramp serves to attach several corners, the size of which coincides with the size of the module. The exit above the ridge is approximately 0.7 m, and the module is attached to the corners with a gap of 150–200 mm. Alternatively, you can hang the battery using the same corners below the roof slope. On a wavy surface, corners are often replaced by pipes of carefully selected diameter.
Solar blocks should be positioned horizontally, which will reduce the temperature spread between their lower and upper parts by 50% when compared with vertical installation. This means that not only will the actual resource increase, but it will also be possible to increase the effectiveness of the system.
The installation location must have the following features:
- as well lit as possible;
- having minimal shadow;
- well blown by winds.