A dehydrator is a device that is a dryer for food (greens, fish, meat, mushrooms, nuts, vegetables and fruits). This device can also be used to prepare healthier (dried, without any other processing) food, for example, various desserts, sprouted grain breads, cookies, chips, etc. Handicraft lovers use the machine to create dried flower bouquets, papier-mâché objects, herbariums and other decorative crafts. Dehydration of products in the device occurs due to the action of warm air, infrared or solar rays.
Store-bought equipment is quite expensive. They allow you to maintain a constant set temperature inside the drying chamber. Making a dehydrator with your own hands is an opportunity available to everyone to save on equipment and get a device that allows you to quickly dry food in the required quantity.
Homemade dryer from an old refrigerator
A homemade dryer can be made from an old refrigerator. This will make a good dehydrator for fruits and vegetables.
Manufacturing algorithm
The process of manufacturing a drying installation from a refrigerator occurs according to the following scheme.
- Carefully dismantle the compressor, radiator and freezer so as not to damage the tubes and avoid leakage of the working substance (refrigerant).
- Remove the inner lining and insulation, leaving the rubber seal on the door.
- A fan is installed in the place where the compressor was installed.
- A hole is made on top (on the roof) of the refrigerator for a pipe (a two-meter piece with a diameter of 100 mm is enough) or an aluminum corrugation 3 m long, which is secured with glue.
- A hook is attached to the door to securely fix it.
- Attach wooden slats to the side walls of the refrigerator box with self-tapping screws or bolts approximately 10-20 cm apart, so that shelves can then be placed on them.
- If there are any holes left, they are sealed.
- To speed up the drying process, place a hood on the pipe or corrugation.
The final design is shown in the photo below.
Nuances of creating a design
The inner lining and insulation are removed because plastic and foam decompose when heated, releasing harmful substances.
When dismantling the insulation, you should wear gloves and a respirator to protect against glass wool (if it served as insulation).
Since the remaining tin cabinet is not particularly rigid, its degree may need to be increased by installing spacers or a galvanized inner casing.
To blow food, it is allowed to use a regular 18 W hood fan with a diameter of 125 mm, only installed to force air inside. Installing a fan heater will significantly speed up the entire process, increasing the productivity of the installation. Instead, you can attach one or two electric heating elements to the back wall with a total power of up to two kW - then the device will work like an electric dryer. In this case, a second exhaust fan should be installed in the upper part of the box.
The created unit can be used all year round. But if a regular fan is installed, then painting the case black, as well as placing the device in the sun in the warm season, helps to increase the temperature inside, which speeds up the entire process of drying food.
In order for the created dryer to work effectively, it is necessary to ensure good airflow of the product laid on the sheets. This is achieved by leaving a gap of 2 cm between the frame and the door on one side, and the back wall of the box on the other.
When using a refrigerator with conventional fans without installing heating elements, it is enough to remove only the compressor with freezer and radiator. Thus, the grooves for installing shelves on them remain, but if necessary, you need to add more. The following can be used as shelves:
- grates intended for grilling, but with cut off handles;
- metal sheets with holes drilled in them;
- meshes with different cell sizes;
- old mesh refrigerator shelves;
- lattice structures made of wire or wooden slats.
It’s easy to come up with a variety of options for creating shelves for vegetables and other products yourself and make them from scrap materials.
If the compressor is in working order and the cooler circulation system is not damaged, then these spare parts can be useful for creating a freezer with your own hands.
Creating a dryer from a refrigerator takes several hours if you have the necessary parts and tools. The design can be improved in various ways, by equipping it, for example, with temperature sensors and a simple automation system, or by experimenting with the location of the fans. To protect against insects from entering the dryer, the ventilation holes should be covered with a mosquito net or gauze folded in 2 or 3 layers.
Dehydrator from a homemade cabinet
A dehydrator can be made from a homemade cabinet in a manner similar to the previous one. Only instead of a refrigerator there is a plywood cabinet. For this you will need the following materials:
- plywood or chipboard, fiberboard;
- wooden slats;
- metal corners and screws;
- aluminium foil;
- electric heater;
- 2 fans;
It is better to use a fan heater instead of a separate heating element. The other fan will be a regular one, working for exhaust.
The cabinet must be arranged in such a way as to ensure unobstructed air circulation. It is collected in this order.
- Make a frame from bars of the required size.
- The box is sheathed on the sides, top, bottom and back with plywood, fiberboard or chipboard.
- Install a front door made of similar materials with many holes on the hinges, approximately as shown in the photo below.
- The inside of the cabinet is covered with foil.
- Install the shelf holders and the baking trays themselves.
- A fan heater is mounted in the lower rear part, and a regular fan in the upper part.
The fans can be connected in parallel and turned on with a switch. The structure can also be additionally equipped with light bulbs indicating the operation of the installation. The fan heater is equipped with a built-in thermostat. It will automatically turn on the heating element. If necessary, you can turn off one spiral to reduce the power of the installation.
Expert recommendations
Using three strips of thin steel, the gables should be made. At the bottom of each strip it is necessary to make longitudinal bends that will not allow rain to penetrate inside. Such useful homemade products necessarily include a roof, which is made of two sheets of polycarbonate. The principle of operation of the device is ventilation; for this, a box should be installed. Air will penetrate through the mesh pan, removing moisture. Through the roof, where there are gable and side gaps, excess moisture will evaporate. To increase the intensity of traction, the back wall should be covered with black film.
Simple solar dryer for fruits and vegetables
The solar dryer can be manufactured in various ways. At the same time, there is no energy consumption: vegetables or fruits are dried by the energy of the sun's rays. For summer residents, a simple design is suitable, which can be made using a hammer, saw, stapler and scissors. Work on creating the installation is carried out in the following sequence.
- A frame of the required size is assembled based on the required volumes of workpieces, for example, from wooden blocks 50 by 50 mm.
- It is sheathed on the sides and back with plywood or boards.
- The back wall is sheathed from the inside with a metal sheet.
- They paint the inside black so that the air heats up more.
- Shelves made of mesh, wire, plywood, tin, plastic and other materials are installed at an angle that provides the best exposure to sunlight.
- Ventilation holes are made in the upper and lower parts of the structure, the size of which must correspond to the dimensions of the installation.
- Cover them with gauze or mosquito net to prevent insects from entering the drying cabinet.
- The front part of the box is made in the form of a frame mounted on canopies.
- It is covered with glass, transparent plastic, polycarbonate or plastic film (secured with a stapler).
- A stand for the box is made from bars or metal pipes.
Also, the created structure can simply be supported on anything. A possible appearance is shown in the photo below.
In such a cabinet, by heating the metal sheet, a temperature of 40-50 degrees is achieved. Ventilation ensures the removal of moisture released from the fruit.
General device design
It should be noted that today gardeners use three types of dryers, which are based on different drying principles.
- Using air flow movement. In principle, the structure of this device is a box, inside of which grids are laid one above the other, and chopped fruits or vegetables are placed on them. One or two holes are made on the side of the box into which fans are inserted. With their help, airflow occurs.
- Using the sun. This is a chamber in the form of a box, installed at an angle so that the sun's rays always fall on the pallets where fruits and vegetables are placed. The front part of the device is often covered with glass or mesh. Experts recommend not using a metal body in this type of dryer. It becomes very hot under the influence of sunlight and begins to emit a lot of thermal energy, which negatively affects the quality of dried fruits.
- Dryer with infrared heating element. In principle, this is all the same as the solar variety. Only instead of sun rays (free), ultraviolet rays are used here, which are emitted, for example, by a special film connected to a transformer. A very effective design that dries quickly and efficiently. But of all those described above, it is the most expensive. True, one of the advantages is the fact that the design of the dryer itself can be simplified to a minimum. There is no need for a drawer or chamber, you just need to install mesh shelves and direct the UV rays from the heating element onto them.
Use of air flow movement for drying
Solar dehydrator with collector
A more complex version of the solar dryer (shown in the photo below) consists of two sections:
- air heating zone consisting of a collector;
- drying zones where products are placed.
The front parts of both zones are covered with transparent material, for example, glass, polycarbonate.
The collector is a box, the bottom of which is covered with a thin sheet of metal painted black. A heat insulator (mineral wool or sawdust) is placed under it to minimize heat loss. Air enters the heating zone through the ventilation holes. Then it goes up through the food shelves and out.
By installing black tubes as an absorbent, for example, painted aluminum corrugation, you can increase the temperature at which the air is heated by the collector.
For the device to work effectively, it must be constantly kept with the collector directed towards the sun . If the collectors are installed on three sides, then there is no need for rotation, and such a drying unit will work all day. All cracks are sealed with sealant.
How to prepare boxes
Place a fan heater in the lowest row so that the warm air moves upward. To do this, a hole is cut in the box with a diameter slightly smaller than the fan. It is necessary that it fits tightly in the hole made.
The resulting structure must be installed on the same box. This must be done so that the wire does not get pinched (it will be located freely in the lowest drawer), and there will be constant air access to the fan heater. You need to install another one on the box with the fan, and make holes in it for access to the power and temperature regulators.
Solar dryer with fan and thermostat
To create a working automated model 1 m long, 0.6 m high and 0.53 m wide, you will need the following materials:
- glass;
- wooden blocks and slats;
- plywood;
- metal corners;
- aluminum sheet;
- fan with a diameter of 120 mm with a voltage of 12 V;
- mosquito net;
- thermostat (for example, W1209), consisting of a temperature controller and a thermostat;
- voltage stabilizer with KR142EN8B microcircuit;
- solar battery producing a voltage of 12 V;
- metal mesh for pallets.
It is recommended to use thermostats equipped with two temperature sensors to control the temperature at the top and bottom of the box.
The device diagram is shown in the photograph below.
The algorithm for manufacturing the structure is as follows.
- According to the diagram above, a frame is assembled from beams and plywood, connecting individual elements with self-tapping screws and metal corners.
- The made body is sealed.
- Wheels (40-100 mm in diameter) are attached to the bottom to make it convenient to turn the structure in the direction of the sun.
- The back door is made of glass so that you can place food and also monitor the drying process.
- Install seven shelves every 7 cm.
- Shelves are made from mosquito or steel mesh and slats.
- An aluminum sheet is laid on the collector panel, pre-painted with black heat-resistant paint.
- Mount the fan on top.
- Assemble an electrical circuit by connecting the stabilizer, solar battery, thermostat and fan, as shown in the diagram below.
- Set the controller to the required operating temperature.
The door must close tightly to prevent insects from getting inside.
A stabilizer is needed to maintain a constant voltage at the fan contacts of 12 V. Further improvement of the created design is possible by adjusting the fan speed. It is recommended to rotate the device so that the collector and battery are constantly illuminated by sunlight.
Assembling an infrared dryer
An infrared dryer is suitable for mushrooms, vegetables, nuts and fruits. It’s quite easy to make it yourself. To do this you will need the following materials:
- iron wire with a diameter of 5 to 8 mm;
- a cardboard box, for example, from a vacuum cleaner;
- aluminium foil;
- metal mesh;
- light bulb socket;
- awl;
- screwdriver;
- self-tapping screws;
- socket for a regular light bulb with fasteners;
- thermometer;
- infrared lamp;
- aluminum tape or glue.
The installation is created in the following sequence.
- The insides of the box are covered with aluminum foil using tape or glue.
- Shelves are made from mesh according to the size of the box.
- On any wall near the bottom, make a hole for the supply wire and secure the cartridge with self-tapping screws.
- Screw in the infrared bulb.
- A thermometer is attached to any sidewall.
- Cut the wire into pieces that are approximately 5 mm longer than the width of the box.
- Punch holes in the sides for the rods for the shelving.
- They insert a wire into them and seal its protruding ends with tape on the outside.
- Stack the shelves.
As a result, after all the manipulations, you will get an installation similar to that shown in the photo below.
The recommended temperature for drying vegetables and fruits is 40-45 degrees. It is adjusted by turning the light bulb on and off, or by opening the top.
The lid can be the side parts of the box, or it can be made separately from the same cardboard. If you want to automate the design, you should use a temperature sensor. Under his control, the light will turn on automatically.
Also in the created design you can use an incandescent lamp (its sufficient power is 60 W) or a heating film used to create heated floors. In the latter case, at home, a piece of 50 by 100 cm with a power of 110 W is sufficient. In general, the length of the fragment is selected based on the box used.
When using film you will also need:
- insulation, for example, bitumen, used to create heated floors;
- a set consisting of 2 clamps, two eyelets and the same number of terminal rings, which is intended for connecting power to the film.
PVC tape is laid on top of the bitumen insulation. To connect the film, you will need to solder wires and contacts.
This dryer allows you to reach temperatures of almost 60 degrees. It can be rolled up and placed on the bottom of a box made using the previously indicated method.
How to assemble a structure
The required number of boxes are placed on the constructed structure. Each box is a drying container. If the cells at the bottom of the box are large, then you can cover the bottom with a mosquito net with medium cells. The assembled pyramid must be wrapped with stretch film - at least 7 layers for packaging film and at least 10 for food film. This ensures overall sealing of the structure. It is necessary to wrap all the boxes except the bottom one (which is intended for air flow).
After the process of sealing the dryer is completed, it is necessary to make sure that the boxes can be used individually. To do this, use scissors or a sharp knife to carefully cut the film at the junction of the boxes with each other. To keep the film tightly, it must be glued to the box along the bottom edge with adhesive tape.
The mode suitable for drying is set on the fan heater as follows: the temperature is set to the maximum, and the power of the device is set to the average value. In this mode, the fan heater will not overheat too much, and, accordingly, will not turn off spontaneously. The optimal temperature for drying is +40-45 degrees.
That's it, the dryer is ready for use. The drying process in such a device takes from 8 to 12 hours.
Do-it-yourself dehydrator for meat and fish
A dryer for meat and fish can be easily made from a plastic container. For this you will need:
- fan;
- plastic container equipped with a lid;
- steel rods with a cross section of 5 mm or studs with threads, washers and nuts;
- pipe cut or coupling.
The entire process of making a dehydrator for drying fish, meat and drying other products from a plastic container is demonstrated in the video:
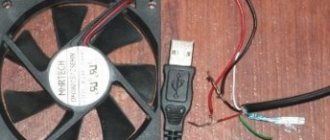
It’s easy to assemble a dehydrator for fish, meat, vegetables, fruits and other products from scrap materials: plywood, boxes, a refrigerator. Various working old fans are suitable for blowing. In each case, you will, of course, need to think over a way to secure them, but the economic costs will be reduced. In small installations, you can use a fan from a computer, having previously provided the required supply voltage. If you automate the dryer, then in terms of functionality it will be able to compete with factory analogues. When drying meat and fish, it is imperative to prevent flies from entering the interior of the installation so that they do not spoil the products.
Useful tips
- Vegetables and fruits should be cut into small and not very thick pieces.
- If you are using a fan dryer, you do not need to turn on the air flow right away. It is necessary that the slices lie in the dryer for 2-3 days.
- Temperature is the main criterion for the correct drying process. 40-50C is the optimal temperature at which the maximum vitamins and nutrients will remain in dried products. Therefore, some summer residents cover the internal surfaces of the dryer with thermal insulation material. This is especially true if the device is made from an old refrigerator.
- Shelves should only be mesh. It’s just that air must constantly circulate in the internal space.
As you can see, making a dryer for drying vegetables and fruits with your own hands is not so difficult. Mostly used building materials are used, so production costs are low.
