The most common failures of extension cords
Conventionally, all extension cord breakdowns can be divided into three areas based on localization:
- Faulty wire (cable) . Fractures and wire burnouts.
- Plug malfunction. The studs are loose, the wire at the connection to the contact burns out.
- There is a fault in the contact block. The plate burns out (rarely) or the contacts become loose.
Most often, the wire breaks or burns out at the connection to the plug or at the entrance to the socket block. This fault can be easily identified even visually and repaired. It’s worse when the damage is somewhere inside the wire under the insulation, and it’s not visible visually. If you have a long (10 m or more) coil or simple extension cord, then it’s a pity to throw away the wire, so it’s better to strain yourself and repair it.
Using an ordinary Chinese extension cord as an example, we will show how all these faults can be repaired. They just took what was at hand - of course, for 200 rubles. You shouldn’t waste a lot of time, but if you have a good extension cord of 30 meters, it’s frankly a shame to throw it away.
Types of electrical switches
In many apartments and houses, the owners have already taken care of installing new type switches, but compared to the old ones, they still have the same operating principle. The following types of switches are available:
- keyboards,
- toggle switches,
- push-button,
- in the form of touch panels,
- with current regulator,
- multi-position to monitor and manage several connected lines simultaneously.
By installation method:
- wall,
- internal,
- for installation in a socket box.
Repair work is not recommended for the following type of switches:
- when changing a Soviet-made switch,
- replacement of Turkish or Chinese devices with a plastic core.
Advice Additional skills and knowledge are required when repairing and replacing switches with a current regulator or with touch panels. Due to their high price, it is better to contact an electrician for a reliable replacement.
Troubleshooting and repair
To perform all the manipulations we will need:
- Plug, wire and socket block.
- Screwdriver.
- Pliers.
- Insulating tape.
- Heat shrink (you can get by if you have electrical tape).
- Knife.
- Multimeter.
- Three needles.
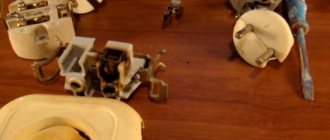
First, we disassemble everything and determine the faults. As you can see, our plug is not removable and its only problem is that initially the wire burned off at its base (we previously cut off the burnt area). Everything is fine in the block with the springs, but the wire at the input has also burnt out. But the wire itself has broken somewhere and we need to find this section.
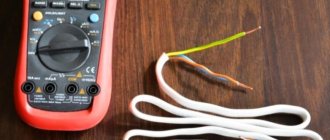
To search, we will need three needles and a multimeter. First, using the dialing mode, we check which specific core is not working. In our case, this is a brown vein. Now we need to find the breakdown location. To do this, we stick one needle into the core in the middle of the wire and two others into the middle of the “halves” of the wire. Now we call using a multimeter.
It can be seen that contact has been lost between the first and second needles, which means there is a breakdown there. Now we take out the third needle and stick it between them, and continue the procedure. So, literally, using the “poke” method, we find out the location of the damage (5 times was enough for us). Now we carefully cut the insulation and eliminate the fault by twisting it and then insulating it.
Now we cut the wires on the plug and connect our wire. We insulate it well so that there is no breakdown.
We connect the wire to the socket block. You can connect the wire in two ways: soldering (as it was originally) or twisting. We will use the second option to show how to repair an extension cord without a soldering iron or solder.
We strip about 4 cm so that we can wrap it around the plate. By the way, the plates can be pulled out freely, so we freely take one plate and attach the wire to it. We crimp the wire at the connection point with pliers. It should look something like the picture.
Let’s say right away that this is a backup option if you don’t have a soldering iron at hand. If we are repairing a thicker cable designed for a larger load, then we solder it. For final manipulations we need a multimeter.
Now we assemble the extension cord and check it: first by calling it, making sure there are no damaged areas, and then connecting it to the network and checking the voltage. Our extension cord is in working order.
How to make an electric baby carrier with a switch
I welcome you, dear readers, to my website. And today we will talk about how to make an electric carrier with a switch with your own hands.
Agree with me that at home it is very difficult to do without an extension cord. I use this miracle of technology every day. My computer and all the other components for it are included in the carrier with a block of four sockets. However, I think it’s the same for many people. It’s unlikely that anyone at home has a place where there are three or four sockets at once.
And if the house is also undergoing renovation, then there is no way to do it without an extension cord. Since you will need to connect the power tool in any case. And if several people are doing the repairs, then carrying one socket will not be enough for them. You need to make an extension cord with several sockets at once. Because if people work in turns, it will take too much time.
You can, of course, take a simpler route, just go to any hardware store or market and buy several carriers at once. By the way, recently carriers in the form of a coil of wire wound on a reel have appeared on the market.
But such coils are not always convenient to carry with you, and besides, if you need to turn on something powerful, such as welding, then all this wire must be completely unwound from the reel.
Now imagine if you have 50 meters in a bay and all this wire is spread out around the house or apartment, or worse, in one room. It will simply be difficult for you to move without getting entangled in these networks.
Therefore, I suggest you make a carrier with your own hands using available materials. The price will be much cheaper than the store one, and the reliability will be no worse, and quite possibly even better.
Accessories for assembling an electric carrier.
In order to assemble a good and reliable carrier, you first need to decide what devices you will include in it, and calculate the total power.
But if there are no serious loads, then you can assemble the carrier using the simplest components.
Let's start with choosing a wire. If the total load of all devices does not exceed 2 kW, then for carrying you can use a wire with a cross-section of 1 mm 2. And the socket and plug must withstand a current of 10 A.
Usually the manufacturer writes on the body of their products what voltage and current they are designed for, so I advise you to pay attention to this when purchasing.
If the load is about 3 kW, then you need to take a wire with a cross-section of 1.5 mm 2. And the socket and plug must withstand a load of 16 A.
If the load is within 5 kW, then the wire must have a cross-section of at least 2.5 mm 2. But the current with such a load will be about 23 A. So you need to buy the appropriate type of plug and socket.
Now, as for the brand of wire. The fact is that carriers very often have to be twisted and untwisted, so I advise you to take only PVA wire.
The wire of this brand has a stranded core and good insulation, which makes it flexible and will last a long time. And wires with a monolithic core are not suitable for carrying.
List of materials for making the carrier yourself:
- Collapsible electrical plug (designed for the power you need);
- Socket or block of sockets (several sockets);
- Wire of the required length and appropriate cross-section;
- NShVI lugs for crimping stranded wires (although if you carry small loads, you can do without lugs).
- screwdriver;
- pliers;
- press jaws;
- knife or special device for stripping insulation from wires.
Finding faults in a two-core cable with thick insulation
In the case of coil extension cords, the “acupuncture” trick will not work, since the insulation is thick and you will simply be tired of poking at the wire. You can use a regular probe tester, with which you can find damage to the wire in the extension cord, and even wiring hidden in the plaster. To do this, you will need a device with a sound indication (or a screen where changes in readings are displayed) - the price is 100 - 150 rubles.
To find damage, you need to plug the extension cord into the outlet and set the tester to medium or high sensitivity. Now we run the tester along the cable. Where there is voltage, the tester will beep, and where there is a break, the tester will be silent. If we run the probe along the entire cable and the signal does not disappear, then we change the position of the plug in the socket and perform the procedure again - the tester responds only to the phase wire.
An extension cord that catches fire due to worn or frayed wiring.
Outdated electrical wiring often causes fires. If a home is more than 20 years old, it may not have the wiring to handle the increasing number of electrical devices in a typical home today, such as computers, wide-screen TVs, video players, microwaves and air conditioners.
Outdated household electrical wiring cannot withstand the increased electrical load. Old cables have a tendency to heat up quickly and catch fire.
Sometimes it's hard to tell if your wiring is old and unsafe; after all, electrical work is usually hidden behind the walls of your home. However, remember that electrical problems pose a serious fire hazard. Watch for these signs of hidden electrical problems:
If you see frayed electrical cords, they should be replaced immediately by an electrician. Those exposed cords that run across the floor or along the walls can be incredibly dangerous if they spit a spark.
Electrical cable available on Amazon
Prevention methods:
- Call a qualified electrician who follows the National Electrical Code to inspect your home and replace old cables.
- Have a professional conduct a thorough electrical safety inspection of your wiring, external power panels, and electrical outlets.
- Install quality smoke detectors and fire extinguishers to improve your chances of surviving an electrical fire, saving lives and minimizing damage.
Smoke detector available on Amazon
One socket in the extension cord does not work, what is the reason, how to repair it?
Most extension cords and surge protectors have a simplified structure - all their sockets are made on three common buses - zero and phase and ground. And there are already three wires going to these buses. There is no need to run a wire to each outlet.
- In such models, the reason why one of the sockets does not work, provided that the others work, can only be weakening of the contacts of the plates, which do not create the proper crimp for the pins of the plug.
- In any case, in order to find out the reason, you will have to open the “patient” and it would be advisable to have a multimeter to test the individual parts.
- If we find such common busbars, then we can simply bend the loose contact of the corresponding socket.
There are extension cords with an autonomous shutdown for each outlet. In such cases, as a rule, one of the buses goes in common, the other contact goes through the switch.
Less often and in more expensive models, the switch “breaks” both phase and zero at the same time, and only “ground” goes directly.
When repairing such an extension cord (rather, it can already be called a surge protector - because such models are already necessarily equipped with protection against interference and a thermal fuse that prevents the total power from being exceeded.


