Almost every room in an apartment or house has lighting fixtures and means of communication. In some cases, the room is equipped with several lamps at once or the existing one is divided into several independent groups. To fully separate the lighting equipment, a two-key switch is connected. What this type of switching equipment is and what features it has, we will look at in this article.
Purpose of double switches
Before you start considering specific types and models of switches, you need to determine why it is needed at all and why it is worth spending money and time on it. In other words, it is worth understanding the main purpose of double switches.
Here you do not need to have unique knowledge to understand that this device is needed in order to control the power line and supply current to a certain circuit. Double switches are much more practical in this regard, because you can control two DC circuits at the same time.
Such switches have analogues on the electrical appliance market, which are very similar to them, but work completely differently. We are talking about pass-through switches. Common people often confuse these switches. You can identify the double switch by the rear panel.
Don't look at the front panel; from the front these copies are absolutely identical. The devices you need have two connectors for connection and a special phase transition on top.
Advantages of two-key models
Why is it worth abandoning the usual and easy-to-use single-key instruments for the sake of double ones?
In fact, the advantages are obvious:
- from one device you can control two different lighting fixtures or two groups of lamps;
- the light intensity in the room can be adjusted, depending on the number of light sources involved;
- due to the selective switching on of individual lamps, energy savings occur;
- if desired, you can control the lighting mode in two rooms at once (in the kitchen and hallway, in the bathroom and toilet);
- Electrical wires are used more rationally and economically.
Adjusting the light is the ability to create a comfortable environment for performing certain actions. For example, when working or reading, you can use both keys to turn on all 5-6 chandelier lights. And for relaxation, 1-2 light bulbs are enough, creating diffused, dim lighting.
Another advantage of modern models is their different designs. Thanks to the variety of colors and styles, you can choose a device that best suits the appearance of the room.
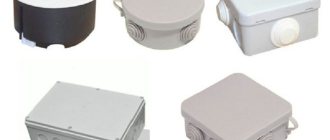
Image gallery
Photo from
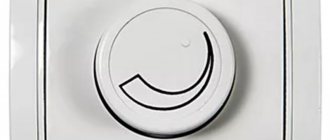
Circle-in-square model
Double switch with separate modules
Overlay model for wooden walls
Switches with natural or colored lighting
Like single-keyboards, double models come in built-in and overhead types. If the walls in an apartment/house are made of brick, concrete, aerated concrete or plasterboard, internal switches are usually installed.
Installation of overhead devices is typical for wooden houses, where when installing internal wiring, certain difficulties associated with PUE standards are expected.
Double switch design
In general, although switches are modern electrical appliances, their design can hardly be called complex. They consist of a working mechanism with connected contacts, wires and sheaths and an external panel.
The panel is a plastic frame with buttons or keys for switching. Also, special fasteners are included with the main components.
Moreover, these same fasteners are not identical in different models of switches. There are two mounting options in total.
- These mounts are also very easy to install. You just need to fix the metal frame with holes for fastenings in the desired position.
- After this, on both sides of this entire system you will see two distinct latches into which you need to screw two screws.
- The paws will remain visible, which can be easily hidden if inserted into a socket box. After that, do some checking.
Try applying slight pressure to the entire mechanism several times to check the mechanical stability of the system.
Check the installation instructions again, make sure you use all the supporting tools and don't forget to install anything. All this is necessary to ensure long-term proper operation of the switch. Most importantly, do not forget to follow safety precautions when working with electricity.
Don't forget about safety
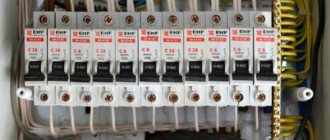
Any manipulations with electrical installations should begin by turning off the circuit breaker, which is located on the communal switchboard. After this, the presence of voltage in the network is checked again with an indicator screwdriver or tester - and so on each time before you start working with the wires.
If the switchboard is located on the landing, then during the work it is recommended to hang a warning sign so that someone does not accidentally turn the toggle switch.
If you are starting to learn the basics of electrical installation, do not work alone, but be sure to invite a partner for insurance: he will hold the stepladder and hand you the pliers
Protective gloves with insulation can also protect against electric shock, although they are not very comfortable when working with wires. When chipping and plastering walls, it is better to wear work clothes, comfortable shoes and a mask or respirator to protect your lungs from dust.
Types of double switches
In general, switches are not some kind of advanced element of the electrical appliance market. Most companies have no need to produce too many different types of switches.
Therefore, they do not have any rich classification. However, there are two main types of such devices, based on such a parameter as the type of fixing structure:
- Switches with self-clamping contacts
- Switches with screw contacts
Each type should be considered in more detail so that the main differences and features of each type of switches become clear.
Switches with self-clamping contacts
In truth, this type of switch is more practical than its counterpart. The whole point is that you don’t need to hire a specialist or try to connect contacts yourself.
- This is a rather dangerous procedure that can lead to current leakage or a short circuit if done carelessly.
- Therefore, it is much more convenient when this happens without human intervention. And such switches have just such a function.
- The point is that the wires are initially secured with special tools that resemble springs.
After you install the protective box, the springs are activated and the contacts are secured themselves, you will not need to risk your health and climb yourself.
But you have to pay for such convenience, and the price of switches with self-clamping contacts is an order of magnitude more expensive than their less technologically advanced counterparts.
What are the differences between the elements responsible for connecting the wiring?
Switches equipped with self-clamping terminals are more convenient for carrying out work. To fix the wire, you just need to strip it and secure it in the terminal. In the clamps, the cable has to be pressed with a screw. Moreover, over time the connection may weaken. You have to periodically check and tighten the screw if necessary.
The switch housing can be made of plastic or ceramic. The second option is used for heavy loads.
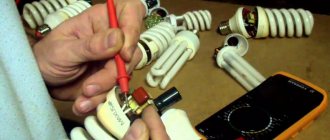
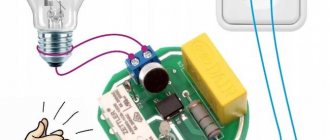
Some switch models have built-in backlighting. It is convenient if you need to find a device to turn on the light in a dark room.
Important! Many people have noticed that LED lamps flicker when unplugged. Most often, the culprit of the problem is the backlit switch.
Switches with screw contacts
Here, too, you will not need to secure it yourself, but it is not as convenient as in the case of self-clamping switches.
- The idea of this technology is that plates with screw fastenings are included with the main components.
- They are intended for grounding contacts. The plate will have to be installed manually, so be careful.
- The main advantage of these switches is their low cost.
- If your budget is not very high or you simply do not want to expand it again, then feel free to purchase switches with screw contacts.
- Especially if you are a knowledgeable person and have done similar work more than once.
Both types of double switches are pass-through, the contacts are located absolutely freely.
Preparatory work
When you have decided which switch suits you best and have purchased all the necessary tools, it’s time to prepare for installation.
To successfully install the switch, you will need all the basic equipment for such work (insulating tape, tongs, pliers, a construction knife, wires, fasteners and the switch itself).
Do not forget to completely disconnect the entire electrical network before starting work, this is a mandatory step. If it is not possible to do this, then it is better to postpone the installation.
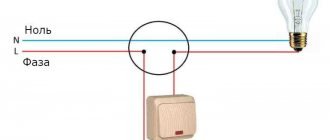
A connection diagram is always included with the double switch. Most importantly, do not forget to constantly check the presence and condition of the grounding, neutral and phase wires. These are three main components, without which the switch will not work properly and an accident may occur.
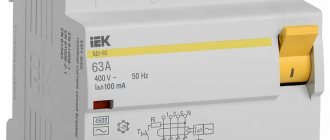
When you finish installation, you can optionally install a residual current device (RCD). This is a special device that will protect your electrical system from current leakage in the future.
Step-by-step instruction
Let's look at how to change the switch.
Dismantling the old
- First of all, it is necessary to de-energize the wires coming to the switch.
- To dismantle the switch, you need to carefully pry off the switch cover with a flat-head screwdriver (if you can’t pick up the cover from the bottom or top, then try to pick it up from the side; on some models of switches there are special latches there).
- After dismantling the cover, the interior of the switch is revealed to us.
- Now you need to unscrew the mounting screws.
- After this, you can remove the switch from the socket.
- Now that the entire internal space is in front of us, we should use an indicator to check the wires for voltage.
AdviceIt is advisable to photograph, if possible, how the wires were connected; this often helps a lot with subsequent installation.
- You can now loosen the clamping screws or quick-release terminals; in the case of quick-release terminals, you may have to cut the wires.
We suggest watching a video on how to dismantle an old switch:
Preparing for installation of a new
- Before further installation of the switch, it is necessary to inspect the wires for frayed insulation.
- If there are any, then it is advisable to cut off this section of the wire, if the length of the wire allows, otherwise wrap it with electrical tape.
- Also, if you have copper stranded wires and the bundle has become significantly thinner, you need to cut it and strip part of the wire for better contact.