When I started working on Arduino, it seemed to me that the whole world was doing the same thing. In fact, it turned out that, like me, many simply find it difficult to get started, to “get into” the topic itself. So I decided to write a quick guide so that you can immediately grab a few components and try this toy. Probably, after reading, you will even immediately understand in many ways what’s what even without my future posts. So.
If you haven't tried Arduino just because you can't get started without knowing what's what, I'll save you now.
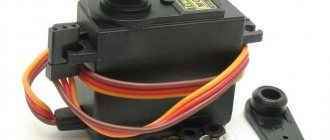
Arduino is as simple as Lego. But when they start to explain it, a bunch of buzzwords pop up: development environment, hardware, stone, firmware, library, driver, sketch, executable file, components, programming skills, software and hardware, Arduino-compatible platform... Who wants to go crazy here? It will do, you have to complicate a simple set of toys for children so much! =) In fact, everything is simple: we have the Arduino itself - this is the brain of our future toys that we will assemble with it.
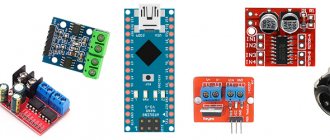
We have two ready-made shields to choose from. Why? We will now “plug” the Arduino into one shield, see how it works, and then reprogram it and plug it into another - and again make sure it works. This way it will immediately become clear to us, and we will be able to move on - fortunately, there are many directions for development together with Arduino.
The first shield is super interesting. From it we will make a radio, which I will tell you a lot about, but not now. The good thing about the kit is that it contains many components and you can add on the final functionality of the device in different ways. But that's all later. The Arduino is already included in this kit, so there is no need to buy it separately. The second shield is super beautiful. With it we will comfortably and intricately illuminate our world. I also plan to tell a lot about her, but later. You can choose any other shields, but I liked these ones because - looking ahead - they have a great future 
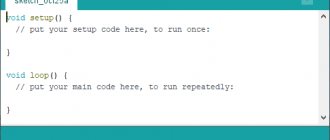
The action plan now is this: we connect and reprogram our Arduino to see how it works and make sure that it is simple. We'll figure out what's what later.
Event Simulation
Real-time event simulation has been the backbone of many industries. Over the years, some major simulation processes have been in the field of aeronautics and aviation. Today, Arduino simulators allow all beginners and professional designers to learn how to program and test ideas without the fear of wasting energy along with their money.
Arduino simulators are great platforms for programmers and designers who want to learn the basics of design and circuit design. The success of such programs is due to the fact that it provides you with the opportunity to learn without the fear of damaging your device. Additionally, students who may have trouble purchasing electrical equipment without having a clue about how it will function can understand many of the nuances through trial and error with the help of these simulators. This will save you a lot of money and time.
Another big advantage of Arduino simulators is that it supports line-by-line debugging, so the user knows exactly where and on which line he or she did something wrong. Simulators come in a variety of forms and are designed to be compatible with major operating systems—Windows, Linux, and Mac OS. Therefore, to make it easier to find a great Arduino simulator designed for your computer's ecosystem, we have compiled a list of the most popular programs.
What else can you do?
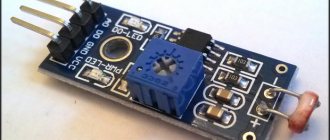
We have created one of the simplest devices, but the possibilities for working with Arduino and other microcontrollers are actually endless. Using various additional sensors, you can implement many different devices:
- Anemometer is a stationary device for measuring wind speed;
- Accelerometer is a sensor that allows you to determine acceleration and orientation in space;
- Analog thermometer - analog sensor for measuring temperature;
- Barometer - a sensor that allows you to determine atmospheric pressure and temperature;
- Soil moisture sensor - a sensor that allows you to find out if the soil is drying out
- Hydrogen sensor - a sensor for detecting hydrogen;
- Current sensor - analog sensor for measuring current;
- Water level sensor - digital sensor of the water level in the tank;
- Temperature and humidity sensor - a sensor that provides information about the ambient temperature and humidity in the form of a digital signal;
- Pulse sensor - analog sensor for measuring heart rate
- A gyroscope is a sensor that allows you to determine your own angular velocity.
This is just a small part of the sensors that you can use to create your devices. We have already done a lot of interesting things and have plans to do many more interesting things.