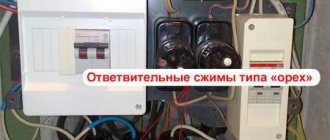
The main difficulty that you may encounter when laying electrical wiring in a private house, apartment or specific room is the need to switch them inside the junction box.
There are several common mistakes associated with this process, and if you want to avoid them, there are a number of important points to consider. Laying out the wires into grooves or cable channels is not difficult. The distribution box is another matter: when working with it, you need to follow certain rules and recommendations.
Junction box problem
This device not only helps to distribute electrical wires throughout the rooms, but also creates an aesthetic appearance in the place where the twists are made.
Also:
- Provides fire safety;
- They retain their appearance for a long time because they are not subject to mechanical stress;
- Reducing costs for the number of wires and consumables.
If there was no distribution box, then each line would have to be run separately. This device can be external or built into a wall recess.
The box helps to separate connected assemblies from flammable surfaces and is easy to install and use during repairs. You can always add an extra branch if necessary.
Floor and baseboard cable channels
Floor and baseboard cable ducts are a separate category. All floor and plinth cable channels also have their own additional elements that simplify the laying of highways.
Plinth cable channels are hollow inside and can accommodate many wires. This is an excellent option for laying antenna or computer cables.
Pros of cable channels
- There is no need to groove walls to lay wires.
- The laid cable is always open for inspection - you can always lay an additional line nearby.
- Despite its apparent softness, the cable channel additionally protects the wires laid in it from mechanical damage.
- The installation of the main line is carried out as quickly as possible.
- Various forms of cable channels allow you to fit the external electrical wiring line into most interior solutions.
Cons of cable channels
- Sometimes cable channels do not look at all in the interior of the room.
- The box “takes away” several centimeters of space from the wall.
- It is easy to accidentally snag the cable channel - knock it off the fastening or break it.
- High-quality installation is only possible with the use of a large number of additional accessories - turns, branches, etc.
Types of distribution boxes
Specialized stores offer customers protective shields, which can be grouped according to individual properties:
- Material of manufacture (PVC, polystyrene, metal);
- They come in round, rectangular or square shapes;
- Degree of housing protection: sealed, with or without protection;
- The input can be different: for cable, corrugation or pipes;
- Closed with a lid with screws and contact installation;
- For different types of installation: hidden or open lines, built into drywall.
Three groups of boxes:
- The desoldering device is intended for tapping and distributing electrical wires in apartments and houses. For example, when installing a switch.
- A distribution box with a terminal block is used when connecting nodes.
The installation mounting box is a socket box; it is used for hidden installation of dimmers, switches and sockets.
Features of installation of boxes in hazardous conditions and their designation in diagrams
A junction box in the basement is potentially dangerous.
Dangerous conditions for installing junction boxes and arranging internal connections include the following situations:
- placement in bathrooms;
- laying electrical wiring in basement spaces;
- arrangement of a junction box close to the ground or in conditions of high humidity (when connecting a submersible pump, for example);
- use for street lighting.
In this case, the conductors are connected only by soldering. It is allowed to twist and tin the resulting connection.
The cable entry into the box is sealed especially carefully and is most often filled with silicone. The line laid in the ground together with the junction box is placed in a metal pipe, which prevents the product from being destroyed by rodents. In addition, according to the requirements of the PUE, such lines must be grounded. The safety measures discussed mainly concern metal junction boxes, in which direct contact with phase voltage threatens the user with electric shock.
Designation on the diagram
Image of distribution boxes, panels
To designate boxes on electrical circuits, special symbols are used, usually in the form of a circle or square with straight lines leading to them. Based on their connection to graphic symbols, they are divided into the following categories:
- introductory boxes;
- branch products;
- straight-through distributors;
- terminal (dead-end) boxes.
Each of the elements designated by one or another icon performs its own function, which is manifested in the difference in their graphic displays (according to GOST 2.755-87).
Installation of distribution box
In a living room, the junction box is installed 15-30 cm below the ceiling. The place must be accessible for regularly checking the condition of the twists.
The device is attached to the wall in several steps:
- According to the instructions, the bottom of the box is screwed to the wall;
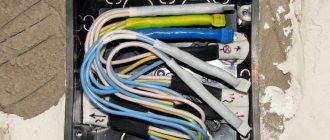
- Bring all the ends of the wires inside and connect them together according to the diagram;
- Check the result of the work;
- Close the lid.
Installation of distribution boxes is carried out using self-tapping screws. If the box must stand in a niche, then it is glued with plaster.
Purpose of branching boxes
Electrical wiring should be divided into separate groups depending on the electricity consumer. For these purposes, special electrical products are used that perform important functions:
- increasing the level of fire safety;
- aesthetics.
The cables are hidden under the box body, which provides reliable protection from mechanical damage and significantly extends the service life of the wiring as a whole. If we consider the installation principle, then devices are divided into built-in and external, suitable for open wiring. The first are placed inside pre-prepared niches, the second are attached to the surface of any wall. There is also a special outdoor box.
Main function of distribution box
Using this electrical product, you can significantly reduce the cost of organizing electrical wiring. Without this element, each electrical appliance would have to be connected to a separate cable, which would increase the number of channels required for installation and spoil the appearance.
Proper distribution of the cable inside the box will increase the safety of residential and non-residential rooms. This is due to the insulation of connecting points with flammable materials contained in the wall. The design of the equipment is thought out to the smallest detail, therefore it guarantees ease of repair work.
But the main function of the box is related to the uniform distribution of electrical energy between all consumers installed in the room. In addition, the product structure takes into account potential expansion due to the addition of new branches of the electrical circuit.
Why are they called differently?
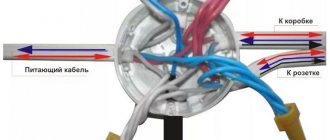
This electrical equipment is called differently, from distribution to branch or junction box. The principle of operation is always identical: the box is the head center, into which electrical energy is supplied from the source, after which it is distributed among different branches, supplying voltage to sockets, switches and lighting fixtures. That is why it got its name – “distribution”. The alternative name “branch” appeared due to the fact that one wire enters the box and several cables exit.
Soldering products are so called because of the method used for switching wires inside the case: after twisting, they must be soldered. Despite the huge variety of modern methods of connecting cables in boxes (terminal blocks, sleeves, clamps, welding), they are still called soldering.
Another synonym for the device was the word “exclusive”. You can hear it only among people involved in the electrical installation industry. In fact, the word is derived from two other terms - distribution and connection: first the wires are distributed into branches, and then they are connected. Following this principle, it is easy to guess where another name for the box came from - “connecting”.
Thus, when going to the store to buy a distribution box, you should not be surprised if the product you need is on the counter, but under a different name. Also pay attention to the dimensions of the device, according to which you will have to create a recess in the wall. For example, rectangular boxes for an apartment are usually produced in a standard size - 100x100x50 mm.
Is it possible to do without installation junction boxes?
Theoretically, this option is possible and acceptable, but to make sure that it is practically impossible to implement, it is enough to imagine a simple picture: an introductory electrical panel is installed at the entrance to the apartment, boxes are not used in the rooms, so you have to pull separate cables to each switch, socket and lighting device. This will lead to significant costs for the purchase of cables, expansion and deepening of the grooves (or installation of wider cable channels, which will disrupt aesthetics). Conclusion: installing a distribution box is an economically feasible and rational solution.
Many people mistakenly believe that an additional connection assembly appearing inside the distribution box (in line with the input panel from a particular outlet) will lead to poor safety, while a solid cable is much better. In fact, if everything is done correctly and correctly, then the selected switching method will not pose a threat. Finally, a product like this makes it easier to find faults on the line, so you don't have to dig through the entire wall to find a damaged section of the electrical circuit.
Connecting wires inside the box
The electrical line is installed according to a pre-designed scheme. All loads and cross-sections of elements are calculated at the planning stage, and the practical part is carried out as follows:
- Remove 2 centimeters of insulation from all ends of the wires;
- If the cable has a double layer of protection, remove the top layer by 5 cm;
- The wiring is connected by color, it is easy and simple;
- Each twist is crimped with pliers, then wrapped with electrical tape or a plastic cap is put on;
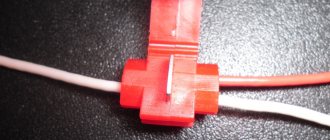
- You can connect the wires in the junction box with the terminals using a clamp, when a twist of the same color is clamped onto one plate.
Then all connections are checked, carefully distributed and the box is closed with a lid.
How to calculate the size of a plastic box
Standard sizes of plastic boxes
Step-by-step instructions for installing the box
If you want all the wires to fit exactly into the boxes, you need to correctly calculate their size. Here are the steps you need to go through:
| Steps, photo: | Description: |
| Step 1. Draw a wiring diagram | We start by sketching out the wiring diagram for the house. You can depict the entire house, or only individual areas. But in any case, you need to accurately measure the length of each part of the route. Specify the size of each type of tray, having previously thought through the wiring in the room so that you have an accurate idea of the most clustered areas. |
| Step 2. Calculate the length of the entire route | Next, we sum up all the obtained values and add about 10% of the margin to the result. It is needed in case of inaccurate trimming, deduction of waste - and in the calculations there is always a chance to make a mistake, and in the end you will need to lengthen some section. |
| Step 3. Box size | You already know how many cables you need to hide at any given time, but there's always the possibility that the number could grow. Therefore, by correlating the cross-sections of the wires with the internal area of the box, make a reserve here too. However, you should not take a very large cable channel, since it is not a fact that it will be filled, and the price of the product can increase several times. Typically, craftsmen believe that no more than 3 wires will be added - this is quite enough. |
| Step 4: Area Ratio | What does GOST say regarding the ratio of the area of the box and the total cross-section of all wires? Wires should not occupy more than 40% of the internal space if the product has a cover, and more than 30% if it is a blind type. If it is difficult for you to calculate, you can find an online calculator of the desired type or use summary tables like those in the column on the left. |
Precautionary measures
When installing the distribution box, it is important to follow safety precautions. If the wires contain different metals, they are connected with adapters. You cannot twist different materials directly.
Be sure to find out where the ground, phase and neutral are located. Before installing the cover, you need to check the functionality of the line.
To do this, connect a powerful household appliance to the network and check the twist: does it heat up or not. If suddenly some wire becomes warm, it means that the contacts need to be better fastened, or replaced with wires with a larger cross-section.
What color solutions are there for cable channels?
The choice of cable channels depends on the overall interior design. There is a large assortment of white products, but colored wire boxes are also often used. Fittings must be used in suitable colors. Different types of tees, adapters and plugs must match the color palette of the cable channels. Products painted to resemble wood are especially popular. Such designs are used in the arrangement of wooden houses and baths.
The color palette includes more than 10 items. Colors such as beech, pine and oak are often found.
Depending on the interior of the room and the color scheme used, the color of the wiring boxes is selected. The use of a colored cable channel allows you to select the material taking into account the basic design of the room. The most popular products are white or wood-look, as they are used to decorate office premises. An unusual version of the cable channel in black.
The beige color palette is in demand, especially the wood texture.
Description of popular models
The most popular product on the market is considered to be the distribution box from Tuso.
It has the following distinctive characteristics:
- Running size: height 4 cm and diameter 6 cm;
- Used indoors for branching wiring;
- The round body with a lid is made of non-flammable plastic;
- The cover is secured with latches;
- Can be installed in concrete and brick;
- It is attached to an open place with screws;
- Has 4 inputs sealed with rubber bands;
- Has good protection against moisture.
This is a budget option, the device is cheap.
Characteristics and dimensions
The choice of one or another element for installation largely depends on how well the accessory is suitable for installation in a particular location and meets the technical conditions and requirements.
Some of the most frequently put forward requirements for distribution boxes are:
- The material from which the product is made.
- External and internal dimensions suitable for use in each specific case.
The dimensions of the main types of polypropylene junction boxes may vary due to the specifications of manufacturers.
However, at the same time, most sizes of round-shaped polypropylene products, both for internal and external installation, can be:
- box with degree of protection IP55, diameter 65 and depth 40 mm;
- diameter 70 and depth 50 mm;
- diameter 80 and depth 50 mm;
These elements each have 4 cable entries with rubber plugs, which simultaneously act as a seal. Fixing the lid with a tight fit around the outer edge of the box.
Rectangular polypropylene distributors can be:
- with degree of protection IP55, dimensions 70x70x40 mm;
- with degree of protection IP55, dimensions 80x80x40 mm;
- with degree of protection IP55, size 100x100x50 mm;
- with degree of protection IP55, size 150x110x70 mm;
- with degree of protection IP55, size 120x80x50 mm;
- with degree of protection IP55 size 190x140x70mm;
- with degree of protection IP55, size 240x190x90mm;
- with degree of protection IP55 size 300x220x120mm;
- with degree of protection IP55 size 380x300x120mm;
- with degree of protection IP55, size 200x140x75 mm;
- with degree of protection IP55, dimensions 240x195x90 mm;
- with degree of protection IP54, dimensions 85x85x35 mm;
- with degree of protection IP54, dimensions 43x80x35 mm;
Junction box Legrand Atlantic IK10
The box is large in size and quadrangular in shape, and also has its own characteristics:
- Height 8 cm, area 15x15 sq. cm;
- Intended for indoor use;
- Made of metal;
- The cover is attached to the body with screws;
- Mounted on brick and concrete surfaces;
- You can mount the housing to the wall or use brackets;
- Paired with the box are mounting perforated slats;
- There is moisture protection;
- The top and outside of the box is varnished and painted.
The only negative is the high cost of the device.
Internal classification
Distribution boxes are used for electrical wiring at any facility that is served by the power grid. Communications are represented by cables with different characteristics and wires that are pulled through the building in various ways.
Cable products for power supply of buildings Source newstes.ru
Therefore, each specific branch has its own standards and requirements. They also apply to electrical distribution boxes.
Installation method
The power grid is stretched inside and outside the building in two ways: on top and inside architectural structures. For the first case, overhead boxes are used. They can be attached to the base using the back wall. Either the fasteners are located inside the product, or outside using mounting lugs with holes for self-tapping screws.
There are two types of boxes for hidden electrical wiring. Some sink into a pre-formed seat in a monolithic base. The body is fixed using a quick-hardening plaster mortar. The second option is intended for structures made of sheet cladding materials. Here, along the outer walls of the box, there are tabs with screws for attaching the body to the canvas.
By material
Internal and external distribution boxes are made of metal or plastic. For the production of the former, tin-plated sheet steel or blanks from aluminum-based alloys are used.
Metal junction box Source el-deco.ru
The prototypes of such products are considered to be cans, in which neat holes were formed using a drill. But unlike them, modern samples meet various technical requirements, including inertness to corrosion.
The advantages of metal products include:
- resistance to various types of mechanical stress;
- long-term resistance to open flame, freezing without deformation of the body;
- durability (depends on inertness to corrosion processes).
Hard plastic is used so that the box retains its shape after mechanical load. It can be polyamide, polypropylene, fluoroplastic. The material is superior to metal in light weight, corrosion resistance, and cost. Another advantage is its high resistance to electric current, that is, the polymer is considered a good insulator.
Plastic electrical distribution boxes Source gorazd25.ru
See also: Catalog of companies that specialize in electrical work of any complexity
Physical parameters
The distribution box for electrical wiring is manufactured with a round, square or rectangular cross-section. The former are more often used for installation in monolithic structures. This is justified by the technique of forming the seat - using a diamond crown by drilling. Here it is convenient to hide the contact connections of a small number of wires, which is important for diverting a switch or socket from the main cable.
Square and rectangular boxes are used more often for outdoor installation. It is easier to distribute several contact connections in them. Therefore, more branches are formed here than in round analogues.
The table shows the standard sizes of distribution boxes for electrical wiring made of polypropylene.
| Section (in mm) | Depth (in mm) |
| Round | |
| 70 | 50 |
| 80 | 50 |
| Round IP55 | |
| 65 | 40 |
| Square IP54 | |
| 85*85 | 35 |
| Square IP55 | |
| 70*70 | 40 |
| 80*80 | 40 |
| 100*100 | 50 |
| Rectangular IP54 | |
| 80*43 | 35 |
| Rectangular IP55 | |
| 120*80 | 50 |
| 150*110 | 70 |
| 190*140 | 70 |
| 200*140 | 75 |
| 240*190 | 90 |
| 240*195 | 90 |
| 300*220 | 90 |
| 380*300 | 120 |
In the residential sector, three options for square boxes are considered the most popular. These are IP54 100*100*50 mm, IP55 80*80*40 mm, IP65 88*88*53 mm. The round ones presented in the table are all used.
Which one is better to choose for your home?
First, the type of wiring is determined: open or hidden. Then a junction box is selected to make it easier to enter the wiring into the housing.
The degree of protection from moisture and dust is also important. Inside the house, an IP44 rating is suitable as it is designed for dry areas. Here you can choose an inexpensive but reliable option.
The box is also selected according to configuration. If the wall is made of concrete, then it is better to take one with a smooth surface, and if it is made of plasterboard, it will be suitable for fastening with screws.
How many holes are needed and what size in the box is calculated based on the size of the electrical cable that will be pulled.
The installation box must be installed on the internal electrical line. The installation is not difficult, but it will help to avoid many troubles. The main thing is to choose the right option so that it includes all the twists and knots. You can do this work yourself using diagrams and instructions.
Design
The design of the distribution box is very simple and is a kind of container with a lid. The box for external installation has special holes with seals for wiring. In the photo below you can see the difference between the outer and hidden boxes.
Hidden and outdoor distribution boxes, respectively.
Although these products perform the same function, as you can see, they have their own significant differences.
You should also draw your attention to the fact that hidden-type boxes usually have special claws with springs installed on the sides. They are designed for fixation when installing wiring through a plasterboard wall.
Photo of distribution box for electrical wiring
Wall mounting methods
Liquid nails can be used as a temporary fastening method. Correct fixation also affects the life of the product. There are several ways to attach a cable channel to the wall:
- Self-tapping screws. The laying step is calculated in advance, which depends on the load on the box, the number of wires, and the cross-sectional dimensions. The average step is 50 centimeters. If the wall has an uneven surface, the step should be reduced to visually hide the gaps and defects of the wall. There is no need to take long screws; a product 40 mm long is enough. Application: wooden and plasterboard walls.
- Dowel-nails. Typically used for installation on concrete and brick surfaces. On the base of the cable duct, holes should be made every 50 cm with a diameter of 6 mm. The channel should be attached to the wall and, using a pencil, place the places where the fastening will be made. In these places you need to drill holes, then attach the box and drive in dowel-nails.
- Bedbugs. These are special mounting clamps that are used for fastening to metal up to 2 mm thick or to aluminum profiles.
- Liquid Nails. They are used when the methods described above cannot be used. Example - tiles in the bathroom, smooth metal surface. It has poor reliability, so it is used as a temporary method of fastening.
The best method depends on the wall material.
Detecting a box using consumer radio technology
If you are not engaged in professional activities, you can use a portable radio as a handy tool. It is enough to tune it to a frequency of 100 kHz; for this, the AM range is selected, then attach the receiver to the wall and move it smoothly. In the area of live wires, interference is created, accompanied by a characteristic pulsating sound with a frequency of 50 Hz, reminiscent of a crackling sound. As you approach the wire, the sound intensifies and decreases as you move away; using this method, you can determine the routes of the wires with an accuracy of 10 cm. To detect the box, you need to determine the route from the outlet to the point where the lines will diverge in several directions, in this place there should be the box is located. This method is good because it can detect not only metal junction boxes, but also plastic ones.
One of the models of a portable receiver with a medium wave range
You can use radio tape recorders as detectors in recording mode; you connect an external microphone on wires, which is applied to the wall. The interference through the microphone circuits is induced and amplified in the amplifier, and the output produces a similar characteristic sound. The disadvantage of this method of detecting boxes is considered to be low accuracy up to 10 cm; you have to clarify it using the tapping method, guided by sound. It is more effective to use industrial devices to detect live wiring.
Cabling
It seems like a simple process, but even here there are some nuances. We recommend choosing cable boxes that have longitudinal partitions in their design. You can easily lay cables in them, so to speak, floor by floor, so that they do not interfere with each other. If the cable channel is a box without partitions, then pay attention to the quality of the cover fastening. It is important here that it is not squeezed out under the pressure of the weight of all the laid wires.
Covers cannot be joined at the joints of the rear panels; installation must be done offset.
Protection class
The main characteristics of branch boxes also include the protection class (GOST 14254-96), which is indicated as IPXX, where XX is a digital designation. Moreover, the first number indicates resistance to dust, the second - to moisture. Below are tables that list the protection class codes.
Table for the first digit:
Table for the second digit:
Using this table, you can easily determine the operating conditions of the device, for example, if the protection class IP65 is indicated on the branch box, this indicates that the device is completely protected from dust and does not allow moisture to enter when a jet of water hits it.
Sequence of work for installing an electrical box
Installation of the mounting box occurs in several stages.
- Preparatory work.
- Box fastening.
- Laying cables.
- Cover fastening.
The lion's share of the preparatory work for installing a box for electrical wiring lies in reasonable planning of the location of the cable network.
Following safety rules, it is recommended to avoid laying the route in places of water supply and gas equipment, near heating devices. Do not also forget that in the event of an emergency, smoke spreads through the cable duct system, which can cause harm to human health. All this must be taken into account when developing an energy supply project.
Directly on the ground, the installation area of the boxes must be pre-marked. At the same time, the vertical and horizontal sections of the route are observed. It is preferable to make turns and additional layers at right angles, over the shortest distance.
Installation of the cable route is carried out in the following sequence:
- Disassemble it by removing the top cover.
- Attach the box to the wall. The distance between fasteners is accepted to be at least 0.5 m. Many products have holes for fastening, they can be used, but it is always worth making allowances for the specific situation. It is best to fasten the box every 50 cm
- For fastening, you can use screws, dowel-nails, anchors or clamps. Thin and light plastic boxes can be secured with glue or double-sided tape. But at the same time you need to ensure that contact with the wall surface is reliable. The surface of the wall must be cleaned and degreased so that contact with the plane of the box is as tight as possible
- Laying wires. The wires can be laid one at a time or in a bundle tied in several places. It is advisable to label each cable or install special tags to make the work easier for those who will deal with the wiring diagram in the future. Wire markings must contain clear symbols and be protected from abrasion over time.
- Installing the cover. It is recommended to lubricate the locking grooves or latches with a special sealant. This will enhance the protective properties of the lid and prevent the entry of dust and moisture. The edges of the mounting box can be coated with sealant before closing.
