to make a simple detector radio receiver with my own hands when I was thirteen years old. It was a homemade detector radio, assembled from a pine board, push pins and a few parts. A lot of time has already passed. My first detector receiver, of course, did not survive. But today, under the influence of nostalgia, I want to repeat that first school design of a detector radio without batteries .
What is a detector receiver - for those who don’t know.
For those who are hearing about a detector receiver for the first time, I’ll say right away that this is not a radio that will fill your room with music around the clock. Here are some of its features:
- — Yes, this radio works without batteries. :-). But…
- — A simple detector receiver will not be able to hear FM stations. The detector receiver only receives AM range stations - Medium, Long, and, if you're lucky, Short waves (MW, LW, HF).
- — The detector receiver is a night radio. Due to the characteristics of DV-SV-HF, normal reception is most often possible after dark. Do not attempt to assemble the detector receiver during the day unless you live near a radio station.
- — Sound volume of the detector receiver. It will be a barely audible “rustling” or, at best, a quiet sound comparable to a whisper.
- — Number of received stations. The detector receiver can only receive high-power or nearby AM radio stations. Therefore, most likely, at first you will be able to catch only one or two radio stations, “drowning” in the noise of interference.
- — The detector receiver requires special high-impedance headphones (headphones originally from the USSR with a resistance of 1600 Ohms or more). Although you can also use regular headphones from the player if you connect them through a matching transformer (see diagram below). Without such a transformer, you won’t be able to hear anything on simple headphones. You can also use piezo headphones.
- — The detector radio needs a good outdoor antenna and grounding . You may not be able to access these benefits in your apartment.
- — If all of the above doesn’t frighten you, then the good news: a detector radio receiver can theoretically work forever :-).
It's impossible to please everyone!
Modern radio stations, as a rule, choose a specific format aimed at a specific target audience: young people, those over 40, progressive people a little over thirty, fans of club music, etc. You won’t be able to please everyone, so you need to understand what the the target audience of the new station - for whom the presenters will broadcast on its waves and what genre of music will be a priority.
The moment of demand is quite important, the technical side is related. To understand which direction is best to broadcast, you need to ask yourself what people want but aren’t getting. By answering it, you need to turn the radio station into satisfying the desires of the target group of radio listeners.
What is heard on the detector receiver.
Previously, in my childhood (during the USSR, as well as perestroika), you could hear a lot of things on the detector receiver: “Deutsche Welle”, “Mayak”, “Voice of Russia” (Moscow Radio), “All-Union Radio”, “Leningrad Radio” " Unfortunately, Russian broadcasting is now being reduced on the CB band, but you can still hear Vesti FM. Foreign radio stations are still present on CB: “Radio Romania”, “International Radio of China”, “Transworld Radio”, “Polish Radio”, “Ukrainian Radio”. In general, if you want, you can find something.
Radio modernization
As you can see, it is not difficult to make such a radio with your own hands, but it has a lot of disadvantages - low sensitivity, large dimensions, and can receive no more than two stations. One of the improvements was discussed above - replacing the large coil with a more compact one with a ferrite core. But there was still one problem left - sound reproduction. If desired, additional high and low frequency amplifiers can be made for this receiver.
In this case, the selectivity and sensitivity of the device will significantly improve, and most importantly, you will be able to listen to radio programs through the speaker. By the way, you can assemble the entire structure in a case from computer speakers. In this case, there will be no need to manufacture an additional low-frequency amplifier. But on the other hand, why spoil such a device with a simple detector receiver?
It is better to assemble a high-quality receiver that operates in the FM range. For this purpose, you can literally use one microcircuit and no more than 5 elements. It is worth paying attention to the fact that reception in this range is much better, and most importantly, a large number of stations operate here.
What is it for.
What is it for? -But here’s why . Detector radio reception is now a rather serious hobby. At least in the west. People make antique detector receivers . This is understandable - they still have a lot of private and municipal low-power CB radio stations . Just a paradise for a fan of detector radio reception (probably, they have everything else there for people as well, and not just AM broadcasting - those bourgeois bastards... :-).
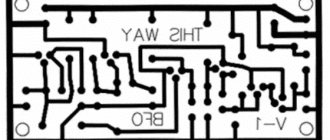
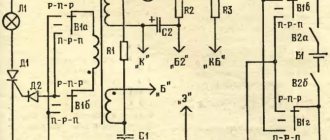
Detector receiver circuit.
shown here consists of four parts , an earphone, an antenna and a ground. The circuit differs from the classic circuit of a detector receiver in that an inductive variometer rather than a variable capacitor. Instead of a variable capacitor, a capacitor C1* with a constant capacitance is used. Selection of capacity is purely experimental. I applied C1 = 180 pf, which allows me to hear “Radio Romania”. Although, in principle, you can do without this capacitor altogether. Much has been written about the dangers of a variable capacitor in a detector receiver I will just say that indeed, this capacitor suppresses not only the interfering, but also the mainly useful signal. And in fact, it is needed in the detector receiver not to maintain oscillations in the circuit, but to “shift” the setting to a longer wavelength range when there is a lack of resource for adjusting the variometer coil. In other words, it is better to do without a variable capacitor at all, while ensuring good tuning by the variometer coil.
Basic manufacturing rules
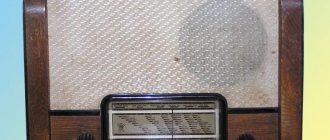
A home-made receiver must be mobile or portable. Soviet VEF Sigma and Ural-Auto radios, and the more modern Manbo S-202 are examples of this.
The receiver contains a minimum of radio elements. These are several transistors or one microcircuit, without taking into account the attached parts in the circuit. They don't have to be expensive. A broadcast receiver that costs a million rubles is almost a fantasy: this is not a professional walkie-talkie for the military and special services. The quality of reception should be acceptable - without unnecessary noise, with the ability to listen to the whole world on the HF band while traveling across countries, and on VHF - to move tens of kilometers away from the transmitter.
You need a scale (or at least a marking on the tuning knob) that allows you to estimate which range and frequency you are listening to. Many radio stations remind listeners what frequency they are broadcasting on. But repeating 100 times a day, for example, “Europe Plus”, “Moscow 106.2” is no longer in fashion.
The receiver must be dust- and moisture-proof. This will provide a housing, for example, from a powerful speaker that has rubber inserts. You can also make such a case yourself, but it is hermetically sealed on almost all sides.
Tools:
- pliers;
- side cutters;
- a set of screwdrivers for minor repairs;
- wood hacksaw;
- hand jigsaw.
You will also need a soldering iron, as well as a stand for it, solder, rosin and soldering flux.
Detector receiver parts.
This detector receiver is a classic in school instrument making. It is assembled on a wooden pine block and push pins. When soldering the receiver on such a board, a nostalgic pine-rosin “tube” aroma is felt - a very important component. As in childhood.
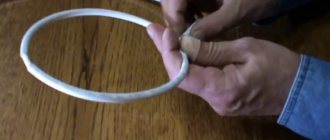
The detector receiver coil is wound on a plastic water pipe and contains approximately 90 turns (until the entire length is filled). To tune the receiver, a piece of ferrite rod from a Selga radio receiver is inserted inside the coil. That is, this detector receiver is configured with a variometer .
Capacitor C1* - as mentioned above - 180 pF. Although it may be of a different denomination. Or you can do without it altogether, if you can receive some radio station.
Capacitor C2 can be 1000 - 2200 pF. Not critical.
Diode D1 - the best diode for a detector receiver is D18 or D311 . But any other high-frequency germanium detector diode can be used. For example D9. Although the sound will be a little quieter. In general, diodes for the detector receiver need to be selected - see below.
Project “What materials block radio waves?”
Radio waves are found everywhere: in space, in the Earth's atmosphere, and sometimes even inside solid objects, depending on the materials. In this project, you will find out what radio absorbent material is, which material is radio absorbent, and how to make the simplest radio wave jammer.
What we need:
- an automatically opening garage door as a radio wave receiver;
- garage key (radio wave source emitting at a frequency of approximately 40,000,000 hertz or 40 megahertz);
- fabric pillowcase;
- block of concrete;
- board 2.5 centimeters thick, approximate size – 120x120 centimeters;
- large soup bowl or metal container;
- notebook, camera for recording your observations (if necessary);
Progress of the experiment:
- Find answers to research questions:
- What is a radio wave transmitter?
- What are radio absorbing materials?
- How are radio waves measured?
- Prepare everything you need.
- Move 1 meter away from the door.
- Check the key operation several times.
- Move away from the door at a distance of 6-9 meters.
- Try to open the door. How easy was it to do?
- Move away slowly until the door stops opening.
- Remember or record your observations.
- Return to the garage. Take the key in your hand, wrap it in a pillowcase and try to open the door. Record your observations.
- Next, use the board. See if it blocks the waves emitted by the key. Try moving further away. Record your observations.
- Take a bowl or container and place the key inside. Is the material from which the container is made RPM or radio absorbent material?
- Carry out a similar experiment with a concrete block.
- Analyze the data received and draw conclusions.
- Find information about the radio-absorbing properties of the materials used and compare them with the results you got.
Conclusion:
You have found out which materials - fabric, wood, concrete and ceramics or metal - are radio absorbent. If you want to explore this topic further, try to find out exactly how the structure of each material affects its radio-absorbing properties.
Selection of diodes for a detector receiver.
The sound volume of the detector receiver directly depends on the type and quality of the selected detector diode . Even diodes of the same name can produce different volumes. Therefore, it is necessary to select the diode by ear, on a working detector receiver. Using a switch, the two diodes are manually quickly switched, and thus the “winner” diode in terms of volume is determined. Next, the winner is placed against the next “contender” and the “winner” diode is again determined. And so on until the loudest “champion” diode is determined.
Excellent results in terms of volume in a detector radio are shown by diodes D311 and D18. And as it turned out, the classic D9 is not the best option compared to the D311 and D18.
Modern radios
Modern devices are very similar to radio receivers in the USSR: they use the same antenna, which produces weak electromagnetic oscillations. High-frequency vibrations from different radio stations appear in the antenna. They are not used directly to transmit a signal, but carry out the operation of the subsequent circuit. Now this effect is achieved using semiconductor devices.
Receivers were widely developed in the mid-20th century and have been continuously improving since then, despite their replacement by mobile phones, tablets and televisions.
The general design of radio receivers has changed slightly since Popov's time. We can say that the circuits have become much more complicated, microcircuits and transistors have been added, and it has become possible to receive not only an audio signal, but also to build in a projector. This is how receivers evolved into televisions. Now, if you wish, you can build whatever your heart desires into the device.
Antenna and ground for detector receiver.
The antenna for the detector receiver is a wire of 20 - 40 meters, stretched on the street between houses or trees. And the higher, the better. But living in an apartment, not everyone can have such an antenna. You can, of course, hang a piece of wire around the inner perimeter of the apartment, but there is no guarantee that such an antenna will work with your detector receiver. Reinforced concrete walls significantly dampen the useful radio signal.
And one more thing - do not try to assemble the detector receiver during the day. Even with a good antenna, during the day, in urban areas, at best, only the hum of interference will be heard. Although exceptions are possible if there is a powerful CB radio station nearby or a local underground CB transmitter ;-).
I also don't always have access to a good antenna. Living in a high-rise building, in the summer I simply run an 8-meter wire out the window. This is enough to hear the powerful “Radio Romania” at night and some other “Bakhhal - Makhkhal - Bukhhall”.
Grounding for the detector receiver - using a radiator. This is not the best grounding, but in a high-rise building you don’t have much choice. The heating battery “catches” a lot of interference. Therefore, I connect through a filter - a regular 3.9 kOhm resistor. Oddly enough, this completely reduces the interference in the form of hum - a clean signal appears in the headphones!