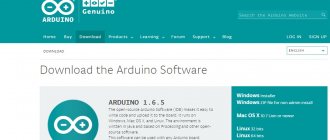
What is Arduino ? Formally, this is a trademark under which official boards and software are produced. The name Arduino comes from the same name of a glass shop in Italy, where the creators of the platform loved to have a glass. The platform offered by Arduino includes hardware (the boards themselves) and software (the development environment).
The Arduino family includes several models of so-called debugging boards. The debug board is, oddly enough, a printed circuit board, at the heart of which there is a microcontroller - the very thing that we will program. A microcontroller is a microcircuit that contains a microprocessor, input-output interfaces, memory (RAM and ROM), timers and other things. Yes, a microprocessor is different, a microprocessor essentially can only perform calculations (like a processor in a computer), and a microcontroller is an almost full-fledged computer housed in a single microcircuit chip. Most Arduino boards use ATmega series microcontrollers from the AVR manufacturer.
We immediately remembered an important idea - Arduino is not a microcontroller, not a processor, Arduino is a platform (and a trademark, of course =)). An Arduino board is a development board with a microcontroller on board.
Iron
In addition to the microcontroller, the debug board contains the hardware necessary for its operation: a quartz oscillator that sets the frequency of the processor, and “loose” capacitors and resistors that perform filtering and pull-up functions.
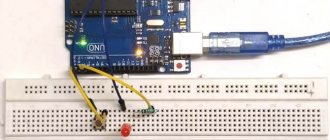
Let's do this: what needs to be done in order to assemble a device on a microcontroller? You need to connect the necessary devices (hereinafter referred to as “hardware”) to the microcontroller outputs, load the firmware onto the microcontroller that will control this hardware, and provide the whole thing with stable power. The goal of the Arduino developers was to combine the above with simplicity and ease of use and modularity, thereby turning the development of electronic devices into a powerful universal designer. This goal was achieved like this: on the board, together with the microcontroller, they placed a “programmer” for loading the firmware, a USB port and a power stabilizer that allows the board to be powered from a wide range of constant voltages: 5-19 volts. The microcontroller needs 5 volts, which the stabilizer provides it with.
Arduino or whatever-duino
Thanks to the openness of Arduino , its design is known and can be freely modified. Therefore, any board manufacturer can produce an analogue of the Arduino board , make changes to the board itself, not to mention the free configuration of kits.
Since Arduino is a manufacturer’s brand, analogues have other names, but usually consonant with Arduino - Freduino, Freeduino, DCcduino, Xdruino, Funduino , Robotale and many others. Moreover, the brand may not be indicated at all, but there will be an inscription like for Arduino. Original Arduinos are made in Italy, most of their analogues are made in China. There are also Russian developments.
Visually, most of these boards look the same (Arduino has a corporate logo) and even have the same blue color (there are some exceptions, but Funduino, for example, is red). Also, analogue boards of Arduino usually have the same prefixes in their names as Arduino itself, for example, DCcduino UNO corresponds to Arduino UNO (what UNO is is below).
DCcduino UNO
Arduino UNO
Unnamed analogue of Arduino UNO
Analogues are usually not inferior in quality, but greatly benefit in price (more on this below).
All instructions, all methodological developments, lessons, etc., oriented towards Arduino, are fully suitable for analogues. Therefore, if image is nothing for you, then feel free to take other duins!
Firmware download
As for the so-called programmer: the initial way to load firmware into the microcontroller is to download a programmer via ISP (in-system programming), which loads the firmware directly into the microcontroller’s memory. This method is good and reliable, but it is more expensive and not as universal as the one used in Arduino. It works like this: instead of an ISP programmer, there is a USB-TTL converter , which allows the Arduino (TTL - transistor-transistor logic on its side) to literally communicate with the computer (USB on its side) and exchange data. But simply communicating with the computer, you won’t be able to load the firmware, so a bootloader “lives” in the memory of the microcontroller (aka bootloader ), which can catch data coming from the computer and load it into the Flash memory of the microcontroller. Every time the microcontroller is started, the bootloader waits for a command from the computer, asking if it wants to load new firmware. If no one answers him for a while, he launches the firmware already in the MK’s memory. This leads to several disadvantages:
- The bootloader sits in Flash memory and takes up space (about 6%, which is quite a lot)
- When power is supplied to the MK, the firmware does not start immediately; each time the bootloader waits for a command from the computer for some time (a couple of seconds) before transferring control to the program in memory.
Both of these disadvantages can be solved partially or completely:
- You can flash an unofficial bootloader, which takes up less memory space and starts faster
- You can upload sketches directly through the ISP, in this case there will be no loss of space or startup delays at all, since the loader will not be in memory at all
Returning to the USB-TTL converter: why did the Arduino developers choose this method of loading the firmware? Yes, everything is very simple: a USB-TTL converter chip costs less than chips that can be used in ISPs (their role is usually played by microcontrollers), which significantly reduces the cost of the platform. But the most important thing is that using a USB-TTL converter gives us the ability to communicate with the board using a computer (smartphone, tablet) without the use of additional hardware, i.e. we can both control some devices (if this is included in the firmware code) and receive data from Arduino, for example, readings from sensors. But the most important thing is that it allows you to debug the code, manually, but still debug it.
④ Arduino Strong programmable module
Rating: 5.0 Price: from 220.87 rub.
up to
585.43 rub.
Go to the store The Arduino Strong board is based on the ATMega328 module and allows you to connect various sensors without the use of additional breadboards or printed circuit boards. The module has 14 output and input digital pins, 6 analog connectors, a resonator and a reset button when hanging. The compact size of the microcontroller allows it to be used in the Smart Home system.
Advantages:
- easy connection to the device via microUSB;
- compatibility with the NodeMCU platform;
- built-in Wi-Fi.
Flaws:
- not detected.
Buy on AliExpress.com
Arduino models
So we got to the Arduino boards themselves, of which there are now a great variety thanks to the openness of the platform: all circuits and source codes are in the public domain, and you can make your own version of the board and sell it, which is what the Chinese are actively doing. The only point: the word Arduino is a registered trademark, and you will have to name your board something else, hence all sorts of Sparks, Elders and other so-called Arduino compatible boards. There are a lot of types of boards, but they use the same models of microcontrollers. The amount of memory and the number of legs depend on the model of the microcontroller, and there are some special features. Most Arduino models use 8-bit AVR microcontrollers with a 16 MHz crystal oscillator (or lower), that is, ATmega boards do not differ in performance, they differ only in the amount of memory, the number of legs and interfaces/timers. Arduino models with MCUs from the ARM manufacturer, for example Arduino DUE, are many times more powerful than their counterparts due to the 32-bit processor, but that's a completely different story.
| Parameter | ATtiny85 | ATmega328 | ATmega32u4 | ATmega2560 |
| Number of legs | 8 | 32 | 44 | 100 |
| Of these are available | 5 | 23 | 24 | 86 |
| Flash memory | 8 Kb | 32 Kb | 32 Kb | 256 Kb |
| EEPROM memory | 512 bytes | 1 Kb | 1 Kb | 4 Kb |
| SRAM memory | 512 bytes | 2 Kb | 2.5 kB | 8 Kb |
| ADC channels | 3 (4 with rst) | 6 (8 in SMD case) | 12 | 16 |
| PWM channels | 3 | 6 | 7 | 15 |
| Timers | 2x 8bit | 2x 8bit | 2x 8bit | 2x 8bit |
| 1x 16bit | 2x 16bit | 4x 16bit | ||
| Hardware Serial | No | x1 | x1 | x4 |
| External interrupts | 1 (+6 PCINT) | 2 (+23 PCINT) | 5 (+44 PCINT) | 8 (+32 PCINT) |
| Boards based on it | Digispark, LilyTiny | Uno, Nano, Pro Mini, Lilypad, Strong | Leonardo, Micro, Pro Micro, BS Micro | Mega, Mega Pro |
Thus, you should immediately understand that, for example, Arduino Uno = Nano = Pro Mini = Lilypad in terms of its capabilities and interchangeability. Or Leonardo=Pro Micro. You can find links to inexpensive Chinese Arduins on my website. Exactly there you will find links to a bunch of sensors, modules and other hardware that can be connected to Arduino. We'll talk about Arduino's capabilities for working with other hardware in one of the following lessons.
What is Arduino?
Arduino is an "open" source hardware platform and circuitry. There are two elements of the Arduino ecosystem: boards and software. Only boards from Arduino.cc can be officially called "Arduino". (The name is a trademark.) From an open source perspective, as Arduino grew in popularity, the Arduino IDE was expanded to support many other boards from various manufacturers. These devices are more properly called "Arduino-compatible". This means that they will work without problems with Arduino code like this:
int digitalRead(uint8_t pin) { uint8_t timer = digitalPinToTimer(pin); uint8_t bit = digitalPinToBitMask(pin); uint8_t port = digitalPinToPort(pin); if (port == NOT_A_PIN) return LOW; if (timer != NOT_ON_TIMER) turnOffPWM(timer); if (*portInputRegister(port) & bit) return HIGH; return LOW; }
On the software side there is a "kernel" and an "IDE". The core is a C++ library called "Arduino core", which is unique to each type of processor. This extensive library allows common functions such as digitalRead() or digitalWrite() to work on many different architectures. The Arduino IDE is a cross-platform application that provides a clear starting point for all Arduino boards.
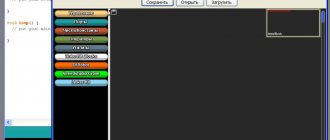
On the hardware side, it's difficult to summarize all the possible options in a concise way. So the focus here is on popular boards (both original and compatible): Uno, Mega, ESP8266, Zero and MKR.
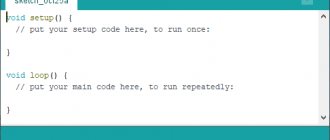
Programming
Arduino is programmed in the C/C++ programming language with its corresponding syntax. The built-in assembler, preprocessor and compiler (avr-gcc or Win-AVR) forgive a large number of errors and do a lot for the user automatically, we don’t even know or think about it. The basic functions for controlling microcontroller pins and interfaces, mathematics and some other functions/macros are taken from an open source framework for working with microcontrollers called Wiring. This is what the basic set of Arduino tools consists of. In this regard, the Arduino developers themselves call the language “simplified C++”, and even gave it a separate name – Arduino Wiring.
Here we should separate the flies from the cutlets: “out of the box” in the Arduino IDE we have access to a huge bunch of different functions and tools:
- All the features of the C++ language that the compiler provides: data types, operators, and generally all the vast syntax. We program in the same C++ that can be used to program anywhere else.
- The “core” of Arduino is the Arduino.h library, which is automatically included in the code. It contains functions for managing pins, interfaces, and also has a set of all sorts of useful functions and tools. It is also responsible for initializing and configuring the microcontroller peripherals at startup. By the way, the core contains standard libraries for Serial, Wire, SPI and EEPROM.
- The folder with the program contains a set of standard libraries: for an LCD display, a stepper, a servo drive and some other hardware.
- The compiler comes with a set of low-level libraries for AVR (sleep, progmem, watchdog and many others).
- The compiler allows you to work with the microcontroller “directly” using registers and reading the datasheet until the morning.
- We can also write in assembler, taking control of every clock cycle of the MK.
If you learn how to code fluently on Arduino and suddenly move on to developing programs in the same C++ in more advanced development environments, you will be unpleasantly surprised by the large amount of additional code that you will have to write by hand. And vice versa, if a person who knows how to use pluses (si-plus-pluses) looks at a typical Arduino code, he will say “how does this even work?” The compiler in the Arduino IDE is configured to be as omnivorous and error-forgiving as possible because it is a learning platform.
Now let's return to the concept of a library. The life of an ordinary Arduino operator is inextricably linked with libraries, because a huge community over the years of its existence has made a huge number of these same libraries for all occasions and for all sold sensors and modules. A library is a set of files that contain additional code that we can use simply by reading the documentation or looking at examples. This approach is called a “black box”; we may not even realize what horror and nightmare (in terms of code complexity) is contained in the library, but we can easily use the opportunities that this code provides. We bought a module - found a library - opened an example - that's it, the result was achieved...
⑨ Arduino Pro Micro Controller Module
Rating: 4.9 Price: from 379.08 rub.
up to
380.61 rub.
Go to the store The Arduino Pro Micro microcontroller is small in size and has 22 pins, 5 of which can be used as PWM outputs and 4 as analog inputs. The external power supply voltage is 6-12 V. A microUSB connector is used to connect to a personal computer. The cable is not included in the package.
Advantages:
- can emulate a keyboard, mouse and game controller;
- 22 digital ports;
- presence of built-in USB.
Flaws:
- lack of USB-UART chips.
Buy on AliExpress.com
Write without libraries?
Many people believe that effective code should be written without libraries, as a blank canvas. This is complete nonsense because:
- Modern microcontrollers have enough memory so that the developer can save time and use ready-made tools. Moreover, serious development is done using real-time operating systems, which themselves are a huge heavy library. Nobody writes assembly language, it’s not 1980 outside.
- Modern compilers “write” and optimize code at a very high level.
- If you write a large project with pure bare code, it will be a canvas of tens of thousands of lines, which will be impossible to understand. The program is divided into files - essentially the same libraries. Some algorithms and parts of the program are initially convenient to wrap in a class and use as a library for several projects. So it’s basically impossible to write without libraries, no matter whether you download it from the Internet or write it yourself.
- The library most often contains a convenient class that implements ready-made tools for working, for example, with a button. If you have one button in your project, it makes no difference whether you describe it manually or use a class. But as soon as two or more identical buttons appear, from the point of view of the amount of memory it is much more efficient to use the library, because the same functions will not be duplicated. We will return to this in the lesson about creating large projects.
- If you are a beginner, then in 99% of cases a library from the Internet will be written and optimized many times better than your code.
① Arduino Uno R3 microcontroller
Rating: 4.9 Price: from 252.97 rub.
up to
317.17 rub.
Go to the store The Arduino Uno R3 microcontroller is based on the ATmega328p with a clock frequency of 16 MHz, has a built-in memory of 32 KB and 20 digital input and output pins for interacting with external devices. Thanks to the open platform, the microcontroller will be useful to designers and programmers who are planning to create their own project. The board is powered both from a USB connection and from an external source: a battery or an AC adapter.
Advantages:
- good soldering quality.
Flaws:
- if used as a programmer, it does not always flash another Arduino board the first time.
Up close
Buy on AliExpress.com
Possibilities
Why learn to work with Arduino and electronics in general?
- This is an incredibly interesting, technical, brain-developing and relatively cheap “DIY” hobby with an endless number of ideas and their implementations.
- The ability to create highly specialized electronic devices and machines that have no analogues on sale or are too expensive. Including for personal needs or for work (a jeweler I know made himself a controller for a muffle furnace, which is very expensive).
- The ability to create new unique devices in order to enter crowdfunding and start sales and your business.
- Excellent practice in programming and electronics, especially before studying for a relevant specialty.
- Possibilities in general: automation of processes and “machines”, automatic regulation of processes, remote control, monitoring of various quantities, wearable and stationary electronic devices for various purposes.
⑫ ATTINY167 microcontroller
Rating: 4.8 Price: 191.83 rub.
Go to store ATtiny167 is a low-power 8-bit microcontroller similar to the previous model, developed on the basis of a powerful RISC AVR CPU. The device combines efficiency and power consumption, achieving performance of 1 MIPS/MHz. The built-in temperature sensor allows you to monitor the state of the board under heavy loads. The DebugWIRE debug system finds errors in libraries and reports them to the user.
Advantages:
- easy installation of libraries using prescribed drivers;
- 14 I/O pins;
- powerful LED sensors.
Flaws:
- defective hardware SPI, which does not allow working with some devices.
Buy on AliExpress.com
Platform haters
In the world of serious programmers and developers, Arduino is not liked very much. Why? Let's look at some popular negative comments about the platform.
- In the Arduino IDE, working with a microcontroller is simplified so much that the Arduino operator does not need to know anything at all about its architecture and how it is generally programmed and configured: everything is done in the form of ready-made and understandable functions. Since when did convenience and simplicity become a bad thing? For a beginner, this is the only way to get acquainted with the world of robotics without studying piles of documentation and receiving the appropriate education. Let me also remind you that Arduino was created primarily for training, and secondly for quickly and conveniently creating prototypes of electronic devices, this is its feature.
- Yes, the standard functions have a lot of protection against fooling a newbie, they are heavy and slow. But a beginner will not need to write such code where speed and memory will be critical! And if necessary, by this time he will already be able to write optimal code and will find quick analogues of Arduino functions on my website or elsewhere on the Internet or write them himself. We also rewrote the standard Arduino core and made it fast and sharp. And one more point: the Arduino core is designed in such a way that it ensures compatibility of code and libraries for all Arduino boards. Have you started making a project on Arduino NANO and are running out of memory/legs? We transfer the project to Arduino MEGA and continue working. Was NANO too big for the project? We transfer it to ATTiny85 without even opening the documentation: most of the libraries work on all Arduino-compatible boards, this is a very big plus, although at the expense of performance and memory.
- And no one promised you HAL! The capabilities of MK are revealed when using libraries (see list of libraries), fortunately the platform’s community is truly huge. You can also always learn how to work with the datasheet and registers and configure anything and everything manually.
- And he does the right thing! One mistake and you could end up with a blocked stone. If desired, you can flash fuses through the Arduino IDE and configure them for other frequencies, we talk about this in this lesson.
- That's right, for children and housewives. The Arduino board is designed for creating breadboards and prototyping; it can be considered as part of an electronic “constructor” for training. The board has all the necessary wiring, why not use it even as the heart of the project?
- True, but there is a small nuance: Arduino IDE is officially free, after a simple installation (Next, Next, Next, Finish) it is immediately ready to work: just select the board from the list and start writing code. Adult development environments require an adult approach and the barrier to entry for working with them is disproportionately high. In addition to difficult installation and configuration, you will find advanced settings of the microcontroller itself in manual mode, reading documentation and datasheets, an “adult” interface and many nuances in the programming itself and compiler settings. It will take a lot of time to study all this.
- Why? The platform does not limit the developer in any way...
- Why? The Arduino IDE does not limit the developer in any way; you can completely abandon Arduino.h and start coding from scratch using registers and assembly inserts, i.e. absolutely the same as in an adult development environment. Not enough “power”? For some reason, it is enough to create 3D printers and other multi-axis CNC machines, the firmware of which consists of tens of thousands of lines of code.
- Yes Yes Yes. But don’t forget about the entry threshold and size of the community with content, libraries and examples “for beginners,” as well as the complexity of working with STM in general. Watch the videos on this channel and compare what is happening with working with Arduino. As for the capabilities and speed of operation, for most amateur projects Arduino (ATmega328/2560) will be more than enough, especially if you know how to write optimal code.
- Yes, because of simple but understandable standard examples, the audience of Arduinists grew very quickly and literally flooded the Internet with their projects, thereby luring other beginners into this hobby. 99% of educational examples, examples of working with libraries and modules are written simply and terribly not optimally: int variables for everything, the ubiquitous delay, blocking loops and so on, in addition to the godless Arduino functions. People take these examples as a basis and continue to write further. But these people are standing on the threshold of a very big door called robotics. Having crossed this threshold, discarding all crooked examples and learning to competently build the structure of their code, they find themselves in a world of limitless opportunities for creativity and research, a world of endlessly interesting and diverse projects on Arduino. This is why I write these lessons.
What else would I like to say about the negativity from “professionals” - in most cases they are simply jealous: in “their time”, to create even a simple project based on a microcontroller, you had to spend a huge amount of time studying the documentation in English for a specific MK model, all the other hardware and microcircuits in the project, learn to work in an unfriendly development environment, wire and solder the board, buy an expensive programmer, and so on. And nowadays you can buy a board for 150 rubles, plug it into USB, launch a “notepad with a Download button” program and start coding using a huge number of ready-made libraries and examples for almost any hardware on the market, and find the answer to any question in Google . Really, the guys are just burning =)
Choosing the Right Arduino for Your Project
Now that we've covered some details about each board, we can determine the optimal use of each board. Although UNO is the most popular board, all other boards also have excellent support through online forums due to the common architecture and the use of a common language and IDE. This means you're less likely to fall into device-specific traps that might prevent a piece of code from running due to hardware configuration or inherent bugs. The Arduino code can be easily transferred to another board without any changes. This is beneficial for the user who wants to change the board at a certain stage of the project. The deciding factor in choosing a board comes down to two main things: hardware and cost. If the cost aspect of each Arduino is obvious, the one with the lowest cost is preferred. That hardware may not be so easy to identify. When considering equipment, consider the following:
- Physical Dimensions
- Processor power
- Memory size
- I/O Capabilities
- Onboard peripherals
- Weight
- Connection
In terms of physical size, the Arduino Nano is the smallest and very portable device. UNO is a medium sized development board, but it is still quite small. It can be used in many projects, including remote control devices such as RC cars and boats. Mega and Due are much larger, making them difficult to use in projects with limited space. If the project requires high processing power, Due comes out on top with a powerful ARM core and large RAM/ROM. Even though the Mega is a big Arduino with a lot of pins, its processor speed remains the same as the UNO and Nano (the same Mega family). Therefore, using Mega does not provide any speed advantage. UNO and Nano use the same processor. In terms of hardware and peripherals, UNO and Nano are identical. If a project requires a lot of pins, Due and Mega are the obvious choice. For a project that does not require a strong processor, but needs a large number of connection pins, Mega is suitable.
Important Pages
- GyverKIT kit - a large Arduino starter kit of my design, sold in Russia
- Catalog of links to cheap Arduins, sensors, modules and other hardware from AliExpress from trusted sellers
- A selection of libraries for Arduino, the most interesting and useful, official and not so
- Complete documentation on the Arduino language, all built-in functions and macros, all available data types
- A collection of useful algorithms for writing sketches: code structure, timers, filters, data parsing
- Video lessons on Arduino programming from the “Arduino Engineer's Notes ” channel are some of the most detailed in RuNet
- Support the author for his work on the lessons
- Feedback - report an error in the lesson or suggest an addition to the text ( [email protected] )
4.8 / 5 ( 18 votes)
Which Arduino Board is the Best?
You may still be wondering: which of these boards is the best Arduino? As you can see, each of these boards has some advantages for different situations. The question “Which Arduino board is better” is not complete. You need to add "...for my application or project".
While it is impossible to cover every board type and option, this information should give you enough information to select a board for your project.
© digitrode.ru
Tags: Arduino, ESP8266, ESP32
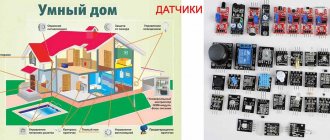
Buying a ready-made Arduino robot as a start to learning
We have already written about purchasing ready-made robots as a way to get acquainted with Arduino initially. There are a huge number of such Arduino-based kits on sale. For younger children, this method of introducing Arduino is preferable, since it is a ready-made toy that they can play with, and then disassemble and use the Arduino board and other components in learning.
Of course, the finished robot may not contain all the parts required in the lessons for beginners, but everything missing can be purchased separately. Simple DIY components such as LEDs and resistors can be purchased at any radio parts store.
The photo shows a popular Arduino robot - a Bluetooth-controlled machine that costs less than $100.
Blutooth controlled car