Nowadays, for many people, phones have been replaced by computers, laptops and even televisions. But still, watching movies on a small screen is not convenient. You can, of course, take the simple route and connect your phone to the projector, but the equipment costs quite a lot, and not everyone is able to buy an expensive device. However, there were always jacks of all trades.
You can make a projection from a phone to an Android or iPhone using inexpensive hand-held tools using the instructions below.
Theory
The principle of transmitting an image from any medium to a vertical surface is based on the laws of optics. When various carriers interact with the light flux, the rays are refracted, the spectrum changes, and is subsequently displayed on the screen.
A homemade projector can be implemented in different ways. In practice, there are several image transmission technologies that are implemented in all kinds of filmoscopes, sliders and projectors. The most popular design solutions are:
- Slide projector – is based on the passage of a light flux through a transparent medium. The figure below shows a diagram of such a device,
Rice. 1: schematic diagram of an overhead projector
where from the light source 2 the flow is directed by the reflector 1 to the slide 4 located in the focusing lens 3. The modified spectrum extends to the optical amplifier 6 and is transmitted to the screen 7.
- Epiprojectors – work by reflecting the light flux from opaque objects.
Rice. 2: schematic diagram of the epiprojector
The figure above shows the principle of operation of a reflective type projector, in which a light source 1 transmits a flux that is reflected by mirrors 2 and falls on an image 3. The modified light flux moves through the lens to a reflector, which transmits the image to the screen.
- Film projectors - transmit video information from moving film slides when a light flux passes through them.
- DLP projectors – broadcast video information by reflecting the light flux from a special chip. The flow itself is formed by a color logical matrix. Such devices provide high image clarity and color accuracy.
Rice. 3: Schematic diagram of DLP projector - LCD projectors - realize image transmission by passing light through a transparent LCD panel. Unlike DLP technology, LCD projectors produce bright, vibrant and rich colors.
Today, digital multimedia projectors can easily compete in photo and video quality with the best HD TVs. Therefore, home projectors can be used as a personal cinema for family movie viewing or as a means of displaying visual materials at conferences and lectures. Alas, it is almost impossible to recreate a digital multimedia device with your own hands, since it is necessary to synchronize the operation of mechanical, optical and digital elements. But anyone can implement a classic projector using digital equipment.
What is needed for this
First, let's look at the operating principle of such equipment. The main design elements are lenses and a lens. The quality of light flux distribution on a large screen depends on them. The main thing is to set the right angle. In the absence of initial technical data regarding the lens and lenses, the correct distance between the elements can be set through trial and error.
The source of the image in our case is the liquid crystal matrix. You can use both a part from a monitor and a smartphone. In the first case, the image will be much clearer and of higher quality overall, because the area of the matrix is critical. The best option is FullHD format scanning - 1920 by 1080 pixels.
The brightness of the projection lamp plays a significant role. The brighter it is, the larger the output area it covers. Roughly speaking, this is an indicator of the final screen size.
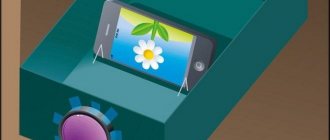
Smartphone based
Mobile phones are used not only for long-distance communication, but also for exchanging video data. That is why the idea of making a projector from a pocket gadget arose. Theoretically, the process of obtaining an image consists of converting a graphic signal from the display through an optical lens to any surface. To do this, you need to make a case that completely darkens the surrounding space, and mounting devices for both the lens and the mobile device.
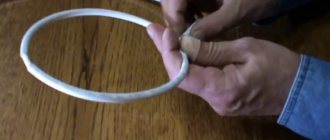
It's quite easy to pick up a magnifying glass or magnifying glass. The main thing is that its overall dimensions are commensurate with the size of the phone screen. You can use the front wall of the case to fix the magnifying glass. To secure the phone vertically, you can use a cardboard box or cardboard ribs in which the mobile phone will not wobble. The easiest way to make a housing is from a cardboard box, since it is easy to cut a hole in it with the required parameters without special equipment.
For work you will need tape, glue, a stationery knife, pencil, ruler and compass.
The process of making a projector from a smartphone is as follows:
- Choose one of the walls of the box so that the distance from it to the opposite one is greatest. This will provide a wider range for customizing display options.
- Mark the middle on the selected wall, around which cut a hole for a magnifying glass.
Rice. 4: make a hole for the magnifying glass - Attach a magnifying glass to the side of the box. To do this, you can use either tape or good glue; it is important that they do not get into the lumen of the lens, otherwise it may ruin the image from the projector.
Rice. 5: Attach the magnifying glass - Make a holder for your mobile phone; it is important that during installation it does not cover the display and fits inside the box.
Rice. 6: Make a holder - To adjust the image experimentally, select the most optimal distance from the mobile to the magnifying glass.
Rice. 7: choose the distance - Make a hole for the mobile charging cord to lead it out of the box.
The projector from your smartphone is ready, you can start broadcasting, but first install a special application that will rotate the image 180°. In some phone models, it is enough to disable auto-rotate screen and install the gadget upside down. It is better to organize viewing in a well-darkened room to increase the clarity and brightness of the picture.
In addition, a holographic projector can be made from a mobile phone and polymer plates (Fig. 8). But the cost of such a homemade product will amount to a considerable penny, with a relatively low image quality, so it can compete with the above-described sample only in the originality of the picture.
Rice. 8: Example of a holographic projector
High-quality projector with LCD matrix and Fresnel lenses
Not every amateur can make such a projector - this will require an understanding of electrical circuits, soldering skills, as well as a lot of free time and money - the components we need are relatively expensive. So, you will need:
Having made sure that everything is at hand, let's get to work:
If desired, instead of plywood, you can make the body from chipboard
The system we will make will require good cooling
Make sure the LED is positioned exactly opposite the center of the lens
The larger the diagonal of the image source, the better the output image quality will be.
It will be needed in order to focus the image at different distances.
Video: high-quality do-it-yourself projector (instructions for experienced electronics engineers)
Creating a home theater is an exciting process. Some people can get by with a simple shoebox projector, while others will happily spend several hours assembling a complex but high-quality device.
Source
Tablet or laptop based
This projector has higher image quality due to its larger screen. There are both more “humane” methods of execution, in which digital devices remain intact, and methods for which you need to remove the graphics matrix to broadcast the image.
To make a projector from a laptop, you will need a cardboard box large enough so that its end side is comparable to the monitor, and its length is at least 50cm. The magnifying glass should be quite large; a Fresnel lens will do the job well; it is also important to use a lens from a device for reading full-page books. To assemble the projector you will need to do the following:
- Cut a hole on the end surface of the box for a magnifying glass.
Rice. 9: Cut a hole for the glass
Its dimensions are made slightly smaller than the lens so that it can be secured to the edges.
- Use electrical tape, tape, or silicone sealant to secure the lens in the hole.
Rice. 10: Fix the lens
It is important to ensure a tight fit between the glass and the cardboard to prevent light from entering the projector from the outside.
- Make a hole in the opposite wall for a laptop monitor.
Rice. 11: Make a hole for the monitor
When installing the latter, the edge of the cardboard should overlap so that light, again, does not penetrate inside the projector.
- Place the laptop upside down so that the keyboard is on the lid of the box. Based on the principle of optical reversal of an image using a lens.
Rice. 12: install laptop
The simplest laptop projector is ready, just plug it into a power outlet and you can enjoy broadcasting your favorite movie. Using the same principle, you can use a tablet to assemble a projector.
Original solutions
You can also make a 3D projector with your own hands at home. It is more difficult to create such a device; it will also require financial costs.
It is necessary to create a truncated plastic pyramid. There are different sizes. An option is suitable, the larger base of which is 60x60 mm, the smaller - 10x10 mm, and the height - 45 mm. To show holograms from a tablet, you will need a larger pyramid, since the device's screen is larger than that of a phone.
It should be placed on the phone screen in the center. After this you can turn on the movie. This type of projector is well suited for entertaining children: holograms will strain the eyes less. In addition, this option looks unusual and attracts attention.
Projector from slide viewer
Making a projector from a ready-made unit greatly simplifies the task, since you no longer need to make any adjustments in terms of optical effects. These settings are made at the factory and the slide viewer perfectly displays graphic objects from paper or other A4 format media. Your only task is to choose the most suitable photo-video signal translator. In this example, we will look at making a projector from a working tablet monitor that fits the size of the diascope.
To do this you will need to do the following:
- Disconnect the matrix from the gadget; a tablet that you no longer use is perfect.
Rice. 13: remove the LCD matrix
When dismantling the matrix, be extremely careful not to damage the fragile element.
- Along with the LCD panel, remove the electronic board of the tablet, as it will be used to connect to the PC for data transfer.
- Place the matrix on the glass with a gap of about 5mm between them.
Rice. 14: Install the LCD panel on the glass
The distance is necessary for ventilation, since a powerful stream of light will also cause excessive heating of the surface.
- Install a fan opposite the gap; in this case, a cooler is used.
Rice. 15: Install the fan
Due to its low weight, it is attached using double-sided construction tape.
The projector is ready - just connect both devices to the network and launch the desired video material through the computer. With this projector you will get fairly high image quality, which, as a rule, depends little on the distance to the screen. It should be noted that smaller devices for viewing slides that will be comparable to the screen of a smartphone can be found on sale.
Content
There is probably no person who has never heard of projectors. Some people actively use the device in the workplace, but for most people, a projector is mainly associated with movie theaters. And no wonder - after all, it was this wonderful device that led to the emergence of cinema as an art form.
In the minds of the mass user, a projector is a large or medium-sized box that resembles a kind of flat camera. Today we will break this stereotype and talk about our “little brothers” - pocket projectors for smartphones.
A smartphone projector (mini projector, pocket projector) is a portable device that projects an image from the phone screen onto any surface.
Most often, such samples are equipped with a light-emitting diode (LED) light source, and their matrix is made using DLP (Digital Light Processing) technology. Thanks to their design features, projectors have modest dimensions and low power consumption. But for these advantages they pay for image quality (lower than in stationary models) and the “rainbow effect”.
The rainbow effect is a distortion of the picture, which manifests itself in multi-colored contours of the image that appear when the viewer's eyes quickly move.
Ways to improve picture quality
To increase the image clarity from a homemade projector, you need to perform the following simple measures:
- Set the monitor to maximum brightness and contrast - this will improve the quality of the picture.
- Eliminate any cracks or gaps in the projector cabinet that could allow excess light to enter.
- Paint the inside walls of your homemade projector black. If possible, it is better to cover it with black velvet fabric to minimize the reflection of light from the walls.
Rice. 16: Paint the walls black
In addition, external factors also affect the quality of the projector’s broadcast. So, in order for the picture to be well perceived, the windows should be covered with curtains during daylight hours, and at night all lighting sources should simply be turned off. Remember, the shorter the distance to the screen, the higher the image quality on it. The screen itself also matters - it is preferable to have a smooth, monochromatic surface in calm colors.
How to connect Android to a projector - wireless application
First of all, check if your projector has a dedicated smartphone app that you can use to control the device. This is the simplest and most affordable option. Brand name projectors come with apps that allow you to connect to them via Wi-Fi or Bluetooth and project your smartphone screen. If you can't find the program in the Play Market or App Store, go to the website of the projector company or look in the device manual.
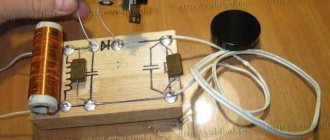
Implementation of the generator and its operating principle
Thanks to electromagnetic induction, an electric current is generated in the generator. This happens because the winding moves in an artificially created magnetic field. This is the principle of operation of an electric generator.
An electric generator has a rotor and a stator. The magnetic field is created using a rotor. Magnets are attached to it. The stator is the stationary part of the generator, and consists of special steel plates and a coil. There is a small gap between the rotor and stator.
There are two types of electric generator. The first has synchronous rotor rotation. It has a complex design and low efficiency. In the second type, the rotor rotates asynchronously. The principle of operation is simple.
Asynchronous motors lose a minimum of energy, while in synchronous generators the loss rate reaches 11%. Therefore, electric motors with asynchronous rotor rotation are very popular in household appliances and in various factories.
During operation, voltage surges may occur, which have a detrimental effect on household appliances. For this purpose, there is a rectifier at the output ends.
The asynchronous generator is easy to maintain. Its body is reliable and sealed. You don’t have to worry about household appliances that have an ohmic load and are sensitive to voltage surges. High efficiency and long service life make the device popular, and it can also be assembled independently.
What will you need to assemble the generator? First, you need to choose a suitable electric motor. You can take it from the washing machine. There is no point in making the stator yourself; it is better to use a ready-made solution that has windings.
You should immediately stock up on a sufficient number of copper wires and insulating materials. Since any generator will produce voltage surges, a rectifier will be needed.
Let's use a tachometer and turn on the engine, so you can find out the speed of rotation of the rotor. You need to add 10% to the resulting value, this will prevent the engine from overheating.
Capacitors will help maintain the required voltage level. They are selected depending on the generator. For example, for a power of 2 kW, a capacitor capacity of 60 μF will be required. You need 3 such parts with the same capacity. To make the device safe, it must be grounded.
Gobo projector
The principle of a gobo projector is simplistically similar to that of laser pointers. This device is often used to broadcast advertising logos, text and pictures.
Used:
- a regular LED lighting spotlight, a wire with a switch is soldered to it;
- Instead of the protective glass of the light bulb, there is a lens. For experiments, as well as for the lens, you may need several varieties of them. Magnifiers can be bought in specialized optical stores, on the Internet;
- a piece of plastic sewer pipe with a coupling;
- heat-resistant sealant (for convenience, it is drawn into a syringe);
- stencils, you can order them from a printing company or you can make them yourself, print them and cut them out of plain paper.
Assembly:
- The light bulb is removed from the reflector and a 100 W LED is installed in its place.
- A wire with a switch is soldered to the lamp.
- A magnifying glass (thick, convex 10x) is inserted into the reflector, everything is secured with sealant (red mixture in the photo) - this is a condenser. On top is another lens, but thinner, for example, 3 or 4 times.
- One or two lenses are also selected as a lens, for example, 50 mm with 5x magnification (if you use two, the picture will be 2 times larger).
- We make a lens from a coupling and a pipe, selecting the diameter of the latter to match the lenses.
Necessary materials
Before you enthusiastically start making a homemade projector, you need to come to terms with the obvious fact - the picture quality will not be excellent. The situation can be improved with the help of good tools and a more or less even surface, but drastic changes will not happen. Budget options are based on the use of smartphones, tablets or laptops, the images of which are enlarged and projected onto the screen.
If you plan to watch feature films on the projector, the quality will be sufficient. However, the picture will be too blurry for broadcasting sports matches or scientific videos. To make a primitive projector you will need the following basic set of tools:
The list can be expanded depending on the method, for example, if you have to make a projector without a magnifying glass.
The idea of using filmstrips
Don't stop at looking at photos. Entertain your family and friends with a fun evening out. Tell a fairy tale or soundtrack a film in your own way, use musical accompaniment.
And you don’t have to look for filmstrips on photographic film, develop them and fix them with reagents. All you need is a printer, imagination and a computer.
- Use clear film such as Lomond.
- Up to 14 frames can fit on one album sheet!
- The final image will have a resolution of 1050 x 800.
- Filmstrip can be drawn in vectors.
- The finished image is printed on white paper to check whether the dimensions will fit the film.
- At the finish line, the picture is printed on Lomond paper.
- If necessary, the tape is cut and spliced to complete the picture, but you can prepare the storyboard yourself and print it so that you do not have to create the film by hand.
- Simply insert the finished slides into the projector and enjoy watching.
A way to make a magnifying glass at home
The purpose of the lenses is clear. This is a magnifying glass that helps you magnify objects. To make your own lens you will need a plastic bottle, water, plasticine or window putty. When you fill the bottle with water, the magnifying device will be ready, but this is clearly not enough.
Sequential creation of a magnifying glass:
- 2 identical circles are cut out of a plastic bottle.
- Then the two circles will need to be connected using plasticine or window putty. You should not forget to roll out the plasticine before work.
- Next, you will need to cut the straw into two parts and attach it to the surface of the lens.
- One end of the straw is inserted into a slit in the lens, and the other is used to remove air. This will help force water inside the lens. But all connections must be tight.
- Then the lens is lowered into the water and liquid is drawn inside.
After all, the lens is removed and the gap is sealed with sealant. At this point, lens manufacturing is considered complete. For convenience, it is recommended to attach a lens to the structure.
ASUS ZenBeam E1
Another option from ASUS, the device is smaller than the S1, so you can even stuff it into the back pocket of your jeans if you want. To me this is a strange idea, but ASUS thinks differently. Moreover, this baby works even longer - charging lasts for 5 hours. The 6000 mAh battery also works as a spare battery for a phone or other suitable equipment. True, there is less brightness margin here. The device was announced in early June, but how much it will cost is still unknown.
Price: not yet for sale
Resolution: 854x480
Brightness: 150 lumens
Connection via wires
The complexity or ease of a wired connection will depend on whether the purchased projector and smartphone support MHL technology . Otherwise, to connect your phone you may need to purchase additional adapters and adapters.
mini-HDMI cable
If the projector has an input for mini-HDMI, then all that remains is to see if the same output is available on the smartphone. If you are lucky and such a connector is present, then you can install the highest quality cable connection.
Important! This connection is a digital interface that provides high-resolution video signal transmission. The sound will also be broadcast in digital multi-channel quality.
The steps for this type of connection are as follows:
- An HDMI cable connects to both gadgets;
- The necessary software and drivers are installed on the mobile device.
But if the projector only has a VGA input jack, then you will have to use an HDMI to VGA adapter. Unfortunately, with such a connection the quality is lost and an additional adapter is required that can convert the signal. But in some adapters it may already be built in. All connection steps are the same as described above.
USB cable
A mini USB connector is provided on almost all mobile phones. If the projector also supports such a connection, you can connect via a USB cable.
If MHL is supported, the projector will treat the mobile as a flash drive. Media files on it will be played without problems. The connection will take place via HDMI, using a micro-USB - HDMI cable.
But if this technology is not supported, then you will need an adapter that converts the signal to HDMI. The adapter kit includes a network cable, which is necessary to create additional power for signal conversion.
The connection process looks like this:
- the adapter connects to the USB connector of the mobile phone;
- the second end is connected to the HDMI input of the projection device;
- the adapter's power cord is plugged into a power outlet;
- The necessary drivers and software are installed on the phone.
Gobo projector
The principle of a gobo projector is simplistically similar to that of laser pointers. This device is often used to broadcast advertising logos, text and pictures.
Used:
- a regular LED lighting spotlight, a wire with a switch is soldered to it;
- Instead of the protective glass of the light bulb, there is a lens. For experiments, as well as for the lens, you may need several varieties of them. Magnifiers can be bought in specialized optical stores, on the Internet;
- a piece of plastic sewer pipe with a coupling;
- heat-resistant sealant (for convenience, it is drawn into a syringe);
- stencils, you can order them from a printing company or you can make them yourself, print them and cut them out of plain paper.
Assembly:
- The light bulb is removed from the reflector and a 100 W LED is installed in its place.
- A wire with a switch is soldered to the lamp.
- A magnifying glass (thick, convex 10x) is inserted into the reflector, everything is secured with sealant (red mixture in the photo) - this is a condenser. On top is another lens, but thinner, for example, 3 or 4 times.
- One or two lenses are also selected as a lens, for example, 50 mm with 5x magnification (if you use two, the picture will be 2 times larger).
- We make a lens from a coupling and a pipe, selecting the diameter of the latter to match the lenses.
ASUS S1 Mobile
A small, inexpensive and mobile projector from ASUS will be a good alternative to a similar accessory from Moto. And thanks to the built-in 6000 mAh battery, ASUS works even longer. With a brightness of 50 lumens (at a quarter power), the projector operates for up to 3 hours. In addition, this thing works as a powerbank and charges the smartphone when necessary. Unfortunately, you can only connect the projector via wire using an adapter and an HDMI/MHL cable.
Price: $270/26,000 rubles
Resolution: 854x480
Brightness: 200 lumens
LG Minibeam Nano
The smoothly contoured projector is lightweight and mobile, although it won't fit in your pants pocket. But compared to other analogues, it works wirelessly; the picture can be streamed via Miracast or Wi-Fi Direct if you don’t want to connect via HDMI/MHL. Through the built-in USB port, you can connect a flash drive and watch videos, photos, or read coursework with the whole family. The projector is not very bright and only works for 2 hours.
Price: $300
Resolution: 854x480
Brightness: 100 lumens